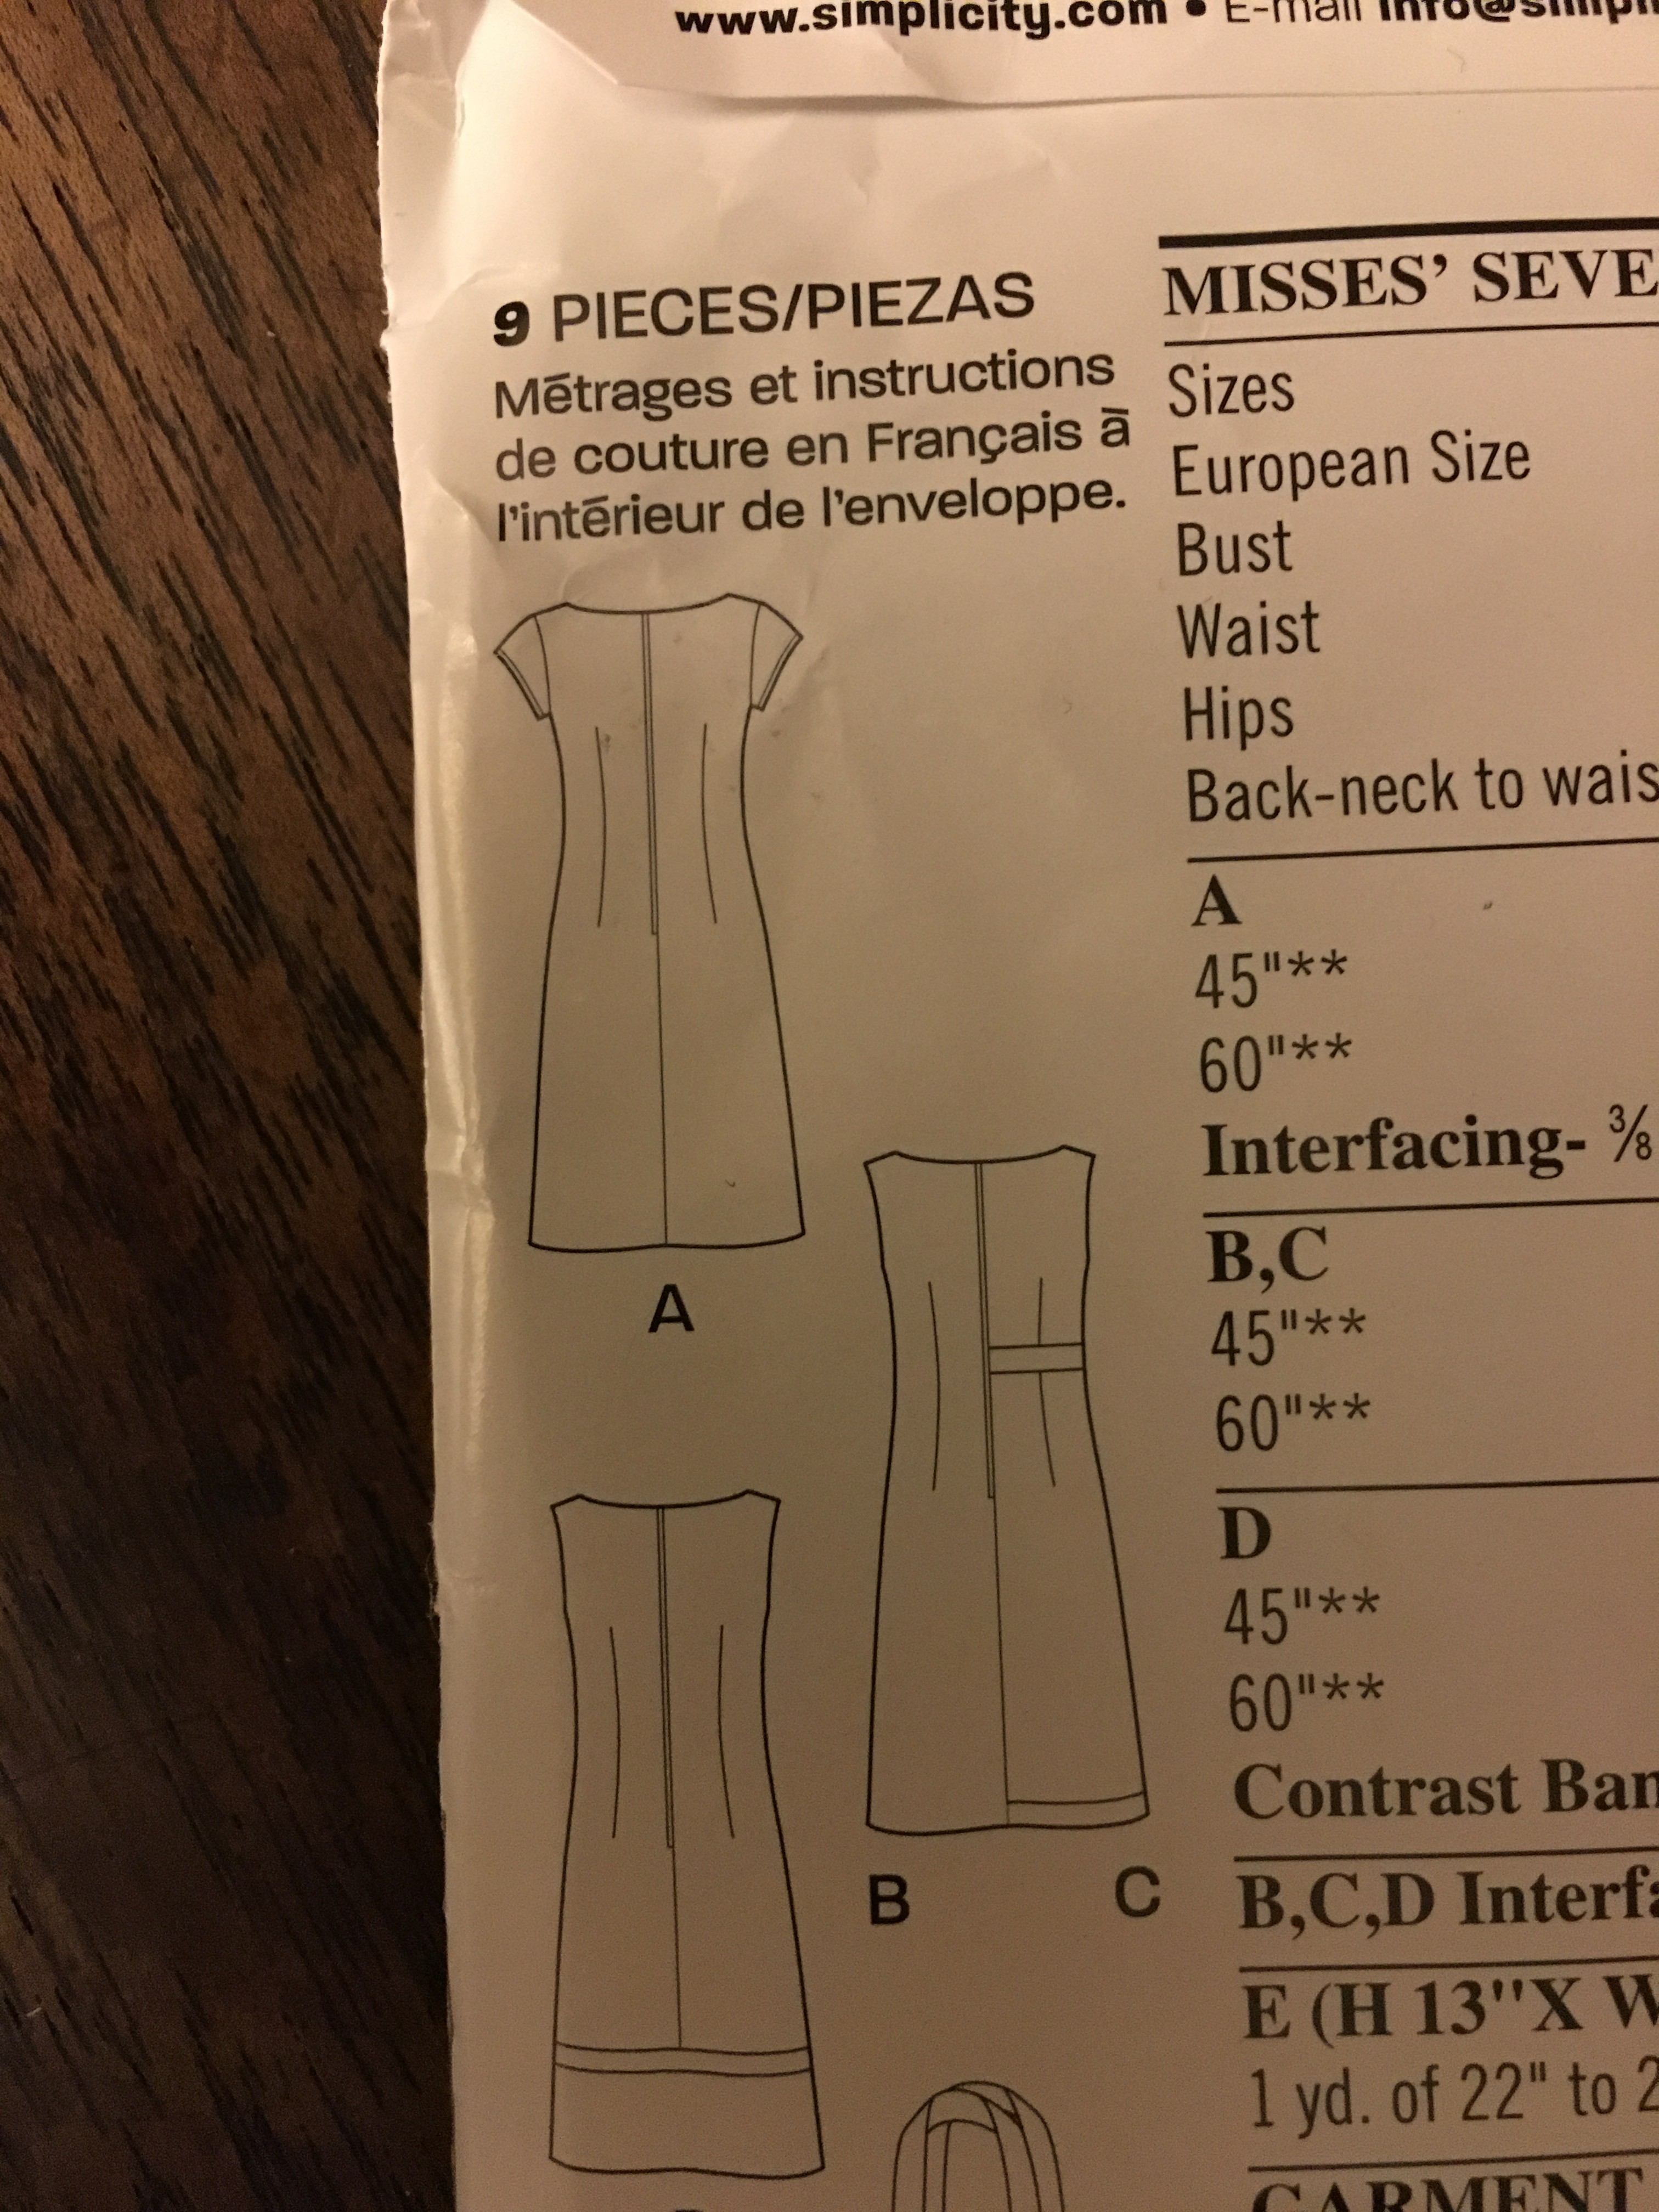
 It took me a long time to get on the Luna Pants bandwagon because I wasn’t sure if this particular style would be flattering to my shape but after seeing so many great versions during Me Made May I decided to take the plunge. I used this clay colored quilting cotton from the April Rhodes Bound collection. I love the dress I made with this green fabric from the same collection, a Washi with sleeves. The fabric has a really nice soft feel to it.
 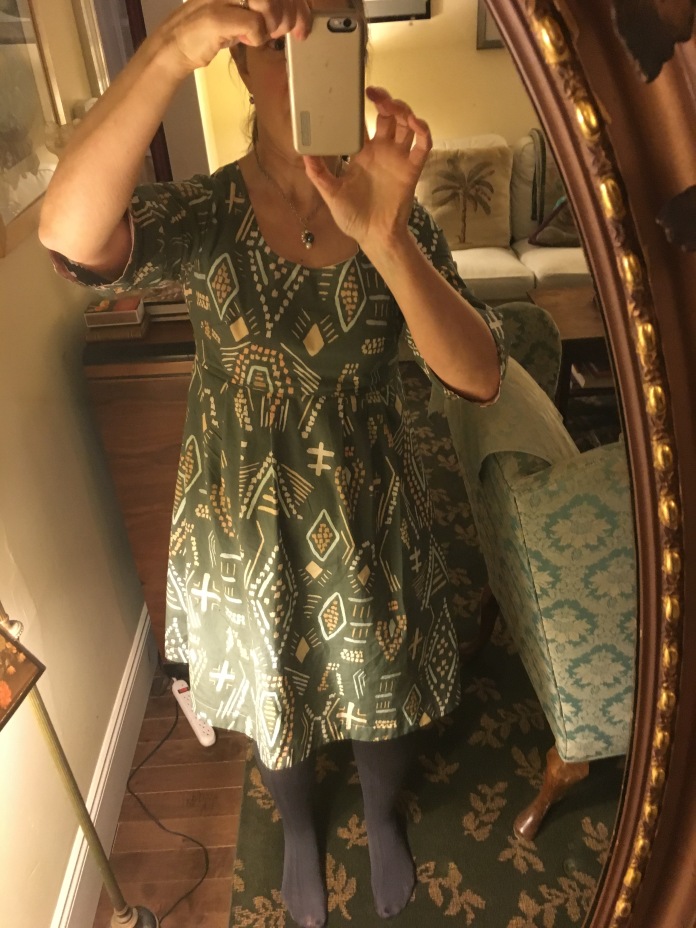 The dress is really comfortable to wear and I knew this fabric would be great for this pattern. It is not this orange in real life btw.
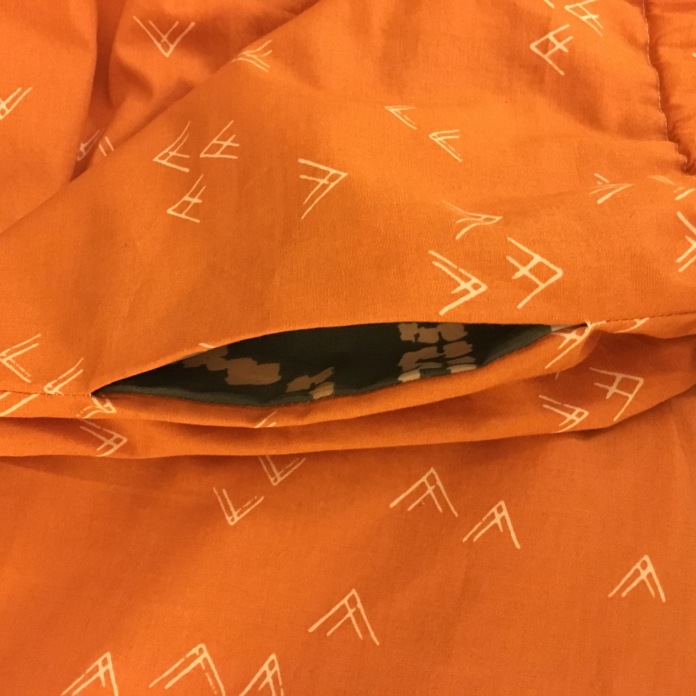
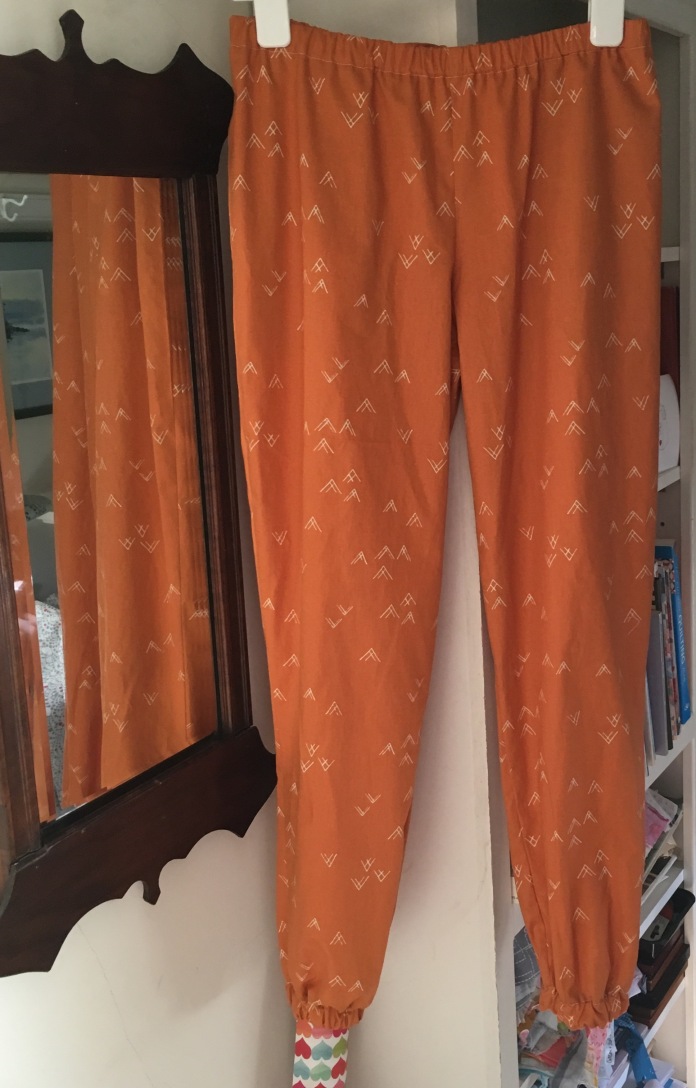 I cut between the medium and large lines (closer to the large around the hips) based on my hip size which is 41 inches. I lengthened the pattern by an inch. I used the leftover scraps from my Bound fabric Washi dress for the pockets.
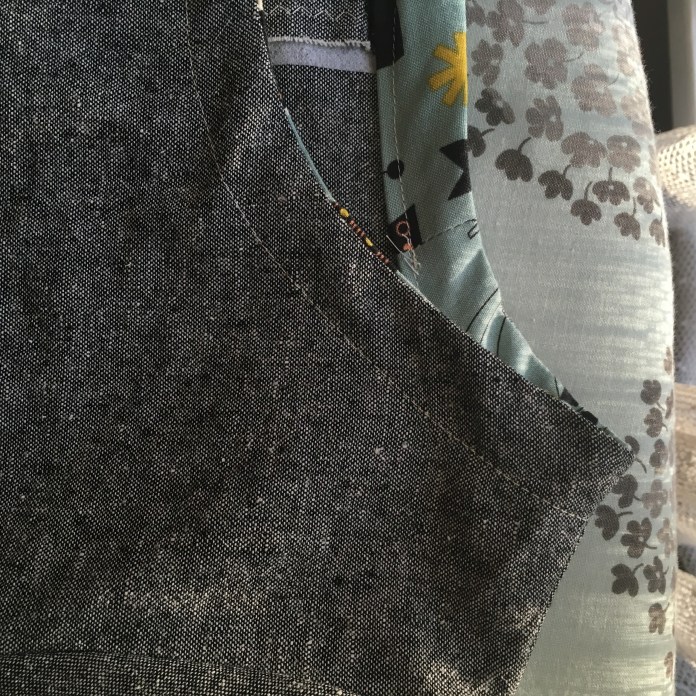
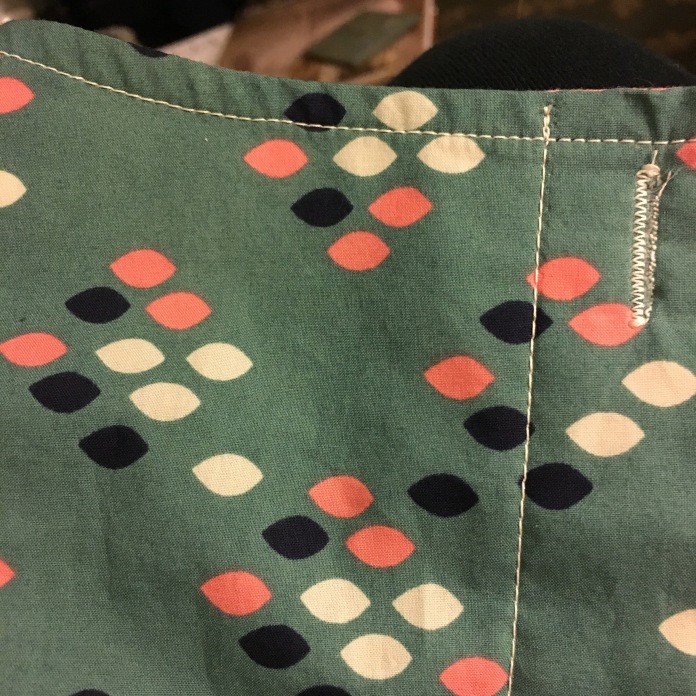
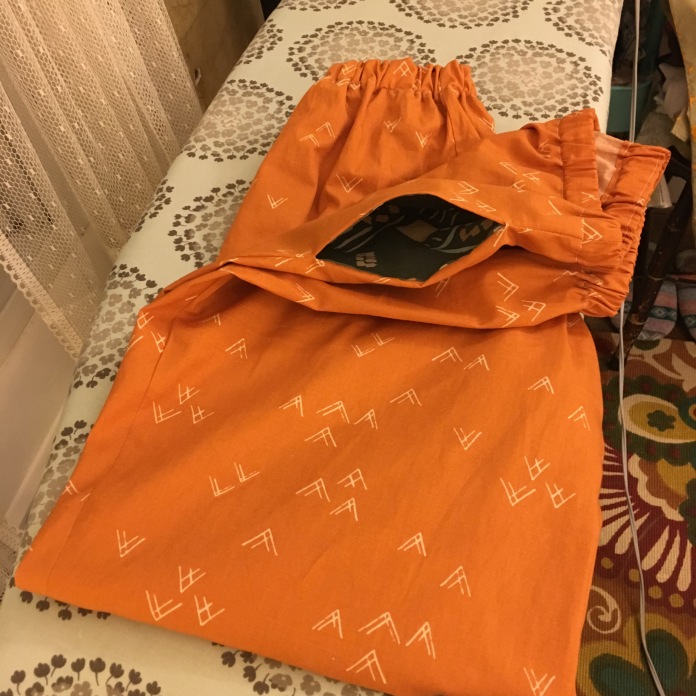 I love the way the tops of the pockets are stitched flat in the waistband seam. Now that I know how to do this, I am tempted to make a skirt just to add pockets exactly like this.
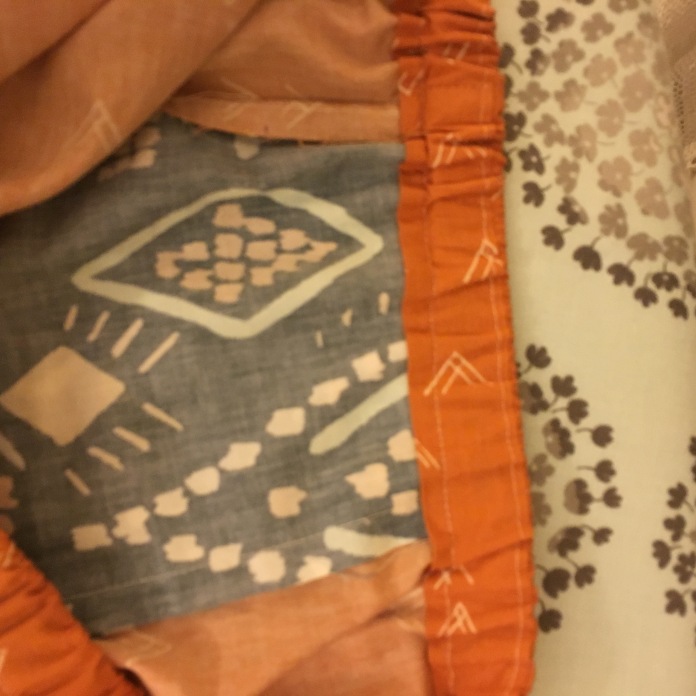 The sewing is straightforward and the directions are easy to follow. Rae also has a series of blog posts that walk you through the construction. Link to Luna Pants Sewalong here. But I didn’t even need it although I will read through her posts before I make the pattern again just to make sure I didn’t miss anything. Even after lengthening the pants, they ended up too short (I hemmed one leg first and tried them on.) What I did to make these fit was to add a facing with more of the green fabric (add facings to all the things is my motto). When I make them again I will probably add two inches and then use a hem facing again because it is fun to add the contrasting fabric and even with the facing I think I would like them a bit longer.
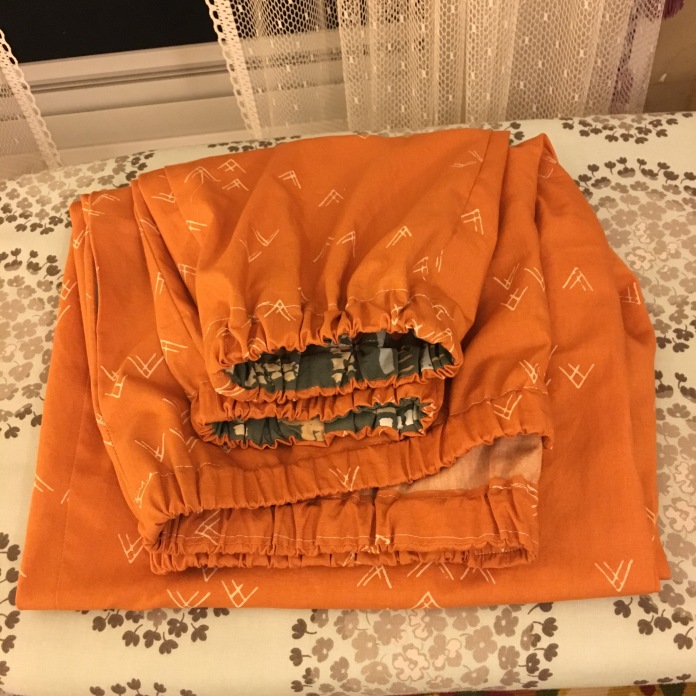 The facing makes them cuter too and it really doesn’t take a lot of time. Another picture of the inside of the pant leg with hem facing:
 If you had told me a couple of years ago that a) I would make pants and b) I would wear them in pictures online, I would have said you were crazy but I really like these. They are fun and comfortable and a quick sew. I have plans to make them again soon. I have some April Rhodes Fringe fabric that I know will be perfect. Here are more pictures of the pants as worn tonight to book club. We read Lab Girl. It is an amazing book. I highly recommend it. Front view:
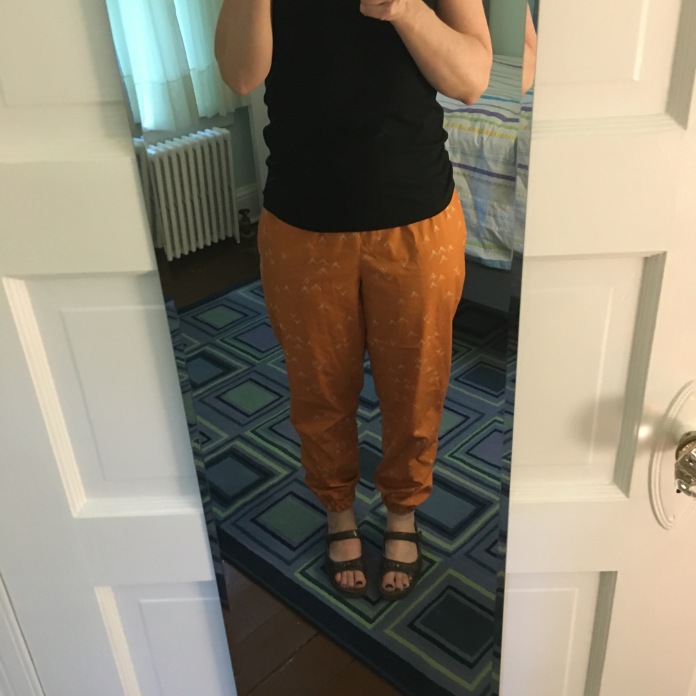 side view
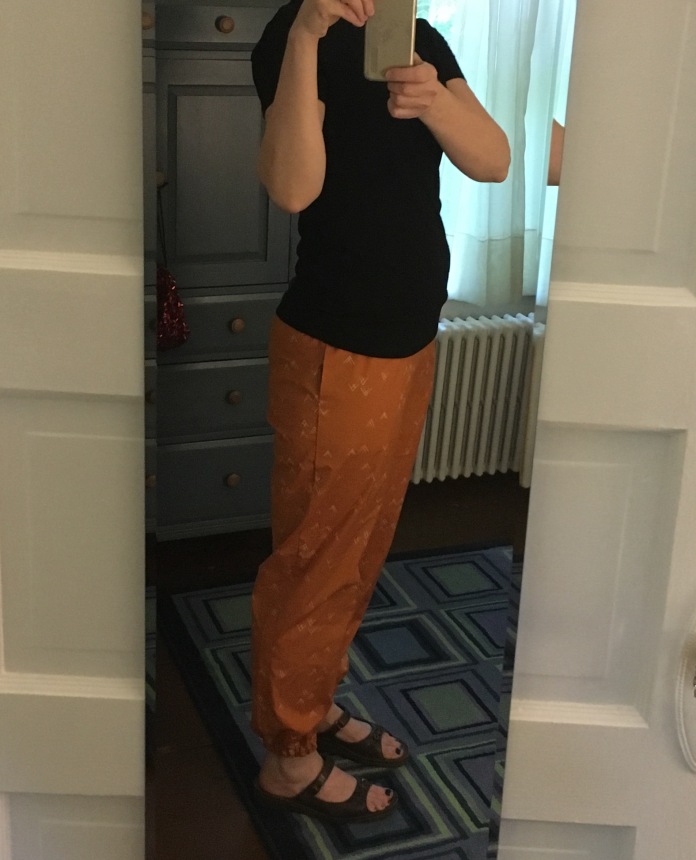 back view
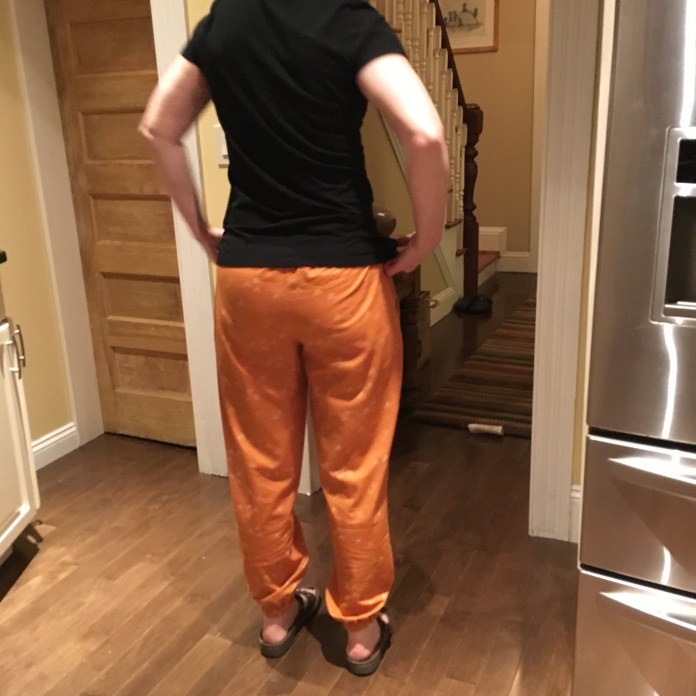 pants in motion (a bit rumpled after book group.)
  Have fun! Make pants! to be continued 🙂
Tag Archives: nursebeansews
A Linen Pearl Shift for Spring
 It’s all about the zipper.
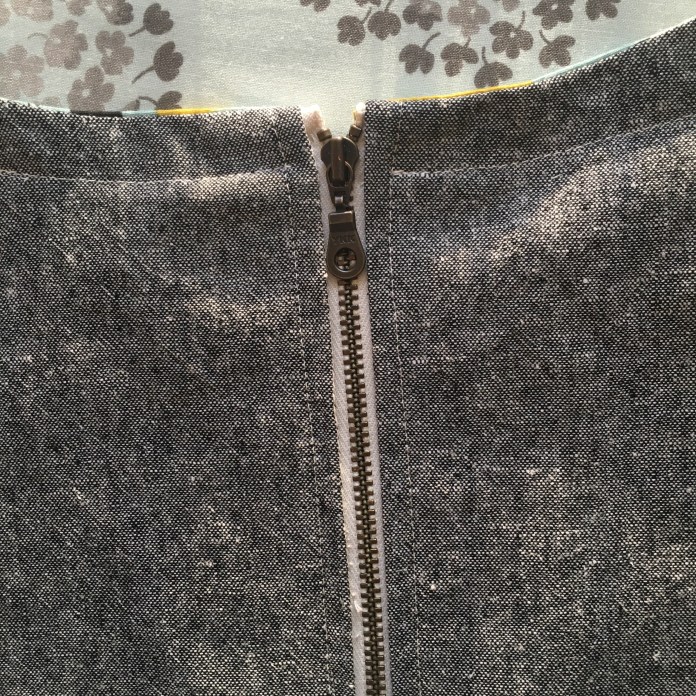 I originally bought this cotton-linen blend fabric because I was inspired by the beautiful version of Anna Maria Horner’s Painted Portrait Dress posted by Miss Make during Me Made May 2015. If you click on her blog post, it is the short sleeved version in the 3rd row on the left. Perfect dress. But then last winter, I found that I was wearing my plaid Pearl shifts so frequently that I thought the fabric would be perfect for a spring version of the pattern. Since then, I also saw a great version of the Inari Tee dress on Instagram using this same fabric so I may need to get more. In any event, this is a great simple pattern that sews up fast. Here is the finished shift hanging on my new place to photograph my projects: my front door. I came to appreciate the importance of natural light taking all those selfies for Me Made May and it already has a hook which is not currently occupied by a holiday wreath.
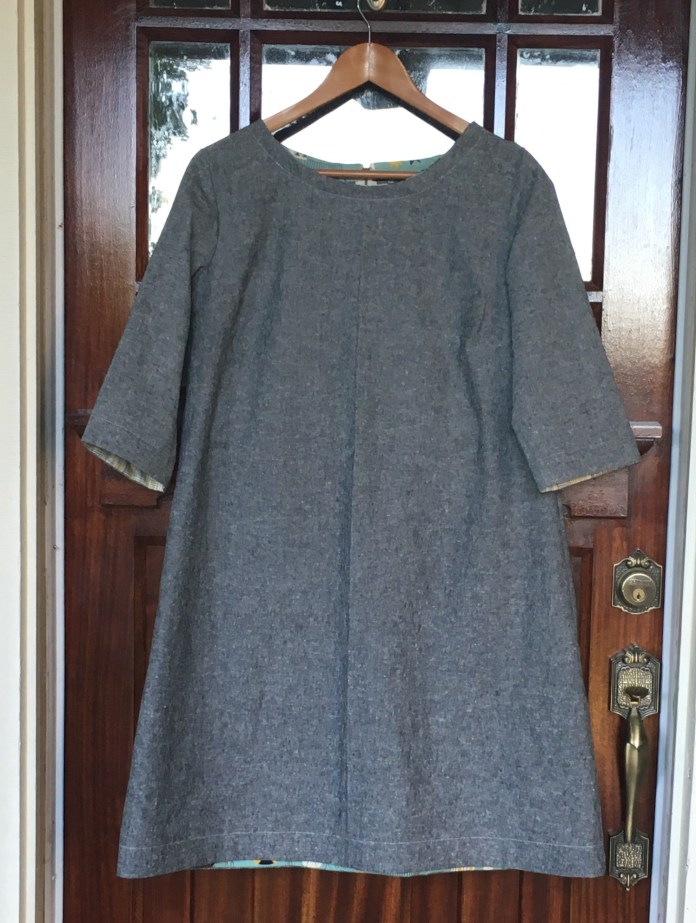 Here are some tricks/shortcuts I use when making this pattern. First, I size up for french seams: I cut on the next size up cutting line for the sleeves and side seams to allow room for french seams. I don’t seem to be able to capture the fraying threads with just one seam and always end up with two, no matter how well I think I have trimmed the threads. Since this happens every time I sew french seams, I am trying to just roll with it and know that my seams are very strong (ha!) and I need to plan for it. I cut on the Large seam line although I am generally more of a medium. This gives me enough space for my double seam and have the dress still fit. By the way, I only use french seams for the long seam from the wrist to the hem. I am not confident enough to attempt them at the shoulder seam. Those I sew using a regular seam and then zigzag to finish.
 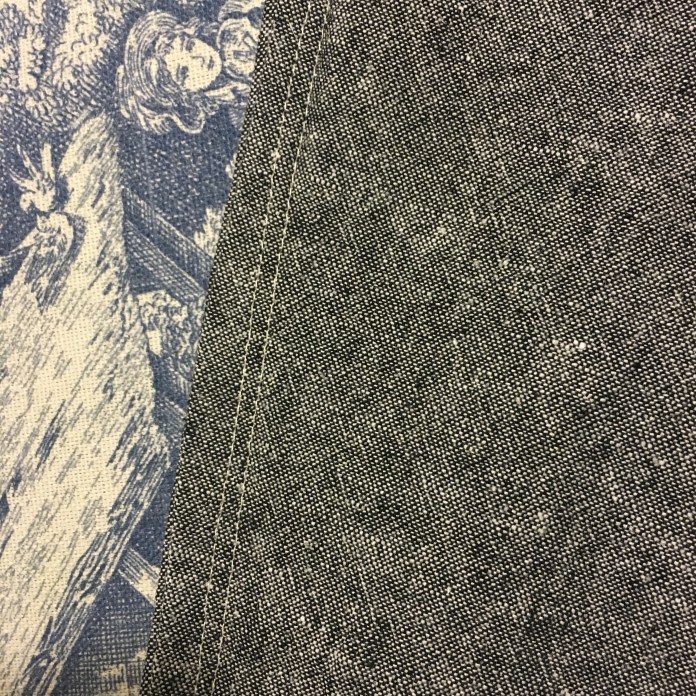 I don’t gather the sleeves: It may sound funny but I don’t gather the sleeves. I have only made the Pearl with heavier fabric with some stretch/give. I line up the center of the sleeve with the shoulder seam, pin it, and then I sew from the top down in one direction and then from the top down on the other side without using pins, just holding the fabric in place as I go. I get a nice clean shoulder seam with no puckers. Then I sew the sleeve and side seams in one long seam. I generally end up trimming a bit of the sleeve before sewing the long seam in order to make everything line up but I end up with a nice looking sleeve that fits the way I want it too. I am happy with the somewhat close fit I get doing it this way and it is quick and easy. I wouldn’t try this at home using your nice fabric. I would try it first with a muslin to see if you like the way it fits, but I did it this way the first time and it has worked for me ever since (this is my 4th Pearl shift.) Picture of finished sleeve seam below.
  I use a contrasting lighter-weight fabric to finish the neck, hem and sleeves: I finish the neckline, hem and sleeves with facings similar to my technique with my Washi’s and Beatrix blouses. In this case, I used two different fabrics since I only had a quarter yard of each. I like how they harmonize. I got these at The Cloth Pocket and the Stitch Lab during trips to Austin. Both are great sources for fabric and inspiration. Choosing facing fabrics is a fun challenge each time I sew. I try to use something I have in my stash. This is less of a challenge these days because my stash is growing. I sew the neckline binding by topstitching about an inch down which I think is a nice look for this simple shift in the heavier fabric.
Word to the wise: measure at least twice and make sure you are looking at the right numbers on your ruler: I used the Brumby Skirt zipper technique as extensively described in my prior post about a Beatrix tunic. I generally make two similar garments at a time. It is often quicker to cut out and sew two similar things. However, a downside to this approach is that when you make a mistake, you sometimes make it twice as I did in this case where I sewed a zipper opening that was not the same size as either of the zippers I had purchased (I realized later that I had lined up the wrong end of the ruler so I was off by an inch without realizing it) and had to delay finishing my projects while I waited for a new order of the right sized zippers to arrive.
Make a muslin and check the fit, even for this simple pattern. I have narrowed the shape of this shift just slightly to make it a bit less triangular which I think is more flattering for my shape and I grade the hemline slightly so that the back is a bit longer than the front, as I do when I make the Beatrix tunic.
That is really all to say that is new. Here are some pictures of the process. A sad zipper that is too small for its opening as seen below.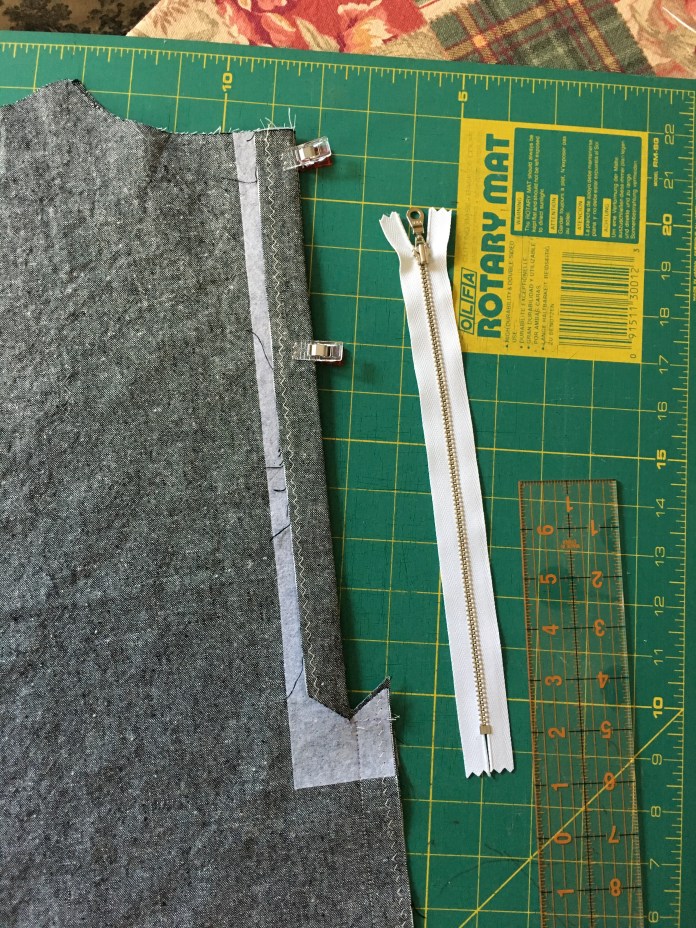 I blame the ruler that has different numbers on the two sides. Of course, I was looking at the wrong side when I measured. I took this picture May 19th and then the project sat as Me Made May sped by and then it was June. More pictures of the Brumby zipper opening technique.
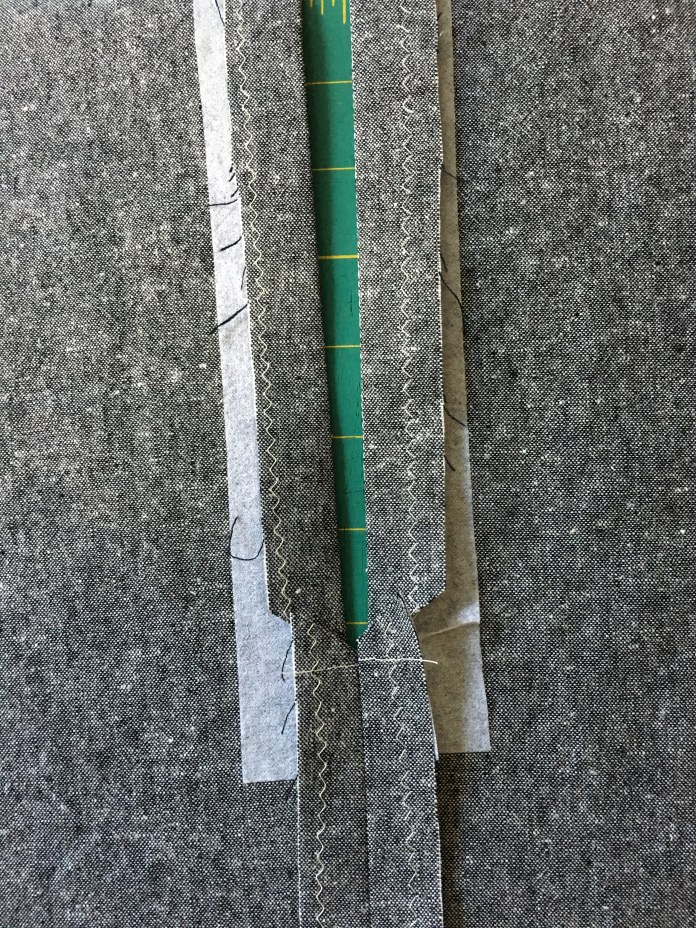 Hem facings in process: step 1
 Step 2
 Step 3
 Sleeve facings


Many views of the neckline. I like the tiny bit of color peeking out.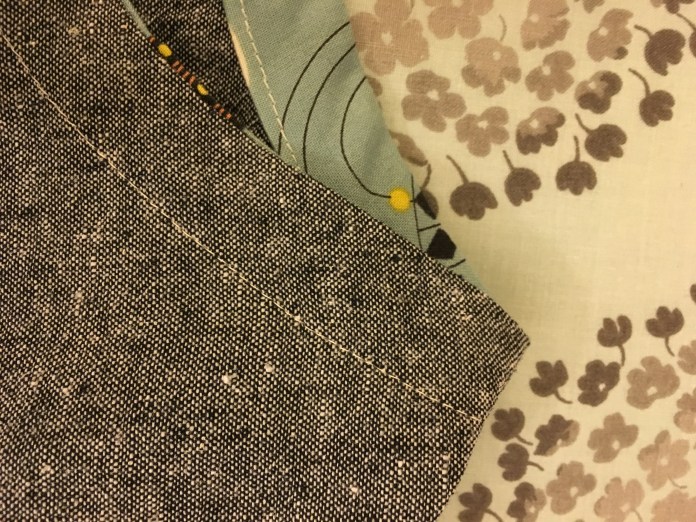 Neckline with zipper. A little wonky but the nubby fabric hides all.
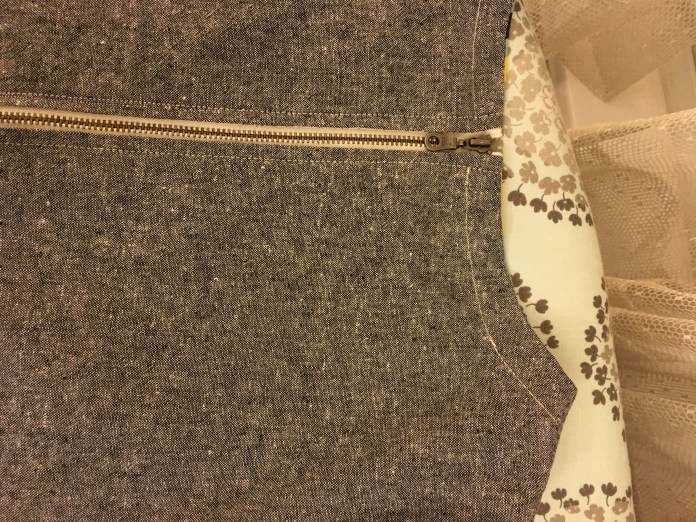 Neckline selfie. It’s a little higher than the Beatrix, a little 60’s looking. I like it with the linen. That’s my dad at a young age in the background. My sewing room walls are covered with my favorite pictures.
 Front of finished dress once againBack of finished dress
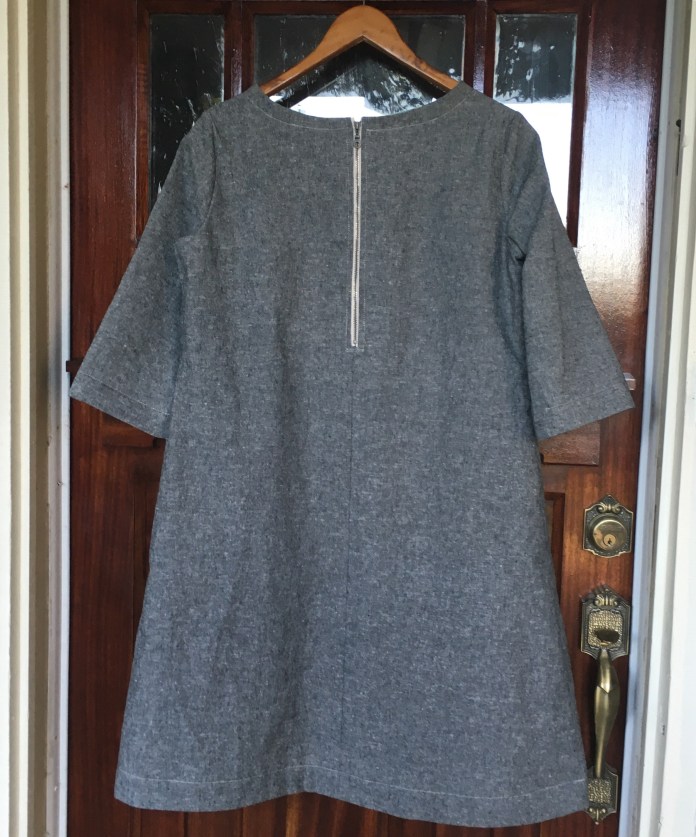 Inside of dress front
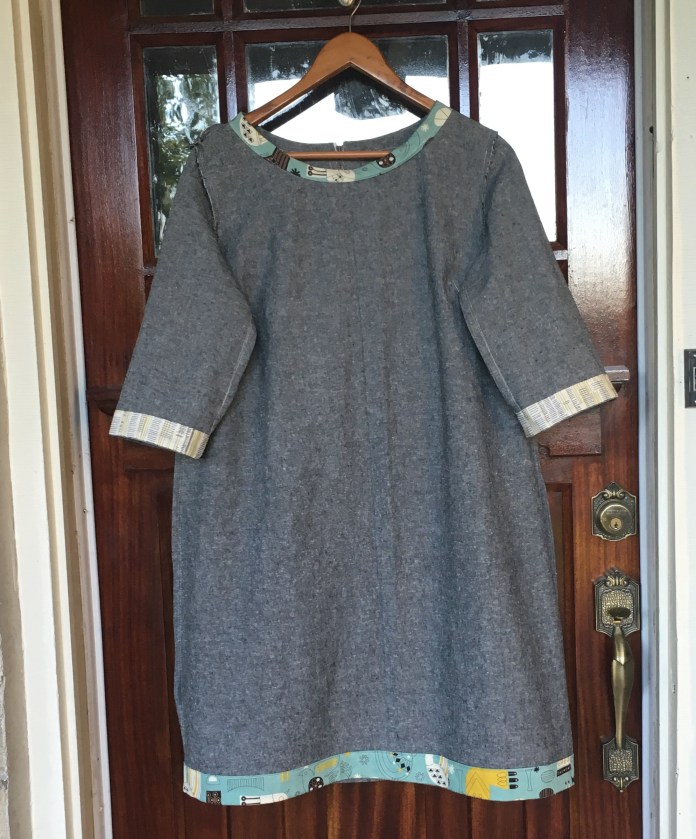 and back
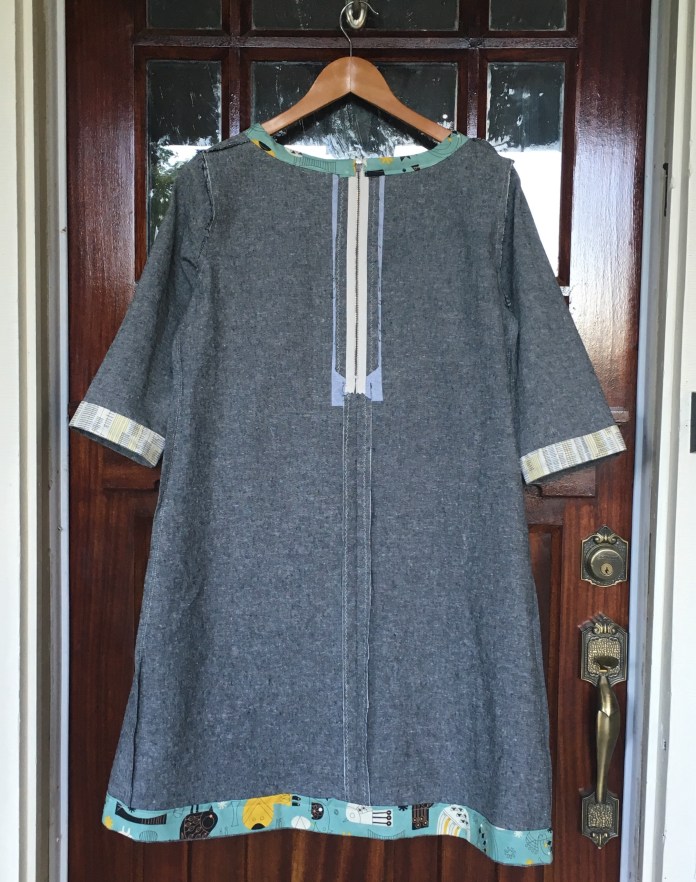
Alison Glass Beatrix Tunic
I started a couple of projects during May, but life got busy and I had some zipper issues and they stayed unfinished until today when I had a lovely unplugged Thursday and had the time and energy to finish them. The first is another tunic using the Made By Rae blouse pattern, the Beatrix. I used this great fabric from Alison Glass. All over the internet there are dresses and Beatrix blouses made with this plus-patterned fabric in different colors but I was actually inspired by this post by Tara whose blog Girl Like the Sea is wonderful. When I saw the same fabric on sale, I snatched it up. I liked the white strips Tara used in the blouse for her daughter and it made me think a white exposed zipper would work well.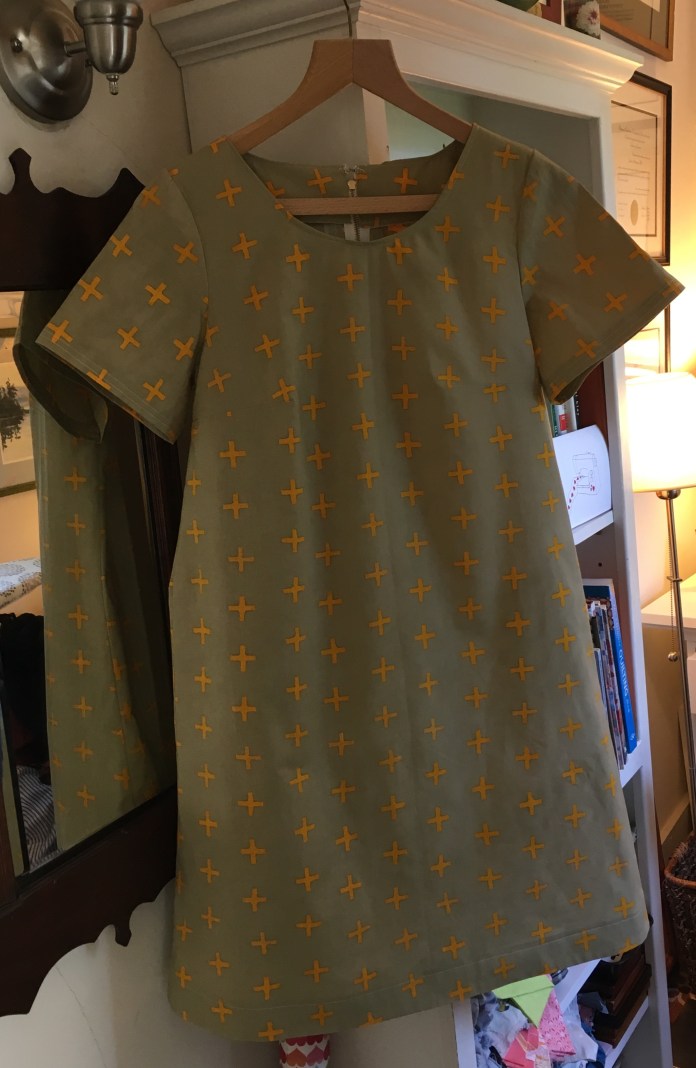 This is my third Beatrix Tunic. The first two were blogged here and here. I have made several versions of the Green Bee Pearl shift and this project is sort of a combination of the patterns. I had used exposed zippers when I made my plaid Pearls and was really happy with the extra zing the metal zipper gave to a relatively simple pattern so I decided to try it here. The hardest part was finding the right zipper. I finally ordered two sizes of white zippers from Zipit, an etsy store with a good selection. I had already cut out this pattern and a linen Pearl and prepared the back for the zipper using Megan Nielson’s tutorial. When I previously inserted the zippers on the plaid Pearls, I used a technique based on Dana’s zipper bag tutorial. It had worked really well for me but I thought the Brumby method might give me a cleaner look. What I learned about the Brumby method, in which you prepare the opening for the zipper first, is that measuring accurately is key. Sadly, when I went to insert the zipper into the opening, it turned out that my measurements were off and the opening for my zipper was too long. One of my zippers was too short and one was too long (sort of a Goldielocks problem). So I had to order more zippers. And this is why these tunics did not end being worn during May! I now have a lot of zippers. 🙂
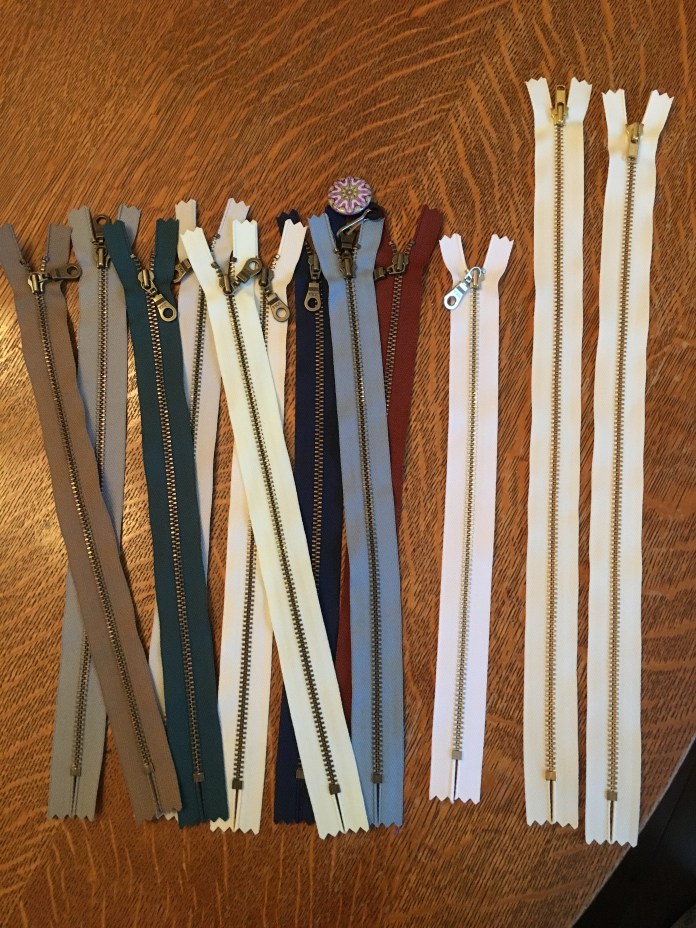 Sometimes I will make a great deal of headway on a project and then weeks go by before I find the time to get back to it. I have learned to relax and know that some day I will finish, even if it takes weeks (or months). For this tunic, I cut out the top of the Beatrix and graded out to the width of the Pearl. This time, I didn’t curve the hem but used the Pearl hem line. My new go-to work uniform is a tunic over leggings with boots in the winter and sandals in the summer. It is easy and comfortable. I will definitely be making more of these. Some pictures below.
 Stay-stiched neck line above and darts below as per the Beatrix Sewalong, a great tutorial broken into smaller, manageable steps. I don’t own a serger so I zip zag most seams to finish.
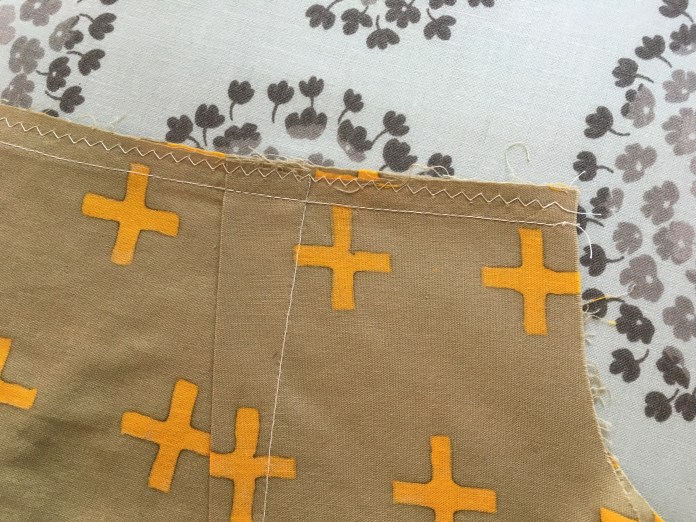 Sleeves are turned down once, ironed and then a second time and stitched with two rows of stitches. Quick, easy and durable.
 My favorite way to make a simple pattern more interesting is a contrasting hem. I love these two fabrics together.
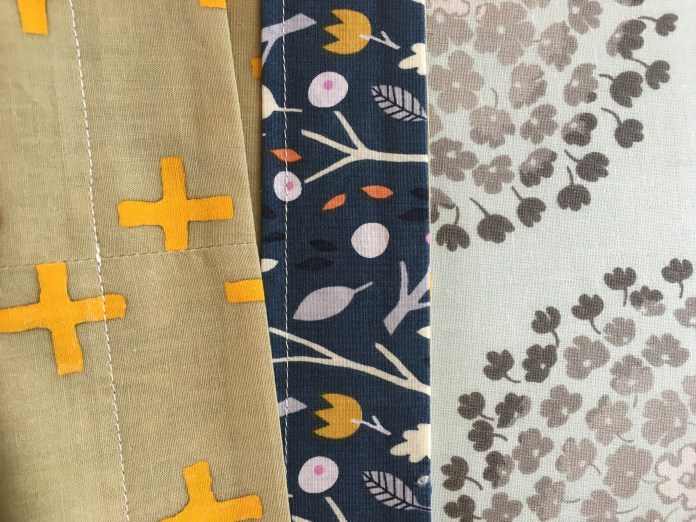 I have blogged about my very simple method for hem facings here and here. Pictures of the steps below. I start with a 3 inch strip of fabric and sew it on right sides together keeping in mind the direction that it will face once the facing is turned up.
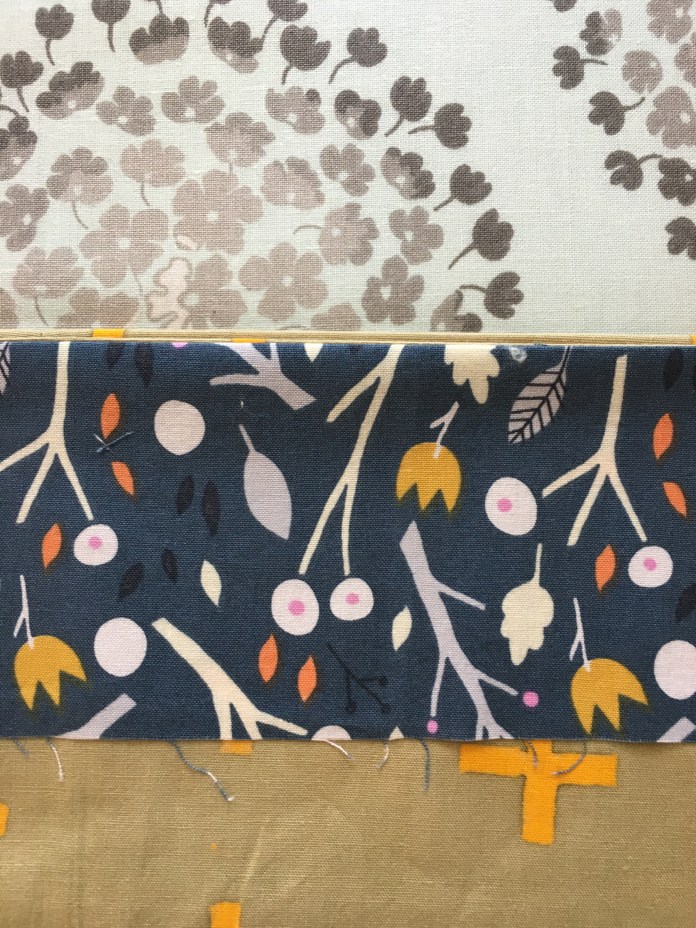 Lots of ironing is involved.
 I actually use the metal plate on my sewing machine as my guide as I sew. It works perfectly for the measurements of this hem facing.
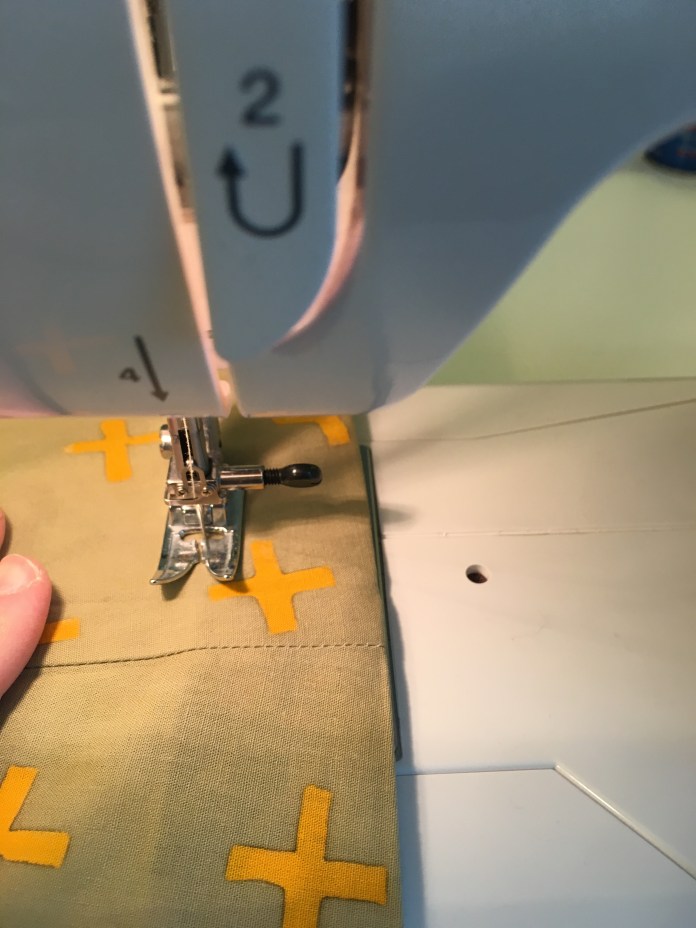 When I think of it, I leave the threads long and pull them to the inside and knot them using the quilter’s technique of sliding the knot down the thread using a big pin or needle as seen here.
 Some pictures of the finished hem. I was really happy with how this one turned out.
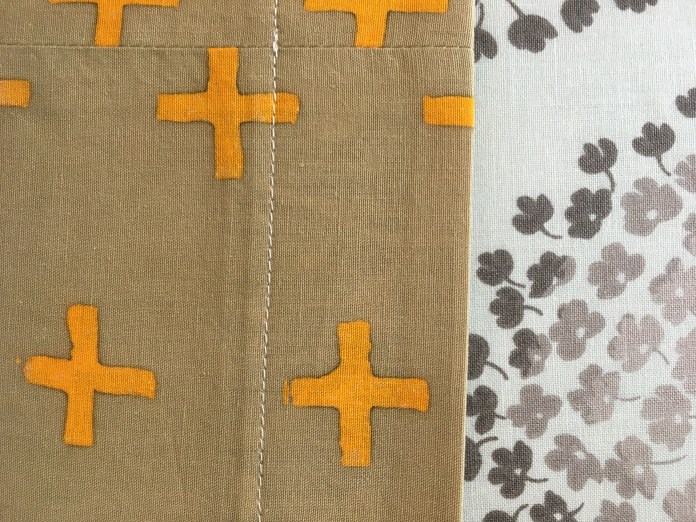 with facing showing
 My zipper didn’t completely line up with the top of the dress so I added a hook and eye at the top. My top stitching along the zipper is not perfect but as my dad actually used to say, “It wouldn’t be noticed from a trotting horse” which is true. I think the machine sometimes has trouble with the layers.
 Finished Dress/Tunic ready to be worn. I intentionally made the back slightly longer (you can see the back facing peeking through in the picture below) because that is where my weight is (ahem) and if I make the front and back the same, the back appears to be riding up which is not the look I am going for.
  Rae also recently posted about a Beatrix with a zipper. Hers has an invisible zipper, something I have yet to master. You can link to her post and see her beautiful blouse here.
Pink Polka Dot Shift for Spring
 Earlier this year I wrote a post about modifying New Look 6095 using techniques I learned by doing the Made By Rae Beatrix blouse Sewalong.
 When I saw this great Cotton and Steel polka dot fabric (from the Lucky Strikes collection designed by Kimberly Kight), I knew it would be perfect for this pattern. The fabric is called Dime Store Dot. I bought it at fabric.com where, as seen below, it is apparently No Longer Available, but it is likely to be found elsewhere and those Cotton and Steel gals have several other dotty fabrics which would work just as well.
 In my previous post, I went though the details of my muslin making process. My first shift was mostly a great success but I wanted to lengthen the sleeves a bit and fix the gaping in front on this version and I accomplished that by doing the same tiny fold I use when I make a Beatrix blouse. It is amazing that this tiny adjustment makes such a difference but it does.
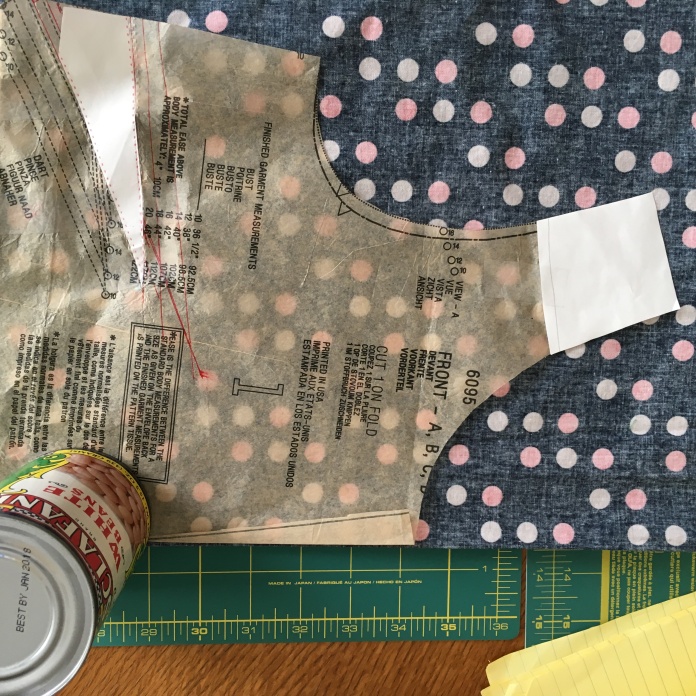 This was a relatively quick sew and it was worn to church today for Me Made May day 22. It was a cold, grey day here and the polka dots were a great contrast. Not much else to say without repeating my previous blog so I will leave you with pictures. I drafted the facing using the Beatrix directions as my guide:


I was careful to staystitch the neckline and understitch the facing as instructed in the Sewalong. I hemmed my dress using a hem facing as I have done for most of my dresses.
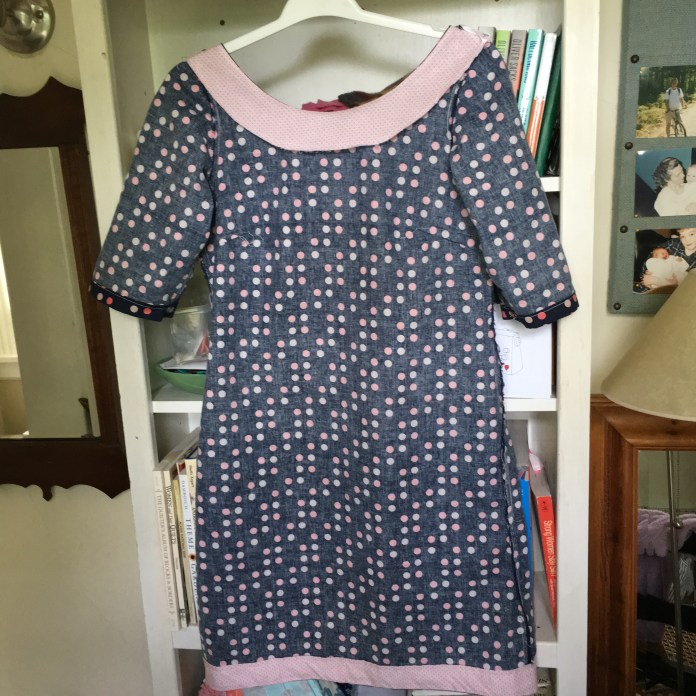 I used one row of hem stitching because the first row of stitches was pretty straight and my motto is “good enough is good enough” which is a good rule to follow in most situations.
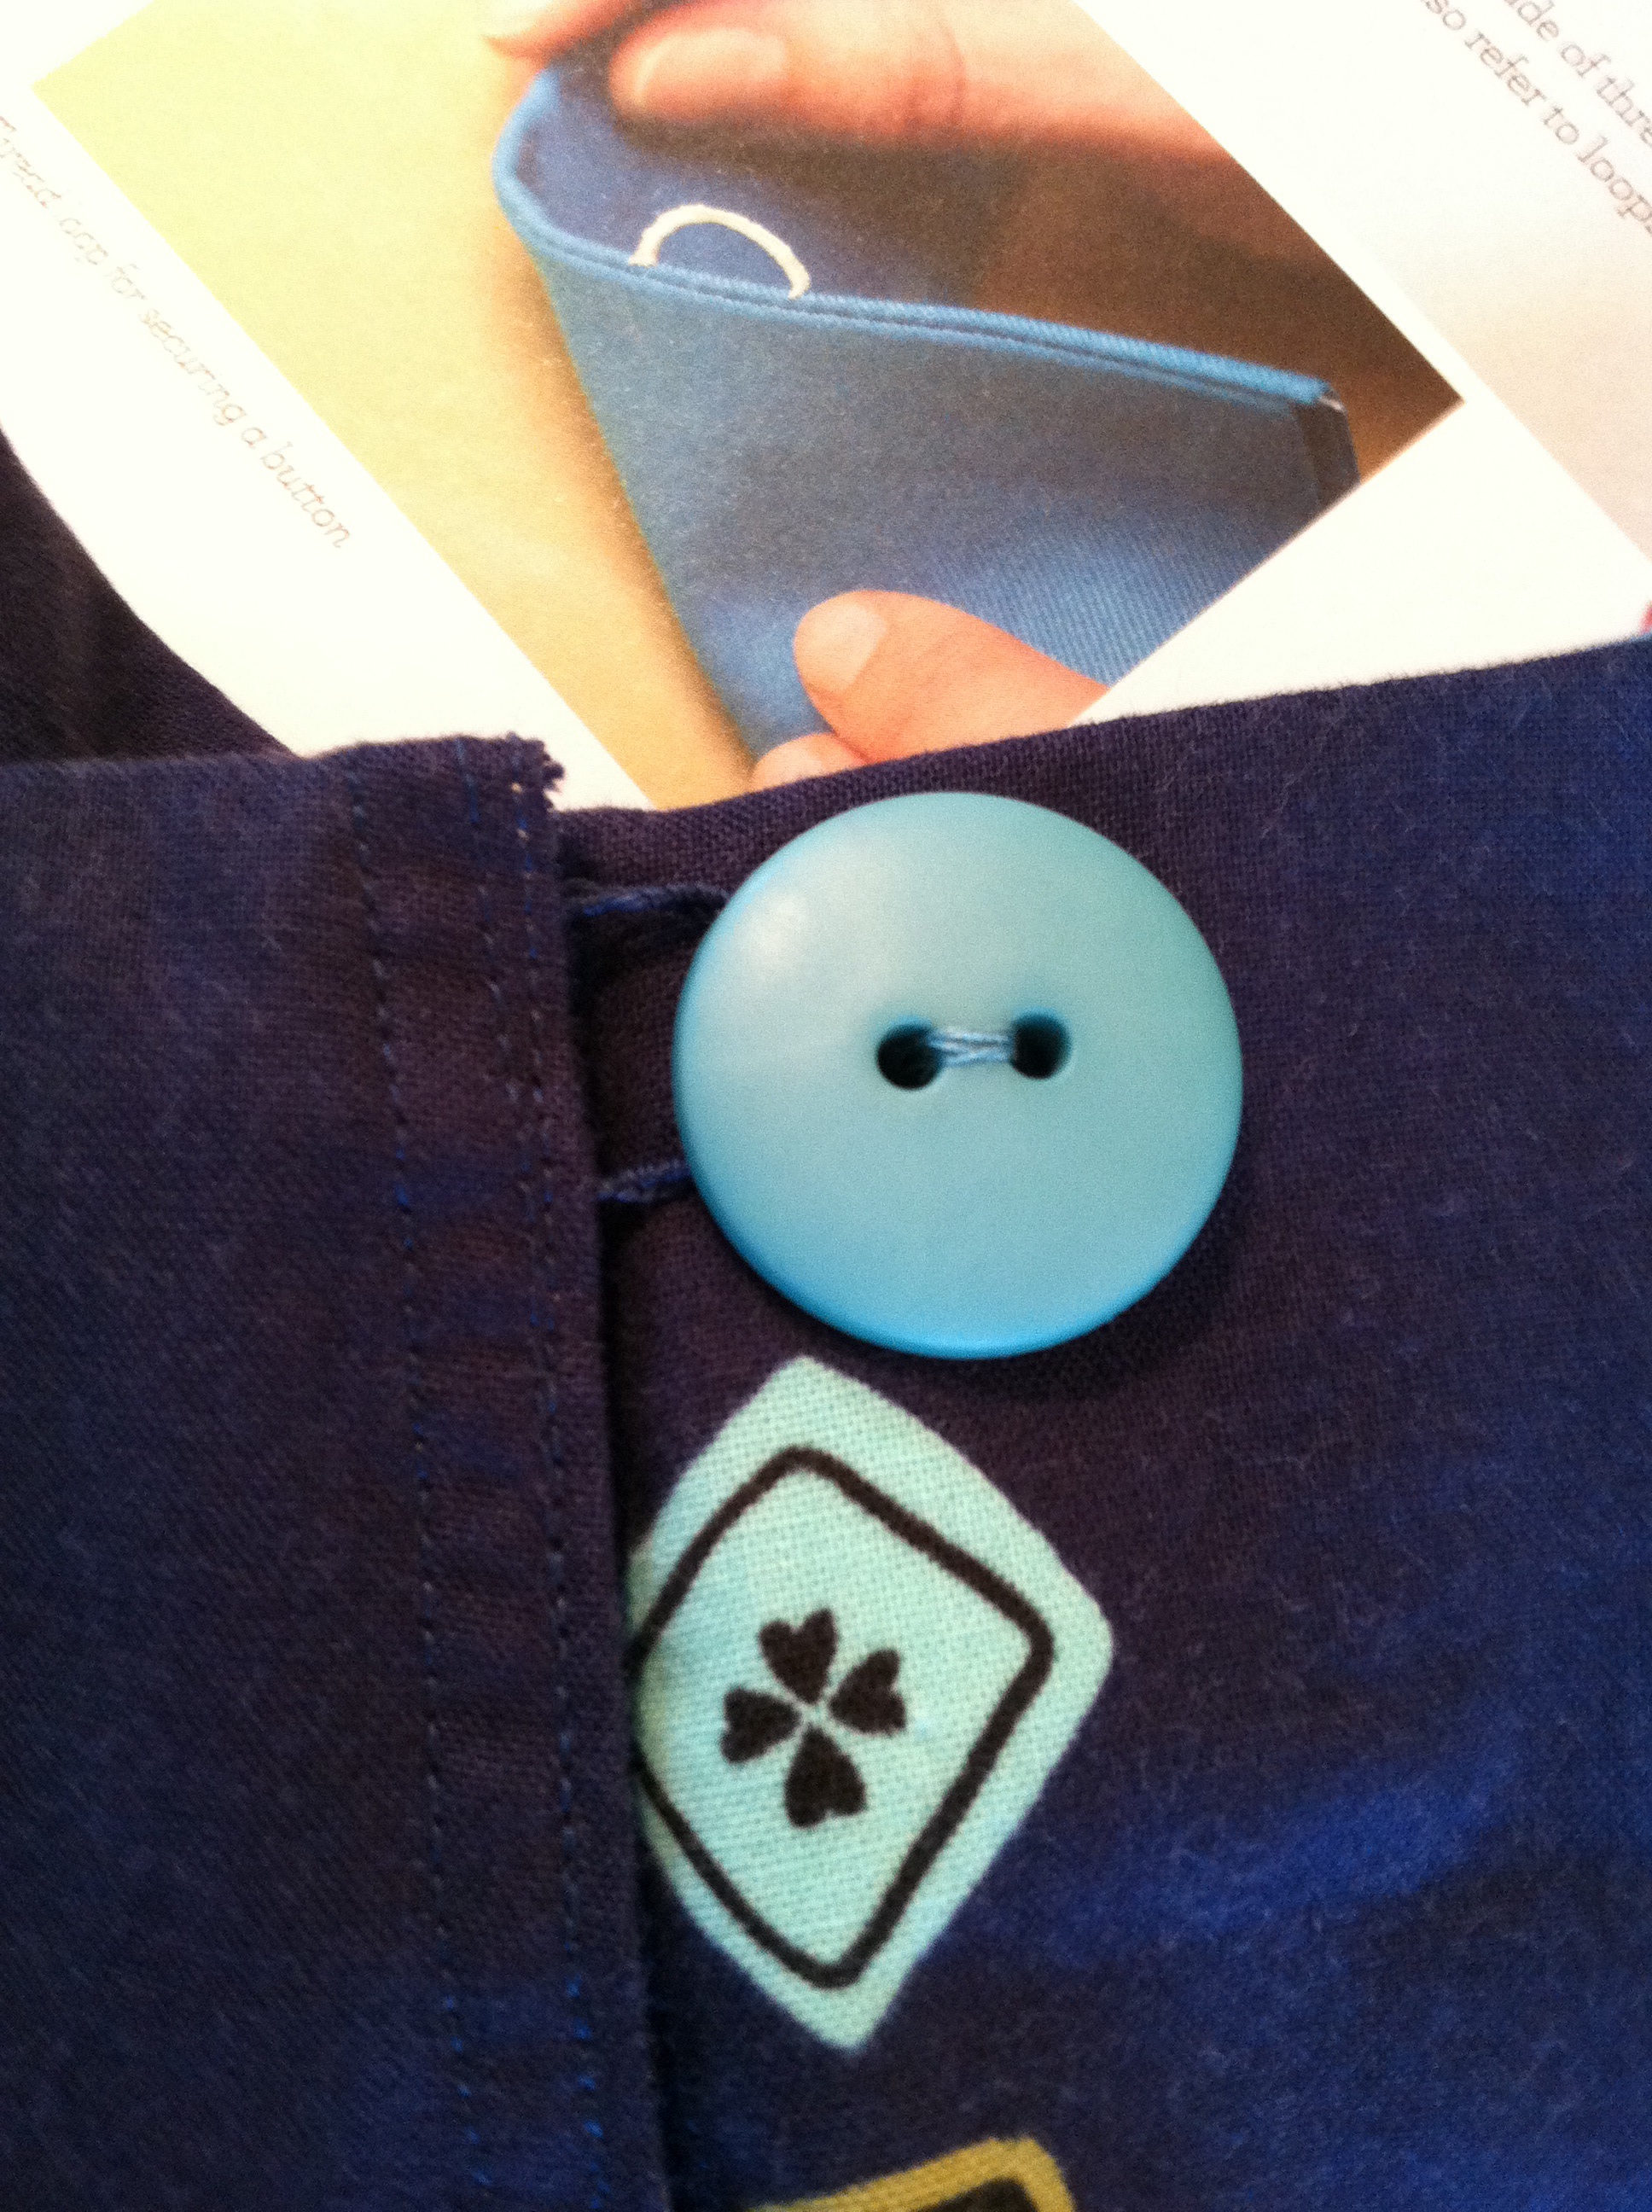
 I used a button from my stash of tag sale buttons.
 Back view.
 I created a thread loop using Tasia from Sewaholic‘s wonderful book: The Sewtionary. I love her clear instructions and photos on so many helpful techniques.
 And here is the finished product. Many views because my husband was available to take pictures. This was a relatively inexpensive, fun dress to make. It feels like spring which makes me happy, even though our weather has been a bit drab.
 I am pretty happy with the fit. The back gapes a bit so I may move the button or shorten the button loop but it is otherwise quite wearable.
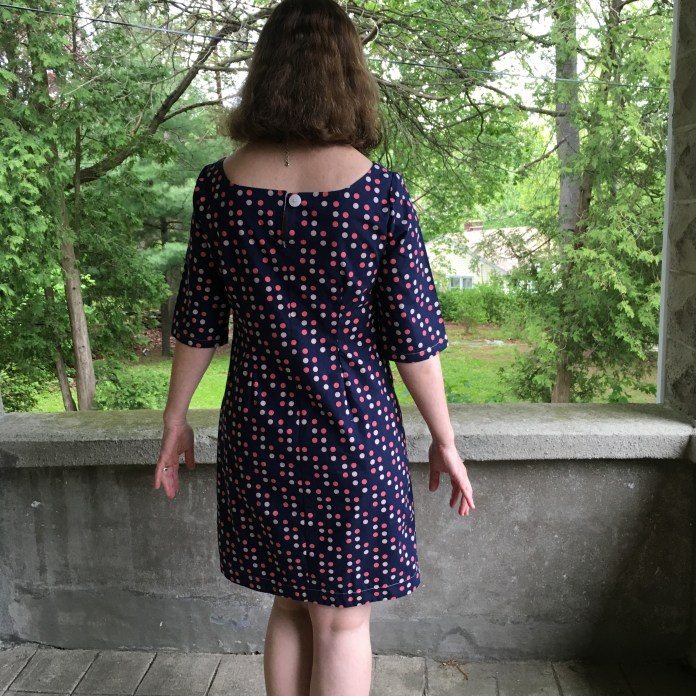 With the obligatory cardigan (still cold in Connecticut).
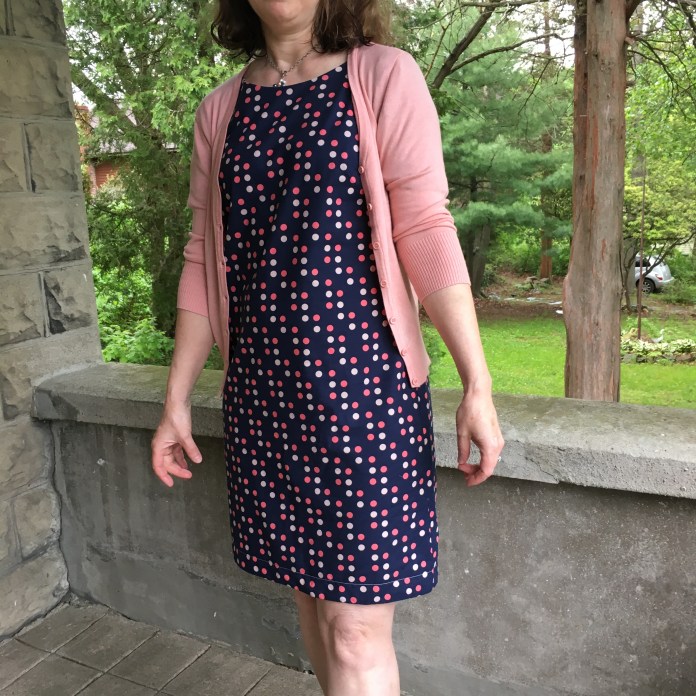 I do not knit so this fall I bought a basic, inexpensive cardigan in multiple colors. I love this muted pink.
 Happy Spring!
Nursebean Reads: Must Read Books, Spring 2016
Earlier this year, I wrote some posts about my unplugged Sunday project and about ways that I have I found more time to read. You can link to them here and here. Today’s post is short and sweet. Here are my must-read book recommendations for right now.

I could not put Lab Girl down. Amazing memoir. Great writing. Unexpected twists and turns. Interesting characters. I am recommending it to everyone as a must read.

I loved Year of Yes. I had heard it recommended on the great podcast “What Should I Read Next”. I was not disappointed. I can’t imagine any woman not loving this book. I am recommending it to my daughters.
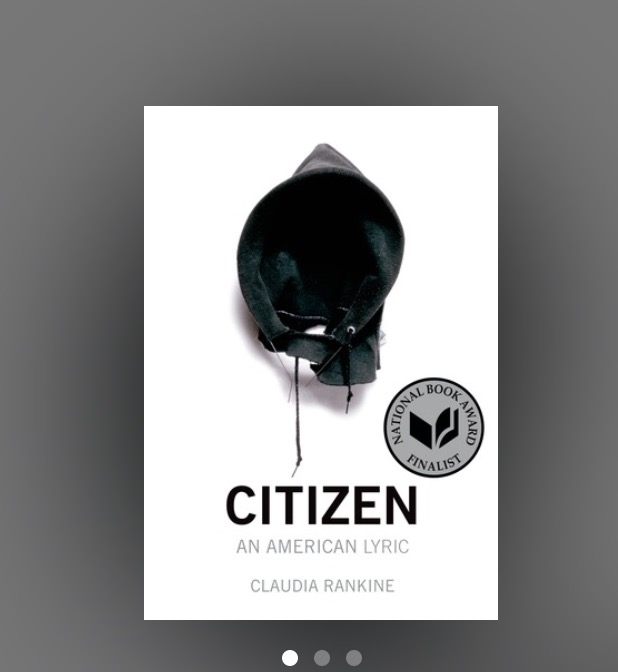
My younger daughter told me I had to read Citizen and she was right. Just read it. Short, powerful, I will read it again.
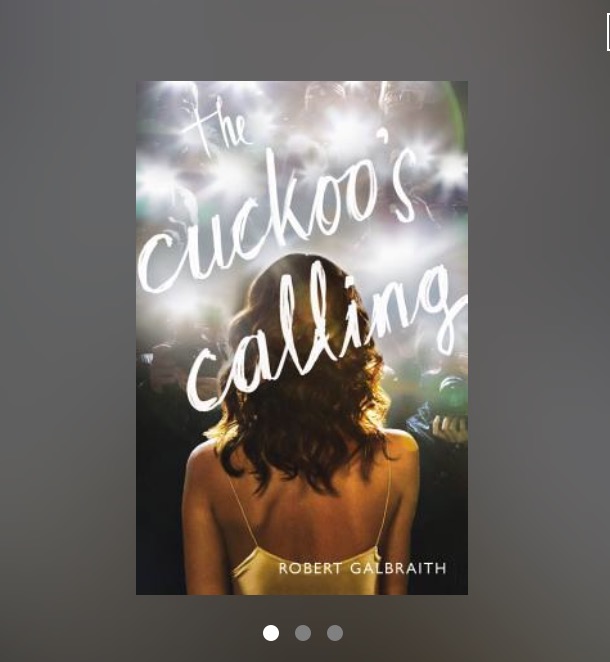
I have been sewing more but continue to find time for reading. I have especially enjoyed hand quilting to audio books and am LOVING the Cormorant Strike series by Robert Galbraith aka J.K. Rowling which I also learned about from listening to the What Should I read next podcast. Book 1, The Cuckoo’s Calling, is amazing on audio book.
The second two books in the three book series are a bit gruesome/disturbing in terms of details. They are true psychological thrillers in the Law and Order SVU mold, not usually my thing, but the characters are wonderful and the audio is amazing.
I have been listening in my car but then get so wrapped up in the story that I end up listening for several hours straight at home. I just finished book 3. So sorry to not have a book 4 to listen to!
Other books I have enjoyed this spring are this book which is a true story about the painter Velasquez and an Englishman who may or may not have owned one of his paintings. It made me want to hop on a train and go look at the Velasquez paintings at the Met.

I also read this book for book group. A really compelling story about a family’s experience during Hurricane Katrina. It is shocking what happened just ten years ago in this country. Very disturbing. Five Days at Memorial, another book about Katrina, has been on my to-read list for a long time and reading Zeitoun has made me want to finally read it.
Next up, this book that I heard about on the podcast. It weighs a ton but is supposed to be a terrific read.

What are you reading and enjoying lately?
A Paisley Washi for my Mother
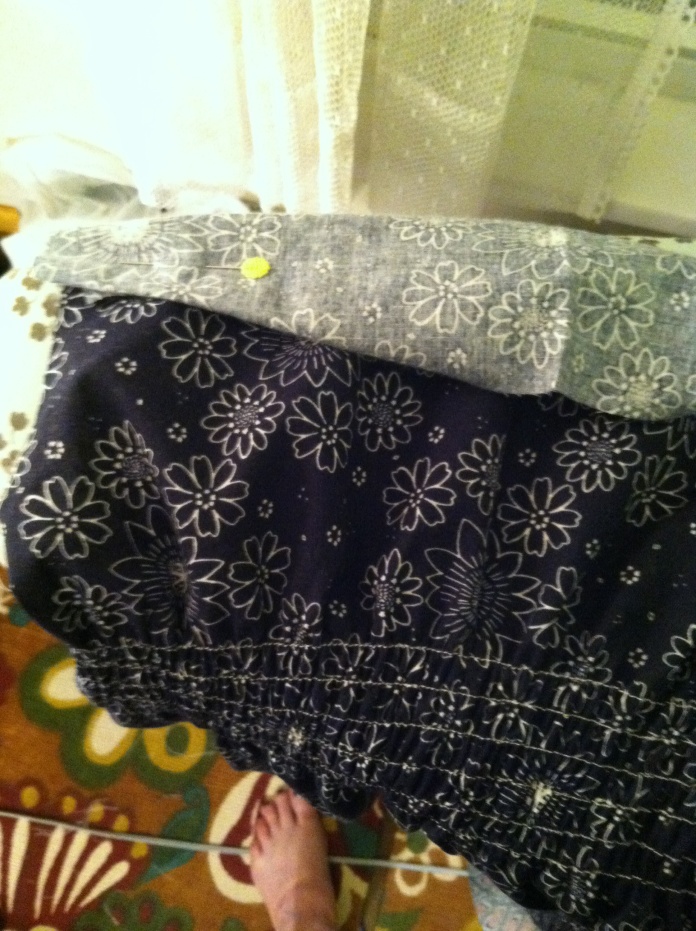
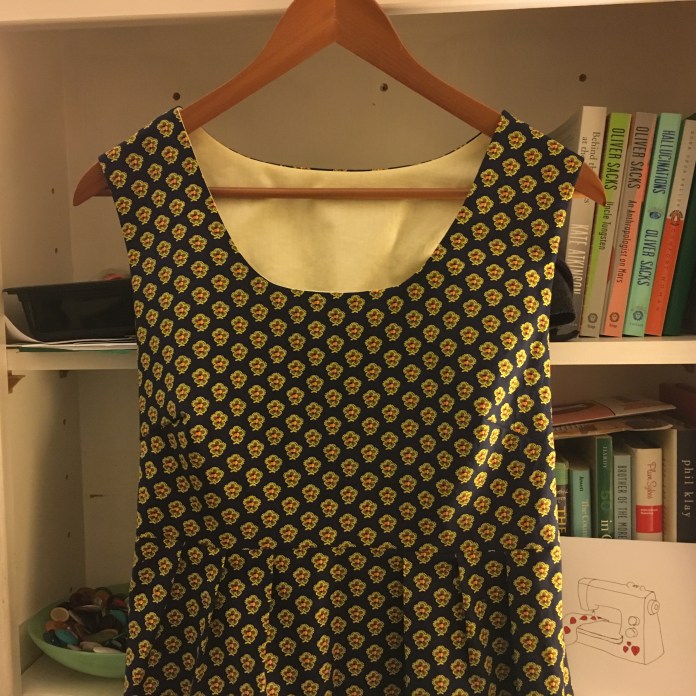 I decided to make a dress for my mother for Mother’s Day with one of my favorite patterns, the Made-by-Rae Washi dress. With so many amazing fabrics out there, I wasn’t sure what to use until I remembered that I had this beautiful paisley-like lightweight cotton that I bought years ago at the wonderful fabric store in Brooklyn where I learned to sew. I love the deep navy with the contrasts of yellow, green and red. It feels very French.
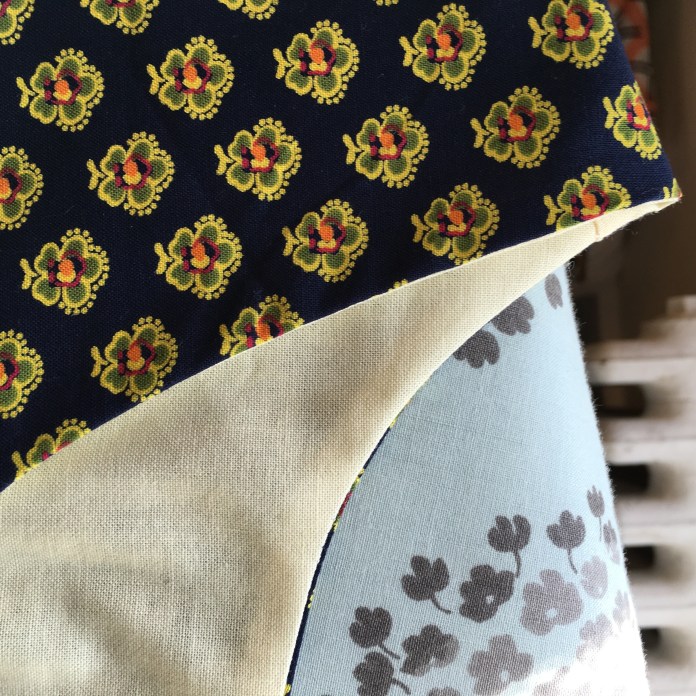 This felt like the perfect fabric for my mother because she is a Professor of French Literature and has studied and lived in France. I made a medium and lengthened it by 2 inches because we are pretty much the same size. The fabric was a dream to work with.
 I lined the bodice using the sausage technique that Rae teaches in her videos.
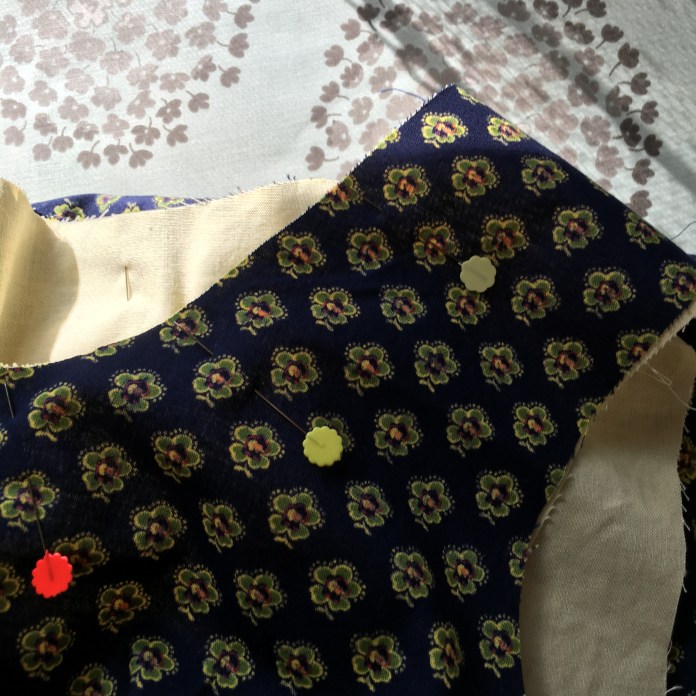 I shirred the back. Rae has a great shirring tutorial here. The nice thing about dark fabric is that you can use a chalk liner to mark your shirring lines. The top of the back is folded up out of the way with wonder clips.
 It is always a good idea to pin or clip the top part of the back before starting to sew the shirring so you don’t catch the top of the back in the shirring seams. (I learned this the hard way.)
 I lined the bodice with a pale yellow cotton that I had in my stash.
  The contrast is so pretty.
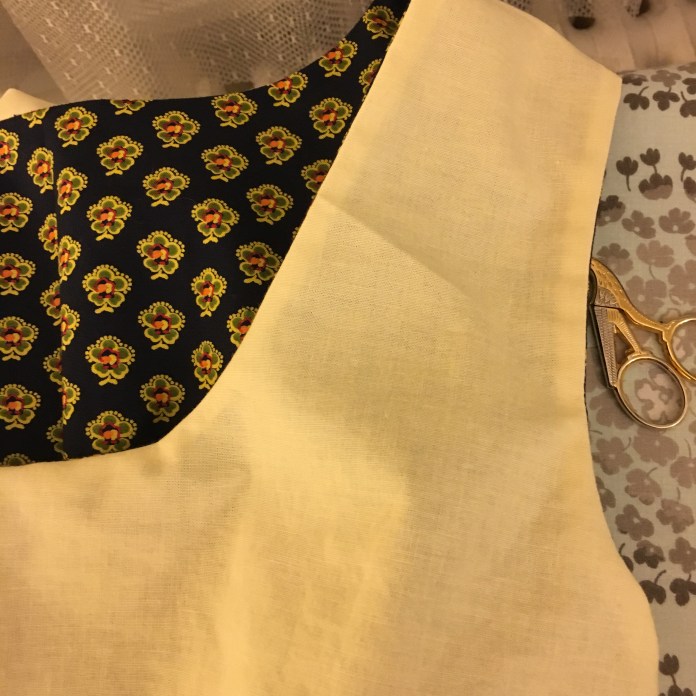 Picture of the inside of the dress. I love the clean finish that you get when you line the bodice.
  I added loops of ribbon for bra straps, a little touch that makes a huge difference for those of us with sloped shoulders. (inside back view below)
 I used the navy fabric and made a hem facing. I generally use hem facings to get a cleaner finish as I wrote about here and here. I didn’t have enough of the yellow or I would have used it to make a contrasting hem facing as I usually do.
 I am really happy with the final product and hope that she will enjoy wearing it all summer. She actually has already worn it to the theater in New York. Check it out! Beautiful, am I right?
 I may have to make one just like it for myself! I will have to check and see how much of this fabric I have left. 🙂
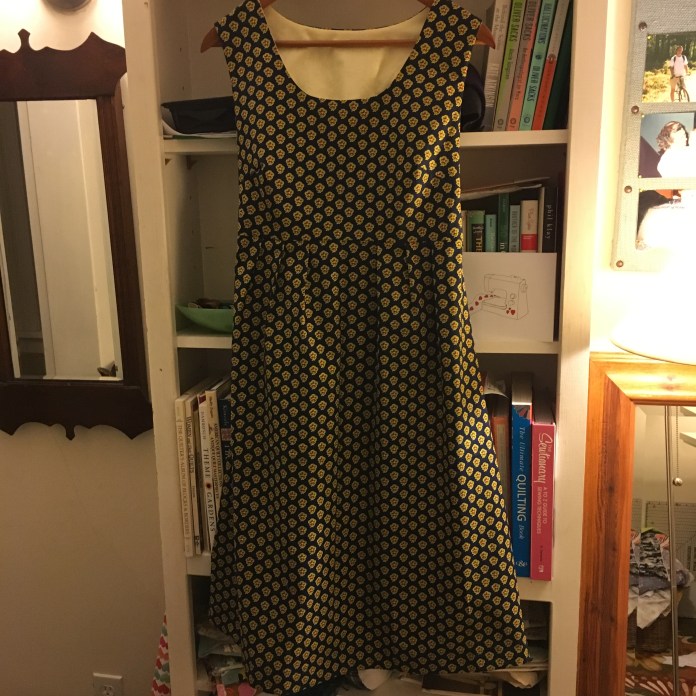 The Washi-such an awesome pattern! Next up, a polka dot Washi for my sister. 😉
Nani Iro Washi Dress
I bought this beautiful Nani Iro double gauze fabric at The Cloth Pocket back in October when I visited my son in Austin. I had originally planned to make a blouse but I was inspired by this beautiful dress that Cherie made for her little girl. It is just perfect. I finally got brave enough to cut into the fabric and decided to make another made-by-rae Washi which is a tried and true pattern for me. I cut the sides a little wider to allow for french seams since double gauze frays. I had good luck with this approach when I made my Charm double gauze washi dress. I realized as I lay the pattern pieces out that I hadn’t allowed for enough fabric to match the stripes. It is actually a tricky thing to line up stripes on a Washi because the front of the dress is made of two separate pieces and the back of the dress has shirring which affects how things line up. Realizing that there was no way to do this easily with less than three yards of fabric, I decided to just line the pieces up with the darker stripes around the waist and hope for the best.  I used chalk to mark the shirring lines but I usually end up just using one chalked line and then using the first sewing line to guide the rest of my seams. Shirring using elastic thread is actually amazingly easy. Rae’s tutorial here.
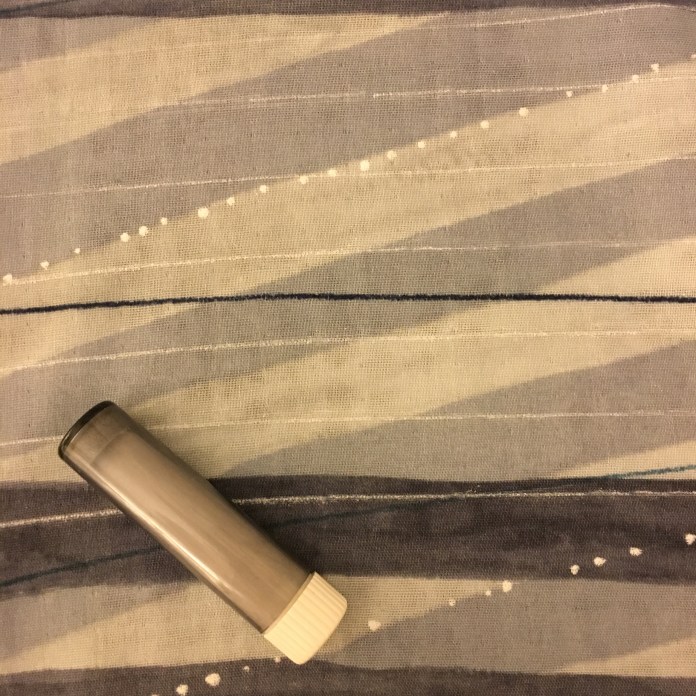 I used organic natural colored cotton batiste to line the bodice using Rae’s helpful videos. The lining is understitched, a technique I learned from the Beatrix Sewalong.
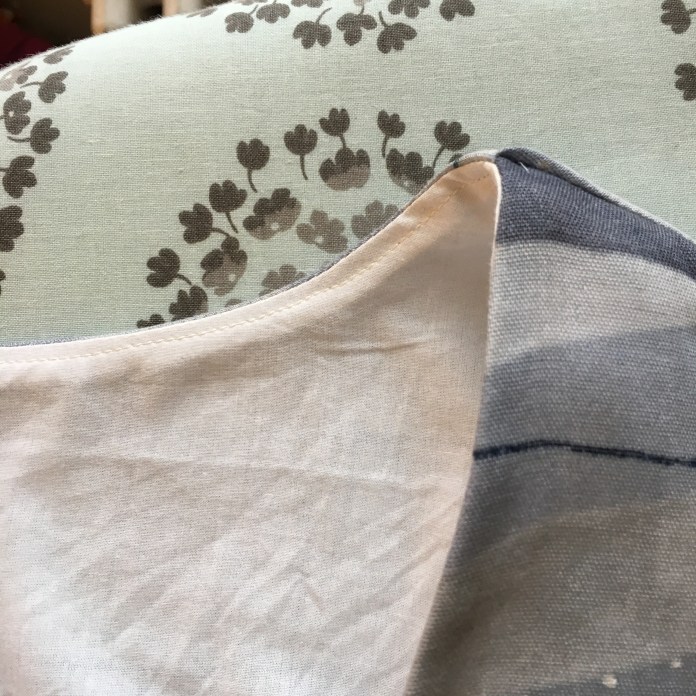 I added a ribbon with snaps for bra strap holders as I sewed the fabric sausage.
 A fabric sausage pinned and ready to be sewn.
 Finished shirring visible as I sew the bodice lining.
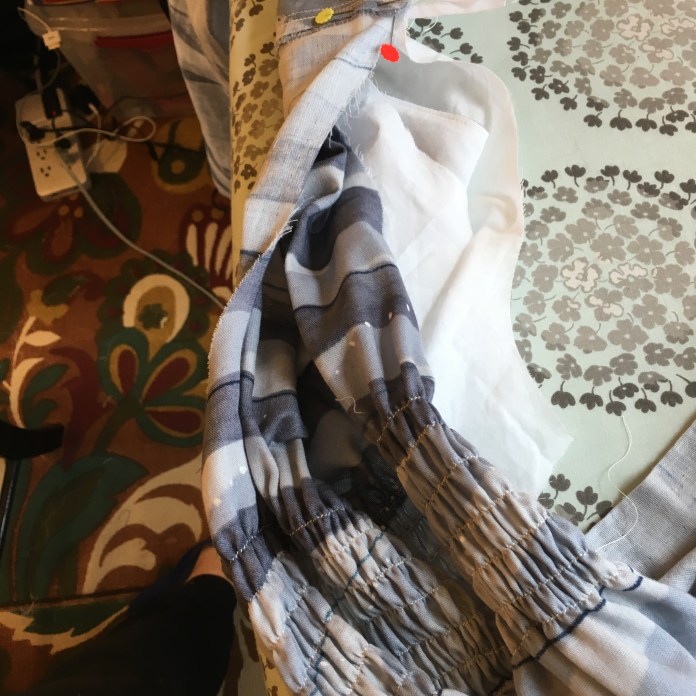 Once again I used a lightweight quilting cotton in a neutral light pink for hem facing. I have used it for several garments. I have almost run out!
 Hem pinned and ready to be sewn.
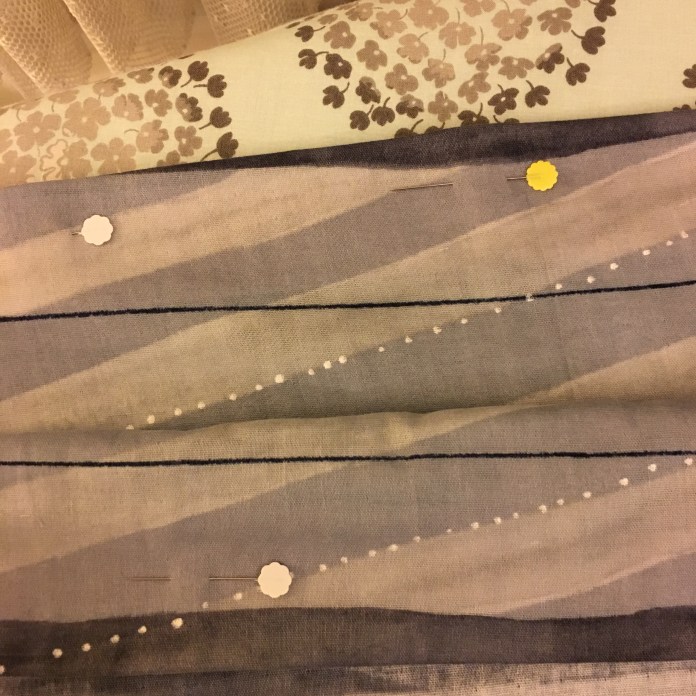 Hem.
Hem. Finished dress back view. The stripes don’t line up on the side but I am happy with the way the back stripes ended up. The photo bomber is my sweet dog Sadie.
 Close up of the beautiful nani iro fabric.
 Shades of grey can be beautiful!
Drops and Dots for Spring
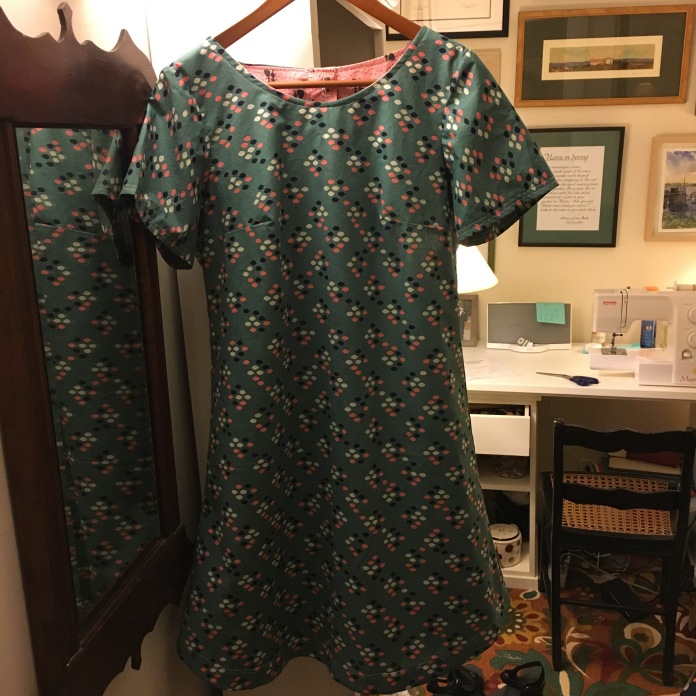 I have had this Cookie Drop Beatrix Tunic in my head since I made my Mochi version several months ago.
 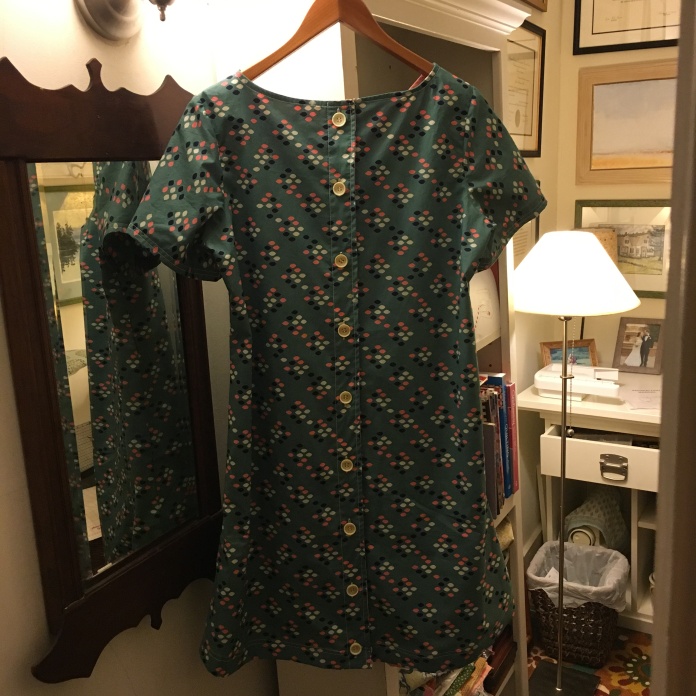 I have always loved this green color. It reminds me of the greens used in so many of the depression era quilts and of my grandparents’ house in Louisville, Kentucky. The mirror below hung in their front hall for over 60 years.
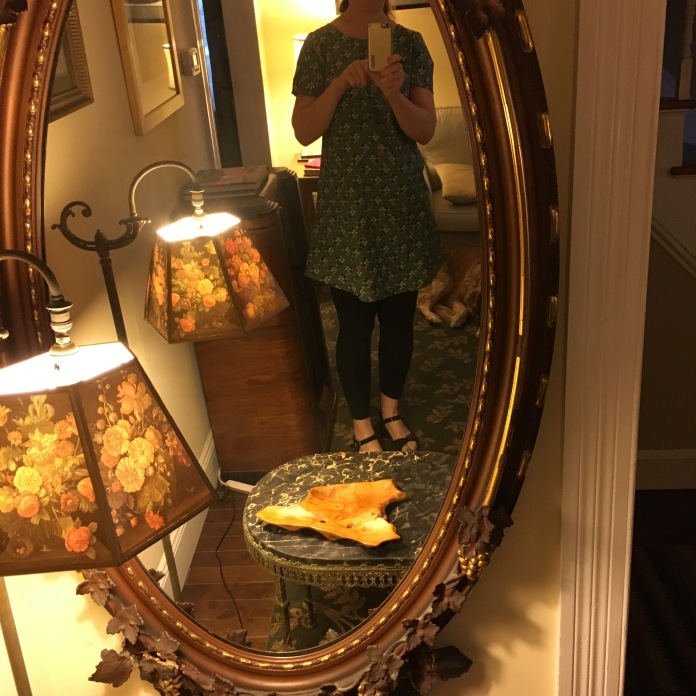 My grandmother loved soft blue greens and those colors predominated in their home. I had the idea for the pop of pink and used this fun fabric for contrasting facings.
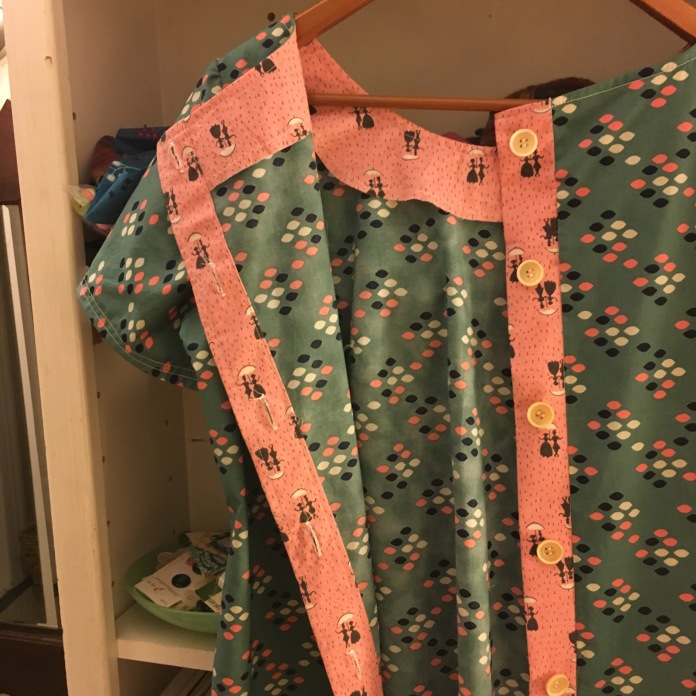 I don’t remember where I got this pink fabric but a friend recognized it. I think she may have given it to me years ago when I had an idea for a quilt with lots of pinks because it was my daughter’s favorite color. That quilt never got made because life got in the way. It may end up being a future project. I still have quilt sized scraps left over.
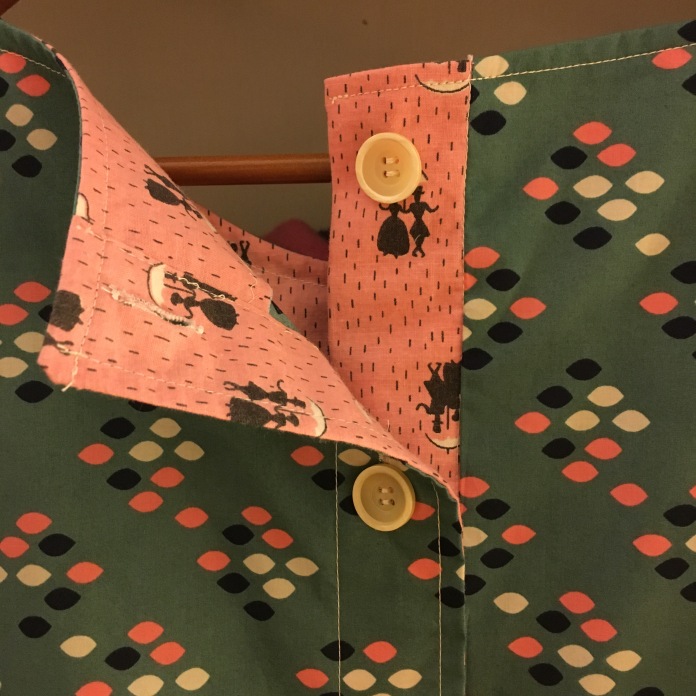 An online friend on instagram commented that the pink fabric reminded her of Mary Poppins. I hadn’t thought of that before but once she said it, I could totally see it. I love Mary Poppins. Who doesn’t? I read all the original books as a child and with my children.
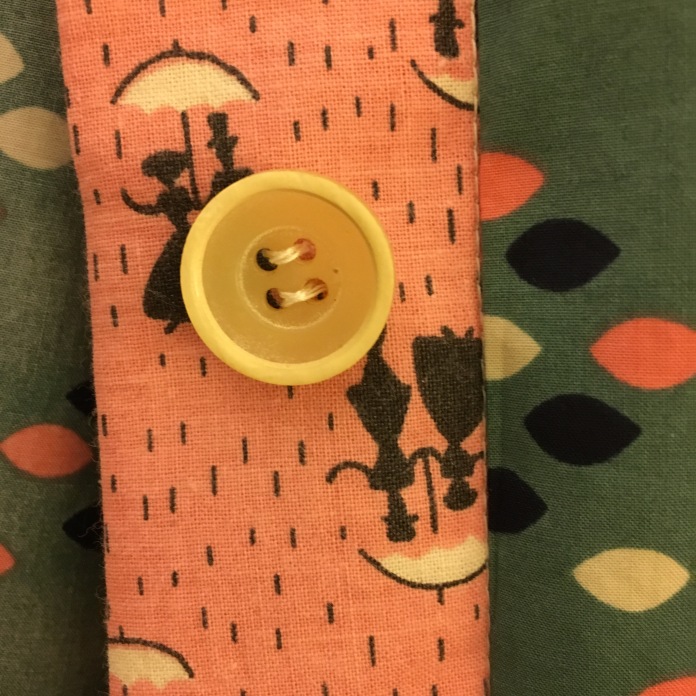 I love the versatility of the Beatrix Pattern by madebyrae. I have made and blogged about several versions. It is relatively straightforward but Rae has a great series of blog posts that walk you through the tricky parts like set-in sleeves.
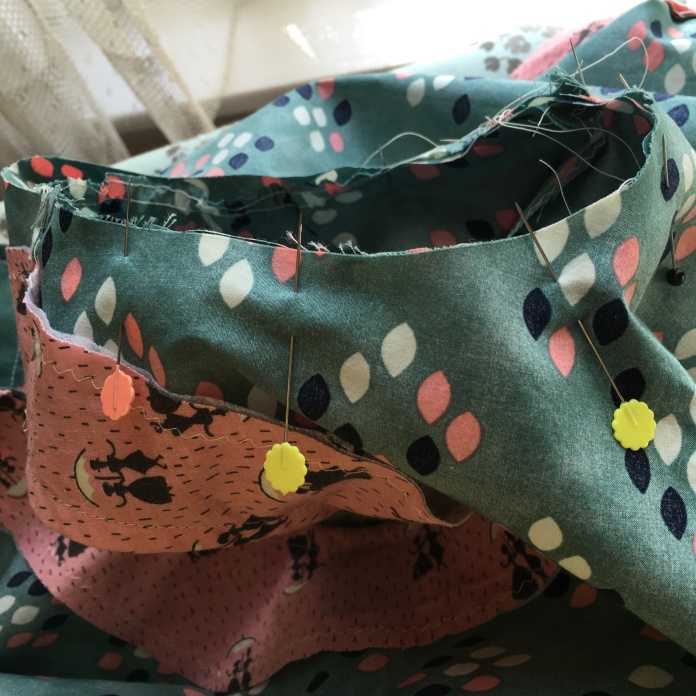 This time, I modified the pattern to use the contrasting fabric just on the inside of the garment. I used Rae’s instructions as if I was going to do a contrasting button placket using the standard measurements on the side with the buttons and then on the side with the button holes, I made the green portion wider and the pink portion narrower adding a seam allowance to each, folding the fabric at the seam where the two fabrics are sewn together, a technique I use for most of my hems. I am really happy with how it turned out. I think the pink on the outside was a little bolder than I wanted to go but I love the way it peeks out. In order to make Mary Poppins and Bert upright, I had to piece the placket facing but I think it came out fine. Waste not want not! The people are sideways on the hem facing which was necessary given the long strip that I needed for the hem facing.
  This fabric is a cotton lawn so it drapes well but was really easy to work with. Although I originally planned to use these green buttons:
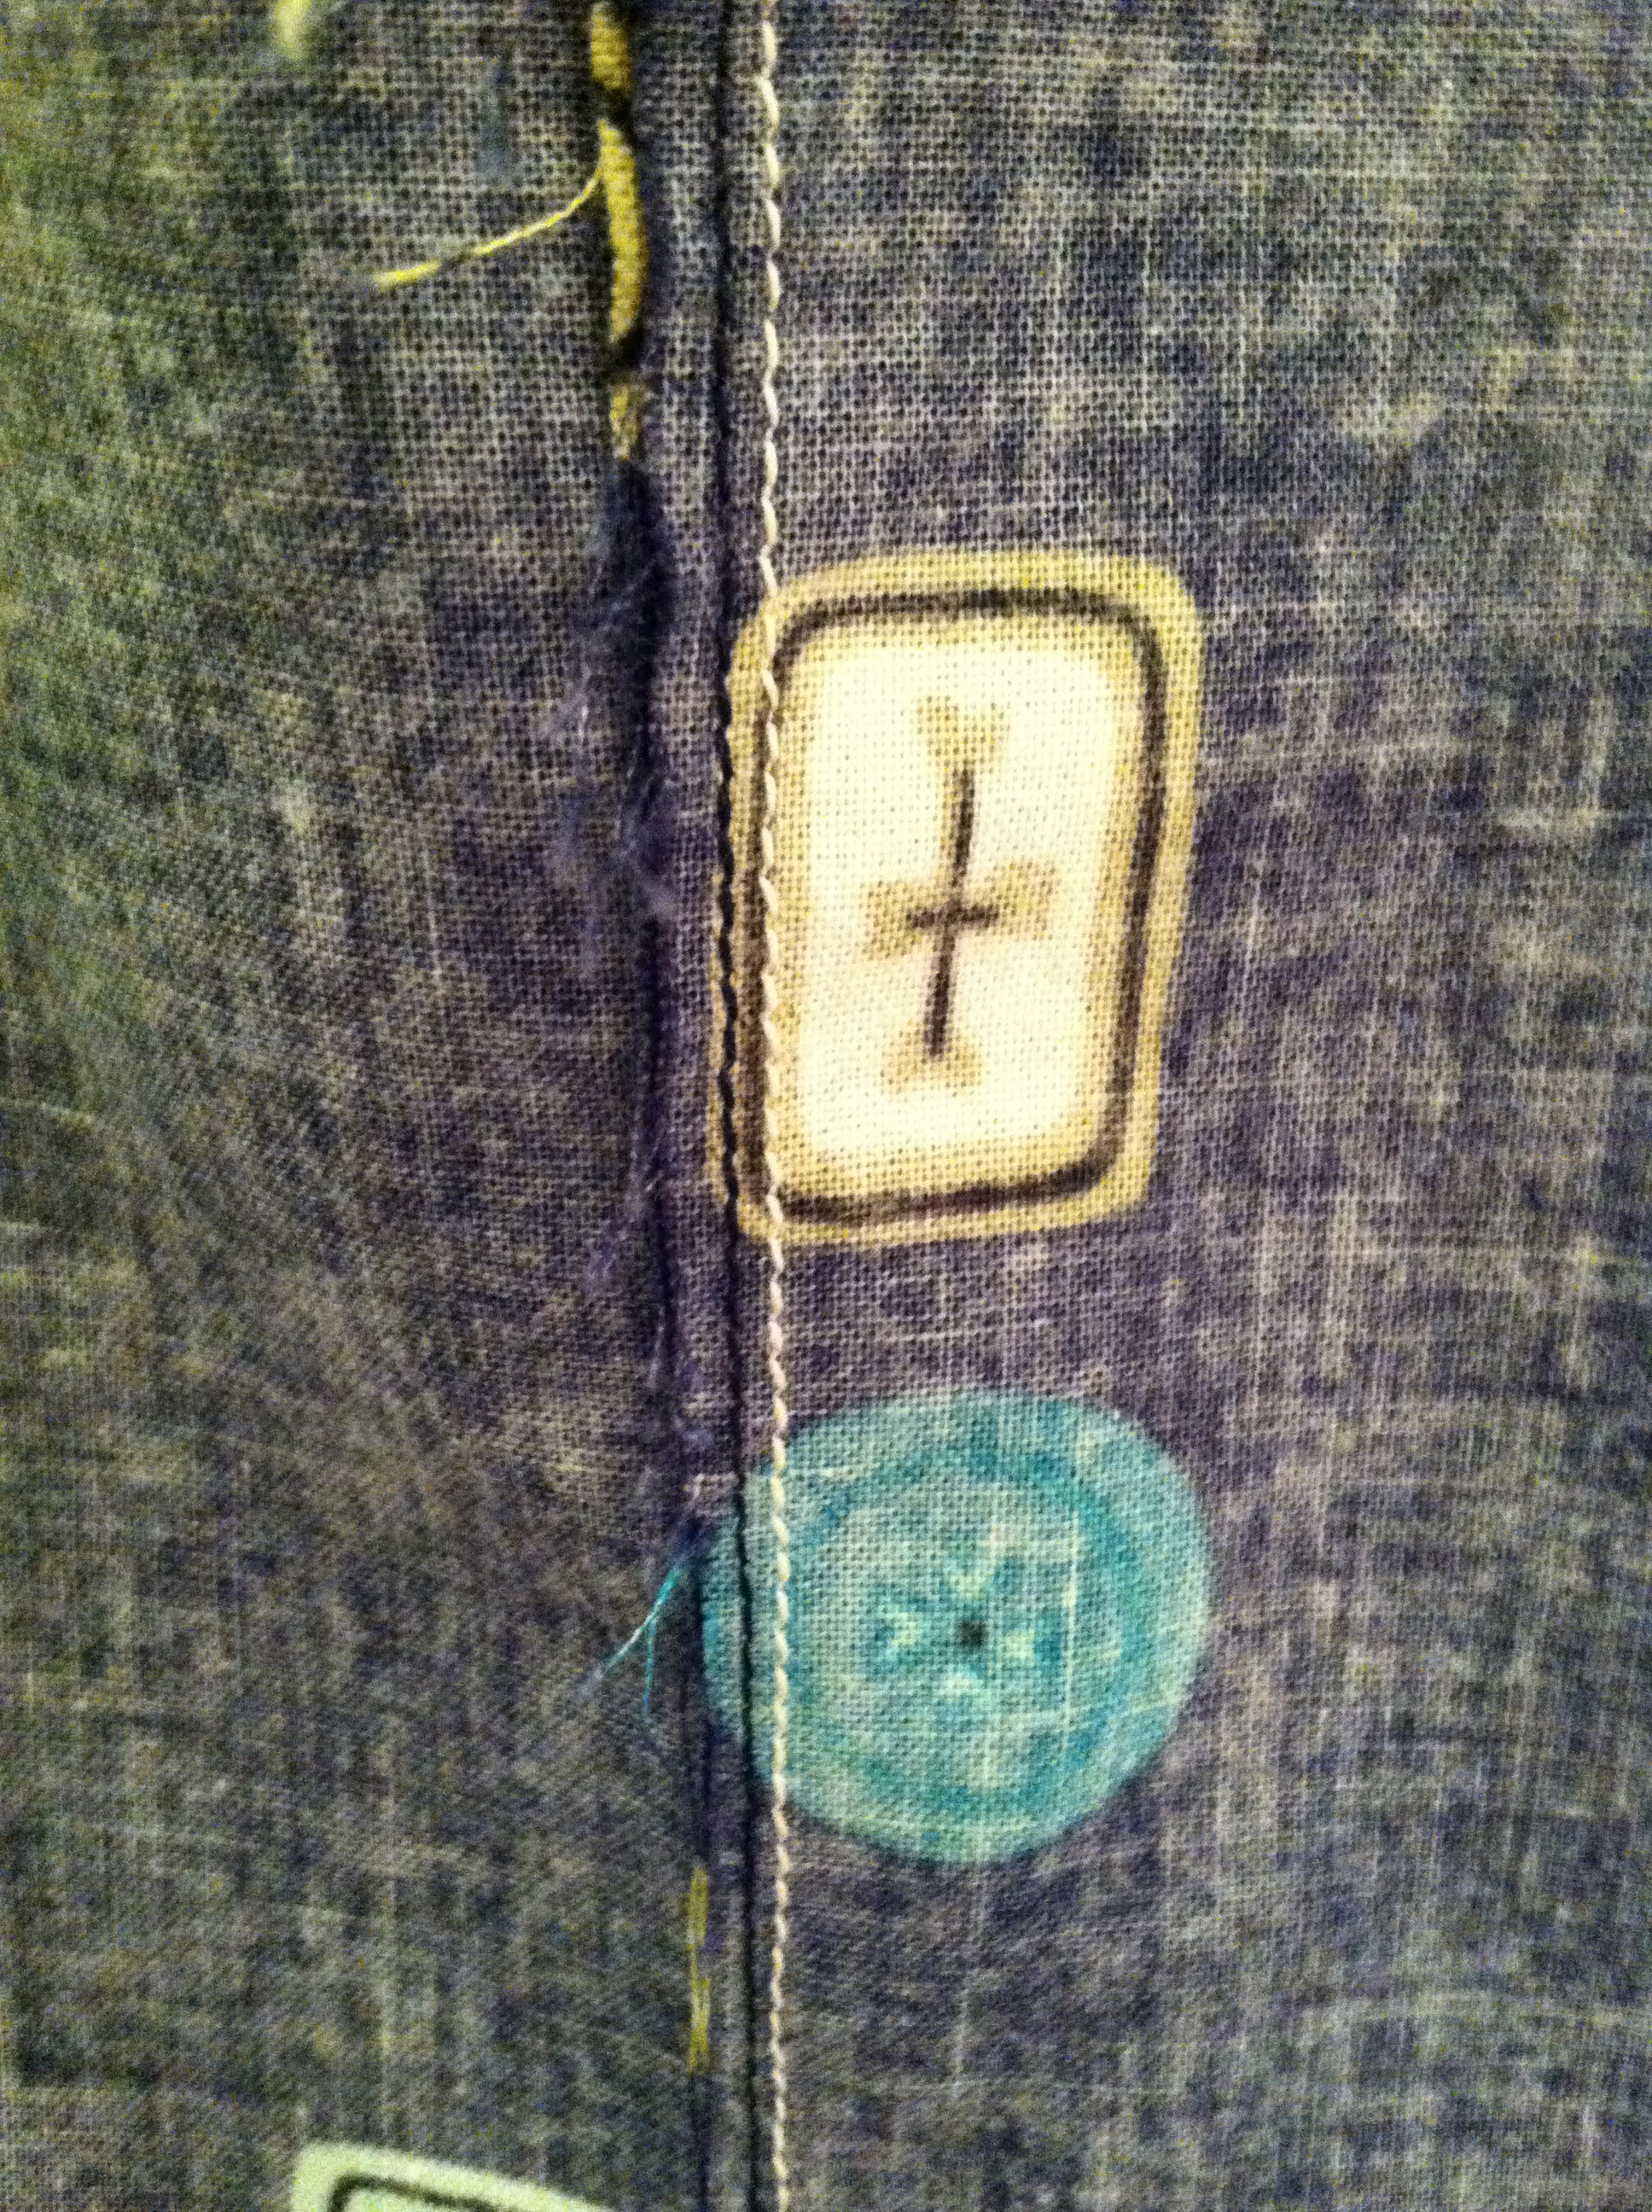
 I decided instead to use these slightly worn, older, cream colored buttons that I rescued from a button jar that I picked up at a tag sale when I first moved to Connecticut in 1995 (buttons seen below with all of my long threads after sewing button holes. I left the threads long deliberately in order to pull them through to the underside and knot them. It didn’t take that long and it looks so much neater.) I like the fact that the buttons have variations in their colors and aren’t exactly matching. I used a cream colored thread which is much softer looking than bright white. I like to sew the two rows of stitches on my button plackets because they help me line up my button holes and I like the look of the stitching.
 I used more of the pink fabric for the facing and hemmed the tunic using the facing technique that I explained here.
 In that same house where I found the button jar, I also found a little package of fabric held together with rubber bands in a pile of old towels in a linen closet. The price was less than $5. That package turned out to be 20 hand pieced quilt blocks. I later used them together with another 25 or so I pieced over the years to make a quilt for a very loved cousin who was going through treatment for cancer. My amazing teacher and professional quilter Judy assembled those blocks and figured out the best way to display them We used a lot of this same green color in that quilt.
 On the back, we created a collage of family photos and messages.
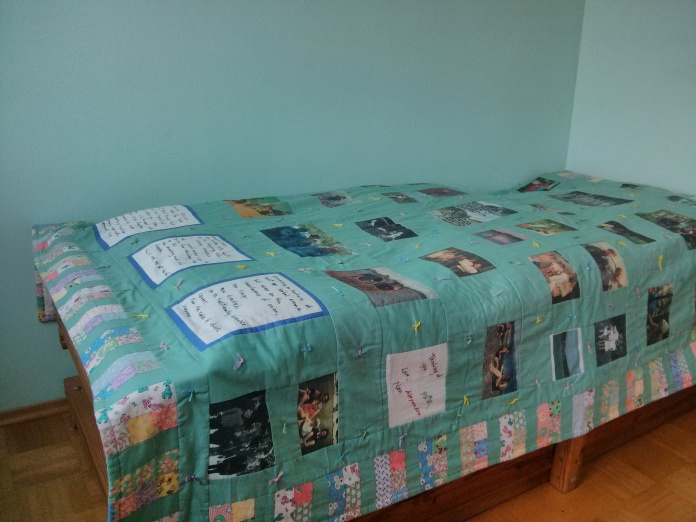 Next up in my quest to finish the works-in-process is a shift dress in cotton and steel polka dots. Drops and dots. What could be better? The cotton and steel cotton lawn fabrics that I used for my Beatrix tunics are still available at fabric.com as of this writing. Happy spring!


A New Look for Beatrix


Last summer, armed with new found knowledge of facings, buttons and sleeves from the MadeByRae Beatrix sewalong, I decided to tackle a basic shift dress pattern that I bought many years ago and never used, New Look 6095.
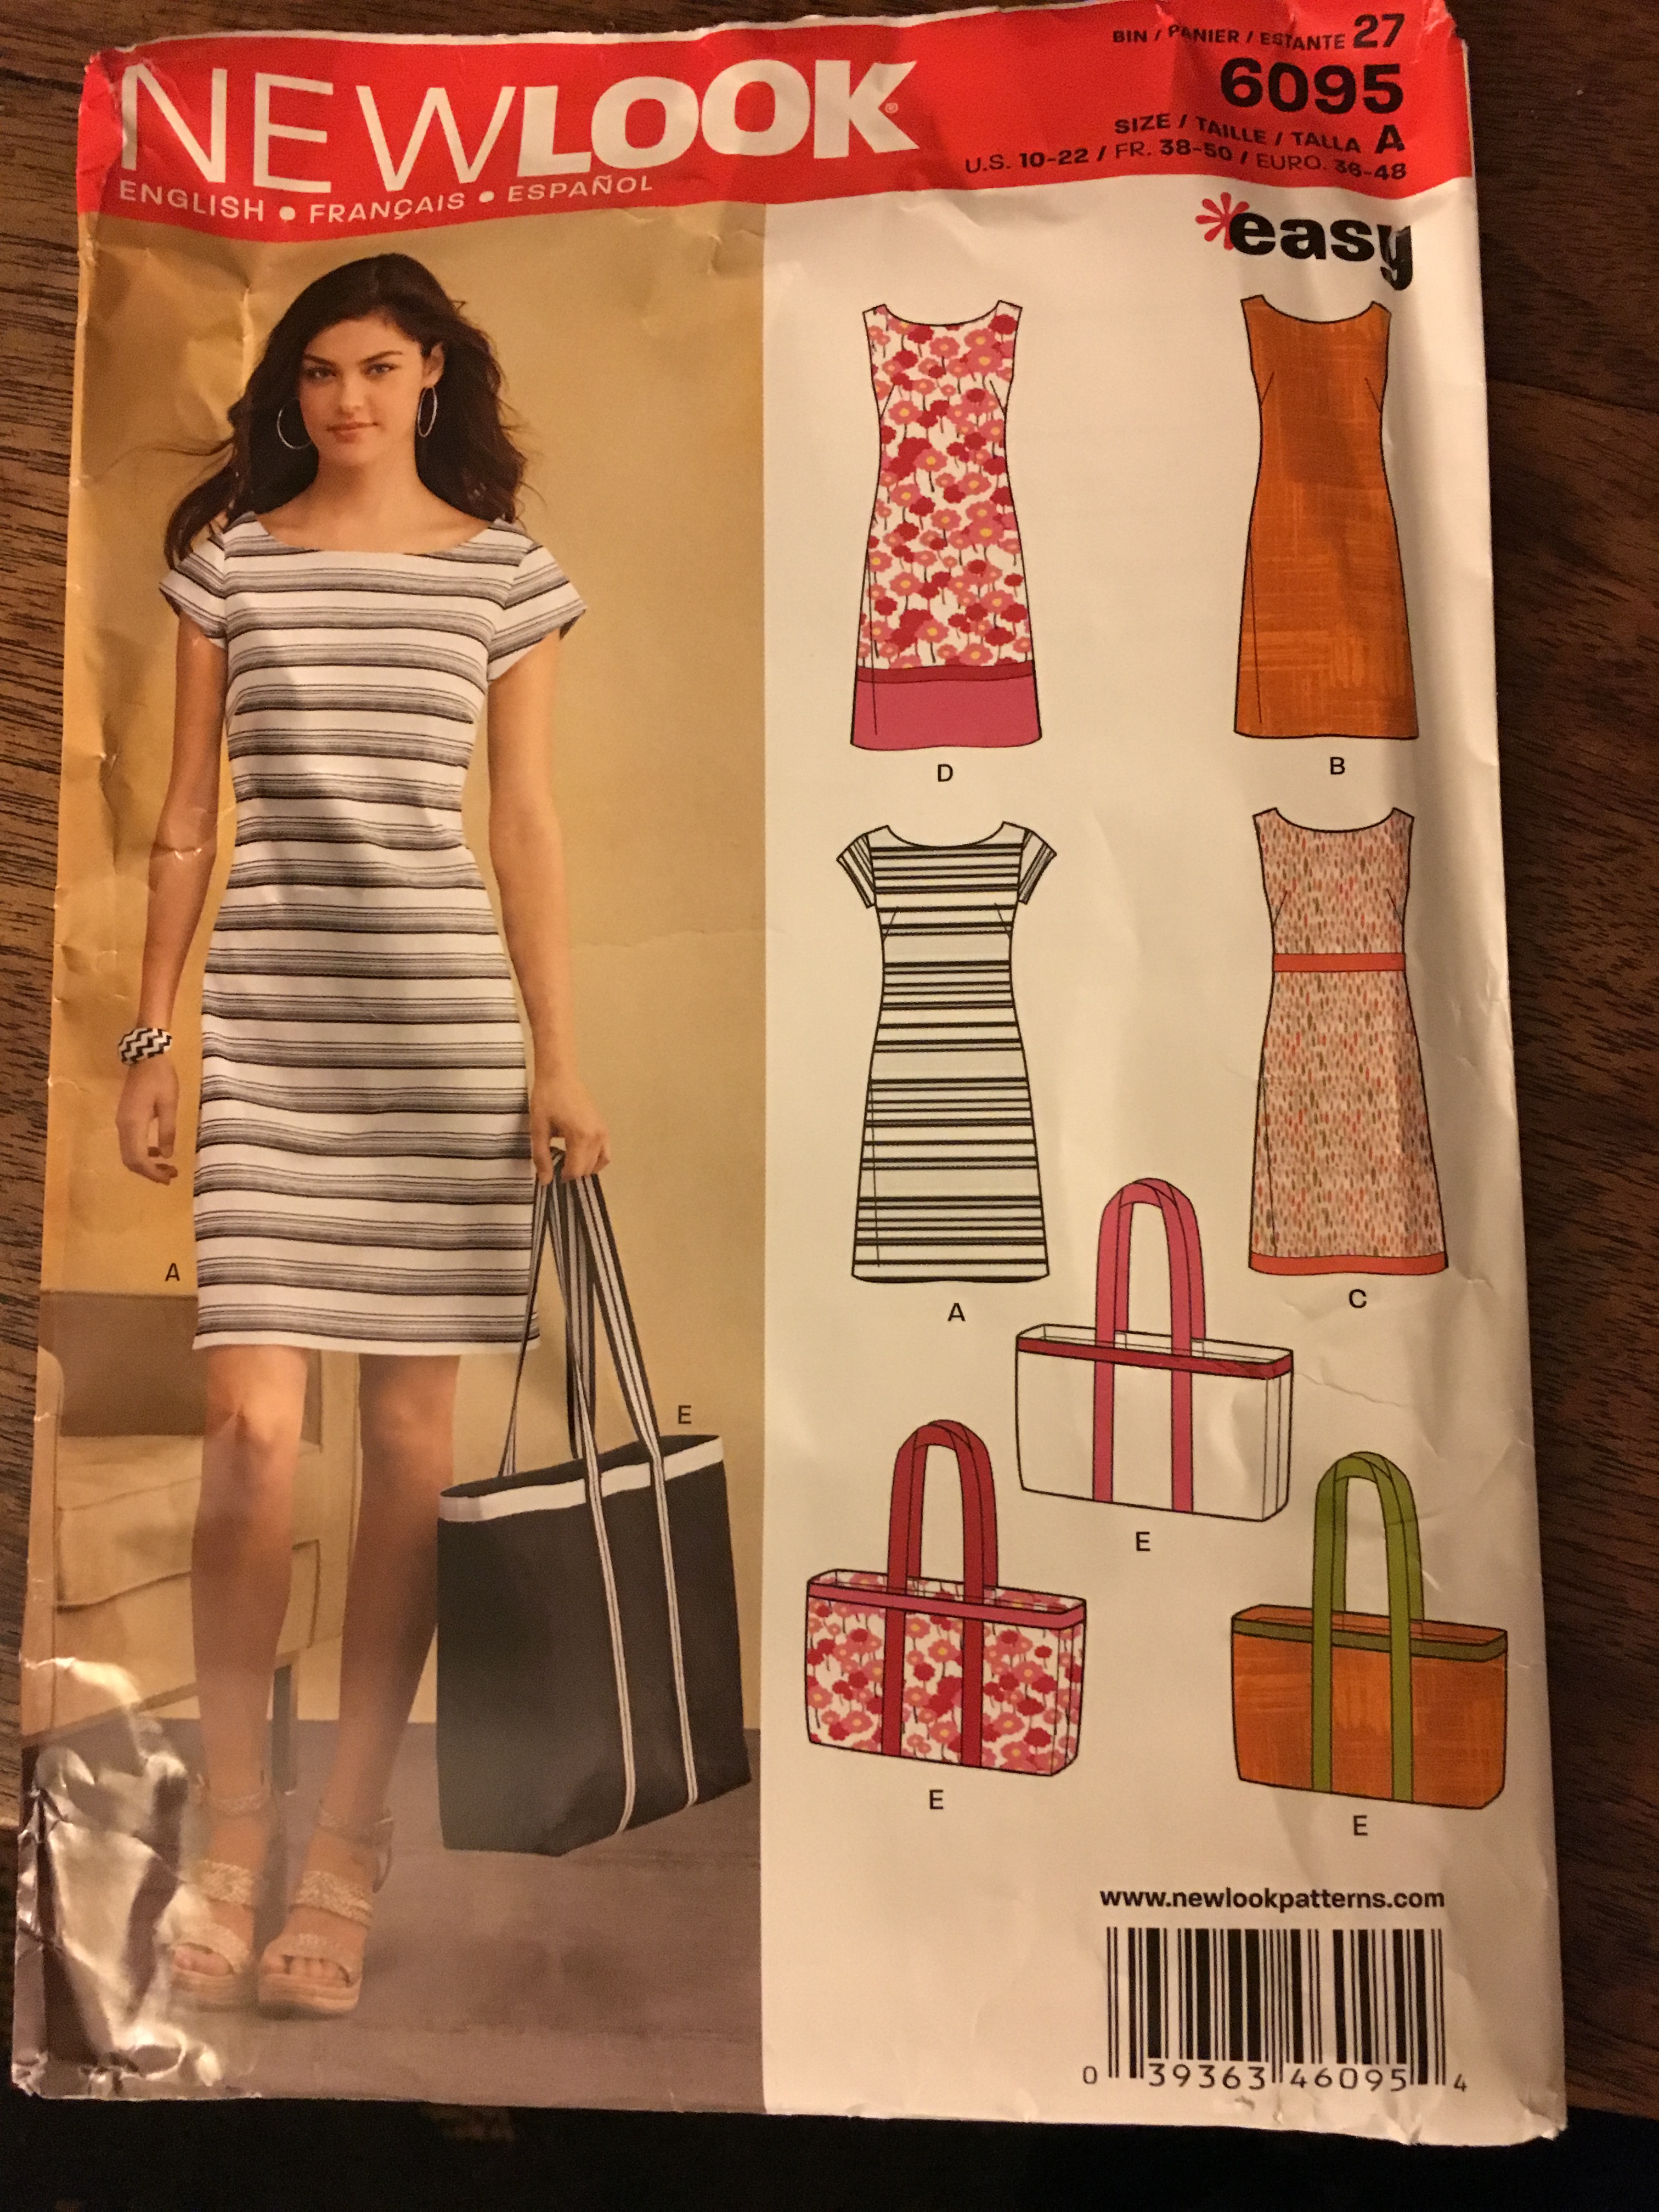
The pattern appeared to be very straightforward with one exception: I took the directions out at some point in the last year and misplaced them. Yikes! So I had pattern pieces but no instructions. This didn’t end up being a big problem although later this year I found the pattern online and bought it again so as to be better equipped before I make it again. The dress is a very simple shape with darts in the front and a neckline that is very similar to the Beatrix style and with two diamond shaped darts in the back to create shape and make the dress somewhat more fitted than the other styles I have made this year. I made version A but I took the sleeves from the pattern and added length to them using the Beatrix sleeve as my template.
The front is one piece cut on the fold and the back is two identical sides which I ended up cutting on the fold as one piece by mistake (I tend to do this) and then cut into two separate sides.
The advantage is that the pattern matching is awesome when you do it this way although I didn’t plan it. I used this beautiful Cotton and Steel fabric which I love.
I ended up making three muslins to get the fit right. Yes this was time-consuming but since the basic pattern was only three pieces it wasn’t terrible, although I did go through a lot of fabric making the muslins (I am now cutting them up to use as lining in other projects.) What I learned is that you sometimes have to play around with the fit for a while and just because your waist is smaller than the shape of the dress, it isn’t necessarily flattering to taper to the waist too dramatically because then your hips seem larger.Yes this should be intuitive but it was really interesting to make these tiny adjustments and see such a change in the shape which is why I ended up having to do it three times!
Based on the patterns measurements I should have worn a 14 or 16 which is not my normal size. I think I originally cut between the 12 and 14 lines. I ended up scaling back down closer to a 10-12 but I ended up using the dart placement per the larger size pattern placement as the darts placement is different depending on the size. When I sized down, I sewed the darts where the smaller size dictated but then found that the fit wasn’t as flattering so I ended up making a smaller size with the dart placement per the larger size. Now that I have the pattern adjusted the way I like it, what I need to do is to trace it onto tracing paper (on my long to do list) because it is currently a hodge-podge of tissue paper pattern pieces with some added paper with some of the lines re-traced. I plan to make it again at least twice starting with the beautiful fabrics below:

Sewing this pattern and playing with the fit taught me that that even small adjustments can result in a big change in the shape and drape of a garment. By experimenting, I got a nice fit for everything except the neckline which I should have adjusted as it does gape a bit in the end. I will fix it next time!

I drafted a facing for the neckline and sewed across the shoulder seam to tack it in place as Rae teaches in the Beatrix sewalong.

I used a Moda turquoise fabric for the neck facing and to face the hems.

My hem facing ended up smaller than planned because I used too narrow a facing strip. I used this Moda fabric all summer to face and line several projects and I was almost out when I got to this dress.
One could use a zipper but I decided to try a button loop because I had a large turquoise button that I thought would work well. I followed the directions for the hand sewn button loop in the Sewaholic book: Sewtionary which is a great resource. I am really happy with how it came out in the end. I drafted a little facing for the button opening. I just sort of made it up and it works.

I an happy with everything except the neck gaping but I know how to fix that using the hollow chest adjustment technique that I used making the Beatrix. I will be making this again soon and this time will have the instructions. Woohoo! I am interested to see if it makes a big difference. Changes I will make to the next version: wider hem facing, hollow chest adjustment and slightly longer sleeves. Otherwise I am really happy with this. It works well with sandals in the summer and with boots and tights in the winter with an olive green cardigan.

Washi Details
A few pictures of the insides of my Washi dresses. I have started lengthening the front bodice lining a bit so I can turn more under to get a cleaner finish. I generally finish the hems with a 3 inch facing that I turn up and finish with two rows of stitching but when I sewed my most recent Washi, I stitched one row and caught the edge of the facing perfectly-a first! and decided not to chance a second row of stitches as they might not have been even and I was happy with how it looked. I generally use scraps for facings. I enjoy the challenge of finding something that works. It is the quilter in me. This Pat Bravo fabric was somewhat sheer so I lined it with white quilting cotton. I like the structure the lining gives to the bodice and the hem.


This Cotton and Steel Washi was lined with wonderful mustard mustang fabric. Love this fabric. I should have probably bought a bolt! I used it to make a Beatrix blouse that I wear all the time.


Most recent April Rhodes Washi with lining and sleeves. I used Rae’s sausage method successfully although there was a lot of fabric in the sausage! I pinned the bulk of it away from the seam line so I wouldn’t catch it when I sewed.


Speaking of pinning. A word to the wise. When sewing the shirring, pin the top of the bodice together. I have caught the top of the bodice in the shirring more times than I care to admit. I just get carried away and don’t notice! This helps. Another tip: make sure you have enough elastic thread in the bobbin before you sew each line of shirring. You don’t want to run out in the middle of a seam because you will have to pick the whole line of stitching out. Happy sewing!