 This is my third year of participating in Me Made May, in which home sewers/sewists from all over the world pledge to wear me-made garments all month long and most post them on social media. This year I decided to try to not only wear a garment that I had sewn each day but to try to wear something different each day-no repeats. I mostly succeeded. I did have one day when I didn’t post-although I had worn a handmade tunic that day, my mother in law was in the hospital, and a picture on social media was the furthest thing from my mind. I ended up with more than 31 posts because there were several days when I wore a second outfit in the evening. I did have a couple of repeats and those were instructive. I wore my blue linen-cotton Gemma Tank, my newly made white double gauze Gemma Tank and my khaki Cali Faye Pocket Skirt more than once. They are the solid colored basics that I need to sew to fill in the gaps among all the patterns. Those will be things that I will sew this summer.
I wore what I normally wear but I did think more about planning something new for each day whereas I normally repeat easy to wear garments over and over again (such as my Isla dresses which I wore all winter.) It was actually fun to wear something new each day and to realize how many things I have sewn that I love to wear. This is really amazing considering that I only started sewing my own clothes a little over two years ago. I actually could probably go another 2 weeks without repeats. I have many beautiful summer dresses that I didn’t wear because May was really cold where I live in Connecticut. I will look forward to wearing them this summer when I warm up.
A blogger friend commented on my instagram that it looked as though I was doing an all Made By Rae Me Made May and it is true that hers are the patterns I use the most. I did though wear three Green Bee Pearl shifts that I have made and loved and my Pocket Skirt. I do think about sewing pattern from other pattern designers and even tried sewing a pattern for a knit shirt that I was really excited to wear-the Piper top by Christine Haynes-but then after sewing it (I didn’t make a muslin) the fit was way off. So I end up going back to the tried and true. It is amazing how a pattern can be made so many different ways that it doesn’t seem like the same dress. Just look at all the Washi’s in the pictures below. For more thoughts on sewing a handmade wardrobe using a couple of tried and true patterns, you can link to a post on that topic here.
I sewed several new garments this month: a Ruby dress, four Cleo skirts, several Gemma Tanks and a pair of Luna pants. I will blog about them later this month. My biggest project this month was finishing a hand quilted queen size quilt which is a gift. It took hours over many years and particularly this month but as of this writing, it is done except for a label which seems like a miracle. I decided not to spend time doing any blogging or reading of books this month in order to get it done and it is huge relief to have finished it and I look forward to sharing details after I give it to the recipients.
Here are my daily pictures basically grouped by week. I have included links to posts with details where possible. For people new to sewing, I would highly recommend the Made By Rae Beatrix Sewalong which is a series of blog posts that Rae Hoekstra created when she launched the Beatrix Blouse. I learned so much by sewing each step and following the instructions in her blog. My very first posts on this blog are from that sewalong and you can see my progress from there. The things I learned from that experience have stayed with me. I also highly recommend her tutorials and videos which I link to in my individual posts for each garment.
I am not sure if going forward I will post daily during Me Made May to the extent that I did this year. It did require a big commitment from my family members who got up early to take pictures. The first two days, I tried using a selfie stick and it really didn’t work. I just couldn’t smile and get a good picture without someone on the other side of the camera. I am really grateful to my daughter and my sweet husband who really got in the spirit and made 7 am photo sessions fun. He has been my champion, so supportive along this sewing journey. Couldn’t have done it without him!
Here are the outfits. I recommend all of the patterns you see here. They are terrific and any one would be a good place to start sewing.
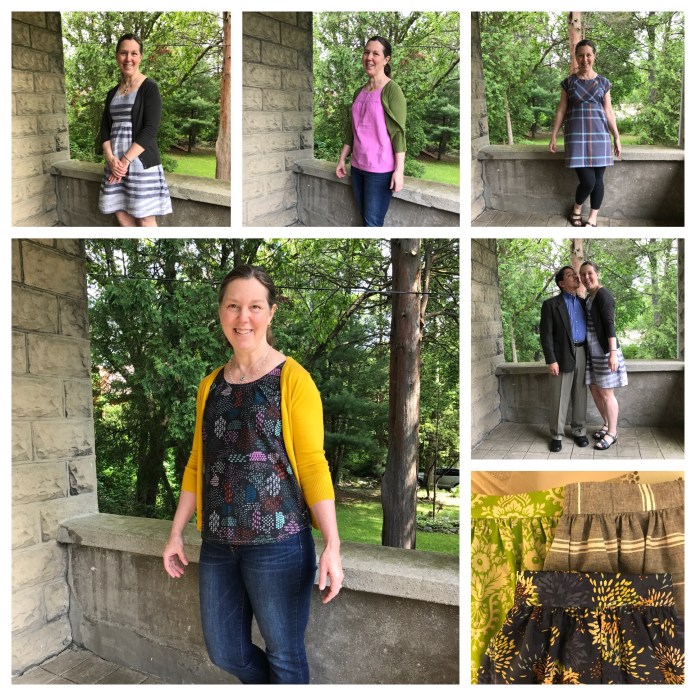
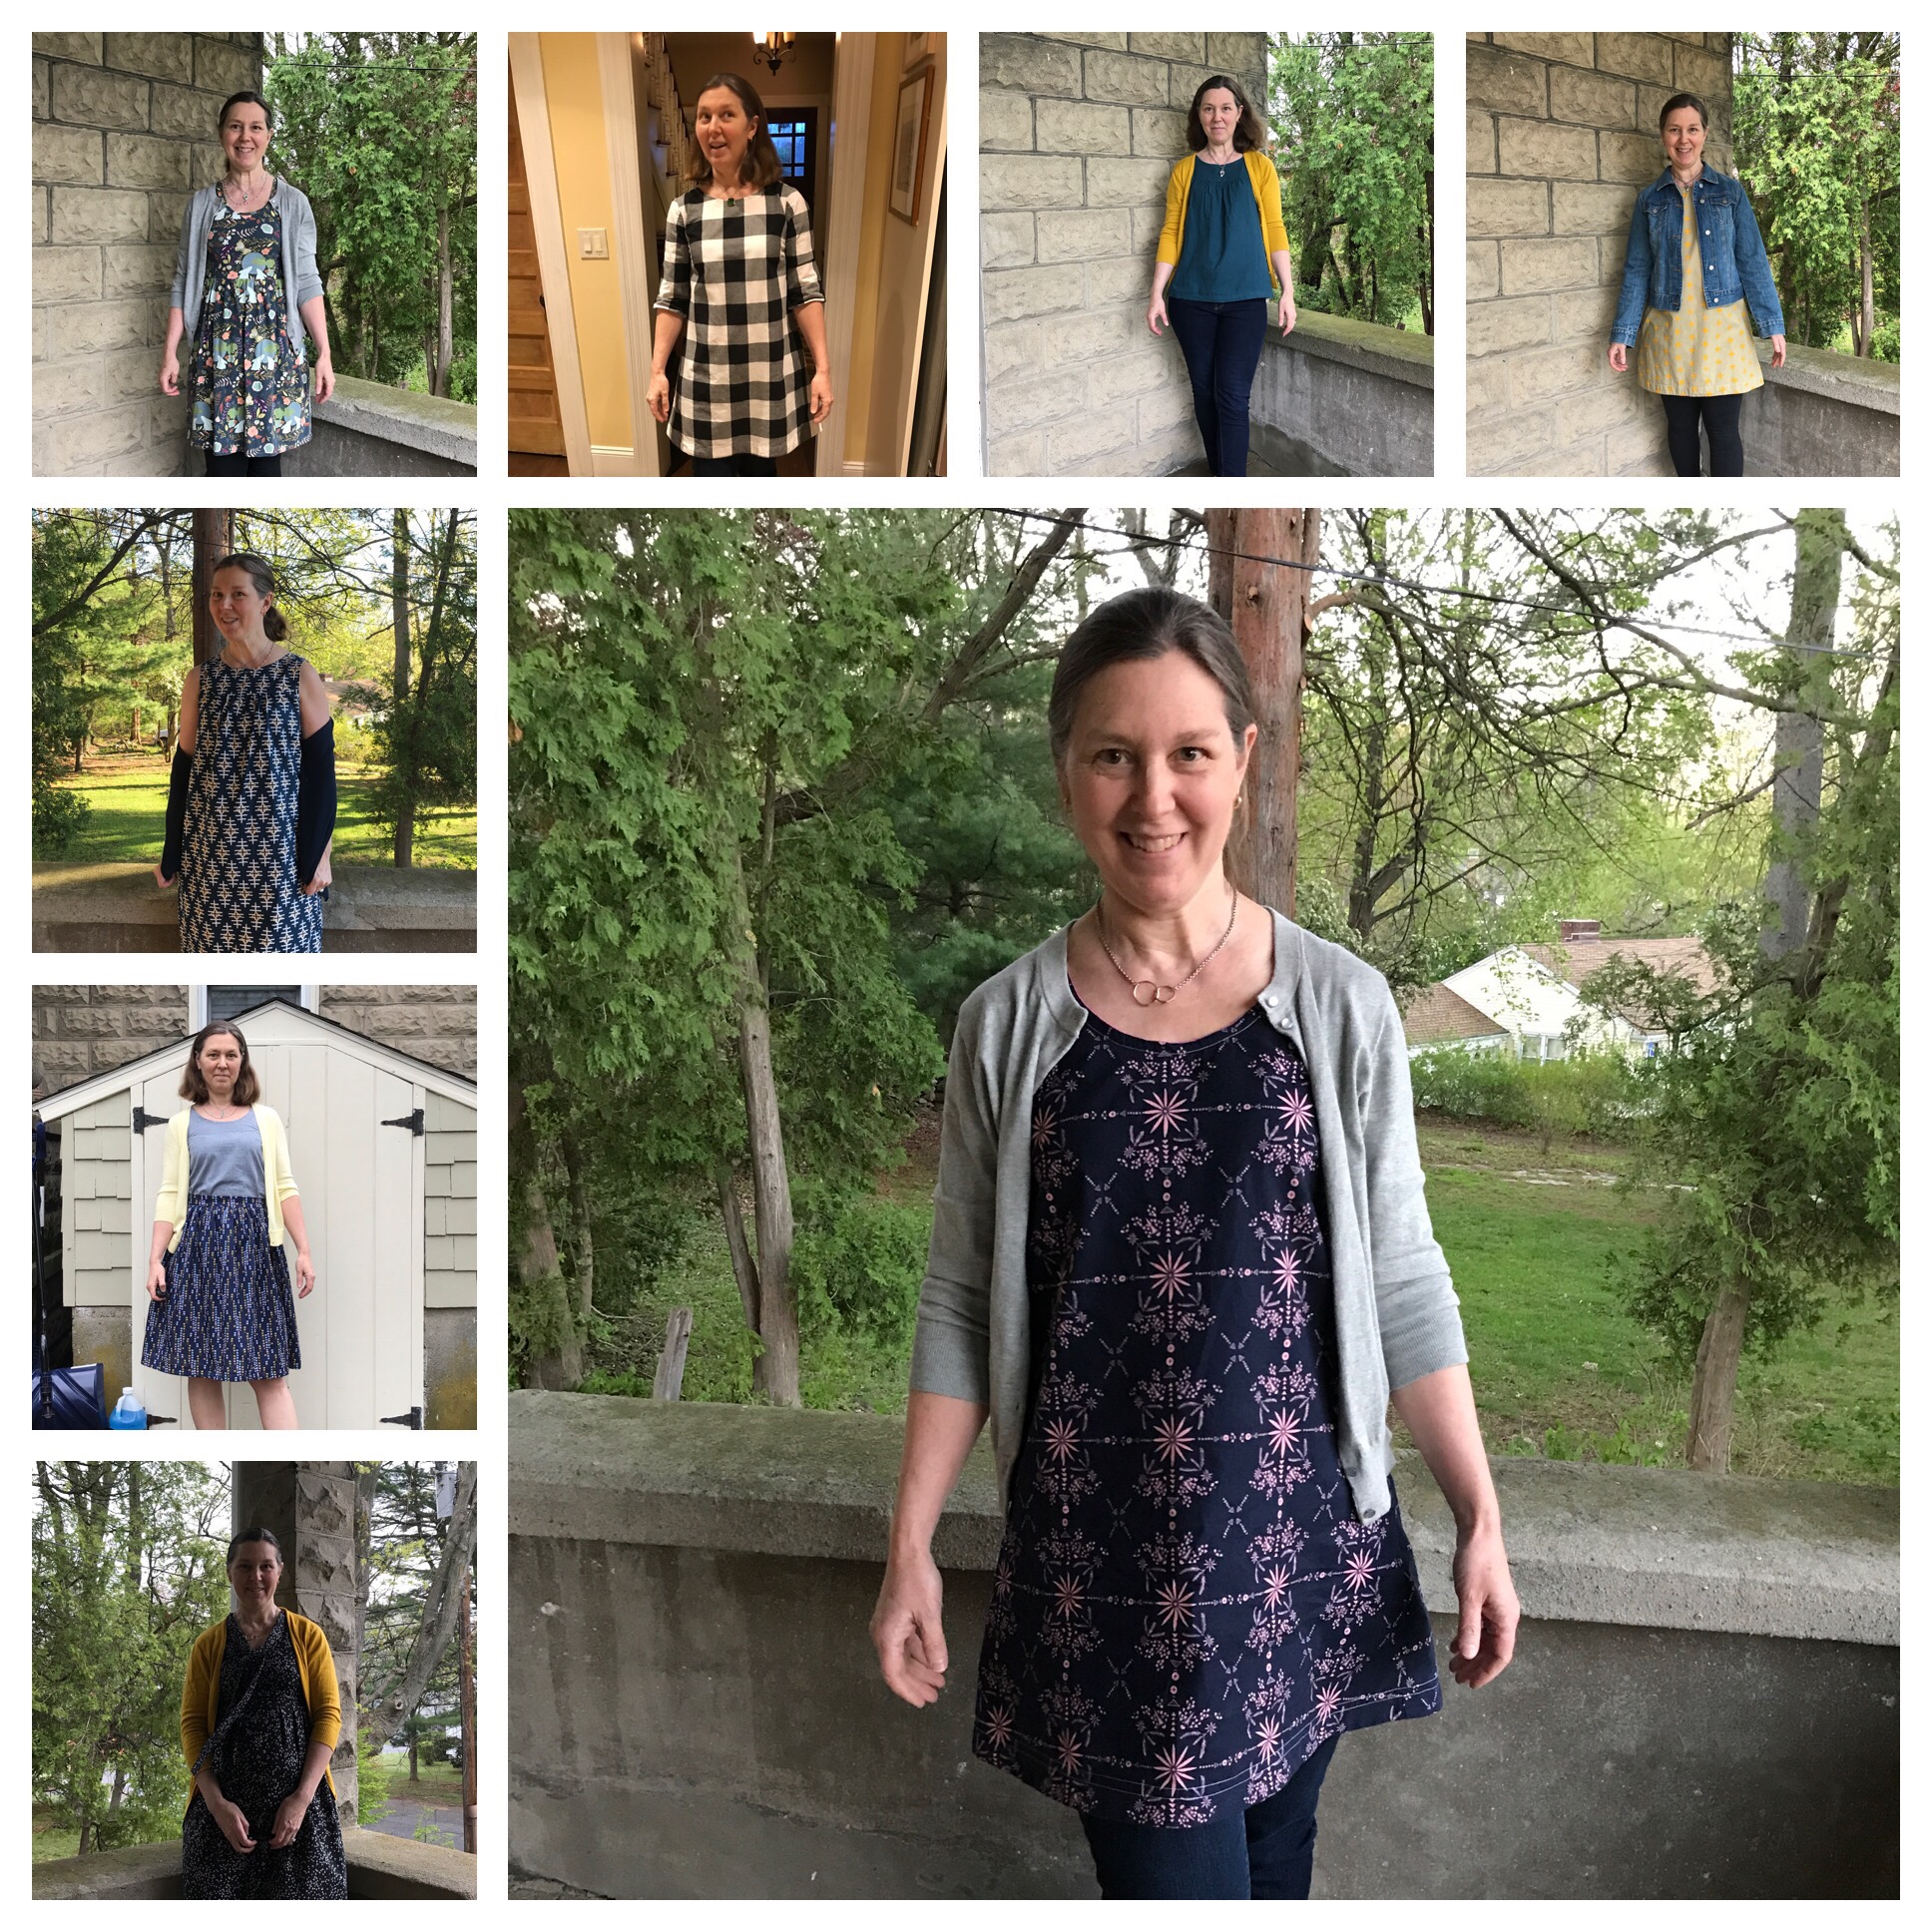
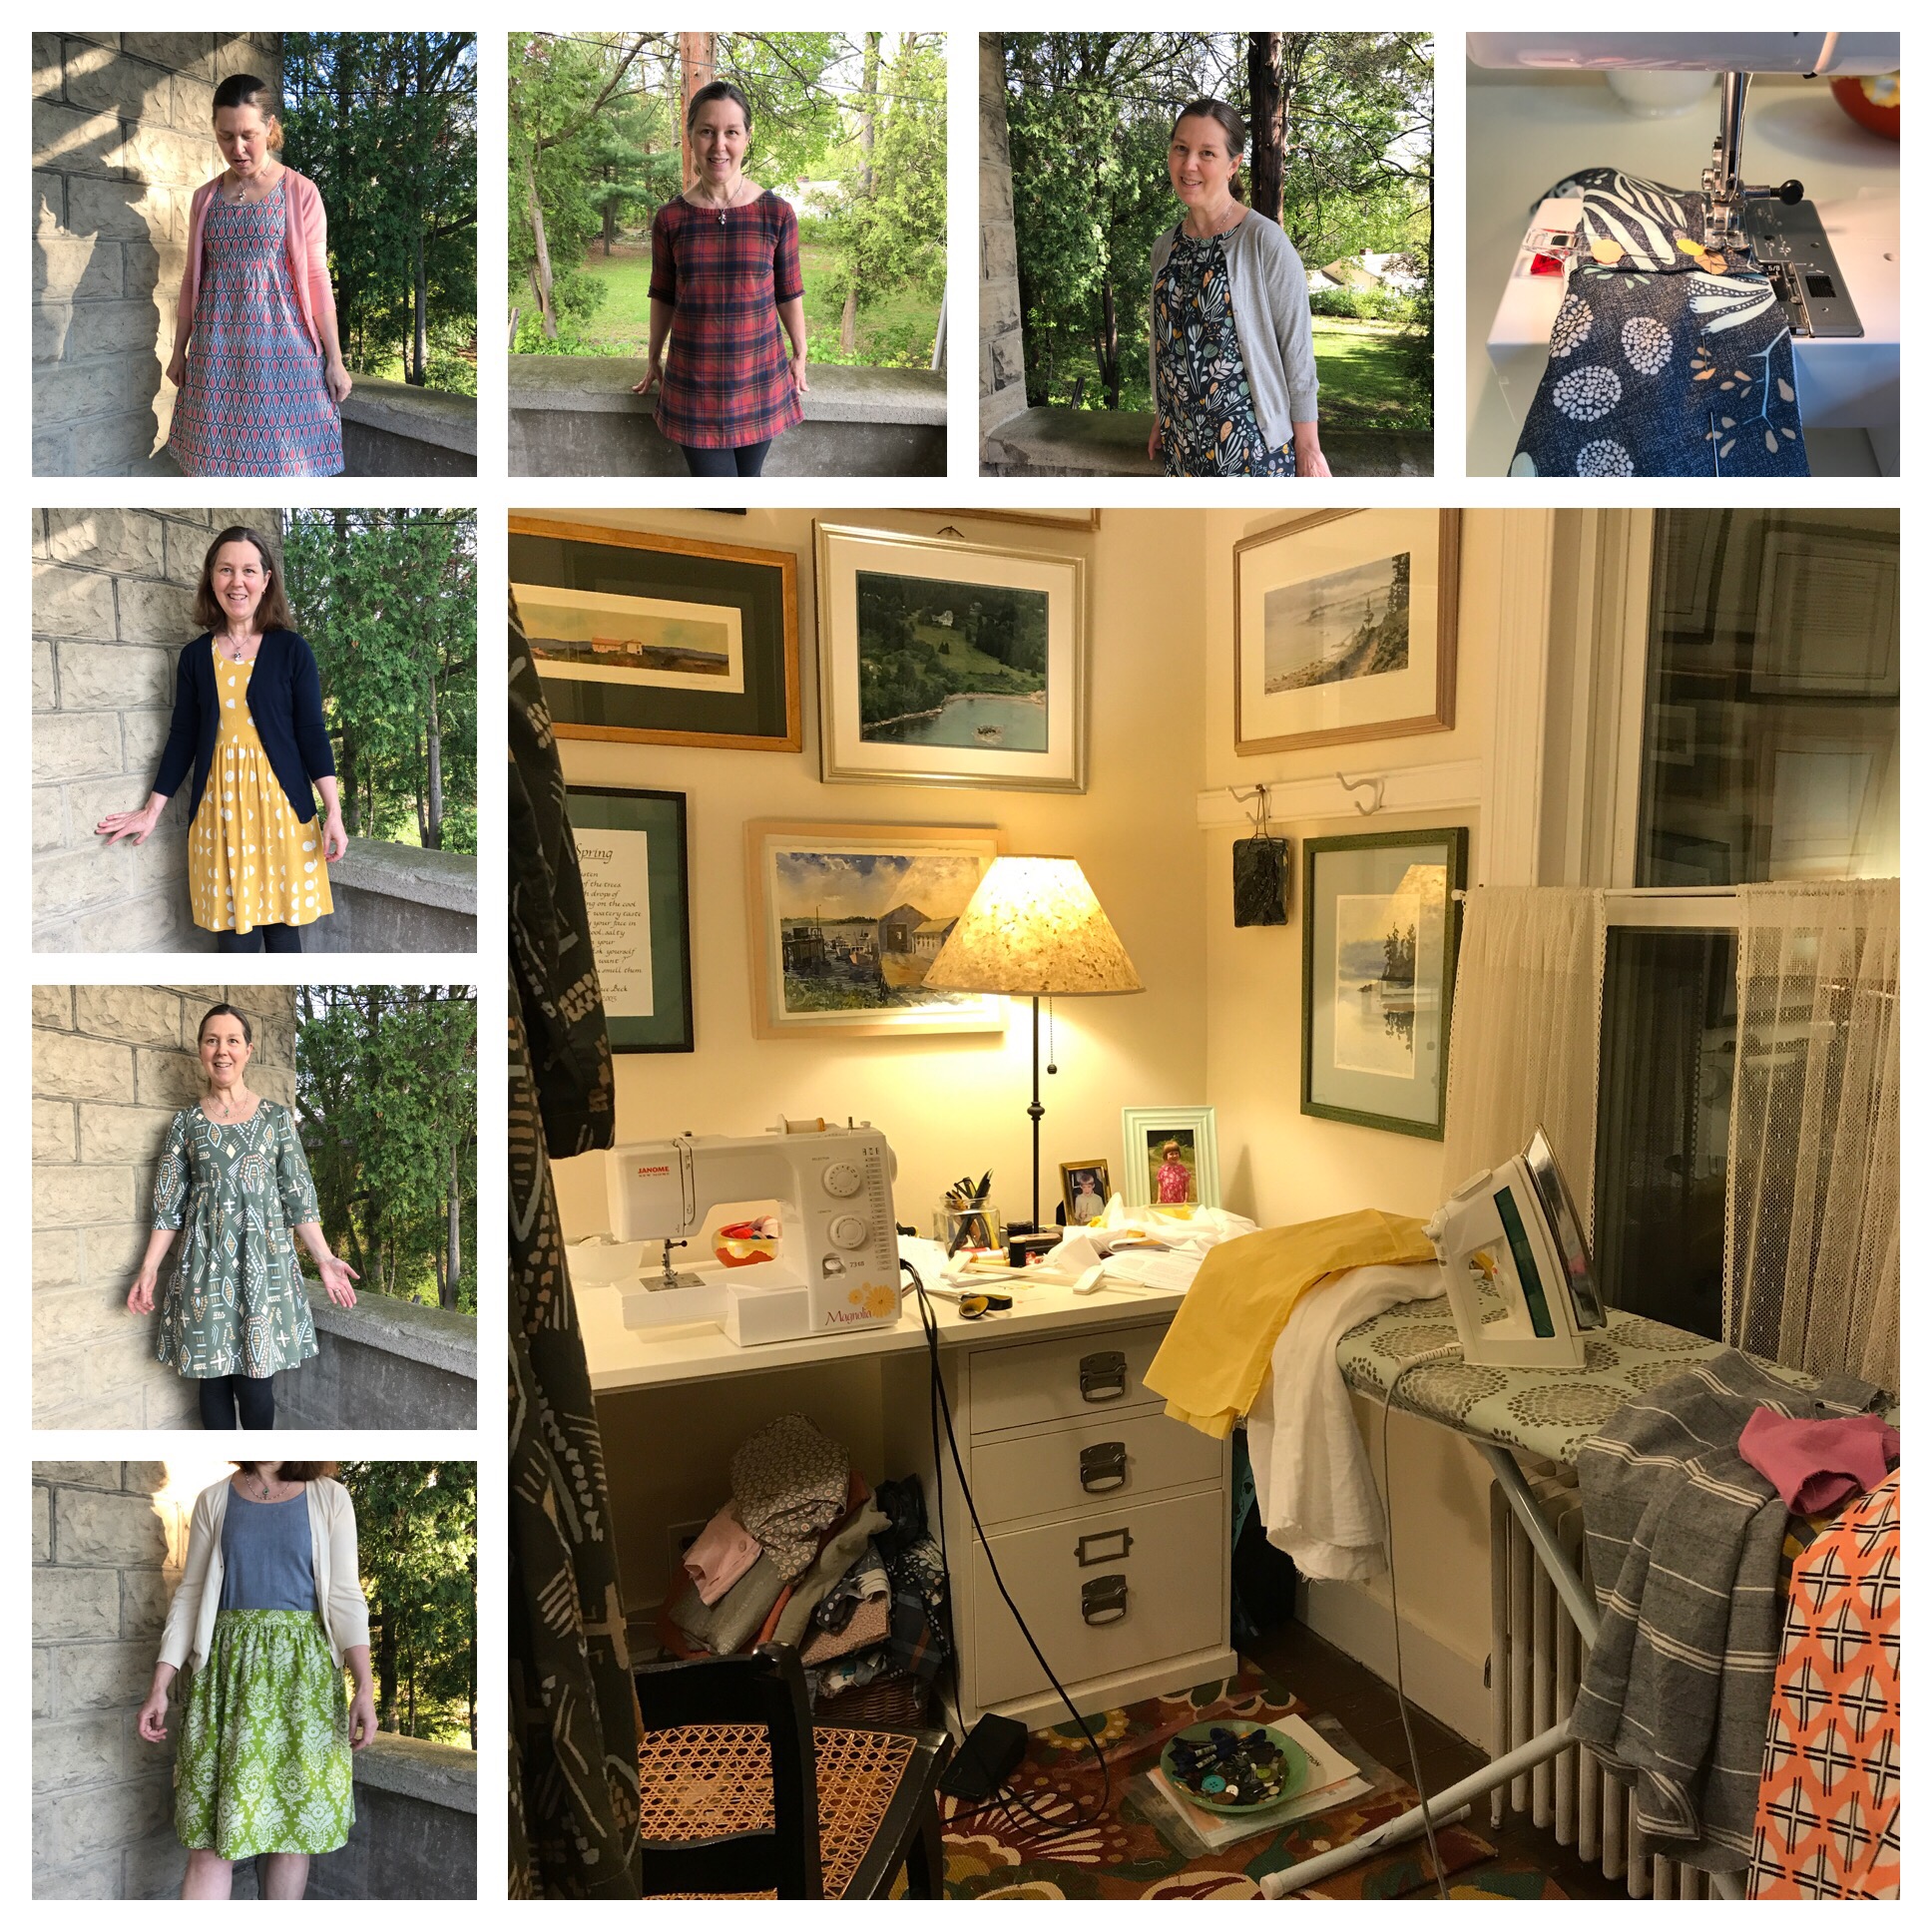
Week 1 clockwise from the lower left hand corner: Washi XP , (that picture on day 1 was really dark. To get a better sense of this dress, just click on the Washi XP link to see better pictures in the blog post), a Gemma Tank and Cleo Skirt, Ruby Dress, Isla Dress, Pearl Shift, double gauze Ruby Blouse, Beatrix-Pearl Tunic and in the center: a new Gemma-Pearl Tunic which I just love. I have two more cut out and ready to sew. 
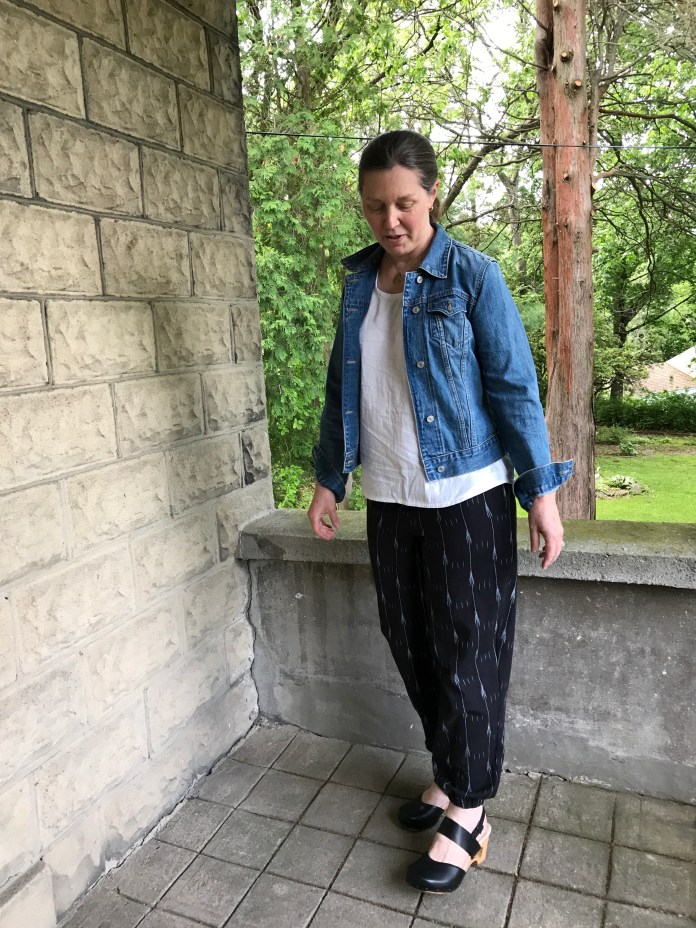
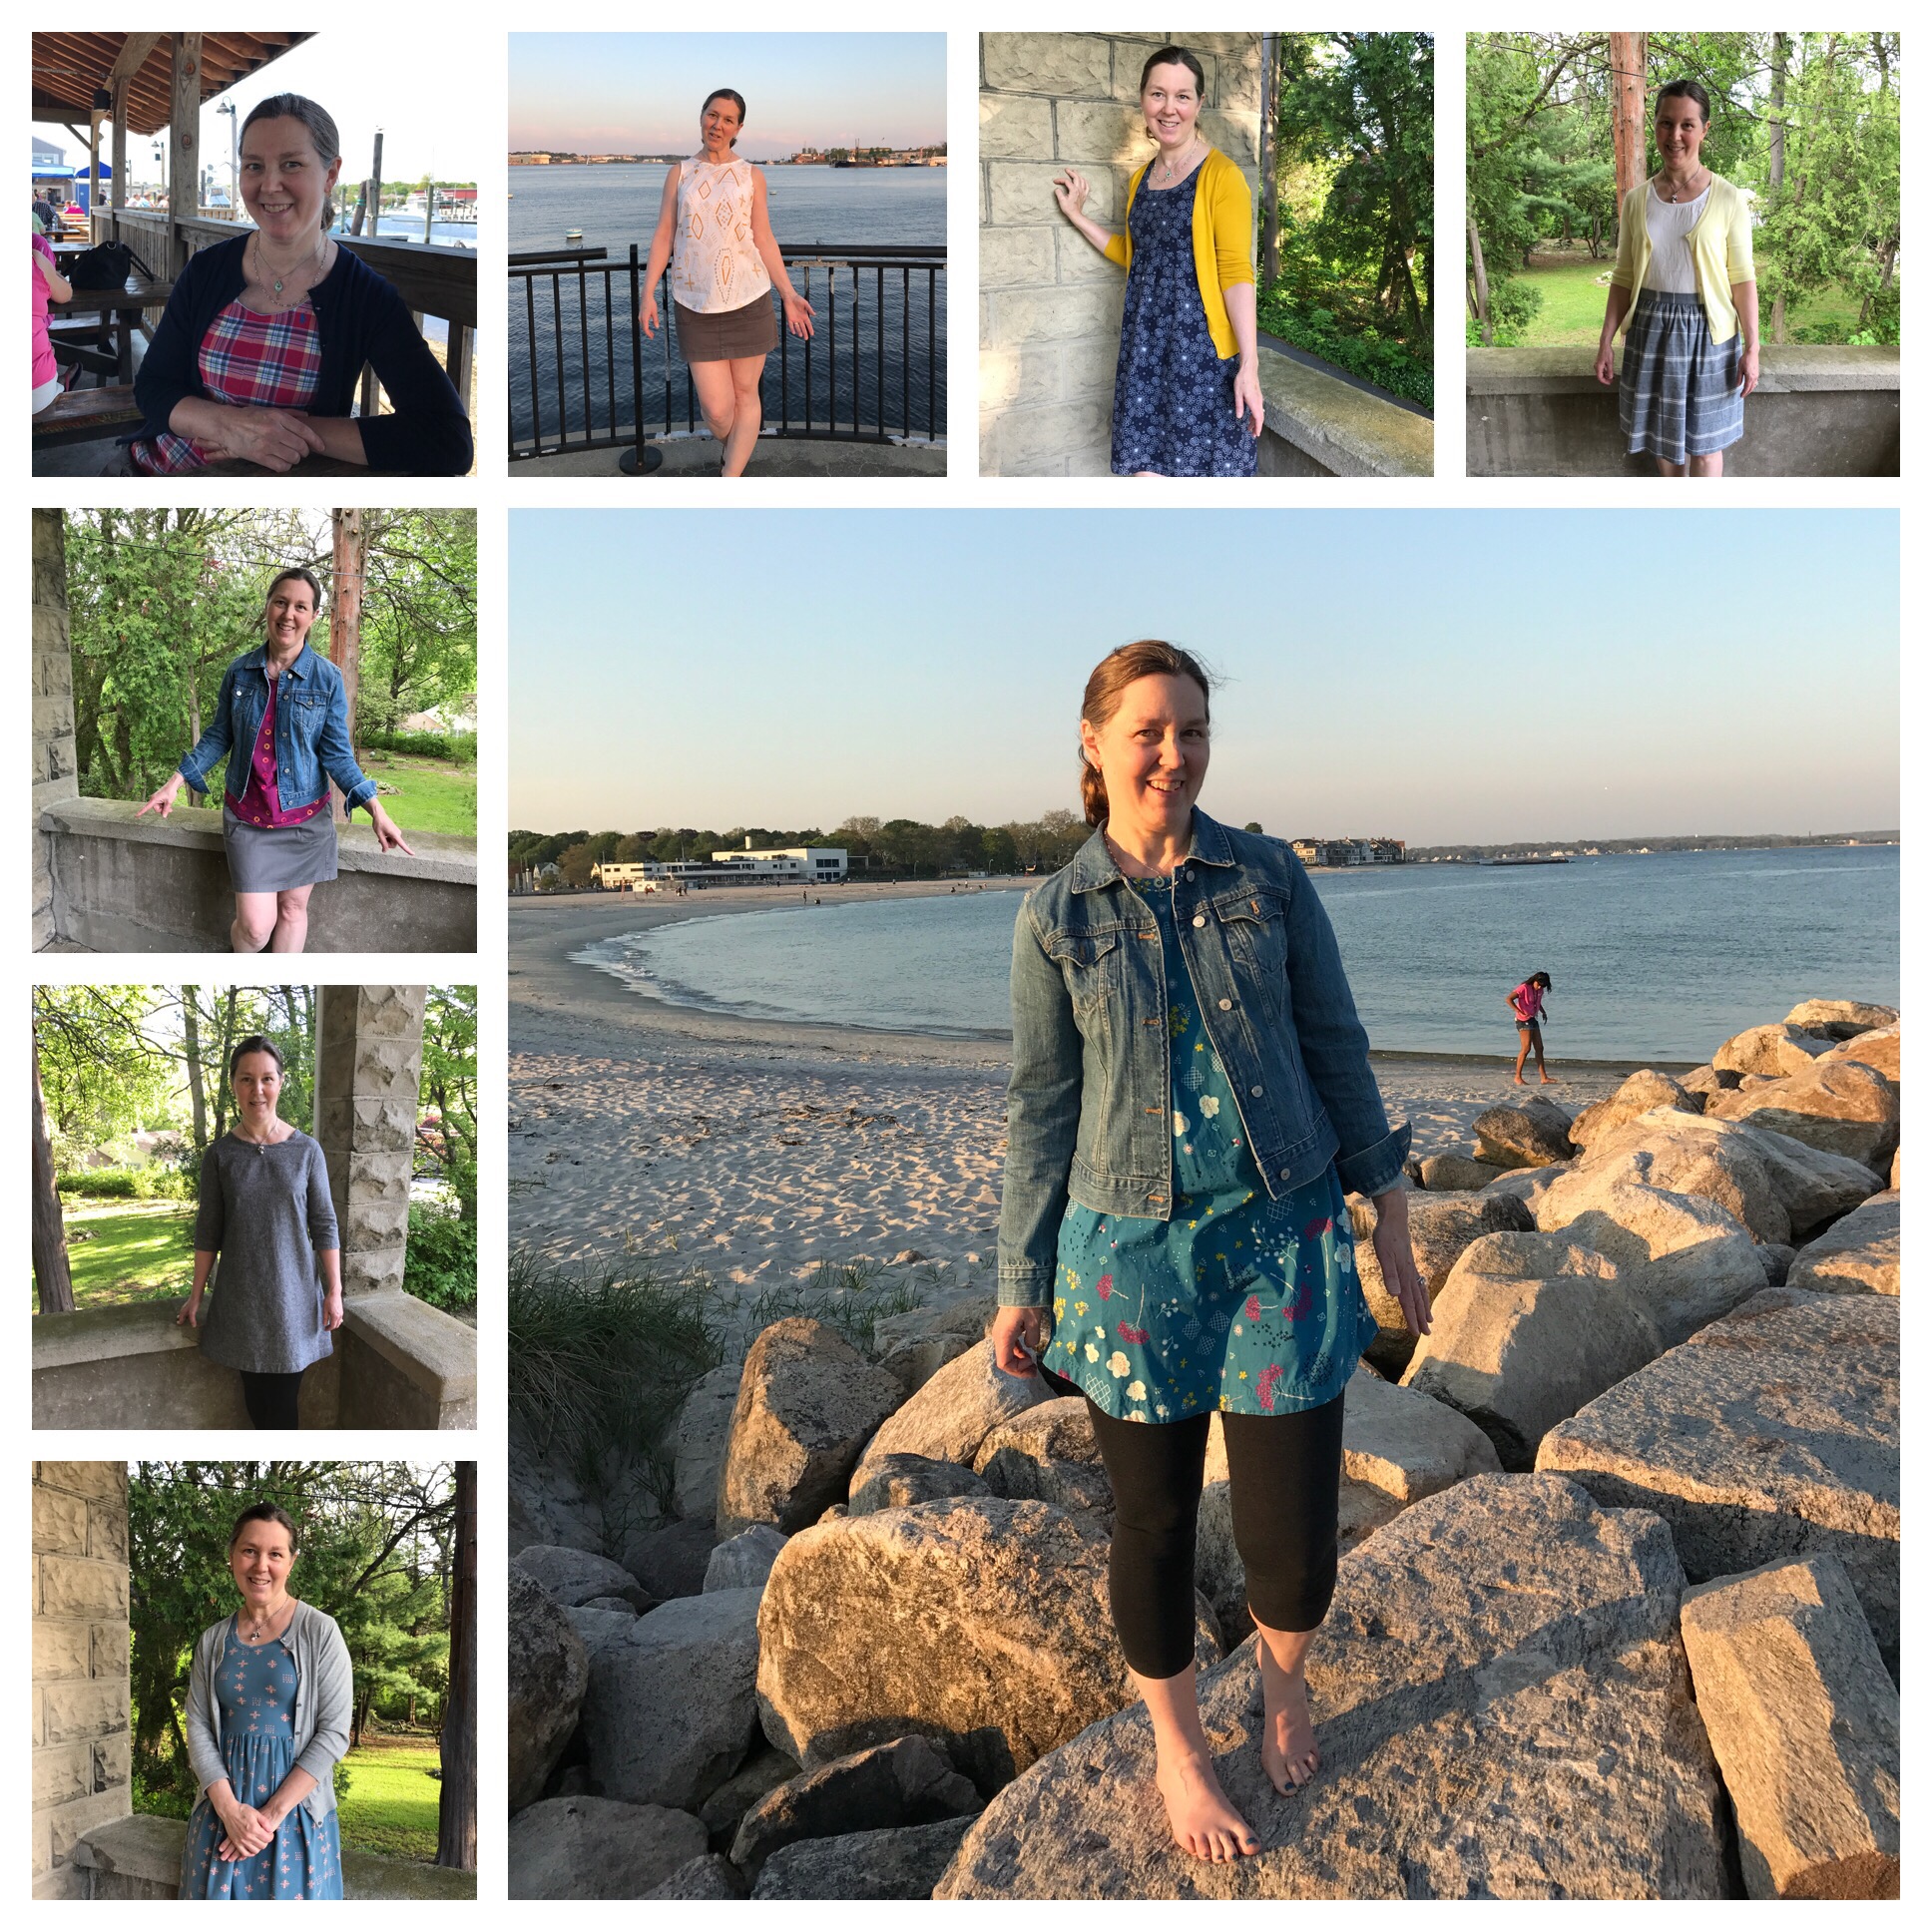
Week 2: Isla Dress, linen Pearl Shift, Cali Faye Pocket Skirt with a new Gemma Tank (Alison Glass fabric, to be blogged), Plaid Gemma Tank refashioned from a Goodwill men’s shirt, Gemma Tank, Washi Dress, Cleo Skirt and white double gauze Gemma Tank . In the center, one of my favorite pictures from the month: a Beatrix Tunic (picture on the beach in New London where I spent a couple of really nice days with my husband mid-month).

Week 3: Cleo Skirt (to be blogged), Washi Dress, Isla Dress, Washi Dress, Pearl Shift, Ruby Dress along with some bonus sewing room shots. 
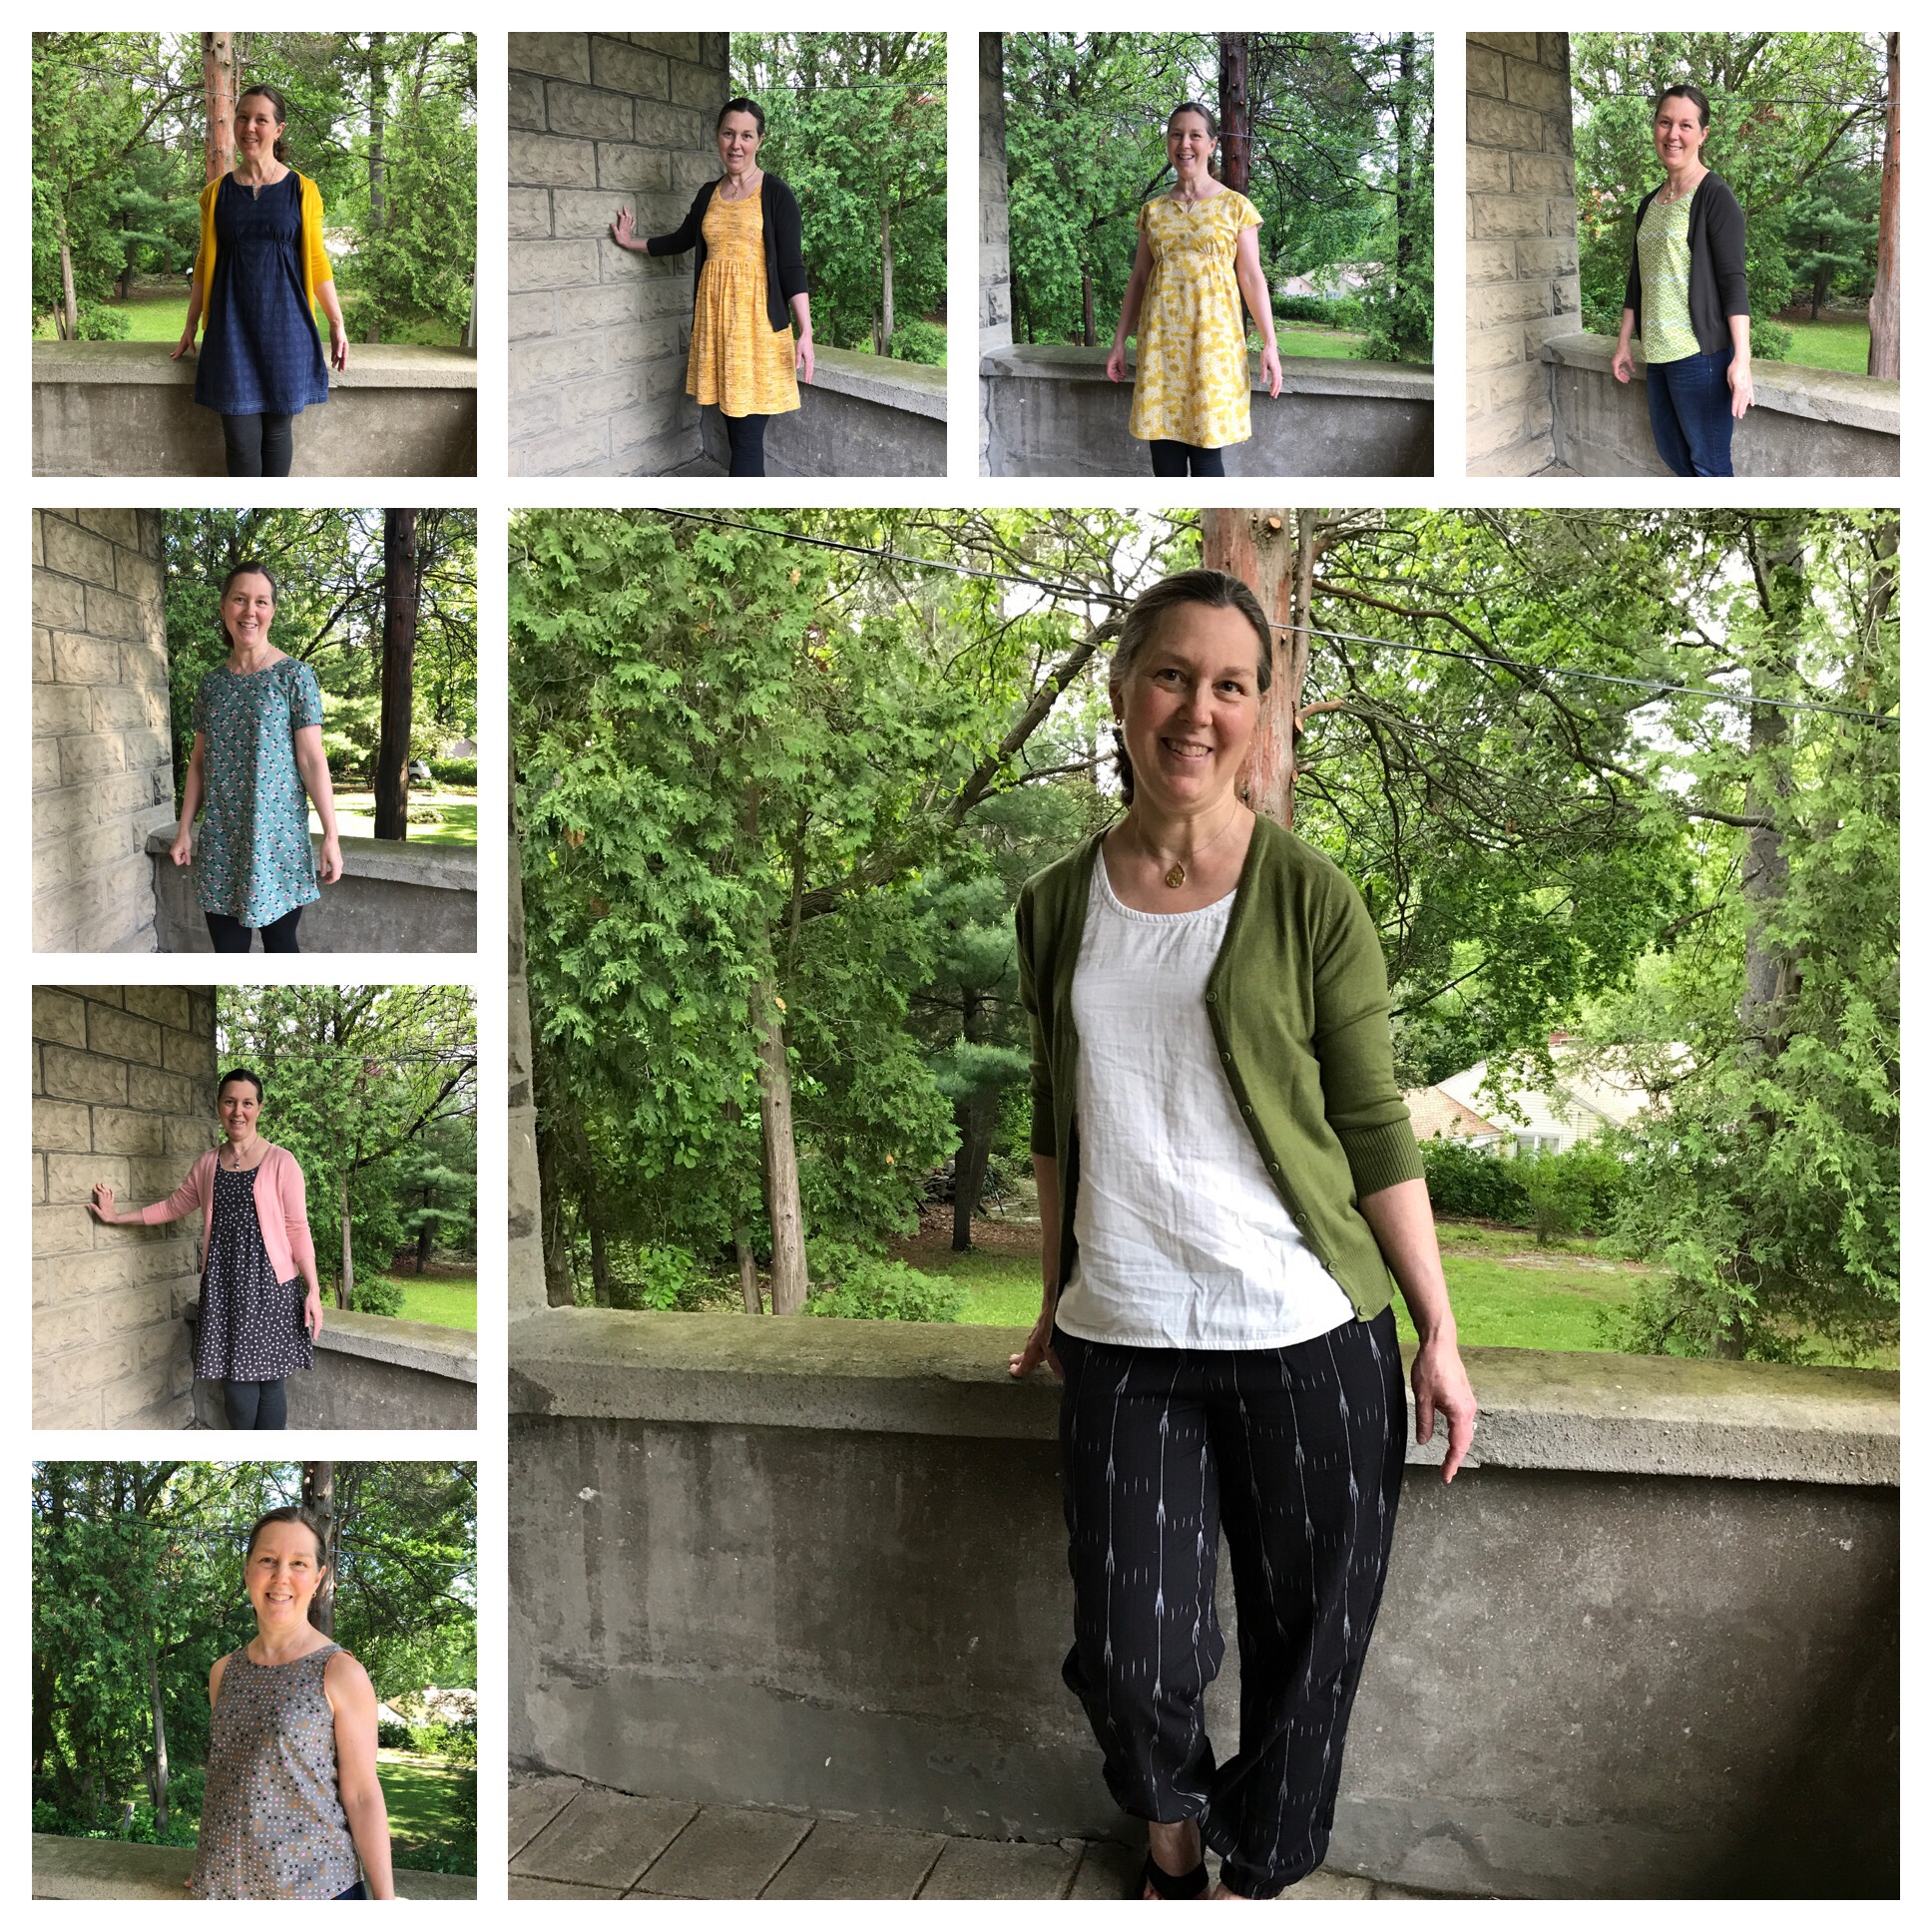
Week 4: Gemma Tank, double gauze Washi Dress, Beatrix Tunic, Bianca Dress, Isla Dress, another Bianca Dress, a Gemma Tank and in the center, my new Luna Pants and double gauze Gemma Tank . You can link to another Luna Pants post here.
Week 5: from the bottom left: Gemma Tank, double gauze Washi Dress, double gauze Ruby Blouse, Loominous Bianca dress, me with my photographer and a picture of some of my Cleo Skirts.
Bonus Pictures: close up of my new Alison Glass Gemma Tank, some pictures of my new double gauze Gemma Tank which may be the most useful thing I made this month and some pictures I took on the days when I wore my Luna pants which are great sewing clothes. Two other Luna posts here and here.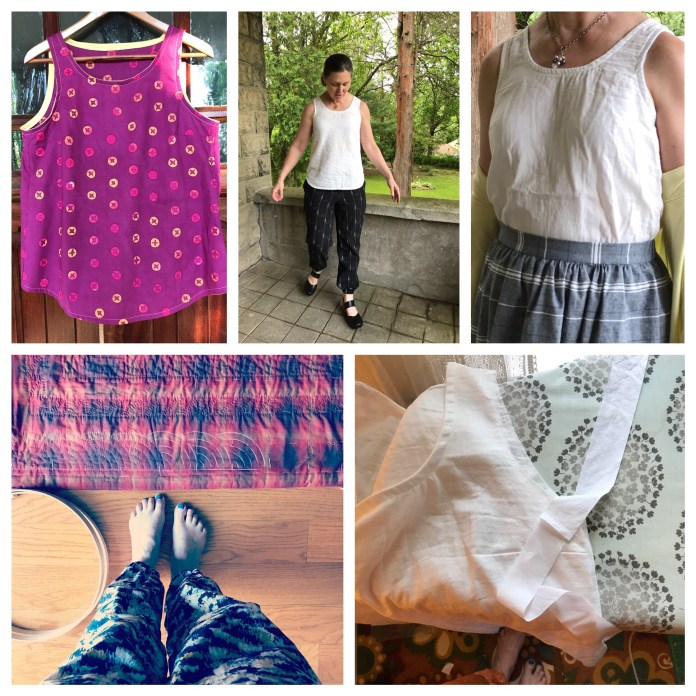 At about day 10, I almost stopped posting. I started to get a feeling of being a little overexposed. But I have been so inspired by other friends on instagram who post beautiful garments and who inspire me to try new things that I persevered and I am glad I did. It is wonderful to have this record of all of the beautiful clothes I have sewn and enjoy wearing and I heard from many people on instagram that my posts inspired them to try sewing these patterns and that really made it worth it.
Happy Sewing everyone and thanks for reading!

 I had been wanting to try making a Gemma Tank lengthened to a tunic length since last summer when I made a lined voile dress version of the Gemma seen here. For the dress version, I followed Rae’s tutorial and made it with a curved hem. This May I decided to blend the Gemma with the Pearl Shift pattern which works for me in a tunic length so I literally taped the pattern pieces together. This is pretty much the most low-tech mash-up you will ever see but it worked really well and I love the finished garment. I used this great pink and navy bandana fabric from Cotton and Steel. I was inspired to buy this print when I saw a great sleeveless version of the Pearl Shift using this fabric made by Alexia Abegg (who designed both the pattern and the fabric) which is pretty close to what I have made here.
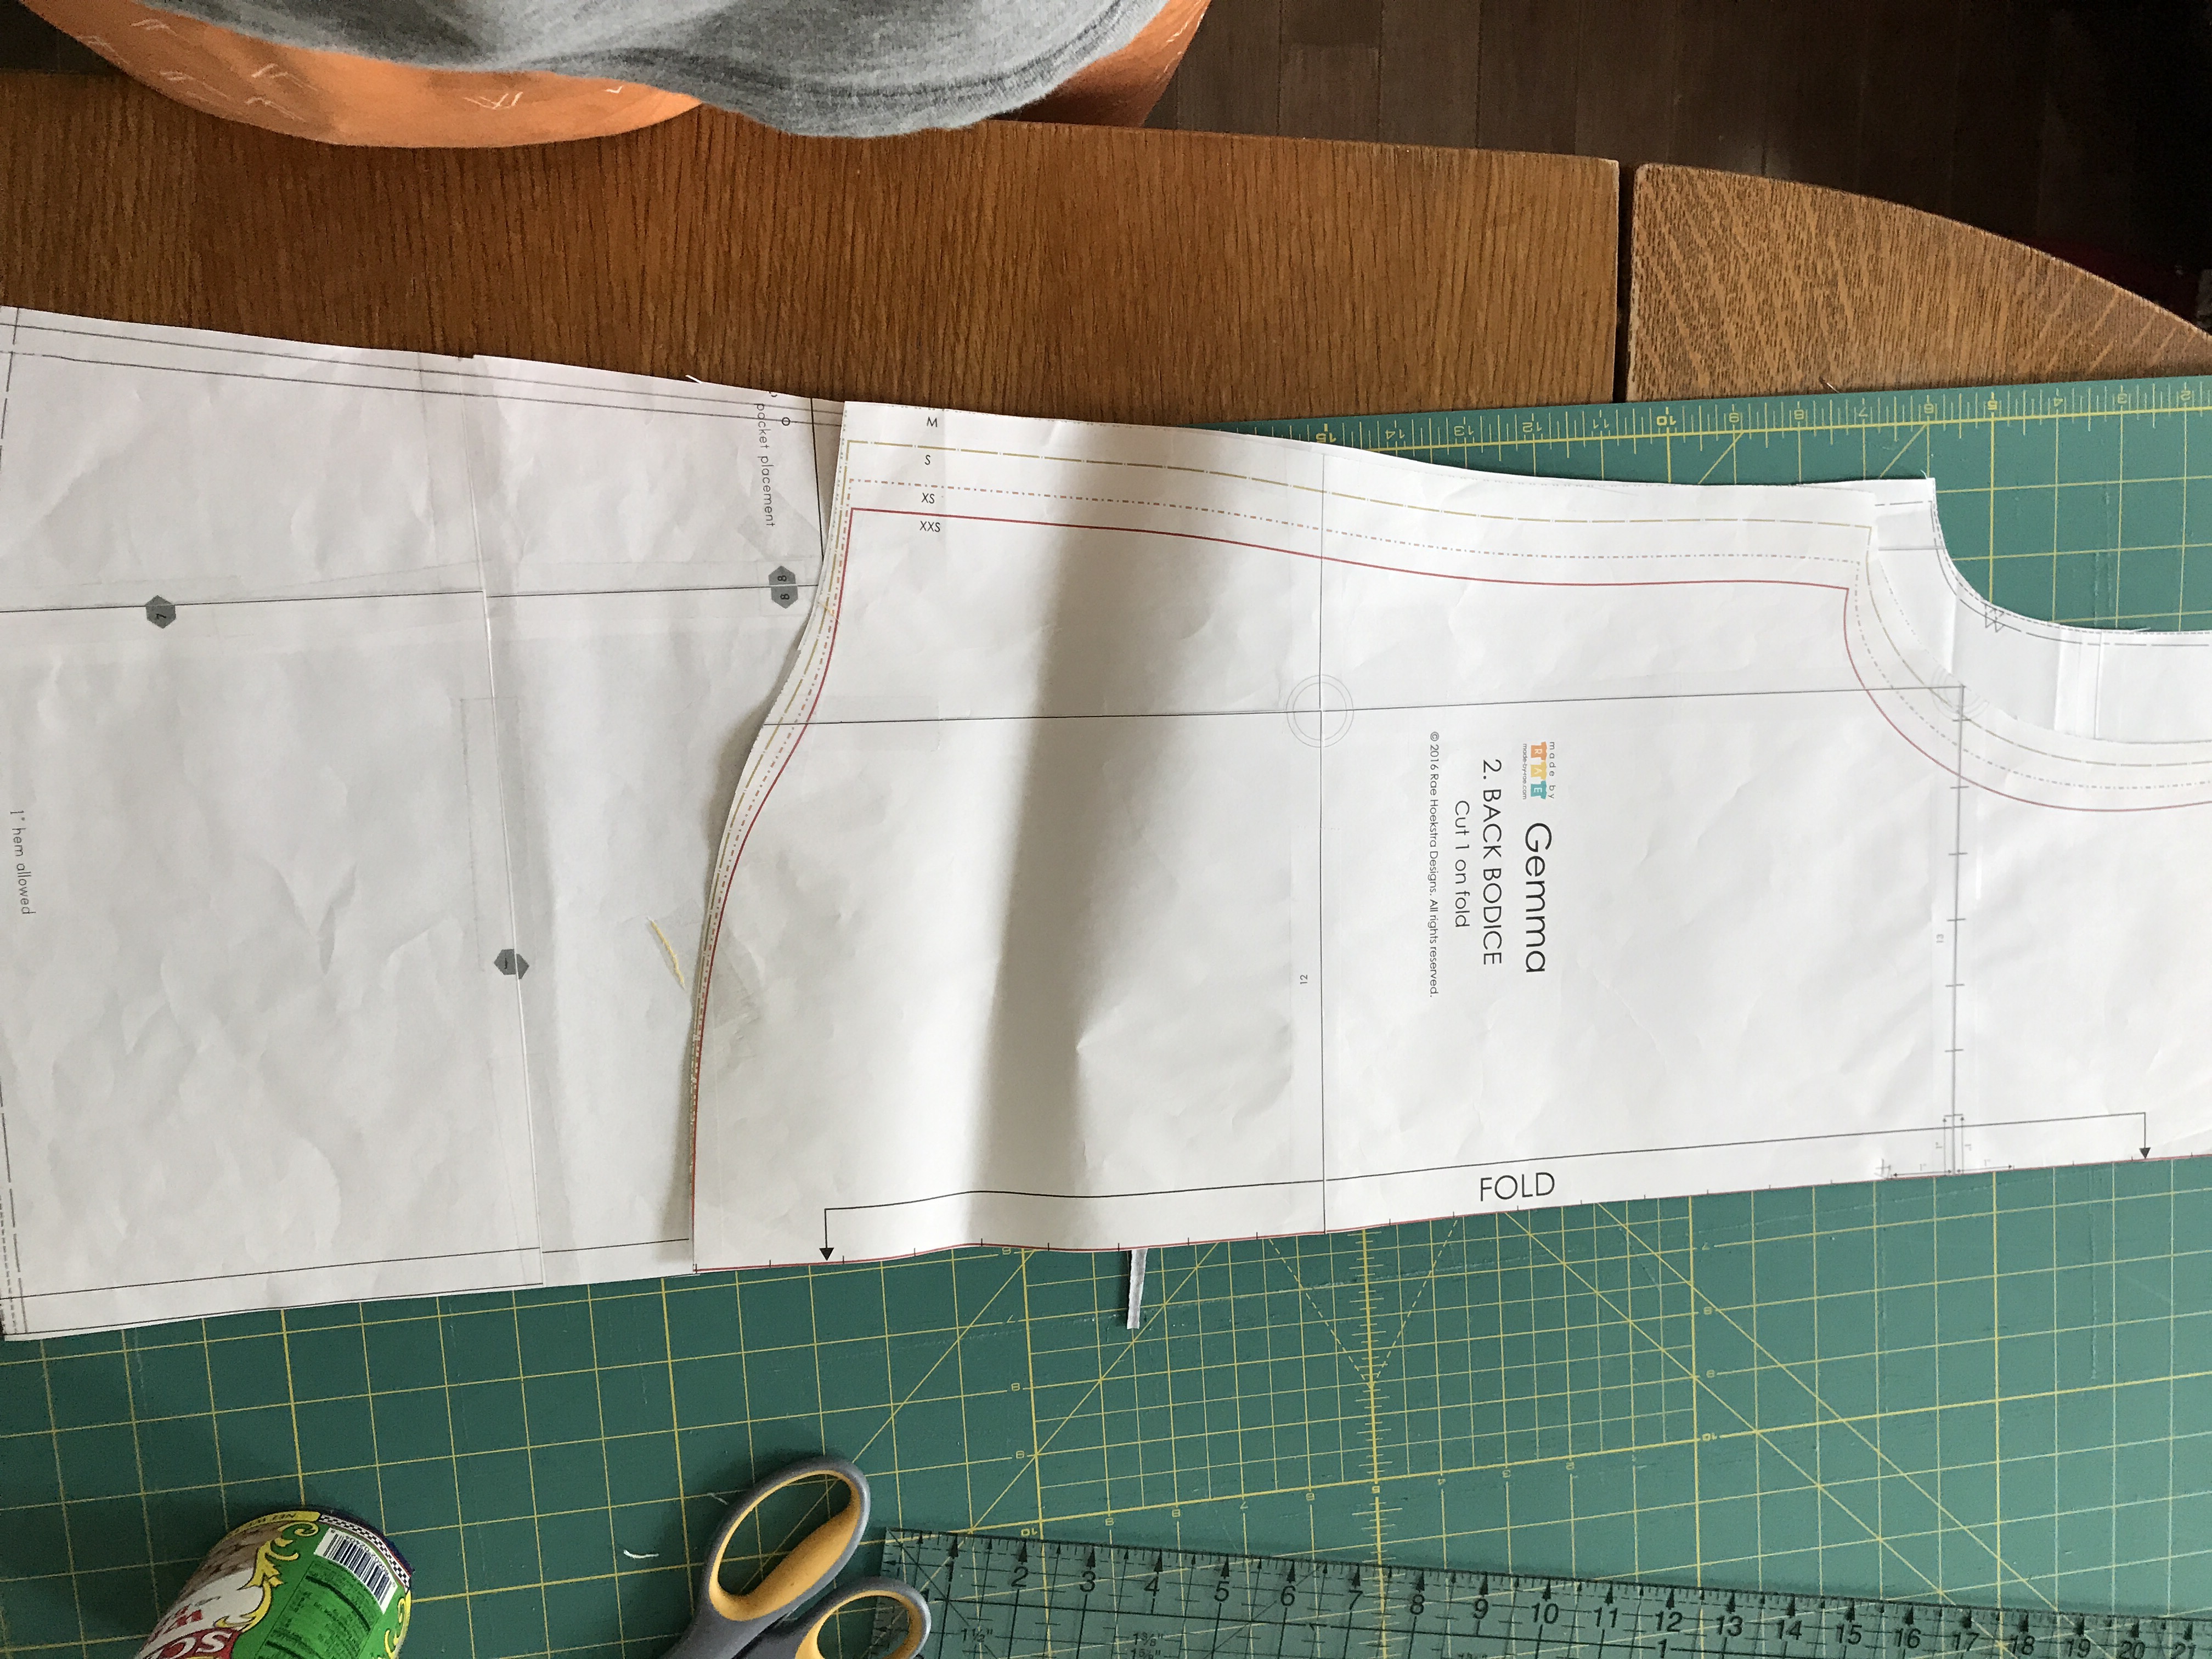 and the front. I lined the pieces up at the center fold and in the front, because the Pearl is wider, I folded down the top of the Pearl pattern and cut on the Gemma cutting lines to just below the bust dart line:
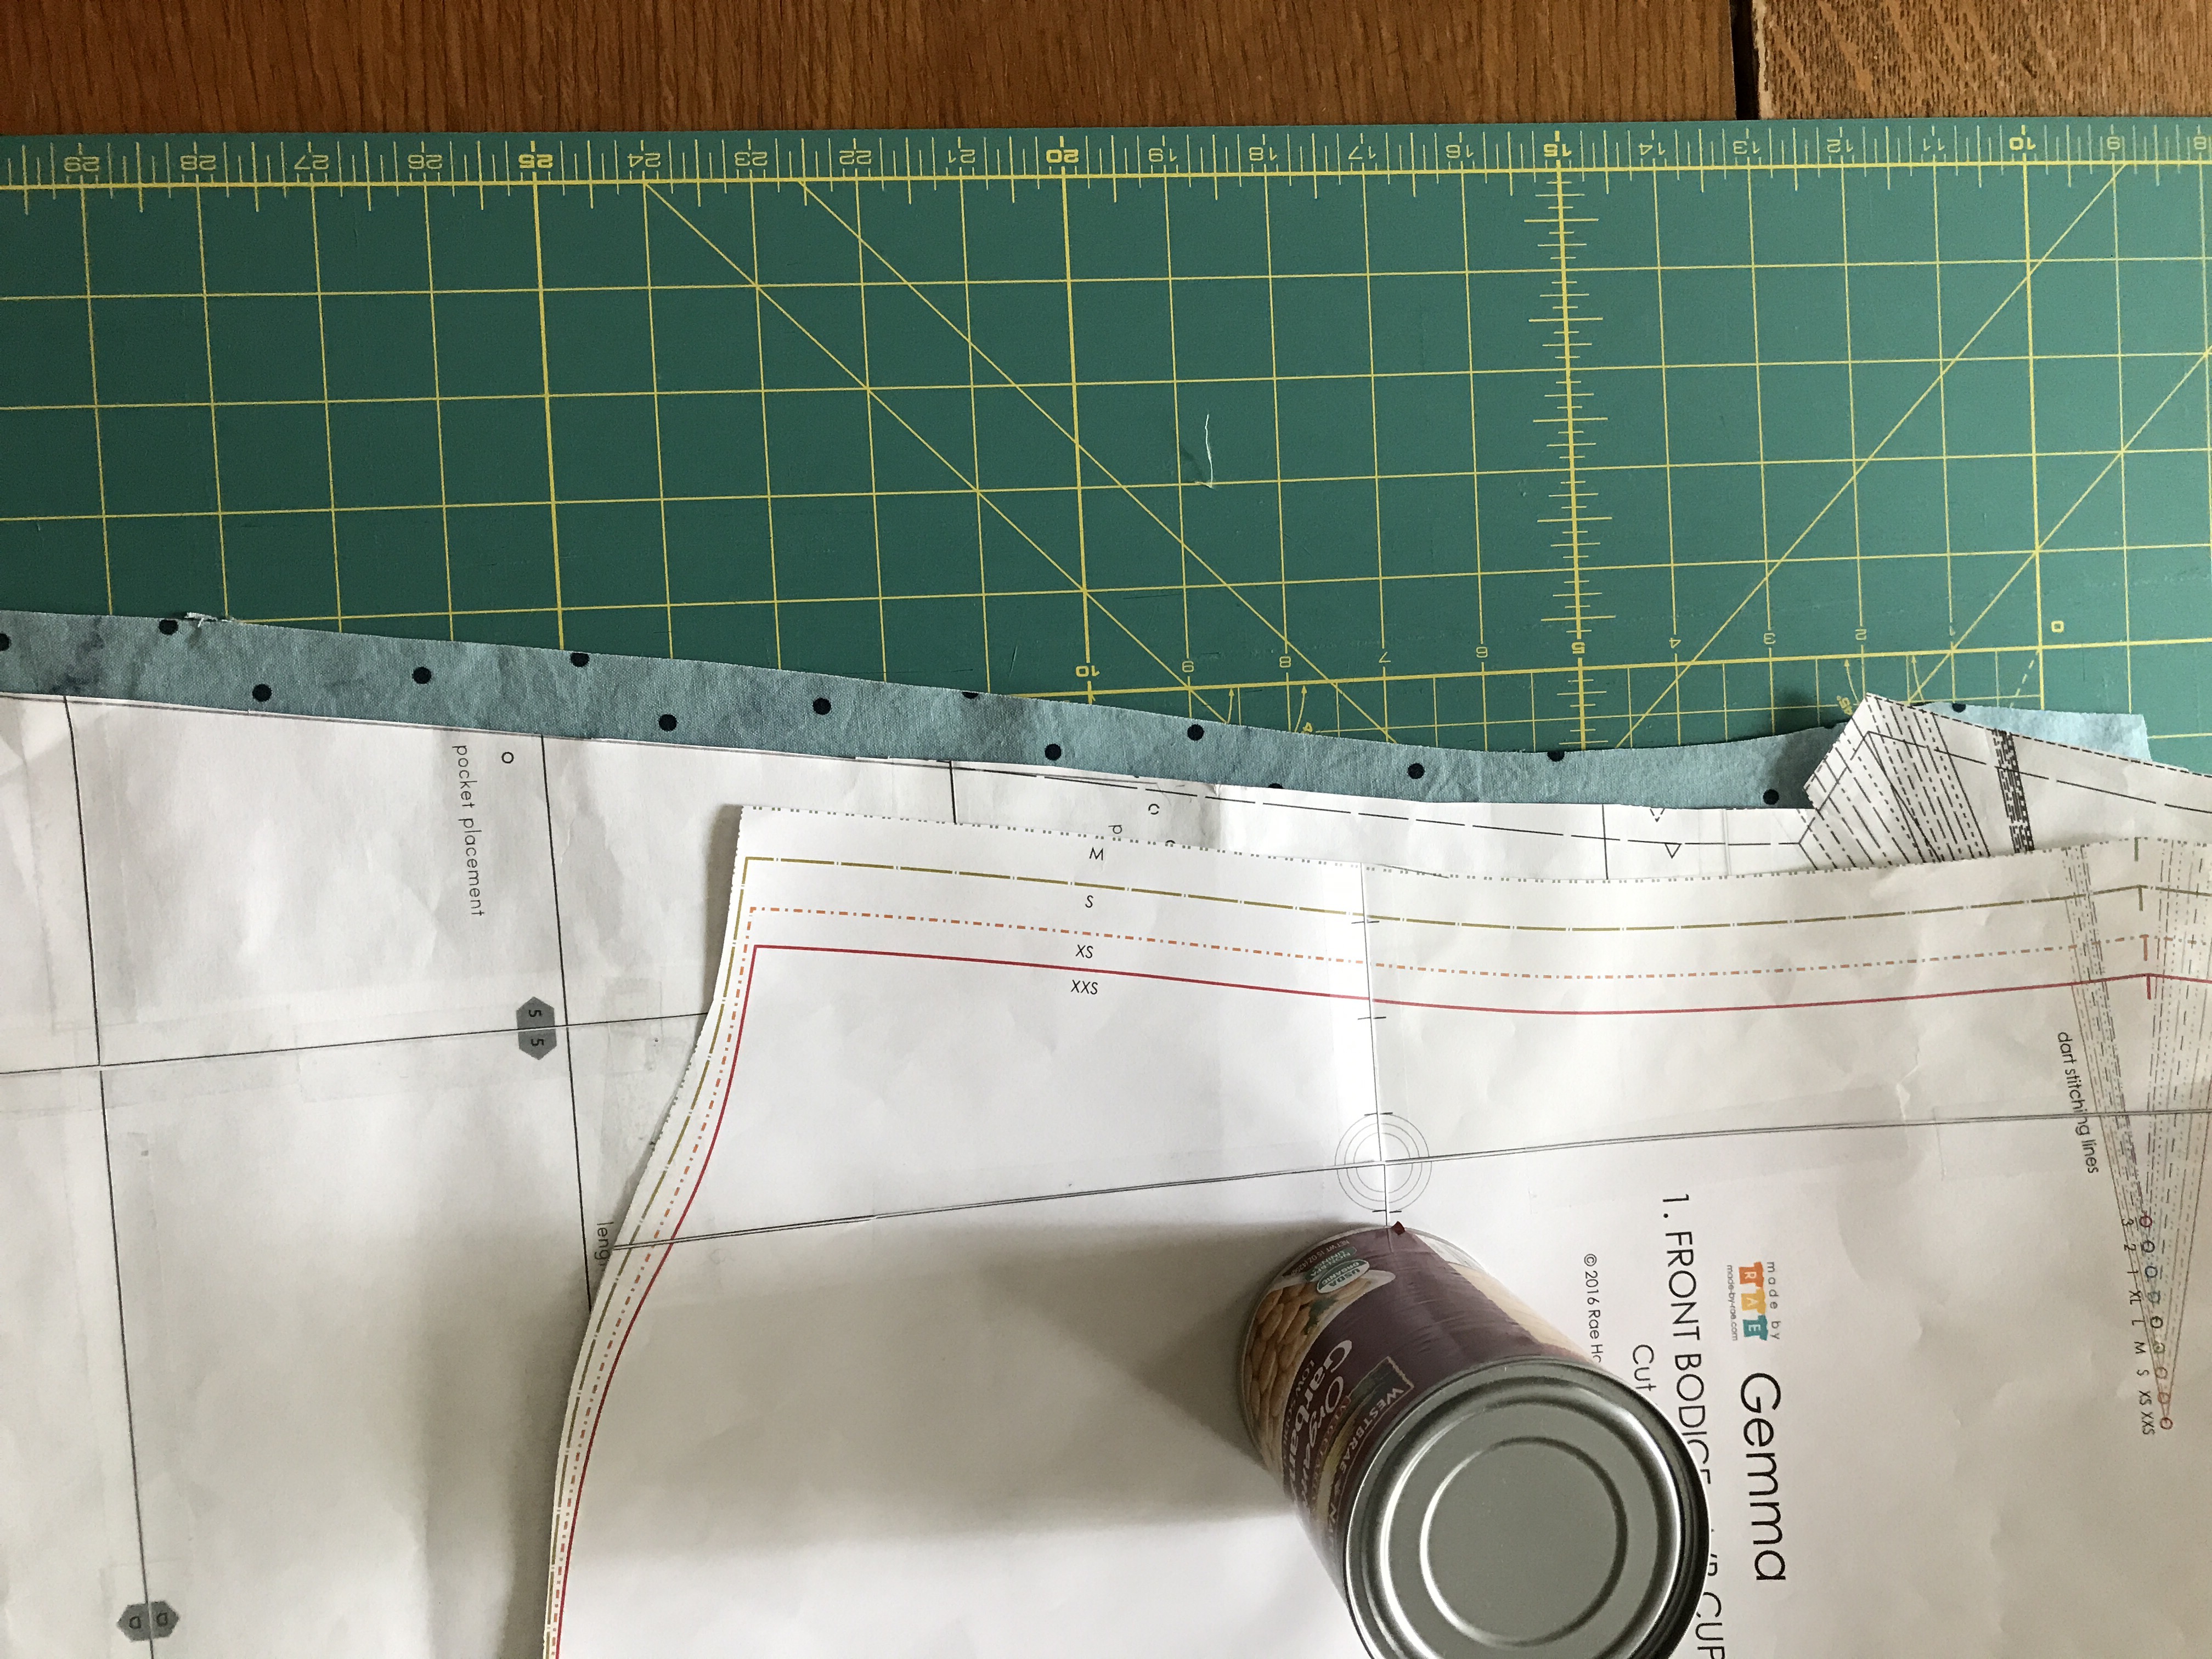
 I then took folded away the bottom of the Gemma and used the Pearl cutting lines as a guide, joining the two lines. I then moved away the pattern pieces and used my rotary cutter to make sure I had a nice smooth seam line.
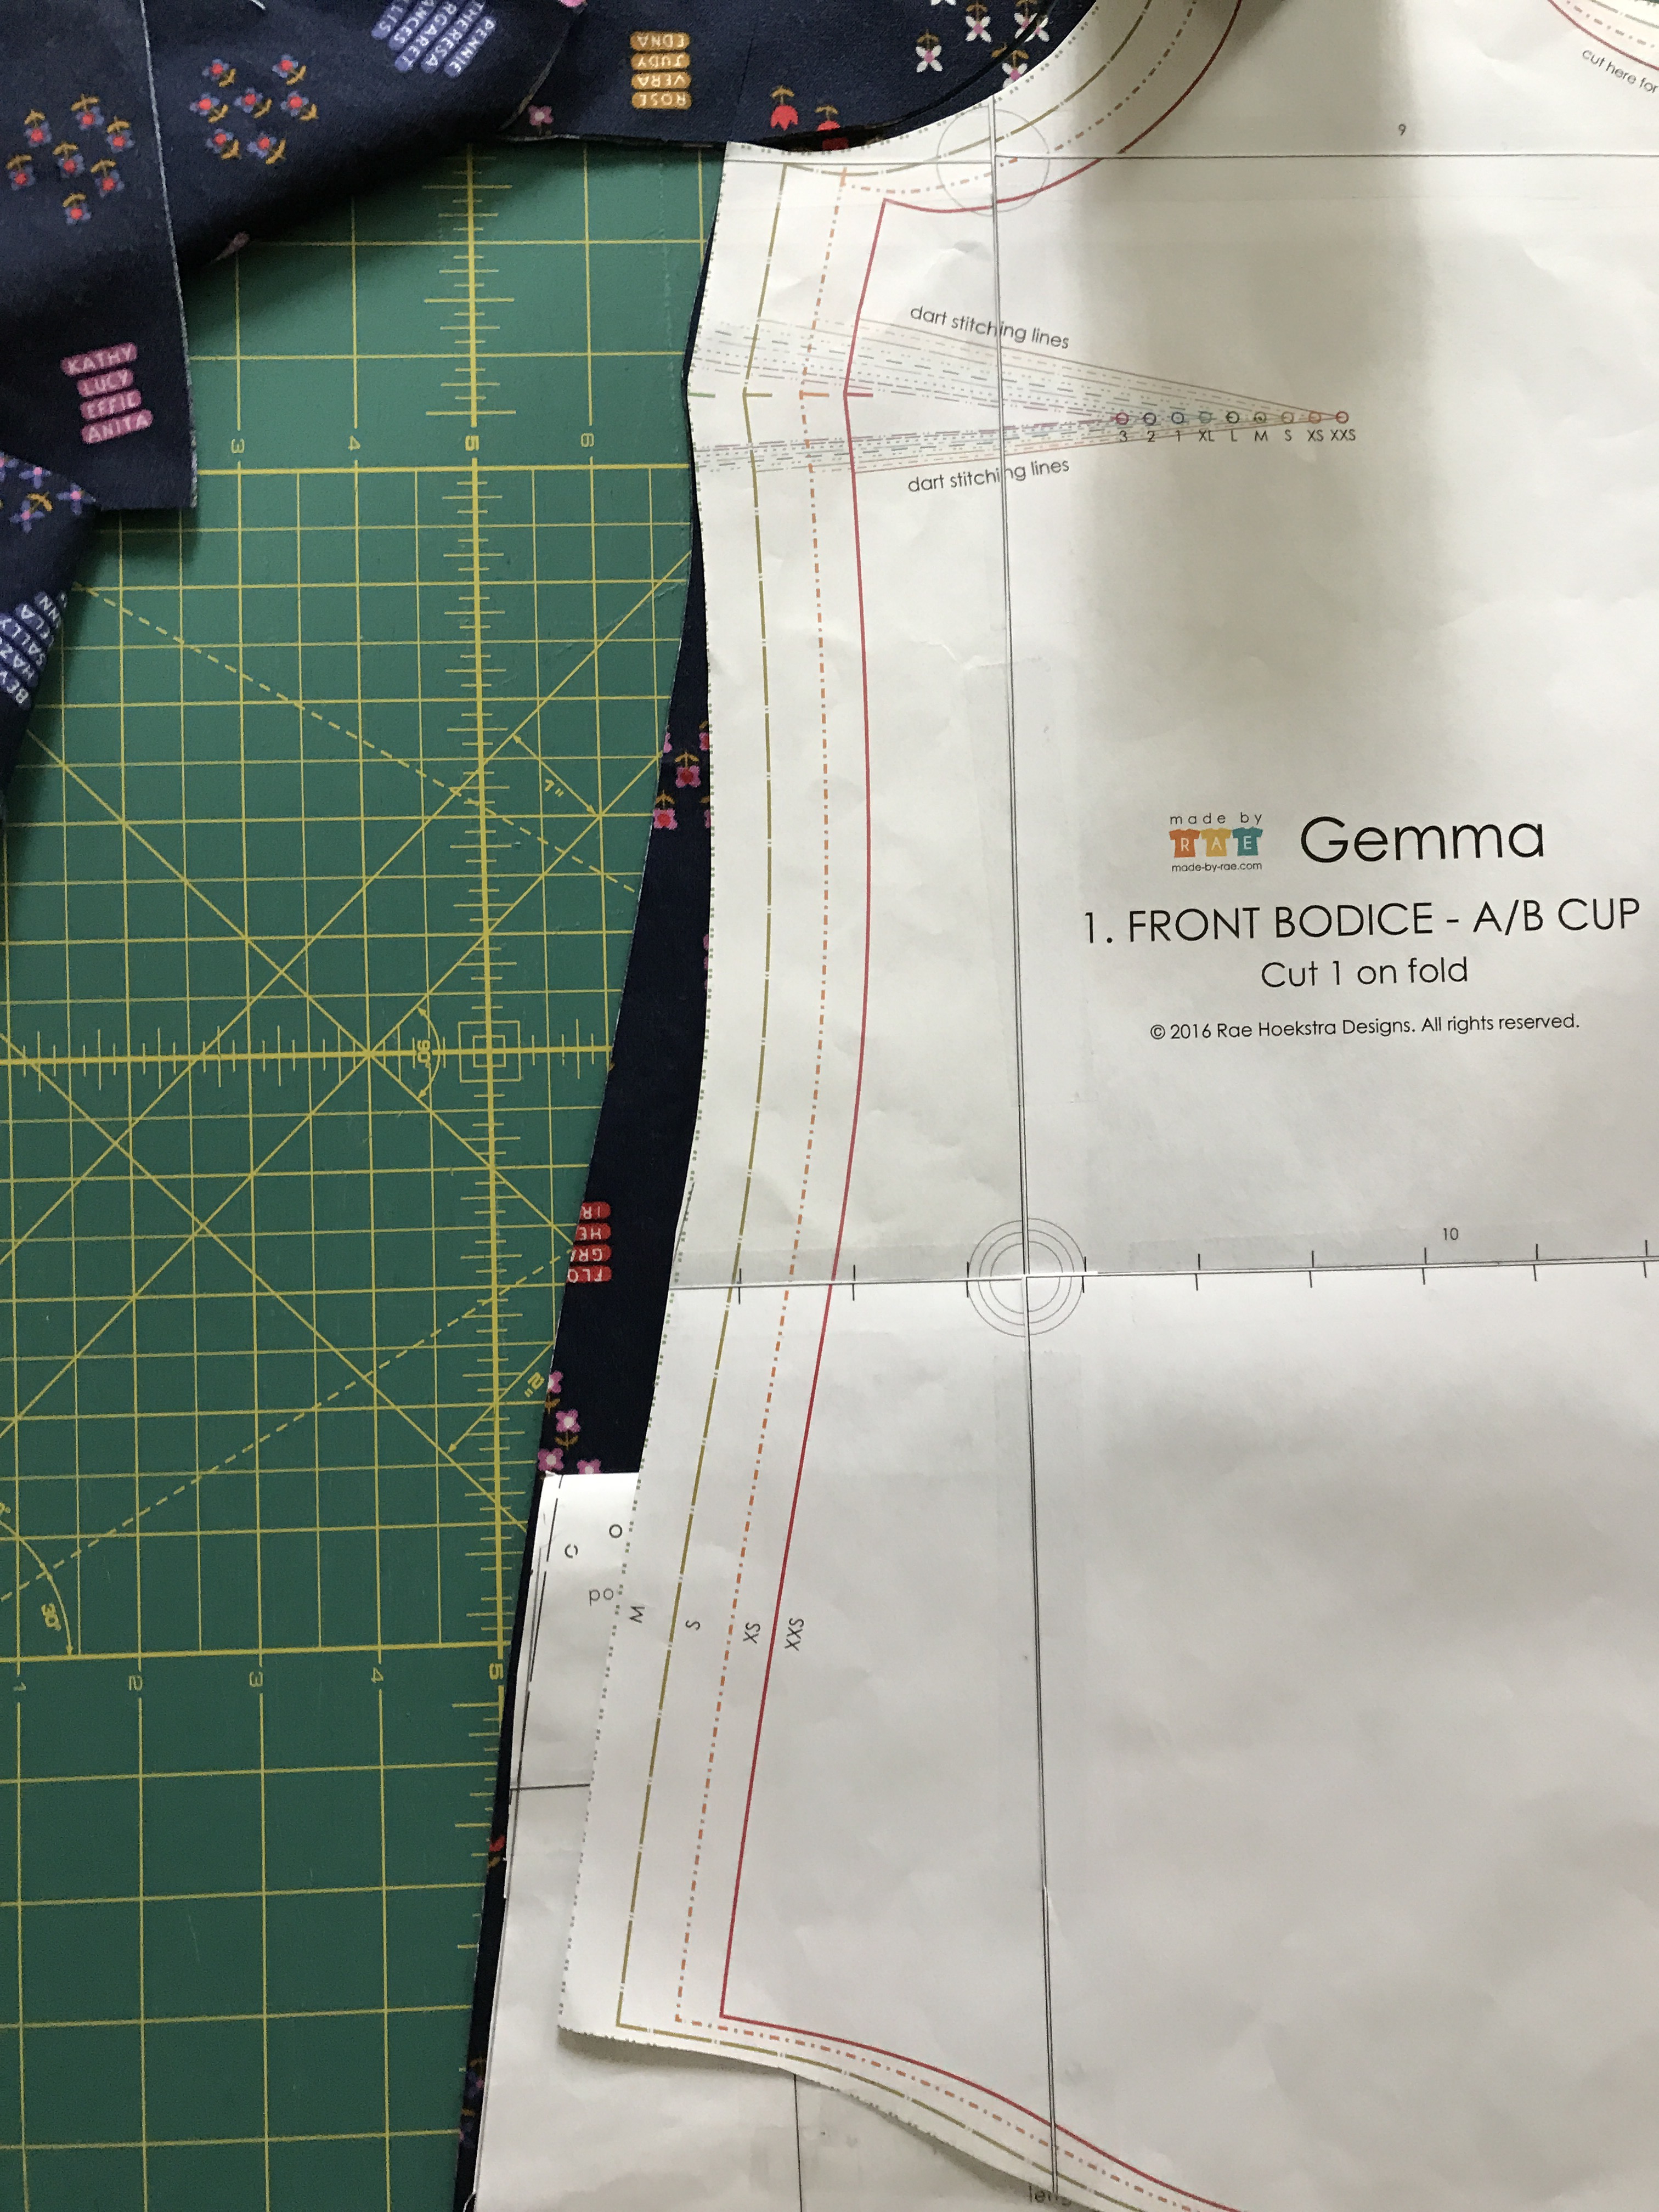
 xx
xx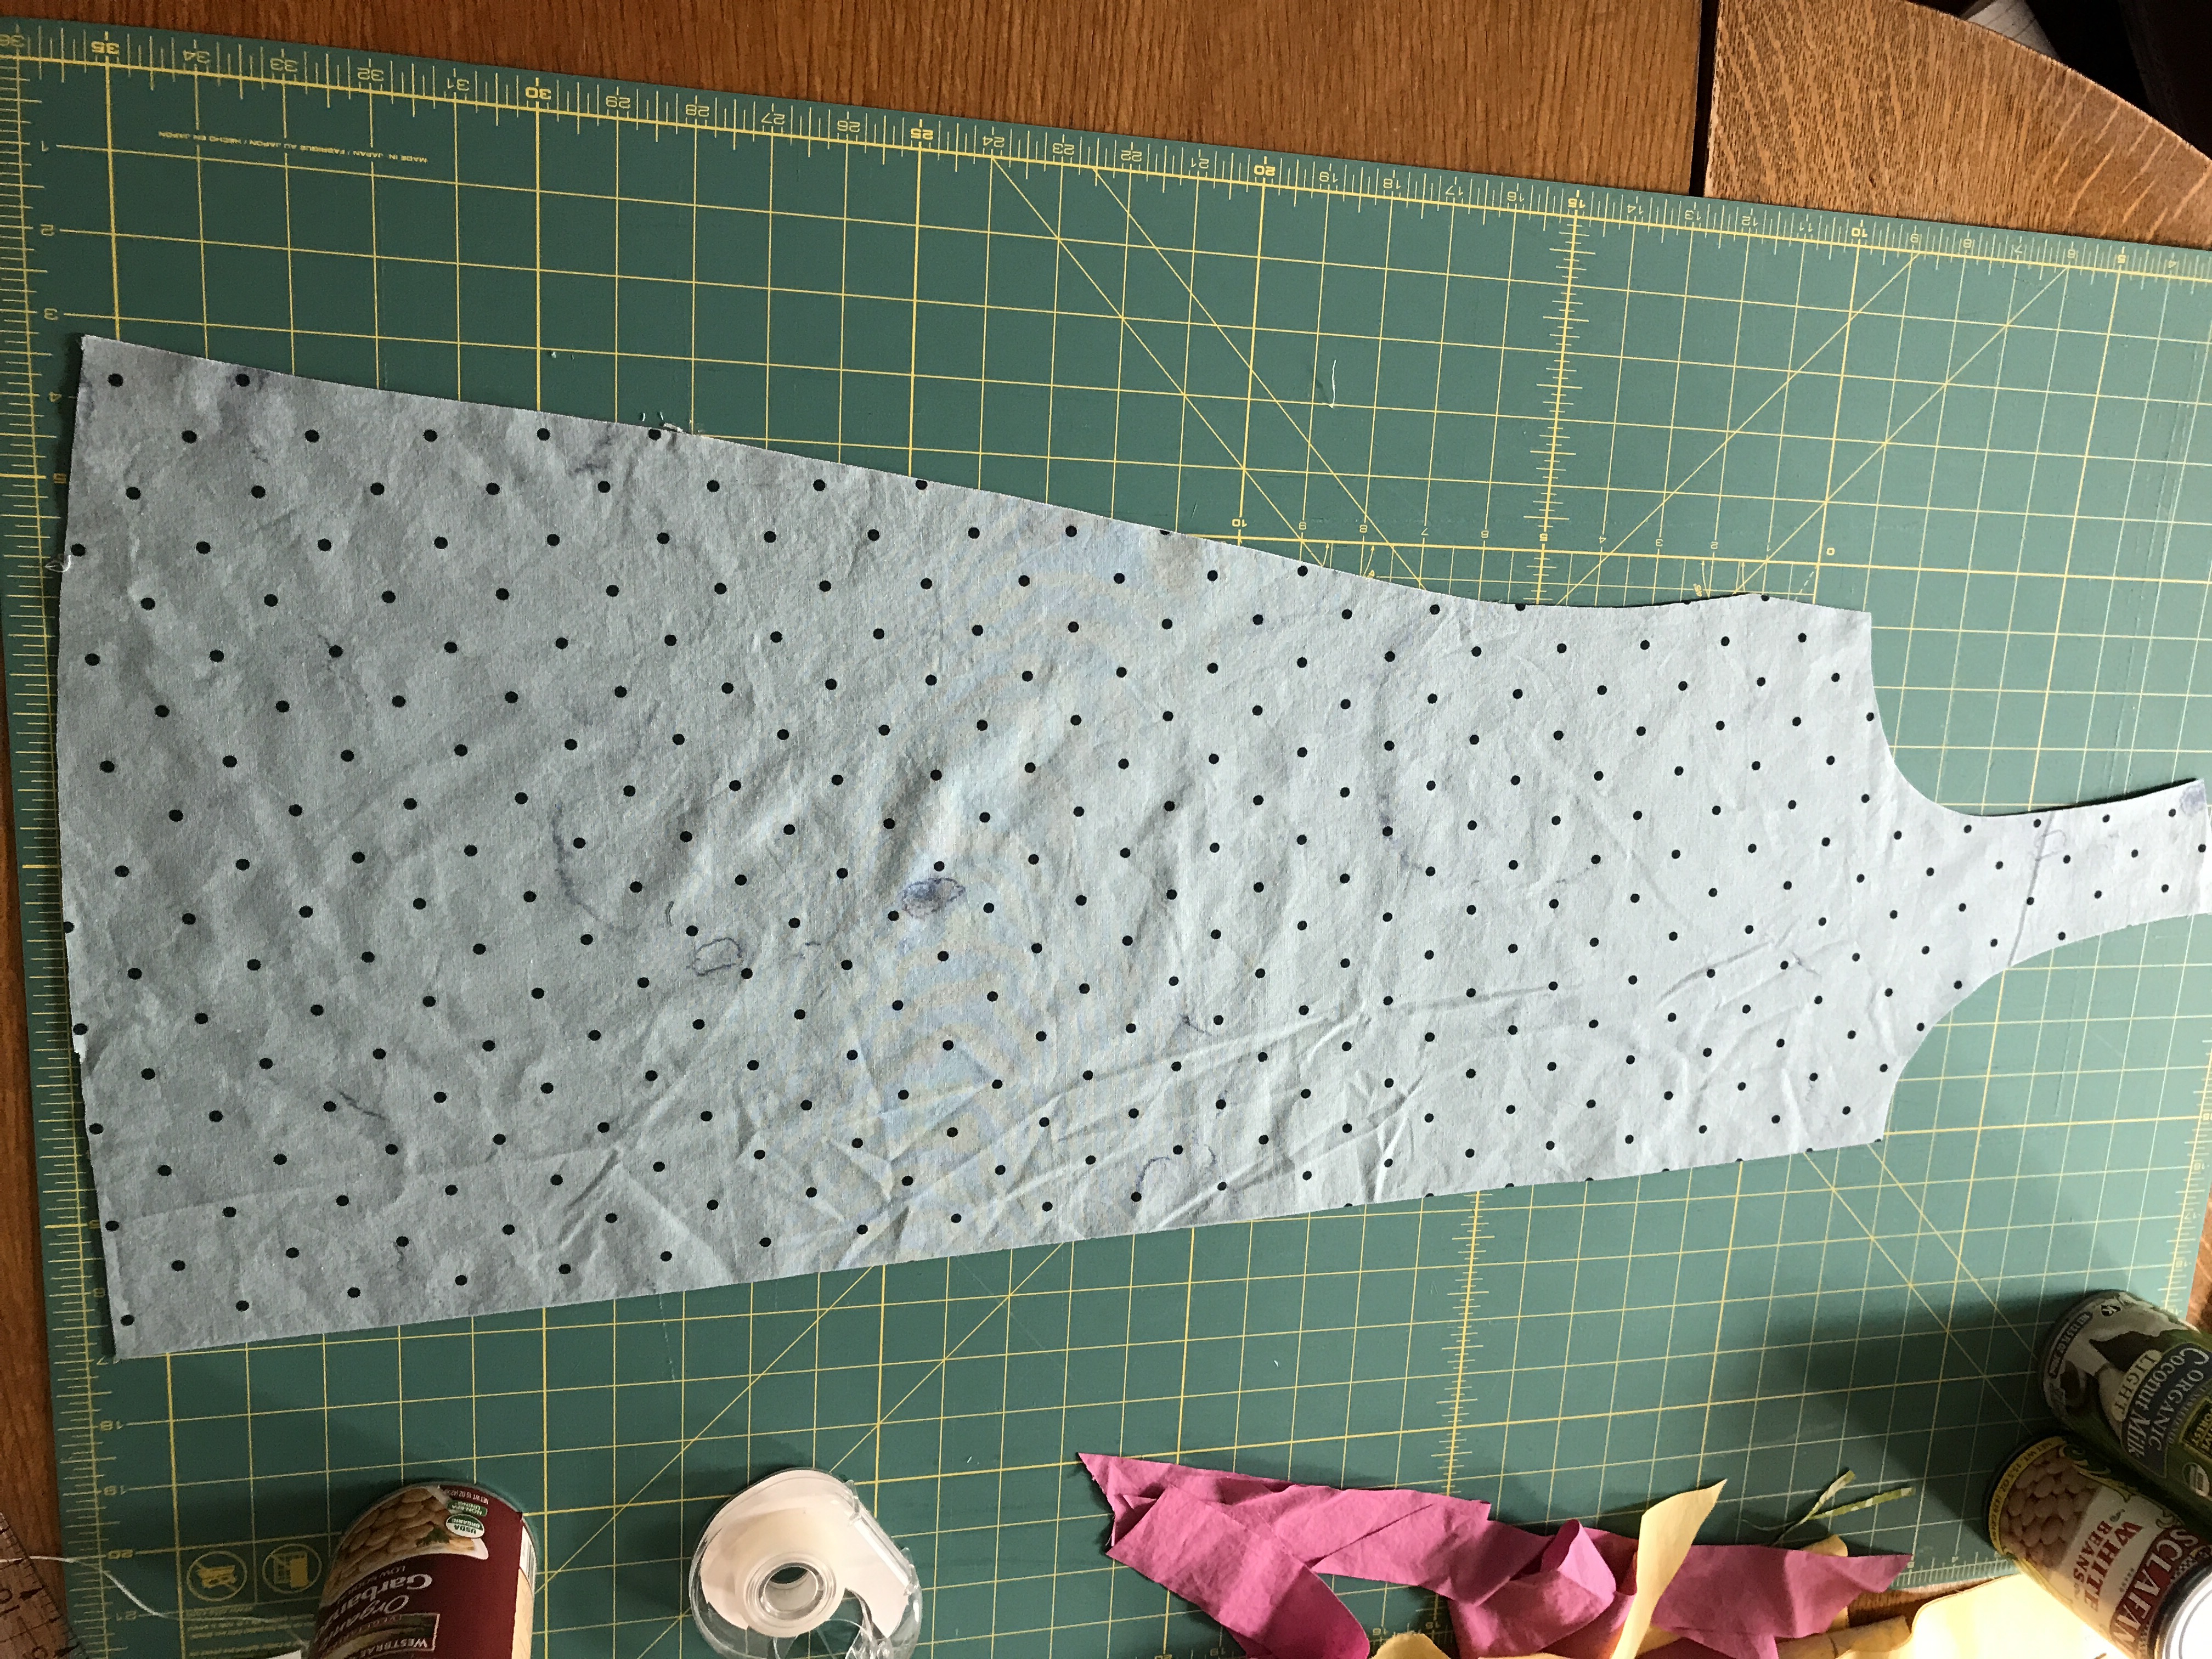 I was using 2 yard pieces of fabric so I basically lined things up to maximize the length and make two equally long pieces. It worked out to be just the right length. One thing I do every time I make a Gemma is to shift the pattern just a tiny bit when I cut the neck as a sort of hollow chest adjustment so it doesn’t gape. Also quite low tech. I shift the pattern piece back after cutting the neckline and cut the rest normally.
 Once cut out it was like sewing any Gemma. It all came together nicely. I stay-stitched around the neck and armholes.
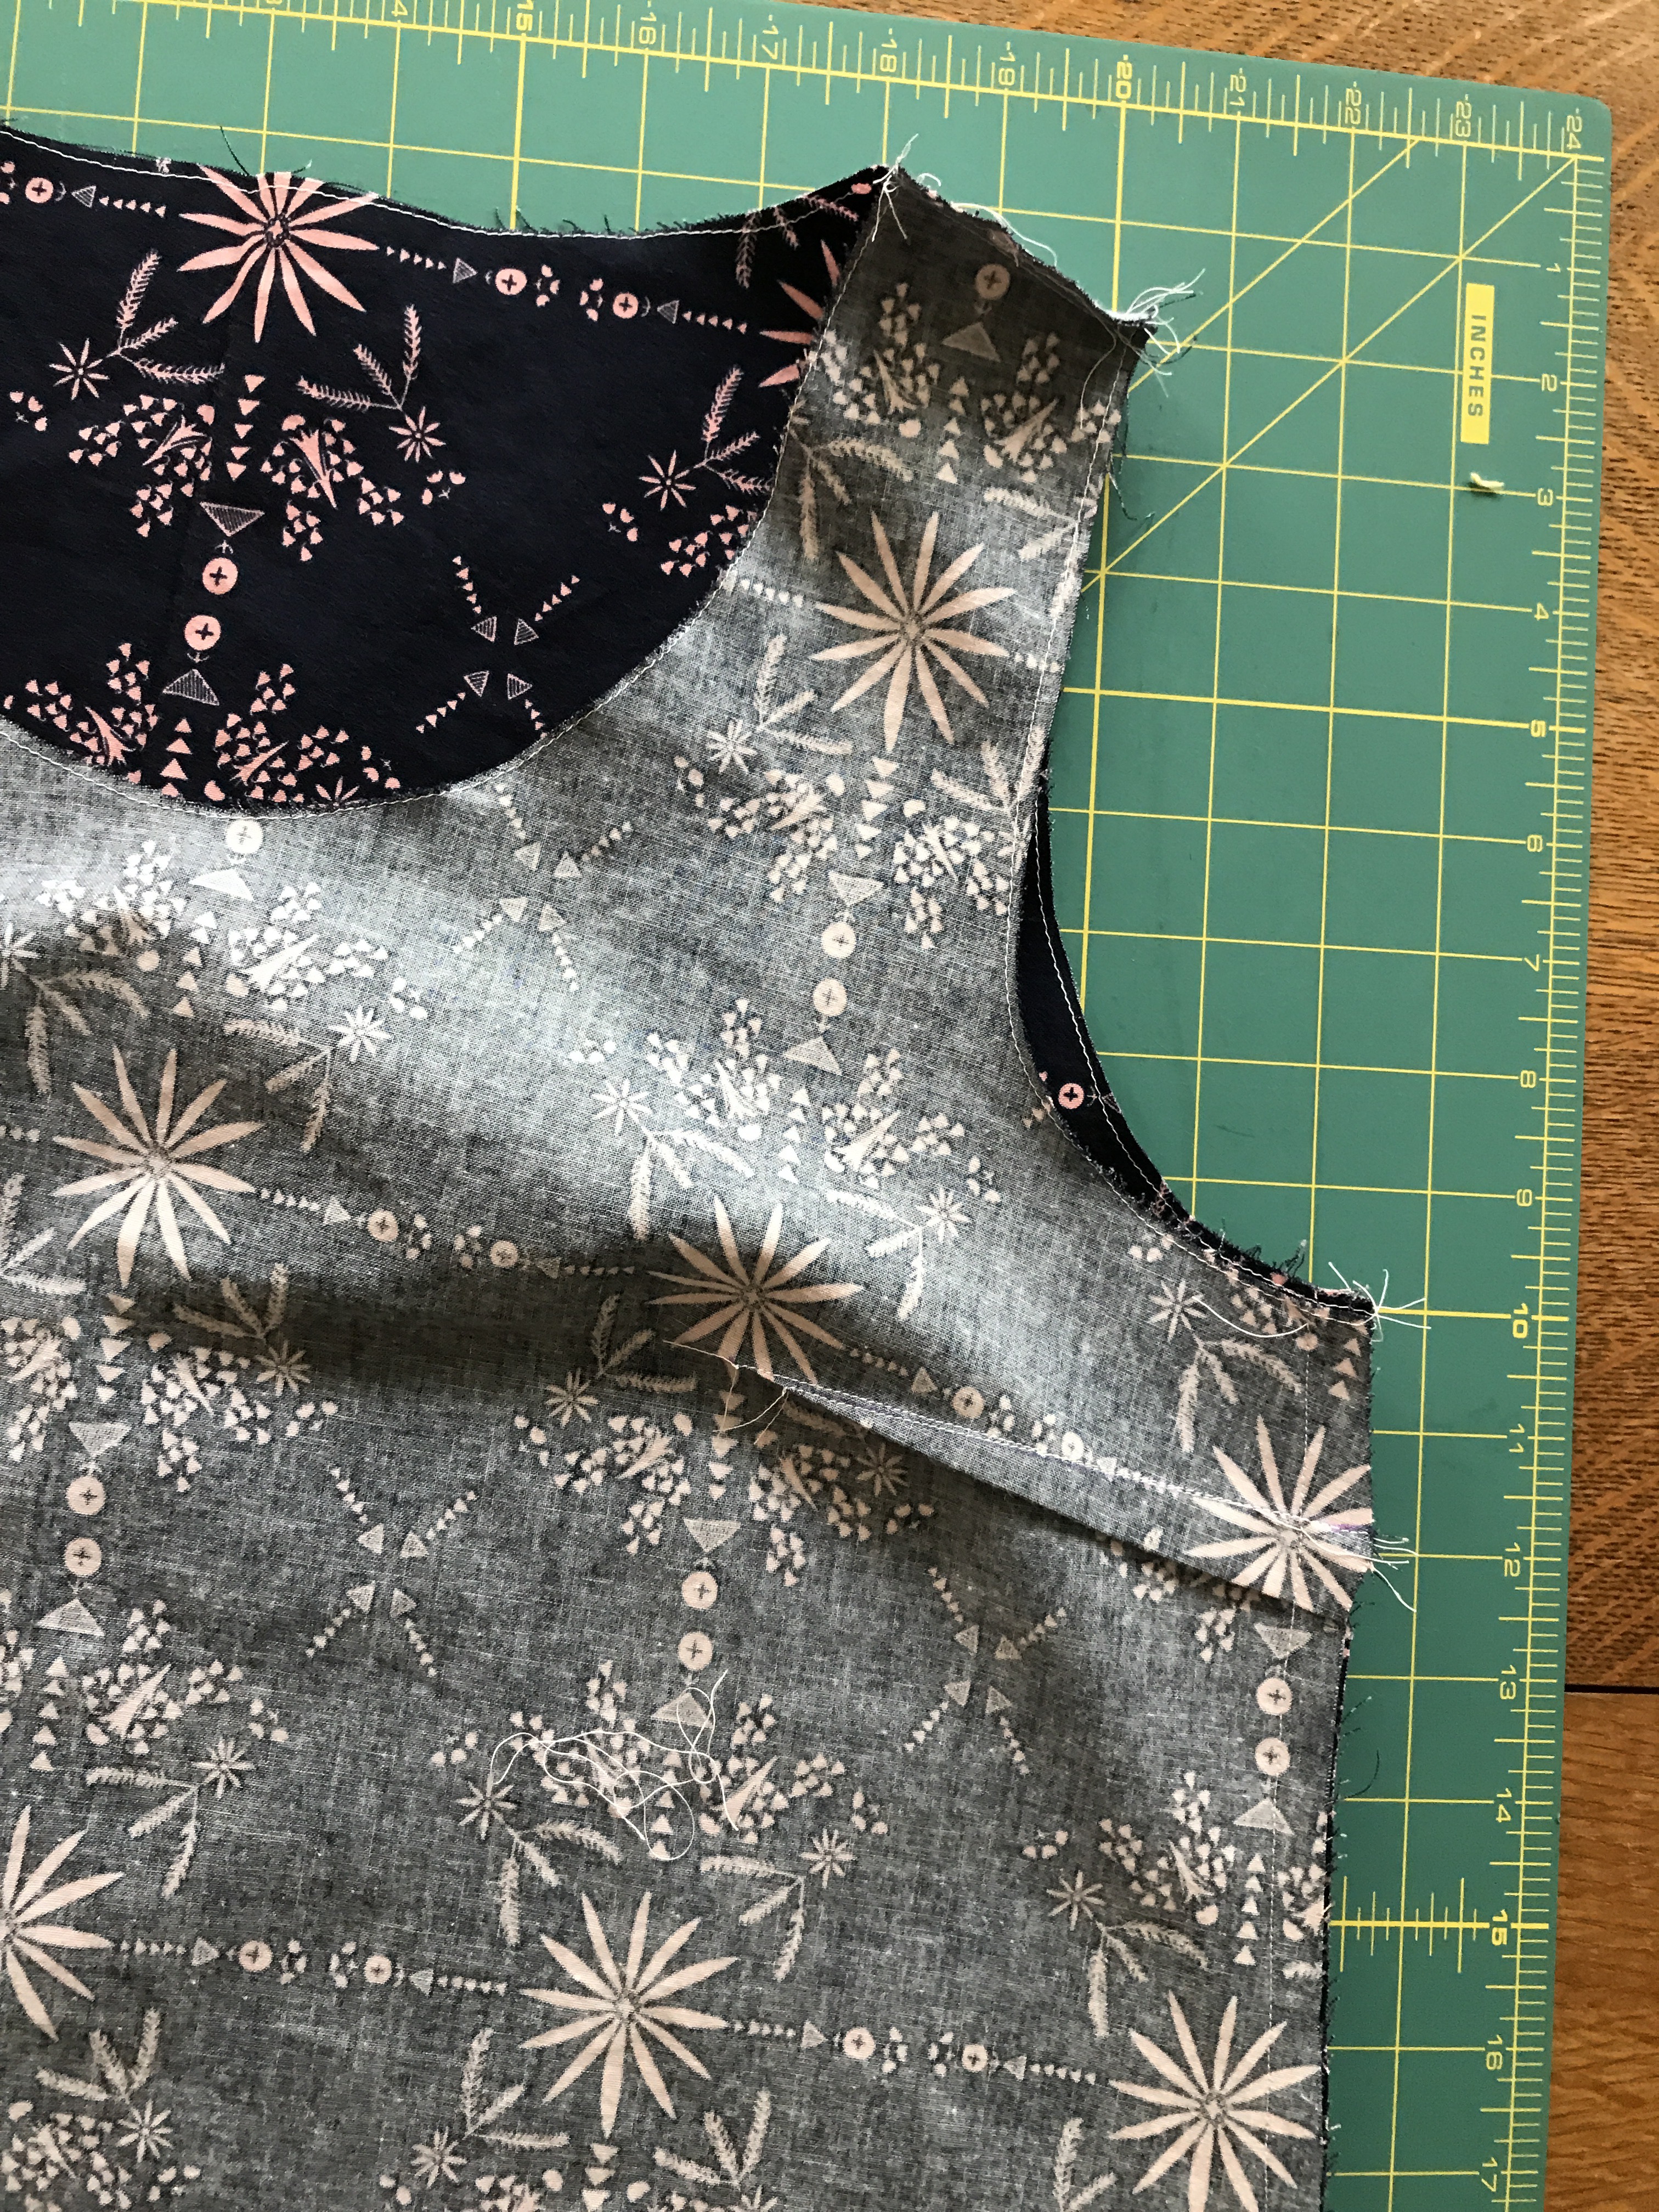 I used some pink cotton lawn to bind the neck and armholes and for a hem facing.
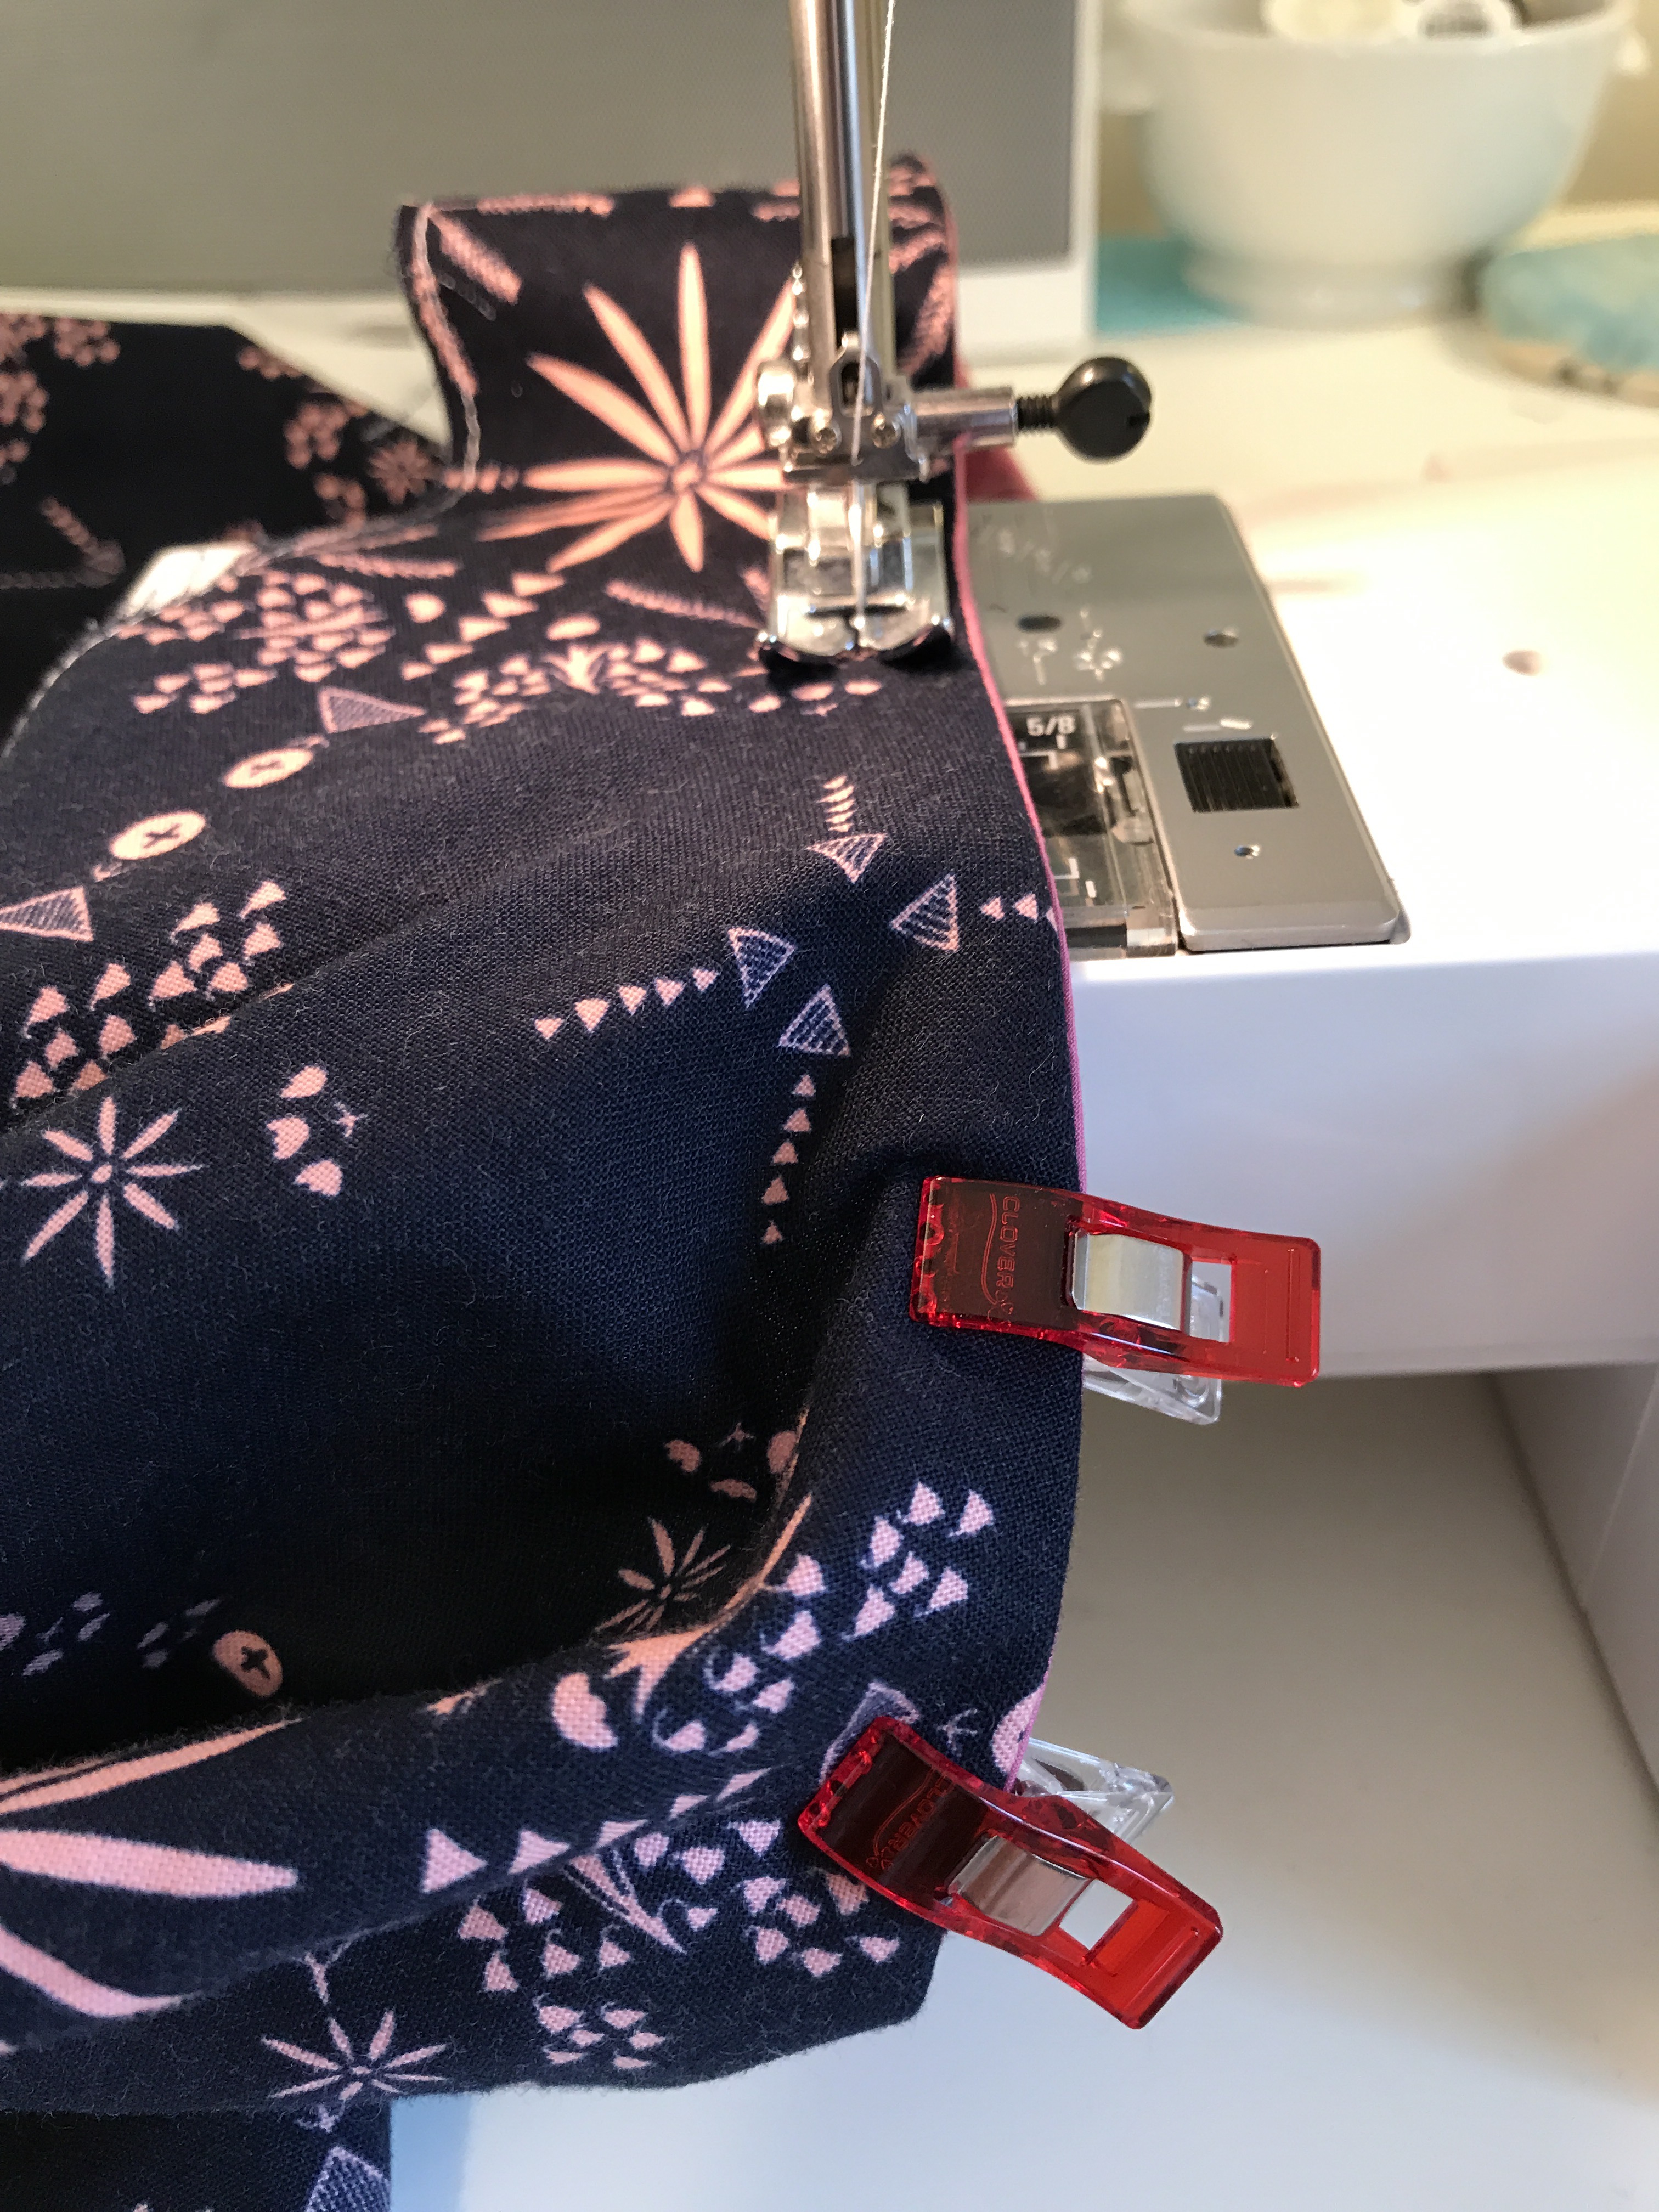 I used this method.
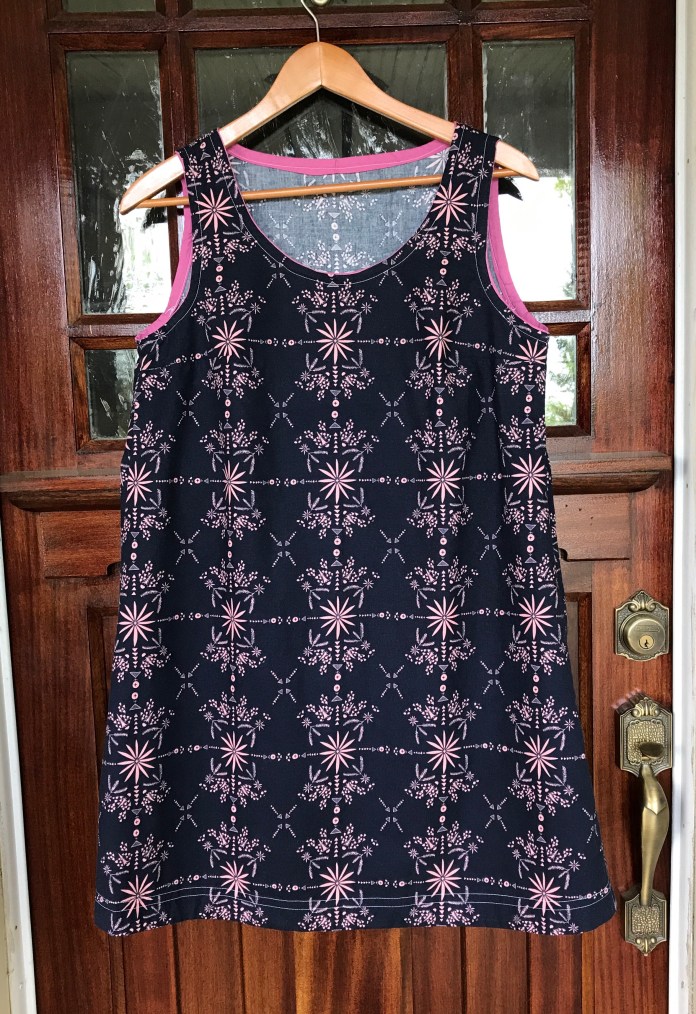
  And after a quick couple of hours, I was in business. This is the perfect after work attire. I love it with leggings, jeans or on its own for hanging around the house. Finished garment from the back on the front door place of honor.
 And as worn from the side. It is just loose enough. Comfortable without gaping.
 From the back:
 And from the front as worn with jeans. Make this! You will be glad you did.


 It’s all about the zipper.
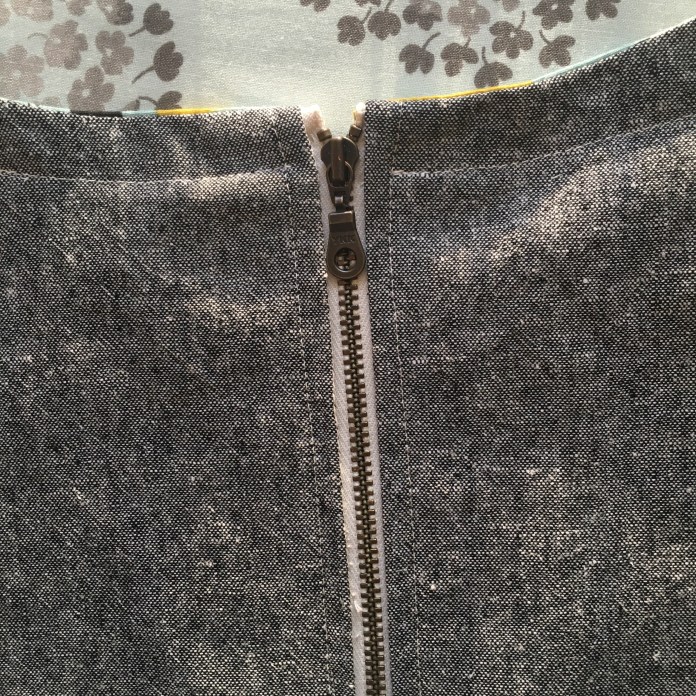 I originally bought this
 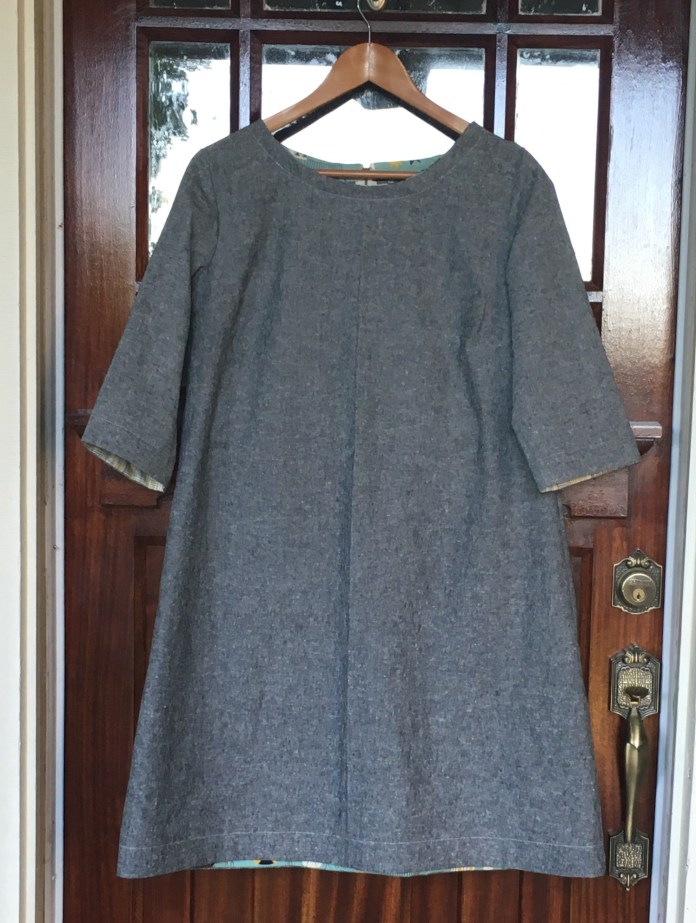 Here are some tricks/shortcuts I use when making this pattern. First, I size up for french seams: I cut on the next size up cutting line for the sleeves and side seams to allow room for french seams. I don’t seem to be able to capture the fraying threads with just one seam and always end up with two, no matter how well I think I have trimmed the threads. Since this happens every time I sew french seams, I am trying to just roll with it and know that my seams are very strong (ha!) and I need to plan for it. I cut on the Large seam line although I am generally more of a medium. This gives me enough space for my double seam and have the dress still fit. By the way, I only use french seams for the long seam from the wrist to the hem. I am not confident enough to attempt them at the shoulder seam. Those I sew using a regular seam and then zigzag to finish.
 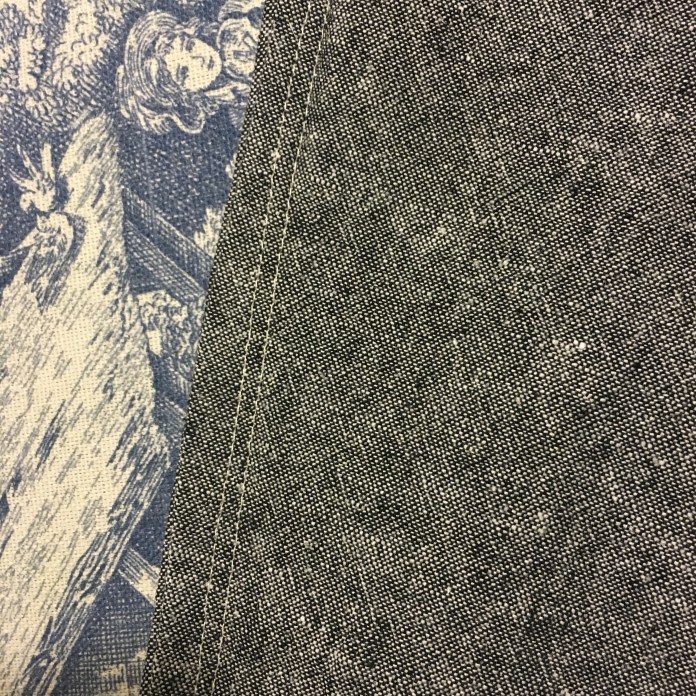 I don’t gather the sleeves: It may sound funny but I don’t gather the sleeves. I have only made the Pearl with heavier fabric with some stretch/give. I line up the center of the sleeve with the shoulder seam, pin it, and then I sew from the top down in one direction and then from the top down on the other side without using pins, just holding the fabric in place as I go. I get a nice clean shoulder seam with no puckers. Then I sew the sleeve and side seams in one long seam. I generally end up trimming a bit of the sleeve before sewing the long seam in order to make everything line up but I end up with a nice looking sleeve that fits the way I want it too. I am happy with the somewhat close fit I get doing it this way and it is quick and easy. I wouldn’t try this at home using your nice fabric. I would try it first with a muslin to see if you like the way it fits, but I did it this way the first time and it has worked for me ever since (this is my 4th Pearl shift.) P
 I use a contrasting lighter-weight fabric to finish the neck, hem and sleeves:
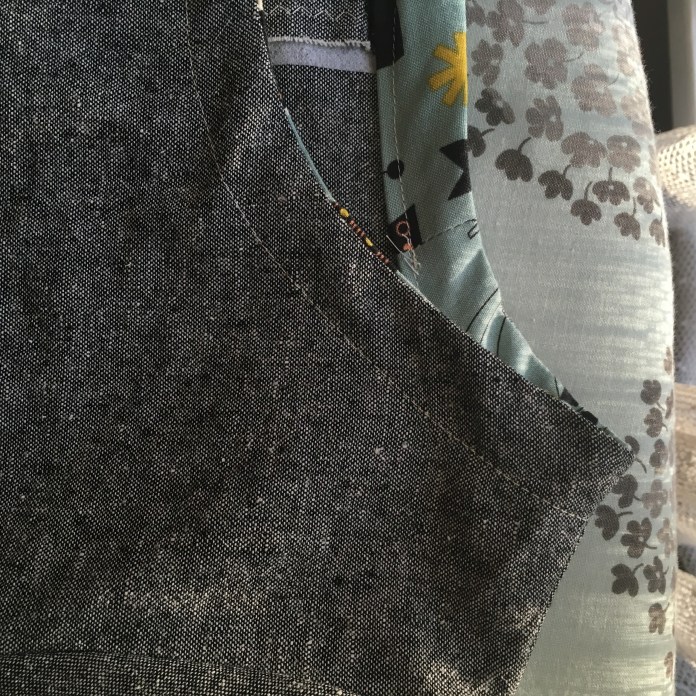
 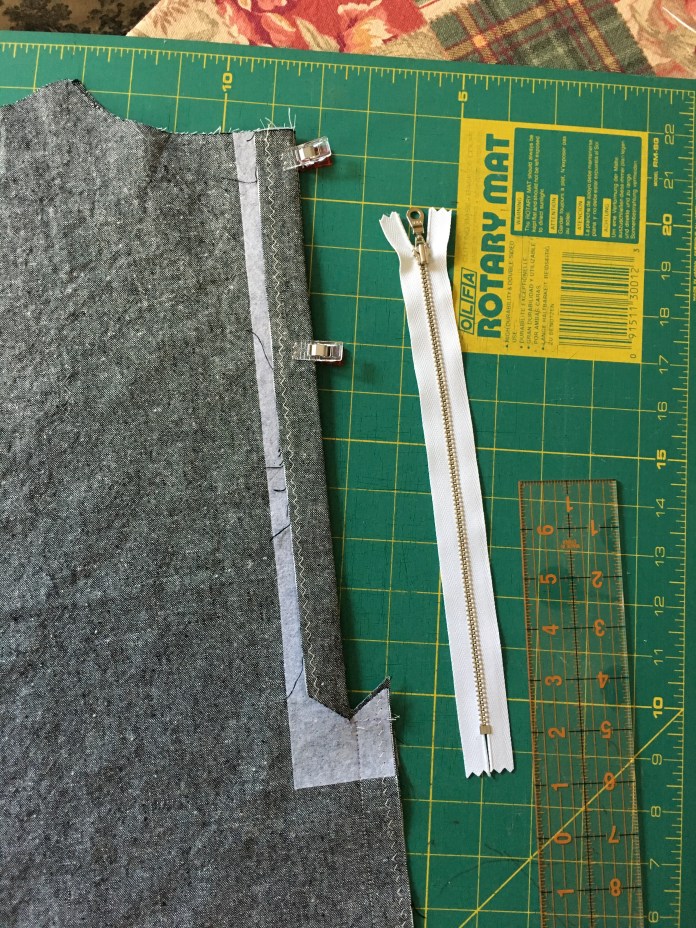 I blame the ruler that has different numbers on the two sides. Of course, I was looking at the wrong side when I measured. I took this picture May 19th and then the project sat as Me Made May sped by and then it was June. More pictures of the
 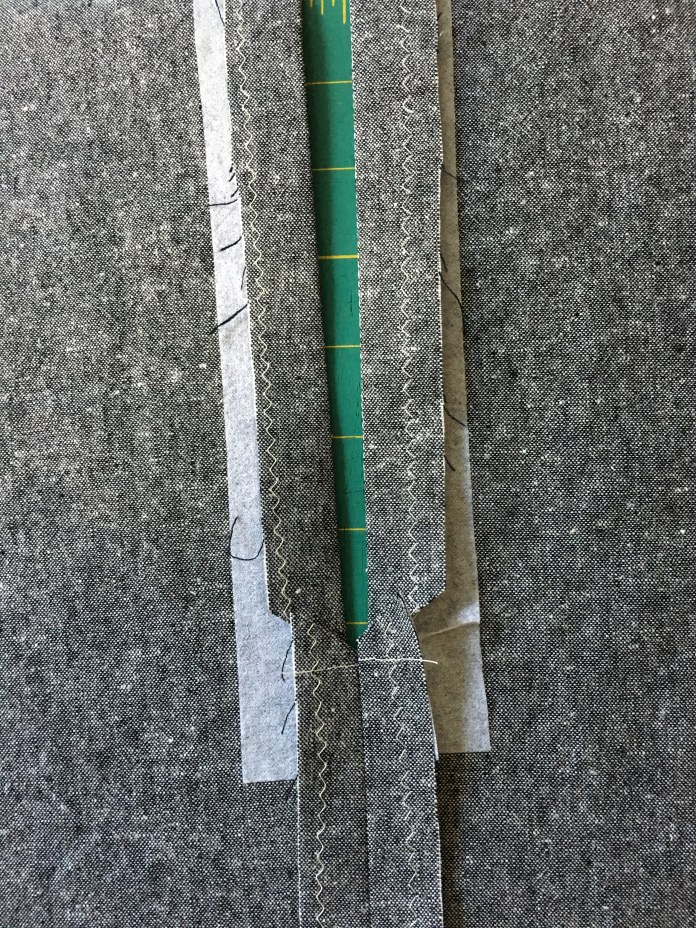 Hem facings in process: step 1
 Step 2
 Step 3
 Sleeve facings

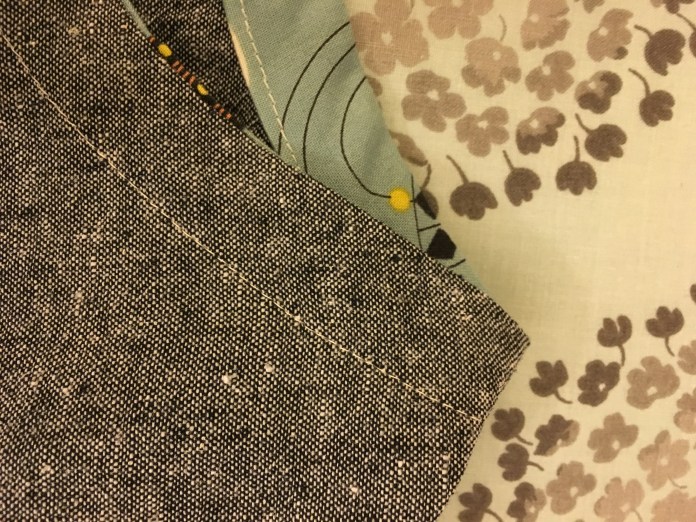 Neckline with zipper. A little wonky but the nubby fabric hides all.
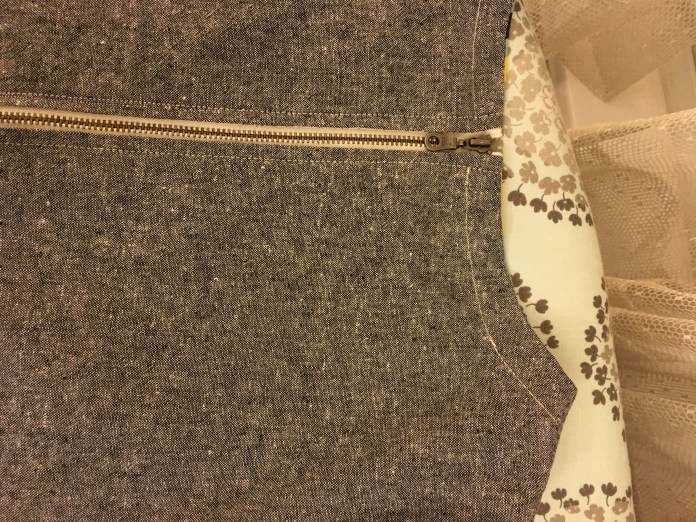 Neckline selfie. It’s a little higher than the Beatrix, a little 60’s looking. I like it with the linen. That’s my dad at a young age in the background. My
  Front of finished dress once again
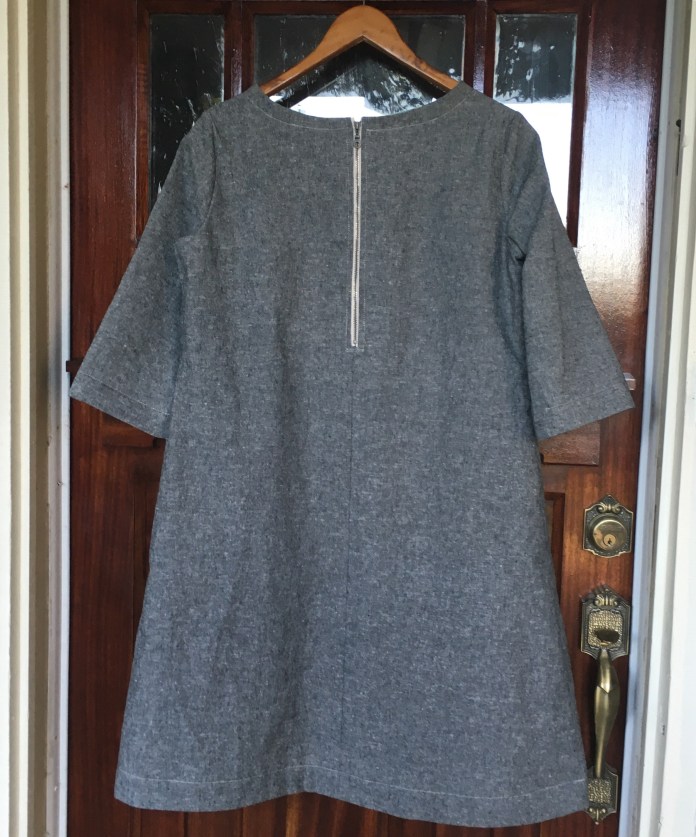 Inside of dress front
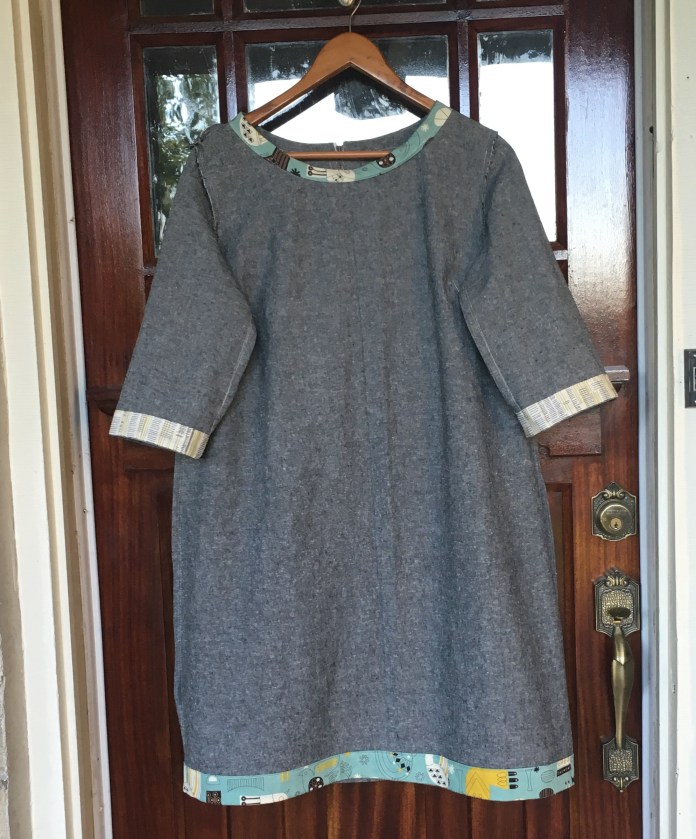 and back
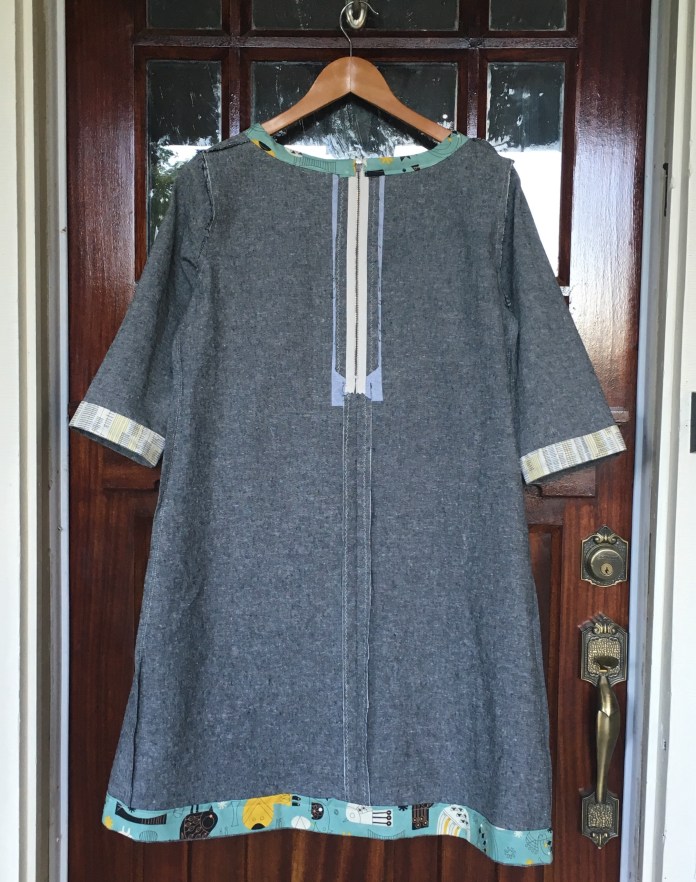


 I made two new Washi dresses for family members. A

 and a
and a 


