One of my goals this year has been to sew with fabric I already have. Over the past few years I have accumulated many yards of beautiful fabric (see below)
 and I am focusing on using it in my sewing projects. One exception this winter was some corduroy that I purchased from Fabscrap, an amazing, volunteer-driven, non-profit organization whose mission is to keep fabric out of landfills by accepting donations from garment manufacturers and individuals and selling what is saleable to the public and then recycling what is left into industrial-grade felt that has many uses. I had the opportunity to visit Fabscrap last fall when the Love to Sew Podcast hosts Caroline and Helen hosted a meet-up there. It was really fun to meet them and other sewists and to see this amazing operation in the Brooklyn Army Terminal. Volunteers sort the donated fabric and then have the opportunity to take some home. I love this business model! A great way to meet fellow sewists. Fabscrap has occasional “flashsales” online via Instagram and when I saw wide-wale cotton corduroy for $5/yard I hopped on it. I have used it to make this York Pinafore which I have been wearing all winter and thought it would also be great for a second Tamarack Jacket. Turns out I was right!

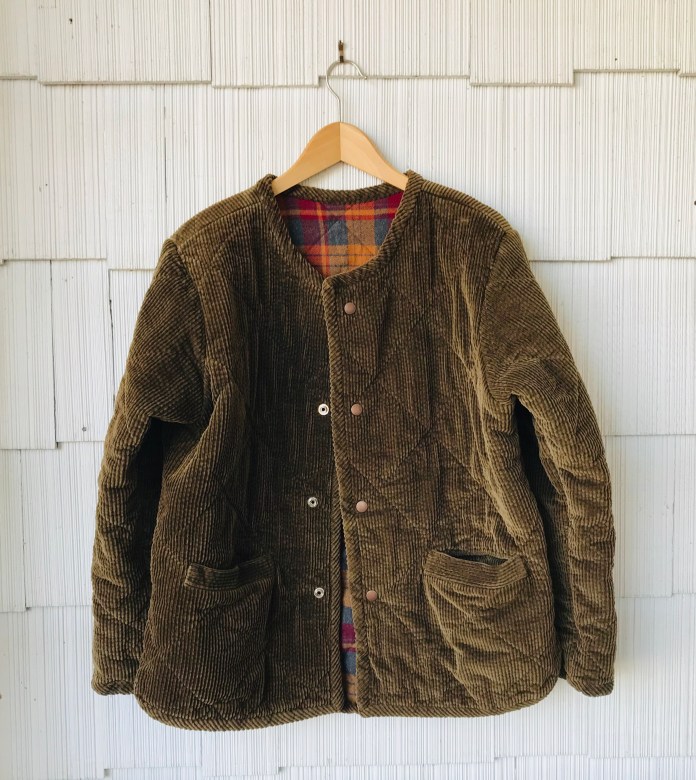
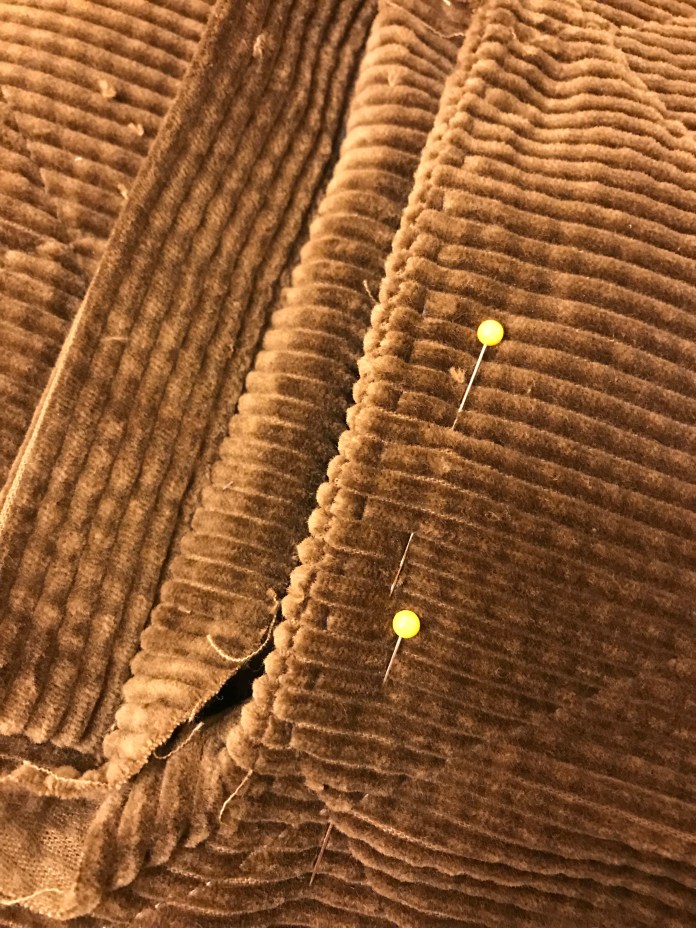
This corduroy is really high quality, soft and plushy with great drape unlike many other corduroys which are more stiff. I wasn’t sure at first whether I would quilt the corduroy itself. I had made a really cute, very pink, Burda jacket for my daughter (see below-circa 1994)
 where I quilted the lining by using quilting cotton and quilt batting and basically made 2 jackets, one the outer corduroy and the other the inner quilted lining and then sewed them together around all the edges with bias binding. The advantage of that approach is that all the seams are hidden. I was definitely tempted to use that approach. But I love the look of the quilting so I tried it on a sample sandwich of the three fabrics I was planning to use
 and I was surprised how well it worked. I used a dark grey thread in my stash since there was no brown in my lining fabric and it was fine.
  I set my stitch length to a long length- I think I set it all the way to 4 but it might have been 3. I decided to have my quilting a bit wider apart. When I made my first version in cotton chambray, I quilted a slightly flattened diamond pattern about 3 inches apart.
 With the corduroy, I decided to quilt using a 4 inch grid.
 I used the corduroy to orient myself and then set my ruler to 45 degrees to draw the quilting lines with my chalk liner.
 In both cases I didn’t end up basting the quilt sandwich but just used pins since none of the fabrics I was using were slippery and they really didn’t shift too much. In both cases I started my first line at the corner of the shoulder
 and then used it to determine where to draw the next lines. I basically quilted an X and then quilted new lines working my way up and down the pieces. It went really quickly and was very satisfying to sew these straight lines.
Something that I did with my second Tamarack was to cut the pieces of batting and lining fabric a bit bigger than the outer corduroy pieces.
 I didn’t have much shifting but this way after quilting everything I just used my rotary cutter to trim everything using the outer corduroy pieces as my guide so everything would line up nicely before sewing the jacket together. I don’t recommend cutting all three pieces bigger because I think you want to be able to orient your quilting lines on the outer piece knowing how it will line up in the finished garment.
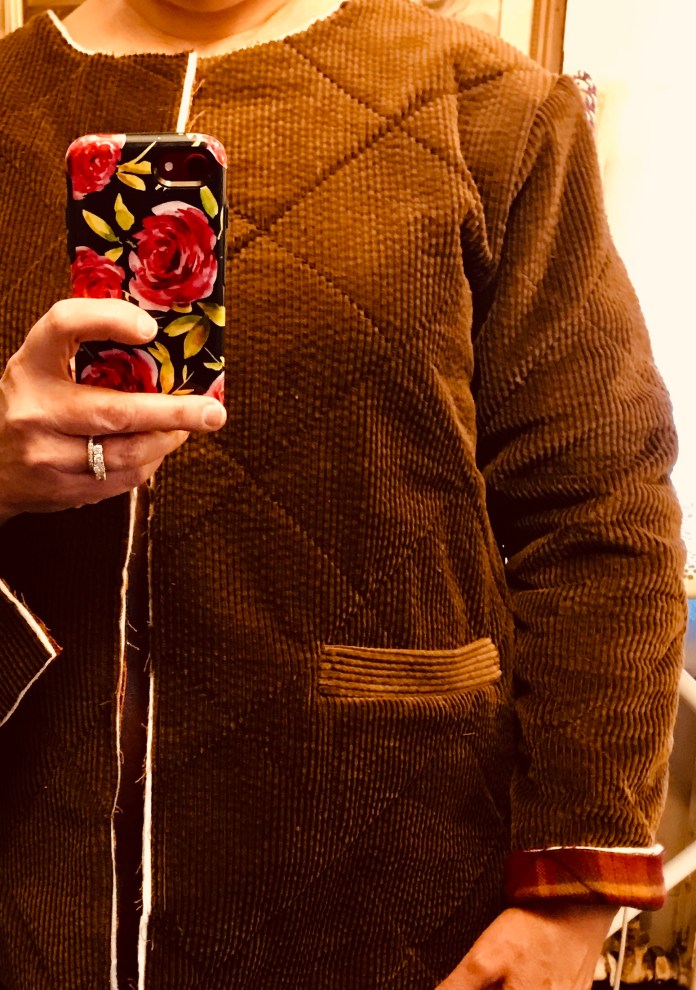
I used a heavyweight cotton flannel to line the jacket. I wear my first Tamarack all the time but it is relatively lightweight and I wanted a version that was warmer for those colder spring and fall days. I was a little worried about the thickness of all of these layers but the only place this came into play was when I sewed my bias binding on and an area where I had joined two pieces lined up with one my corners with the bulk making it a little wonky. What I ended up doing was to switch the way my jacket opens so that the less wonky corner is on top. I could have unpicked the binding and re-sewn it so that the bulk wasn’t at the corner but it didn’t bother me that much. As I did with my first Tamarack, I sewed the binding strip on in a single layer and then turned it under and handstitched it in place. I love the way the diagonal lines in the corduroy look in the bias binding. It was worth the stress of sewing all that bulk!

I thought about using buttons instead of snaps given the thickness of the corduroy and played around with some vintage buttons in my stash
 but in the end, went with heavy duty coppery snaps from Joannes. I bought the handheld snap setter which wasn’t too expensive and works great. My better than a hammer. Totally worth the purchase.

The most stressful and then satisfying parts of the Tamarack are the welt pockets. I almost didn’t add them since again I was worried about corduroy bulk but I just love them in my first version.
 They are just the right size and shape for hands and keys and my phone. So I was brave and added them and was so glad I did. I have not been successful in making the inside view of the pockets cute so I adapted a little hack where once the pockets are sewn, I hand-sewed a rectangle of fabric over the inner view of the pocket.
 Now they don’t swing around and I think it just makes everything more durable. I highly recommend this approach.


Size-wise I had made a straight 12 last year when I made my first version. I had actually cut it out a bit longer and had lengthened the sleeve pieces but once assembled I found that I didn’t need the length in either place which surprised me and I trimmed them back to the proportions exactly as drafted. I am 5’91/2″ and my torso is very long-I usually add 2 inches to all tops-but the proportions as drafted were perfect. I made my first version one year ago and I have put on some weight this year but I made the same size and it was just fine. For reference, right now my bust measures 37″ and my hips are 42 1/2″ and here is the size chart for the Tamarack.
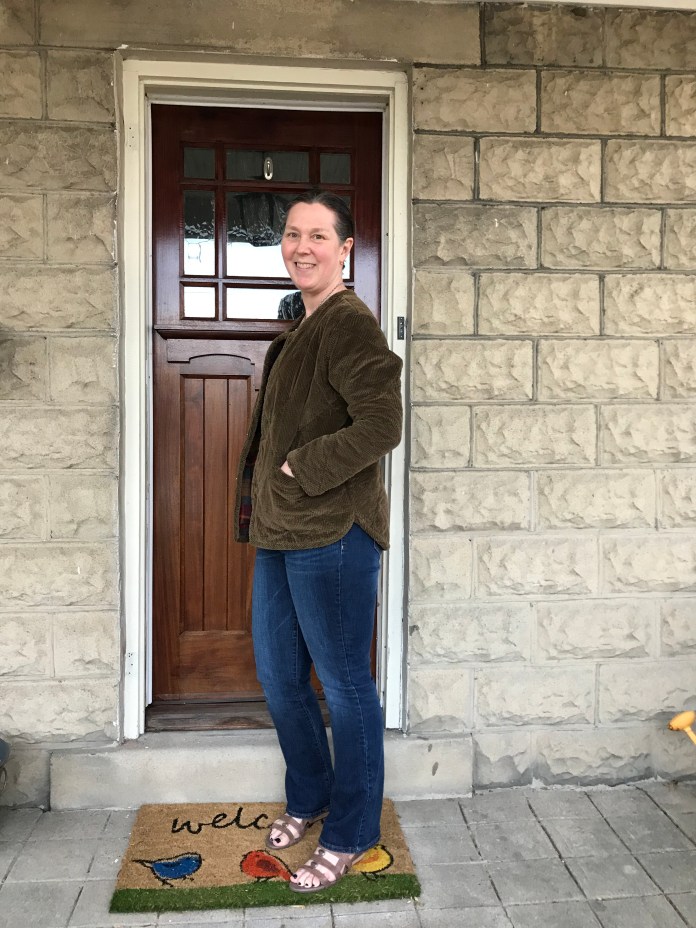
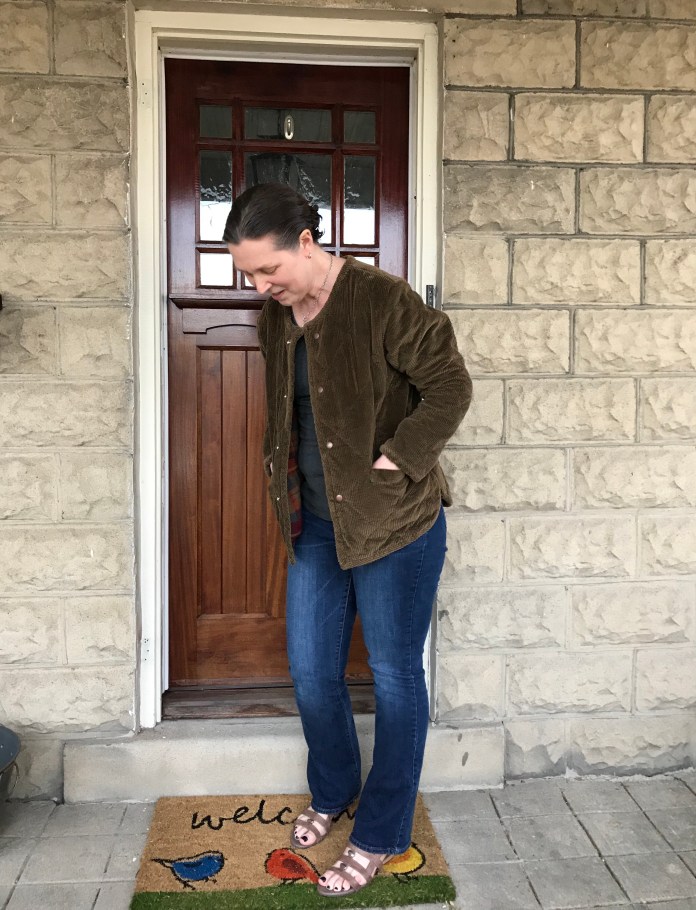
 I chose my measurements based on my bust but I am pretty sure my hips were smaller last year but since I knew that my jacket still fit me perfectly, I didn’t grade between sizes because I didn’t want to shift the proportions of the jacket. The fit is a bit loose and slouchy in a good way. I can wear two light layers underneath but it doesn’t really allow for a heavy sweater. If you plan to wear your jacket with heavier layers, I would suggest making a muslin. My shoulders are somewhat sloped and the dropped sleeves work well for me. I have plenty of room in the shoulders. The fit is really just right. The best part of both of my Tamaracks is how comfortable they feel when I wear them. They really are just light wrapping yourself in a comfy quilt.
I think I washed my fabrics twice before cutting just because they both were cotton and subject to shrinkage. This would not be a bad idea if you are concerned about shrinkage. I used scraps of quilt batting left over from quilting projects. This is such a great pattern for that. It is important to use quilt batting that doesn’t require close quilting. The all-cotton batting I use, Warm and Natural, can be quilted or tied so it is perfect.
I didn’t bind the inner seams with bias binding as some people do. It is a pretty look but all that bulk just overwhelmed me. I zigzagged the edges and in some places hand sewed the seams together with an overcast stitch to reduce fraying.
Here are many pictures of both jackets as worn after washing and drying it in my machines. I have not found any issue with it not fitting after washing-on the contrary the washing softens everything up and it fits better. I know from my experience as a quilter that these will just get softer and nicer to wear with age.
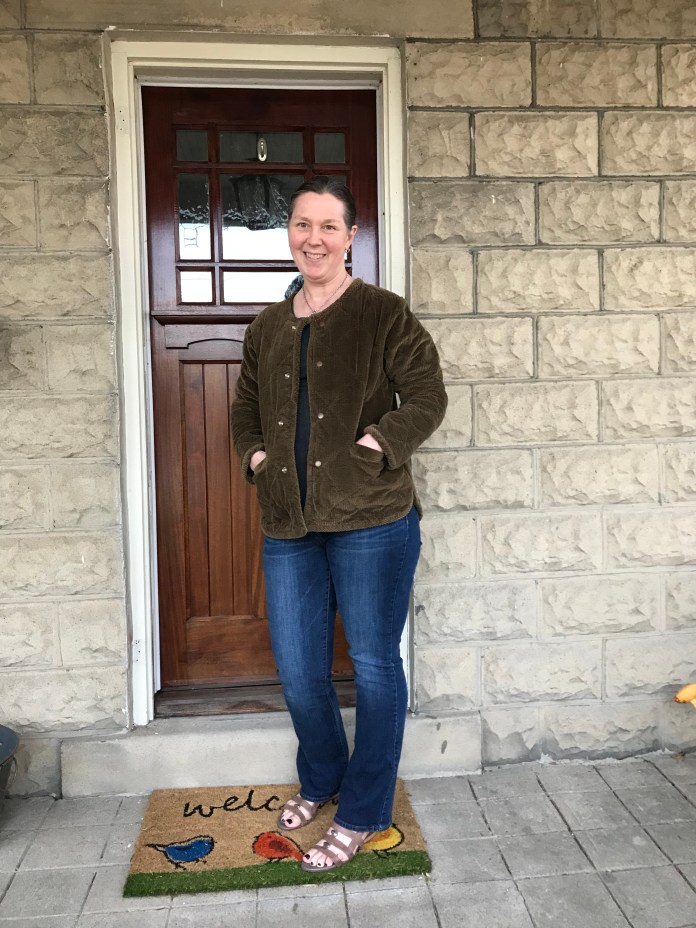
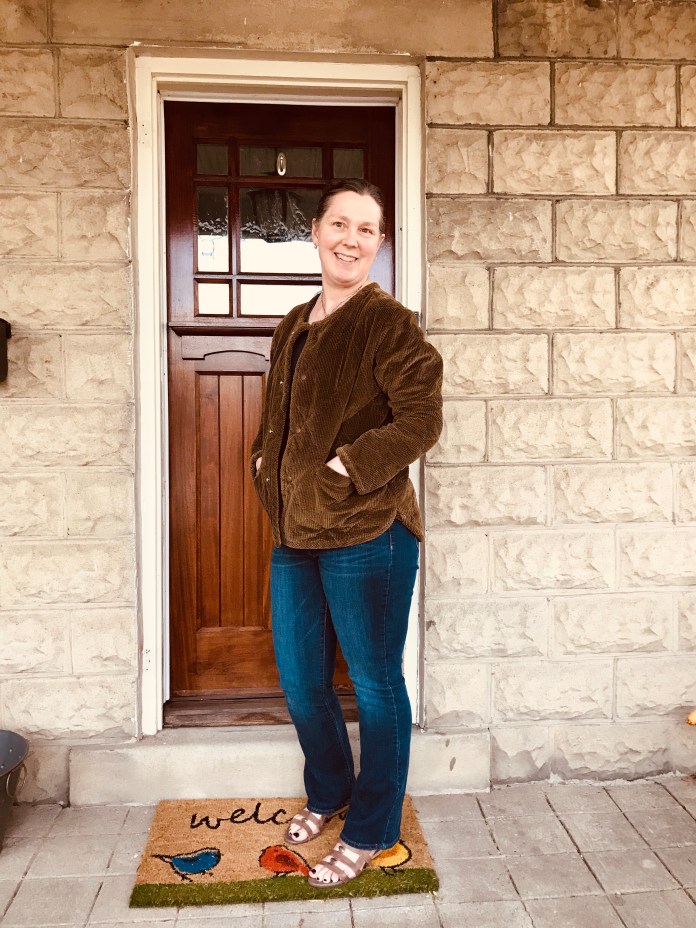
On the front door (version 2):

On the front porch:
 As worn after washing:
 At the Art Institute of Chicago (version 1):

And at the Bean (Chicago):

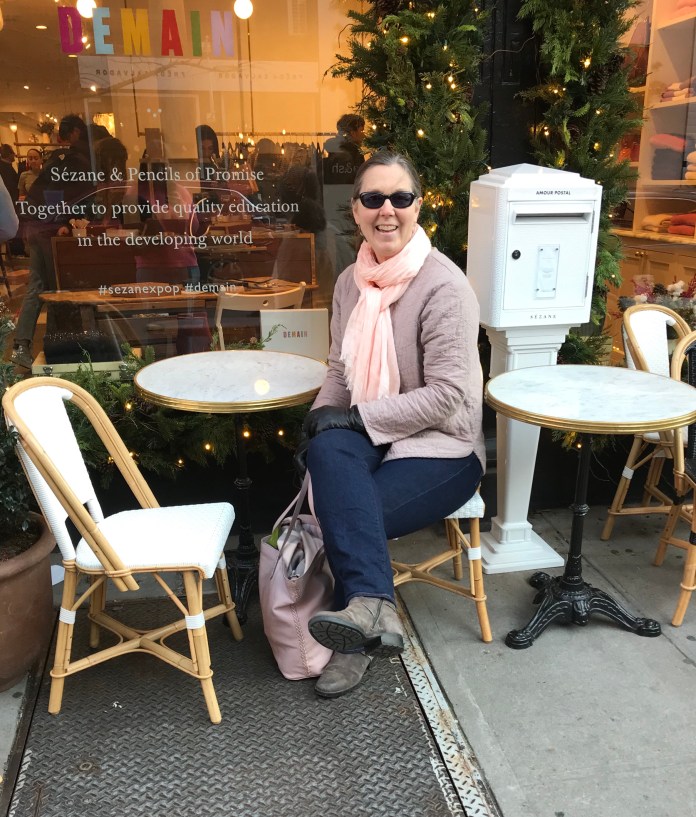
On a trip to NYC (version 1):
 If you haven’t made this pattern I highly recommend it. It is actually easier than you would think to make. The only tricky part are the pockets and it was fun to learn to make them and hand sewing goes a long way to make them come out nice
 (with the corduroy I had no choice since I just couldn’t get some parts of the assembly under the presser foot.
One more picture vivified (I have been vivifying all my pictures recently):
I will definitely make this pattern again. I would love to sew a very light-weight version in linen or double gauze and hand-quilt the pieces. Feel free to ask any questions below. I can’t recommend this pattern more highly!
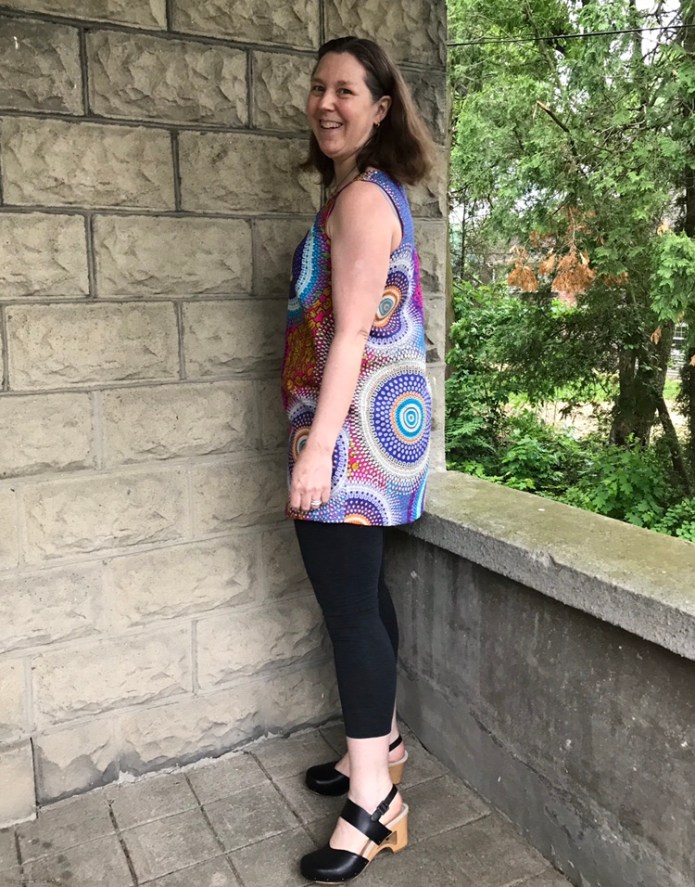
 I wore the Helen’s Closet
  I had some beautiful paisley rayon challis left over from making
  Bias Binding Close-up
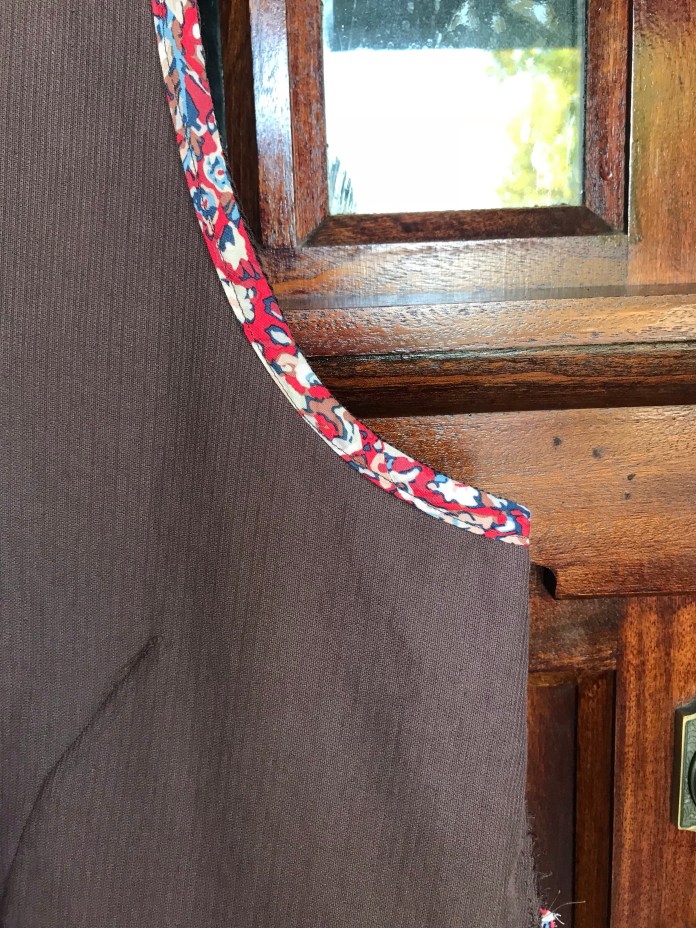 I love the little pop of patterned fabric
 I like to line the pockets and this paisley lining is really lovely, almost feels like silk.
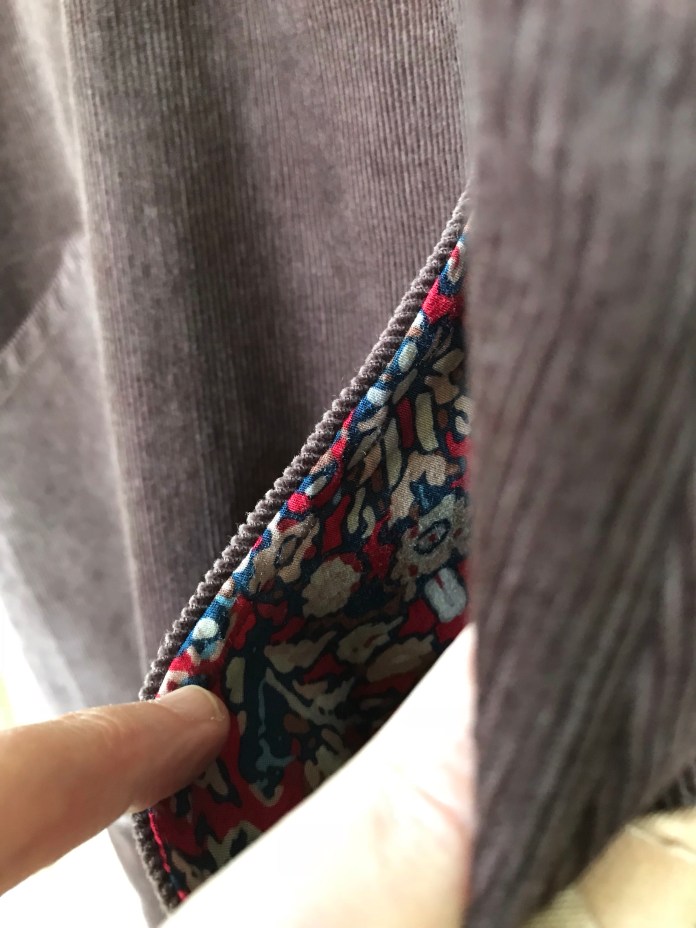 It was a bit slippery going with the bias binding but worth it. I made a size large as I have been doing but probably could have taken it in a bit because the fabric doesn’t drape like linen. I plan to make several
 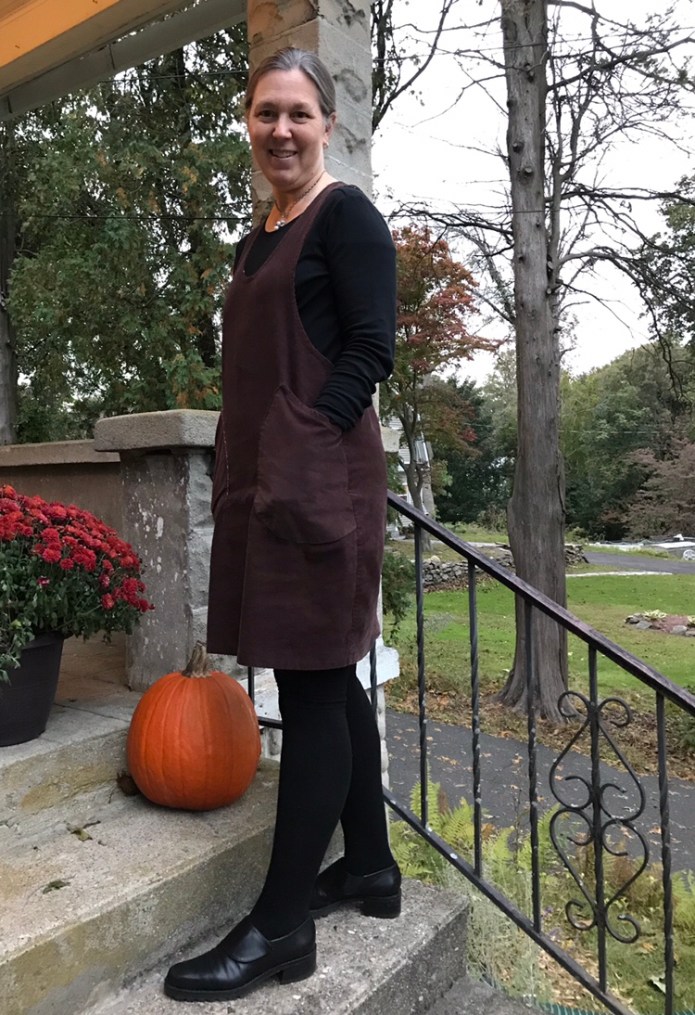 This fall I am busy as I always am in the fall, teaching new nursing students, so I appreciate my go-to patterns that enable me to still make a wearable garment in a day. This was a Sunday project. Probably more versions to come, likely a black wide wale version.
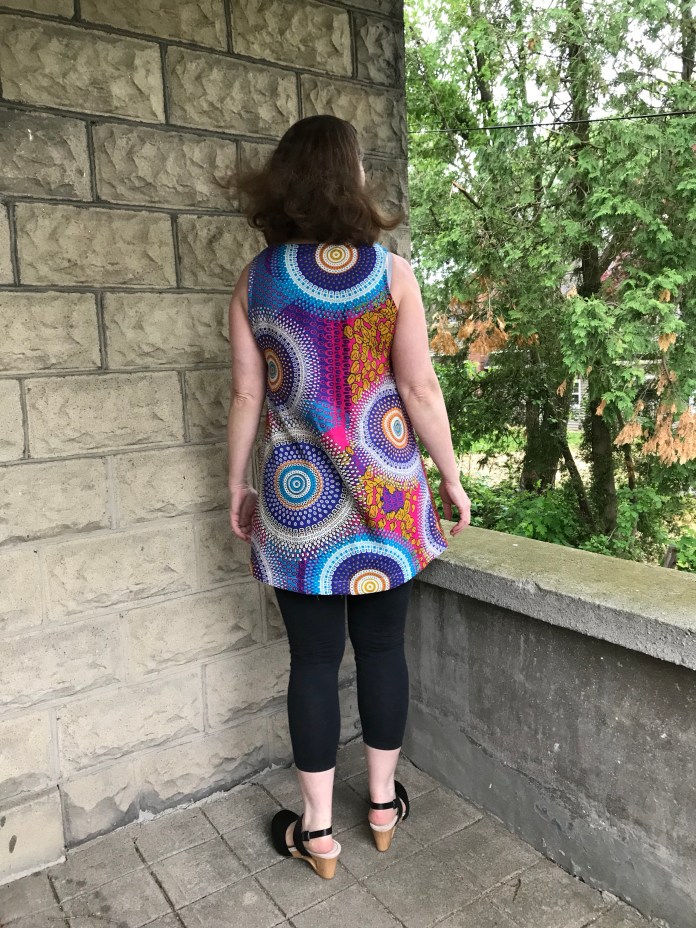
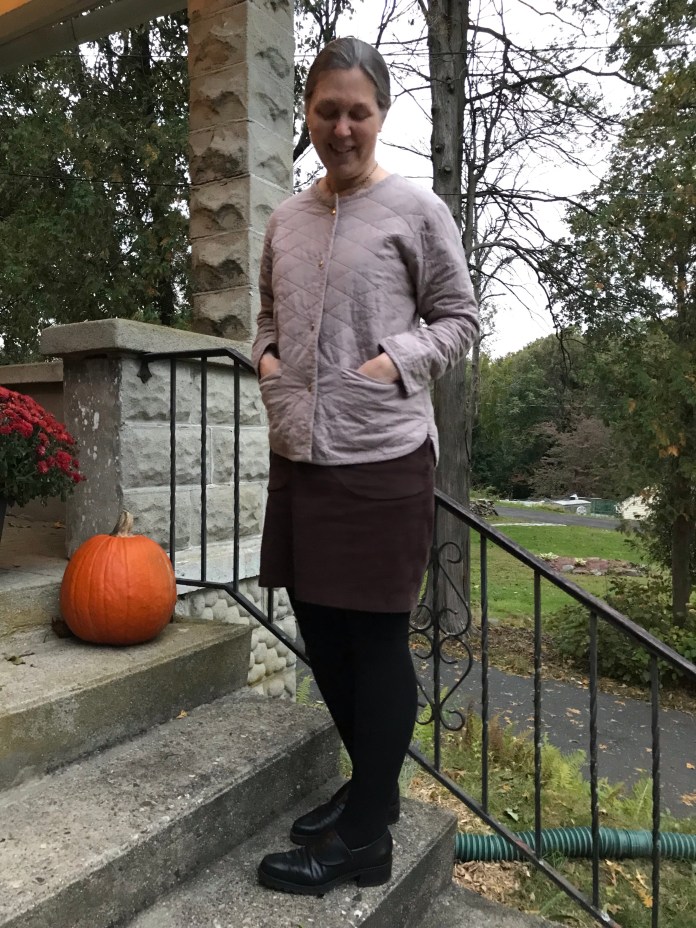
  I have to say that my Tamarack Jacket goes with this outfit as it goes with just about everything. I am loving wearing it.
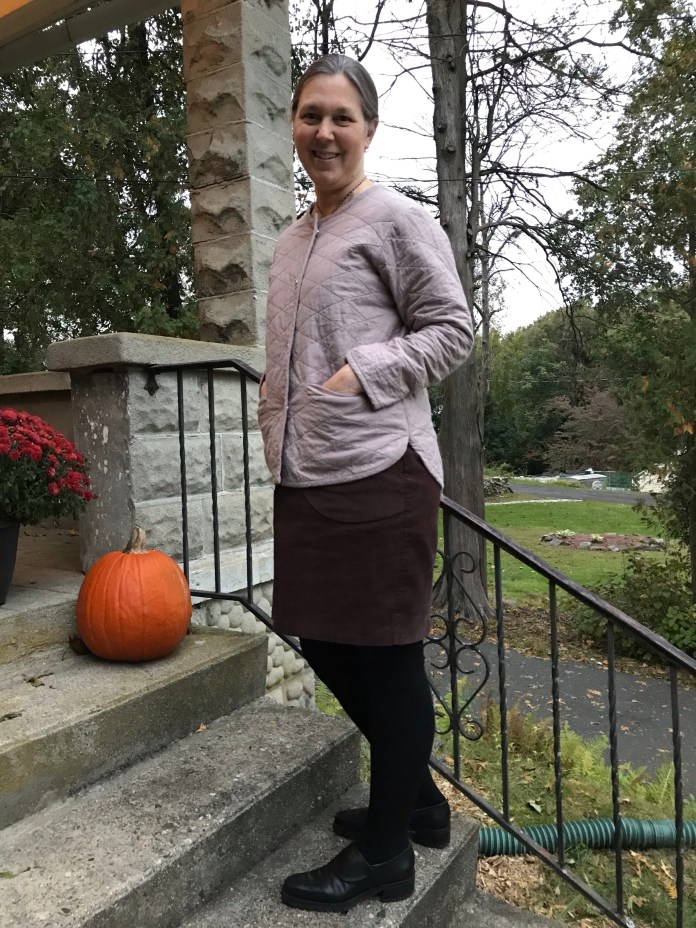 My pockets were not as neat as I would have liked on the inside and so I cut a large square of the lining fabric and hand-stitched it over each pocket on the inside of the jacket.
 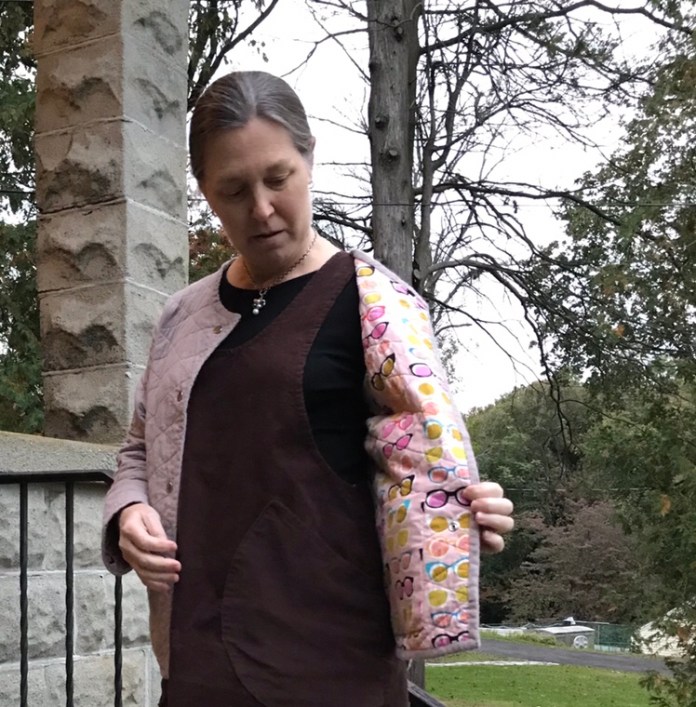 I love the neat look and I think it will be more durable and it doesn’t interfere at all with putting anything in the pocket. I also like that I was able to include some of the selvage with the designers’ names.
  I am slowly building a fall wardrobe of basics that work together. The
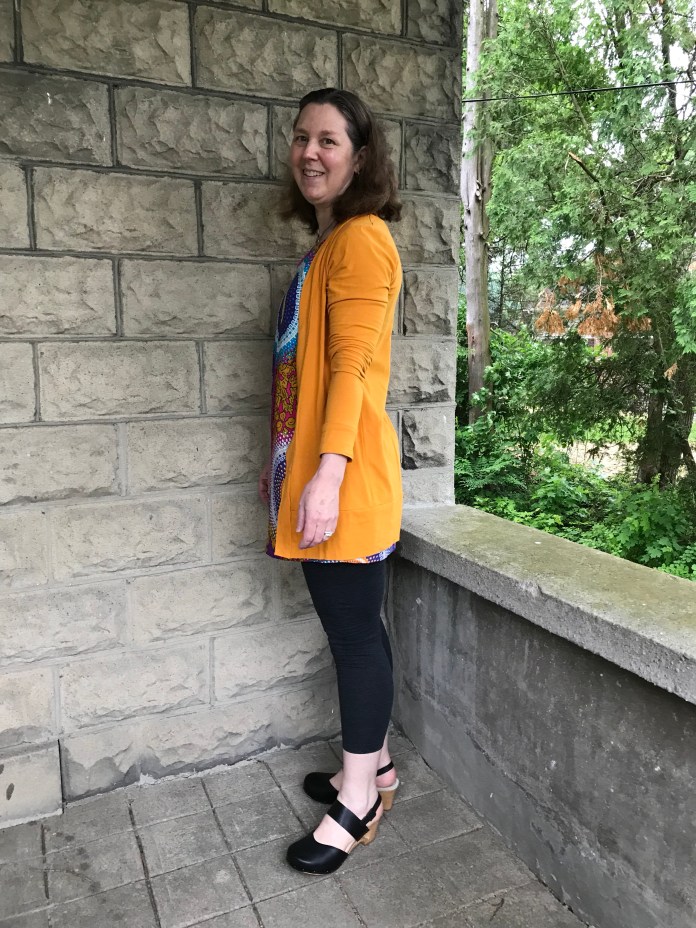
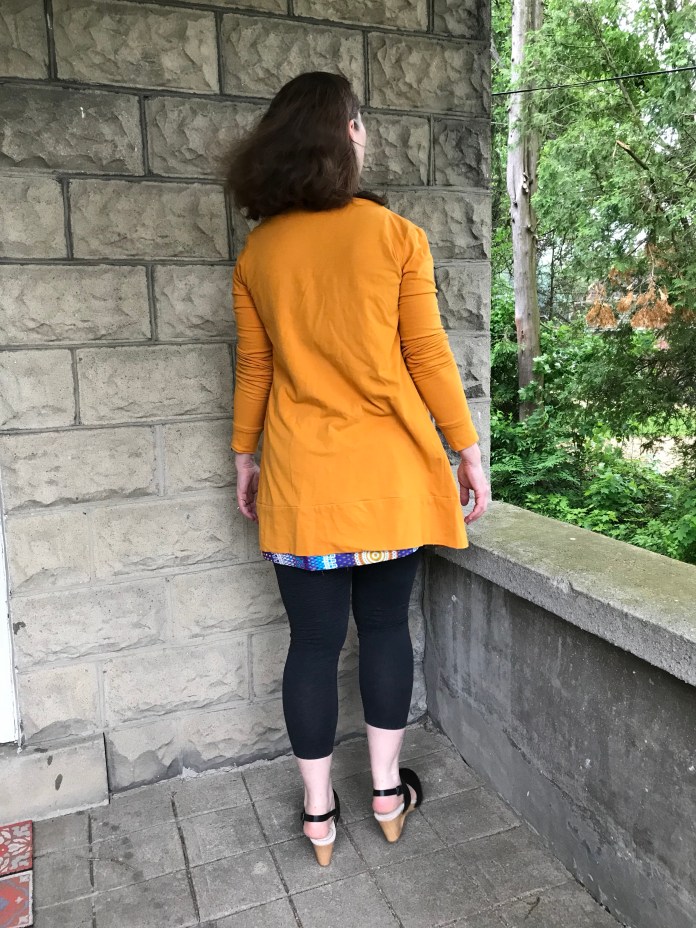


 I finished sewing a boho blouse using the