

The first Gemma Tank I made was this one. Pictures of it as worn by me here.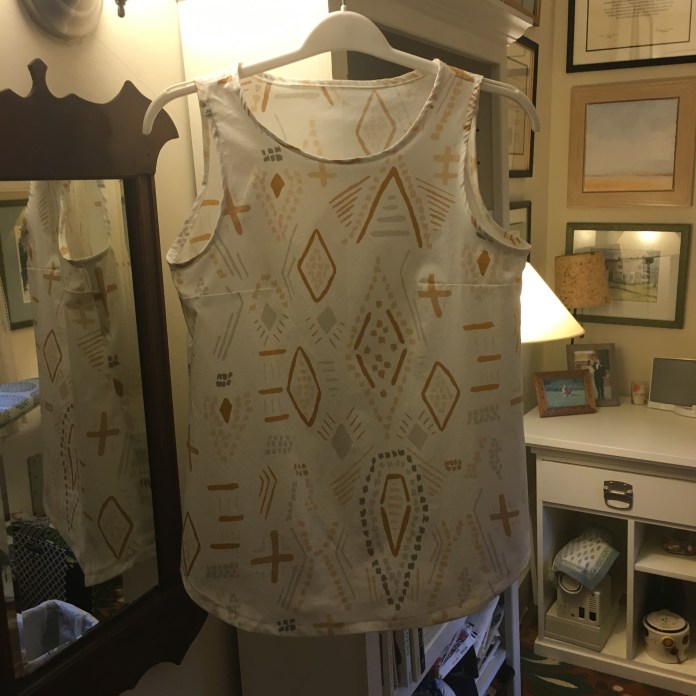 I cut a Medium with the higher neck option, although I shaved a small bit off the front of the neck. You can see approximately how much I took off below although the picture below is a different Gemma (made the same way). I just slid the pattern down and cut a bit lower using the same curve so that the edge would be below the collarbones.
 I also lengthened it by approximately two inches.
 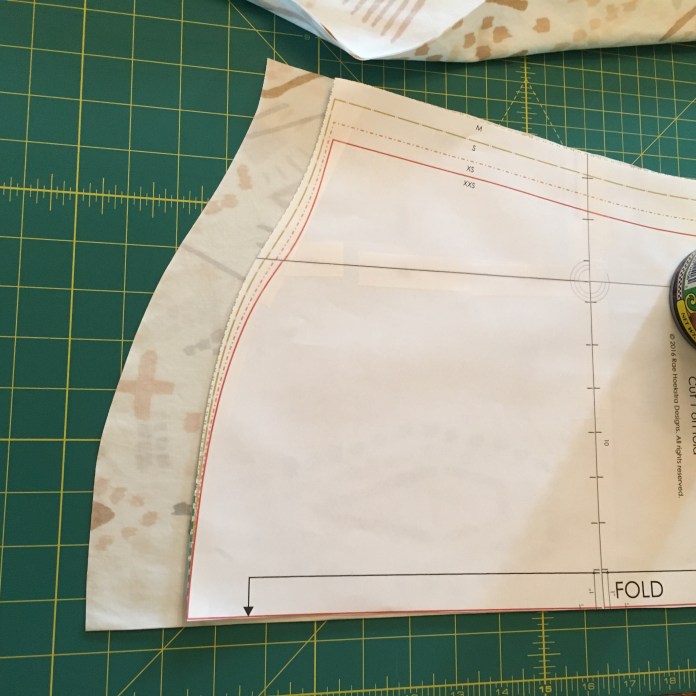 I mostly followed the directions for the bias binding using the traditional method with two changes: I cut my bias strips 1.5 inches instead of 1.25 since I sometimes find I don’t catch the whole edge with the narrower strip and I sewed from the front side on the edge of the binding rather than in the ditch. I find I can line things up better that way and I like the look of the stitching. You can see the position of the needle below. When I initially sew the binding to the edge, I use my presser foot as a visual seam guide and it is about 3/8 inch so my whole binding ends up being a bit wider.
 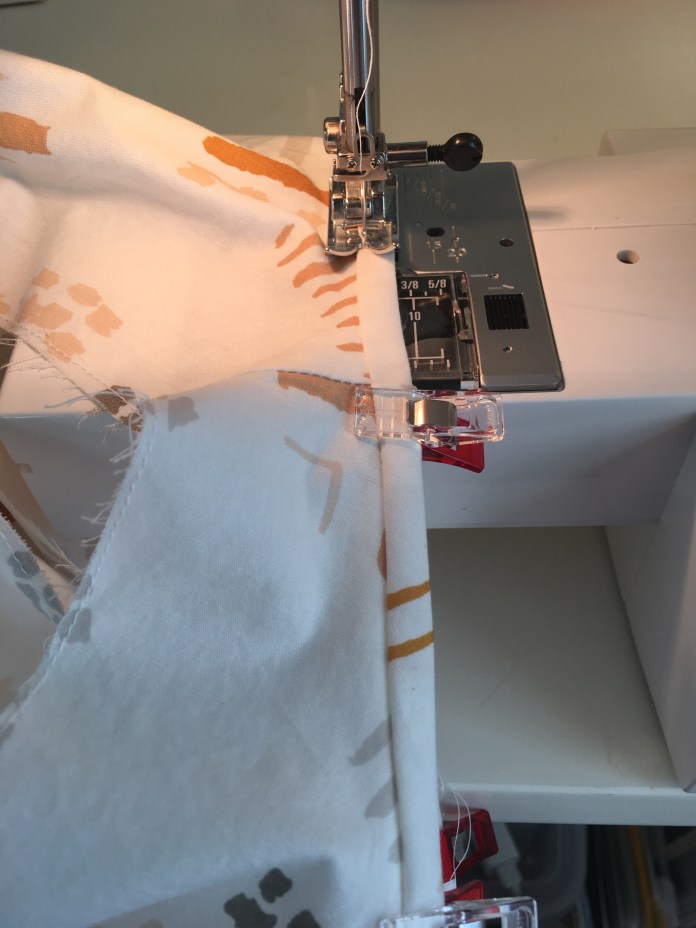 I used this beautiful cream colored Art Gallery quilting cotton by April Rhodes. I love this line and had previously made a Washi Dress with the same fabric in the green colorway, seen below.
 I was so happy with the feel of the fabric-it is soft and works beautifully for sewing garments. It is more like a lawn than quilting cotton. In fact, I bought another 3 yards of the green as a back up plan. I have done that only a few times but I was so happy with my Washi that I wanted to have extra to be able to make it again when I wear it out which I will since I wear it all the time. I often make little changes as I sew and then forget what I changed (I do the same thing when I cook) so I have learned to take pictures. I actually had to look at my picture below to remember that my bias strips were 1.5 inches.
 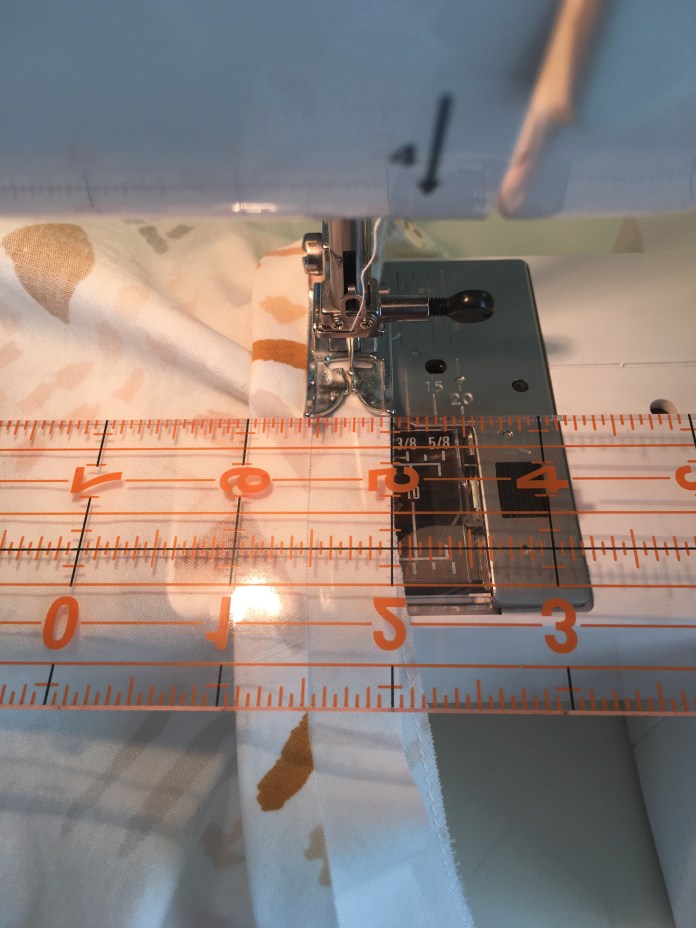 I don’t pin before I sew, I just hold the edges together and it generally works pretty well. Then I iron the stitching line and press the edge to the other side and use wonder clips to hold the bias binding in place before I sew the second seam which, as seen below in the finished version, is just to the inside of the ditch. It actually looks like it was sewn on the inside and flipped to the front using the topstitch method, the way Rae shows you here in this great tutorial. Fellow blogger Teri used this method beautifully when she made this great checked Gemma. I am not sure if I would find the topstitch method easier than what I currently do because I have never tried it but I am really happy with this sort of fake topstitch method I developed by mistake. I actually started doing it this way because I couldn’t sew as straight a seam in the ditch as I liked and had better results sewing just over a bit on the side of the seam. I am really happy with how it turns out when everything cooperates. The picture below was taken after several washings and I am still very happy with how this shirt turned out.
 I like using the wonder clips because I turn the blouse inside out and iron the binding to the wrong side and whereas I used to pin it in place on the wrong side and then flip it and have to move all the pins to the outside before sewing, the side doesn’t matter with the wonder clips and it saves a step. This is what the outside looks like before sewing the second seam.
 I also sewed a facing onto the hem of this Gemma using more of the binding tape. For some reason, I get a much neater hem doing this than just turning up the fabric. Although it might seem like more work, the seam line gives a visual place to turn up the edge, I iron like crazy and everything just turns out neater. I also like a slightly wider hem than the pattern calls for because I find it lies flatter and doesn’t curl up.
 I do a lot of ironing when I make the hems this way. I have described this in several previous blogs. I often use contrasting fabric for fun. You can see other examples here, here, here and here. Pictures of the hem facing process below.
 As those of you who follow me on instagram know, I have been in the midst of sewing quite a few Gemmas. One might even call it Gemma madness. I have another binding method that I like even better that I will post about soon (also non-traditional.) Stay tuned!

I love all those prints you have been using! So many tops! You definitely like that pattern.
LikeLiked by 1 person
Thank you Linda! It is a great pattern. A quick and fun sew!
LikeLike
Pingback: Gemma Tanks using Upcycled Plaid Shirts | nursebeansews
Pingback: Loominous Gemma | nursebeansews
Pingback: How to sew a Lined Gemma | nursebeansews
Pingback: Nursebeansews a lot: 2016 year-end wrap up | nursebeansews
Pingback: Snowversary 2017 | nursebeansews
Pingback: Tucks and Dots: my take on the Stylish Dress Book Dress E | nursebeansews
Pingback: Ojos Flame Challis York Pinafore | nursebeansews