
2025 was a dumpster fire and also it was filled with beauty and grace and, surprisingly, sewing. I have written in my last few posts about some of the garments I sewed this year. I ended the year with two projects that had been weighing on me, and I am so relieved to have finished: a Looper quilt for my youngest daughter and a Star quilt for my youngest grandson. The Star quilt was conceived when he was born but a broken wrist and graduate school and life intervened, but he will get it next week when I visit and he is still only 4 and I am sure he will love it.

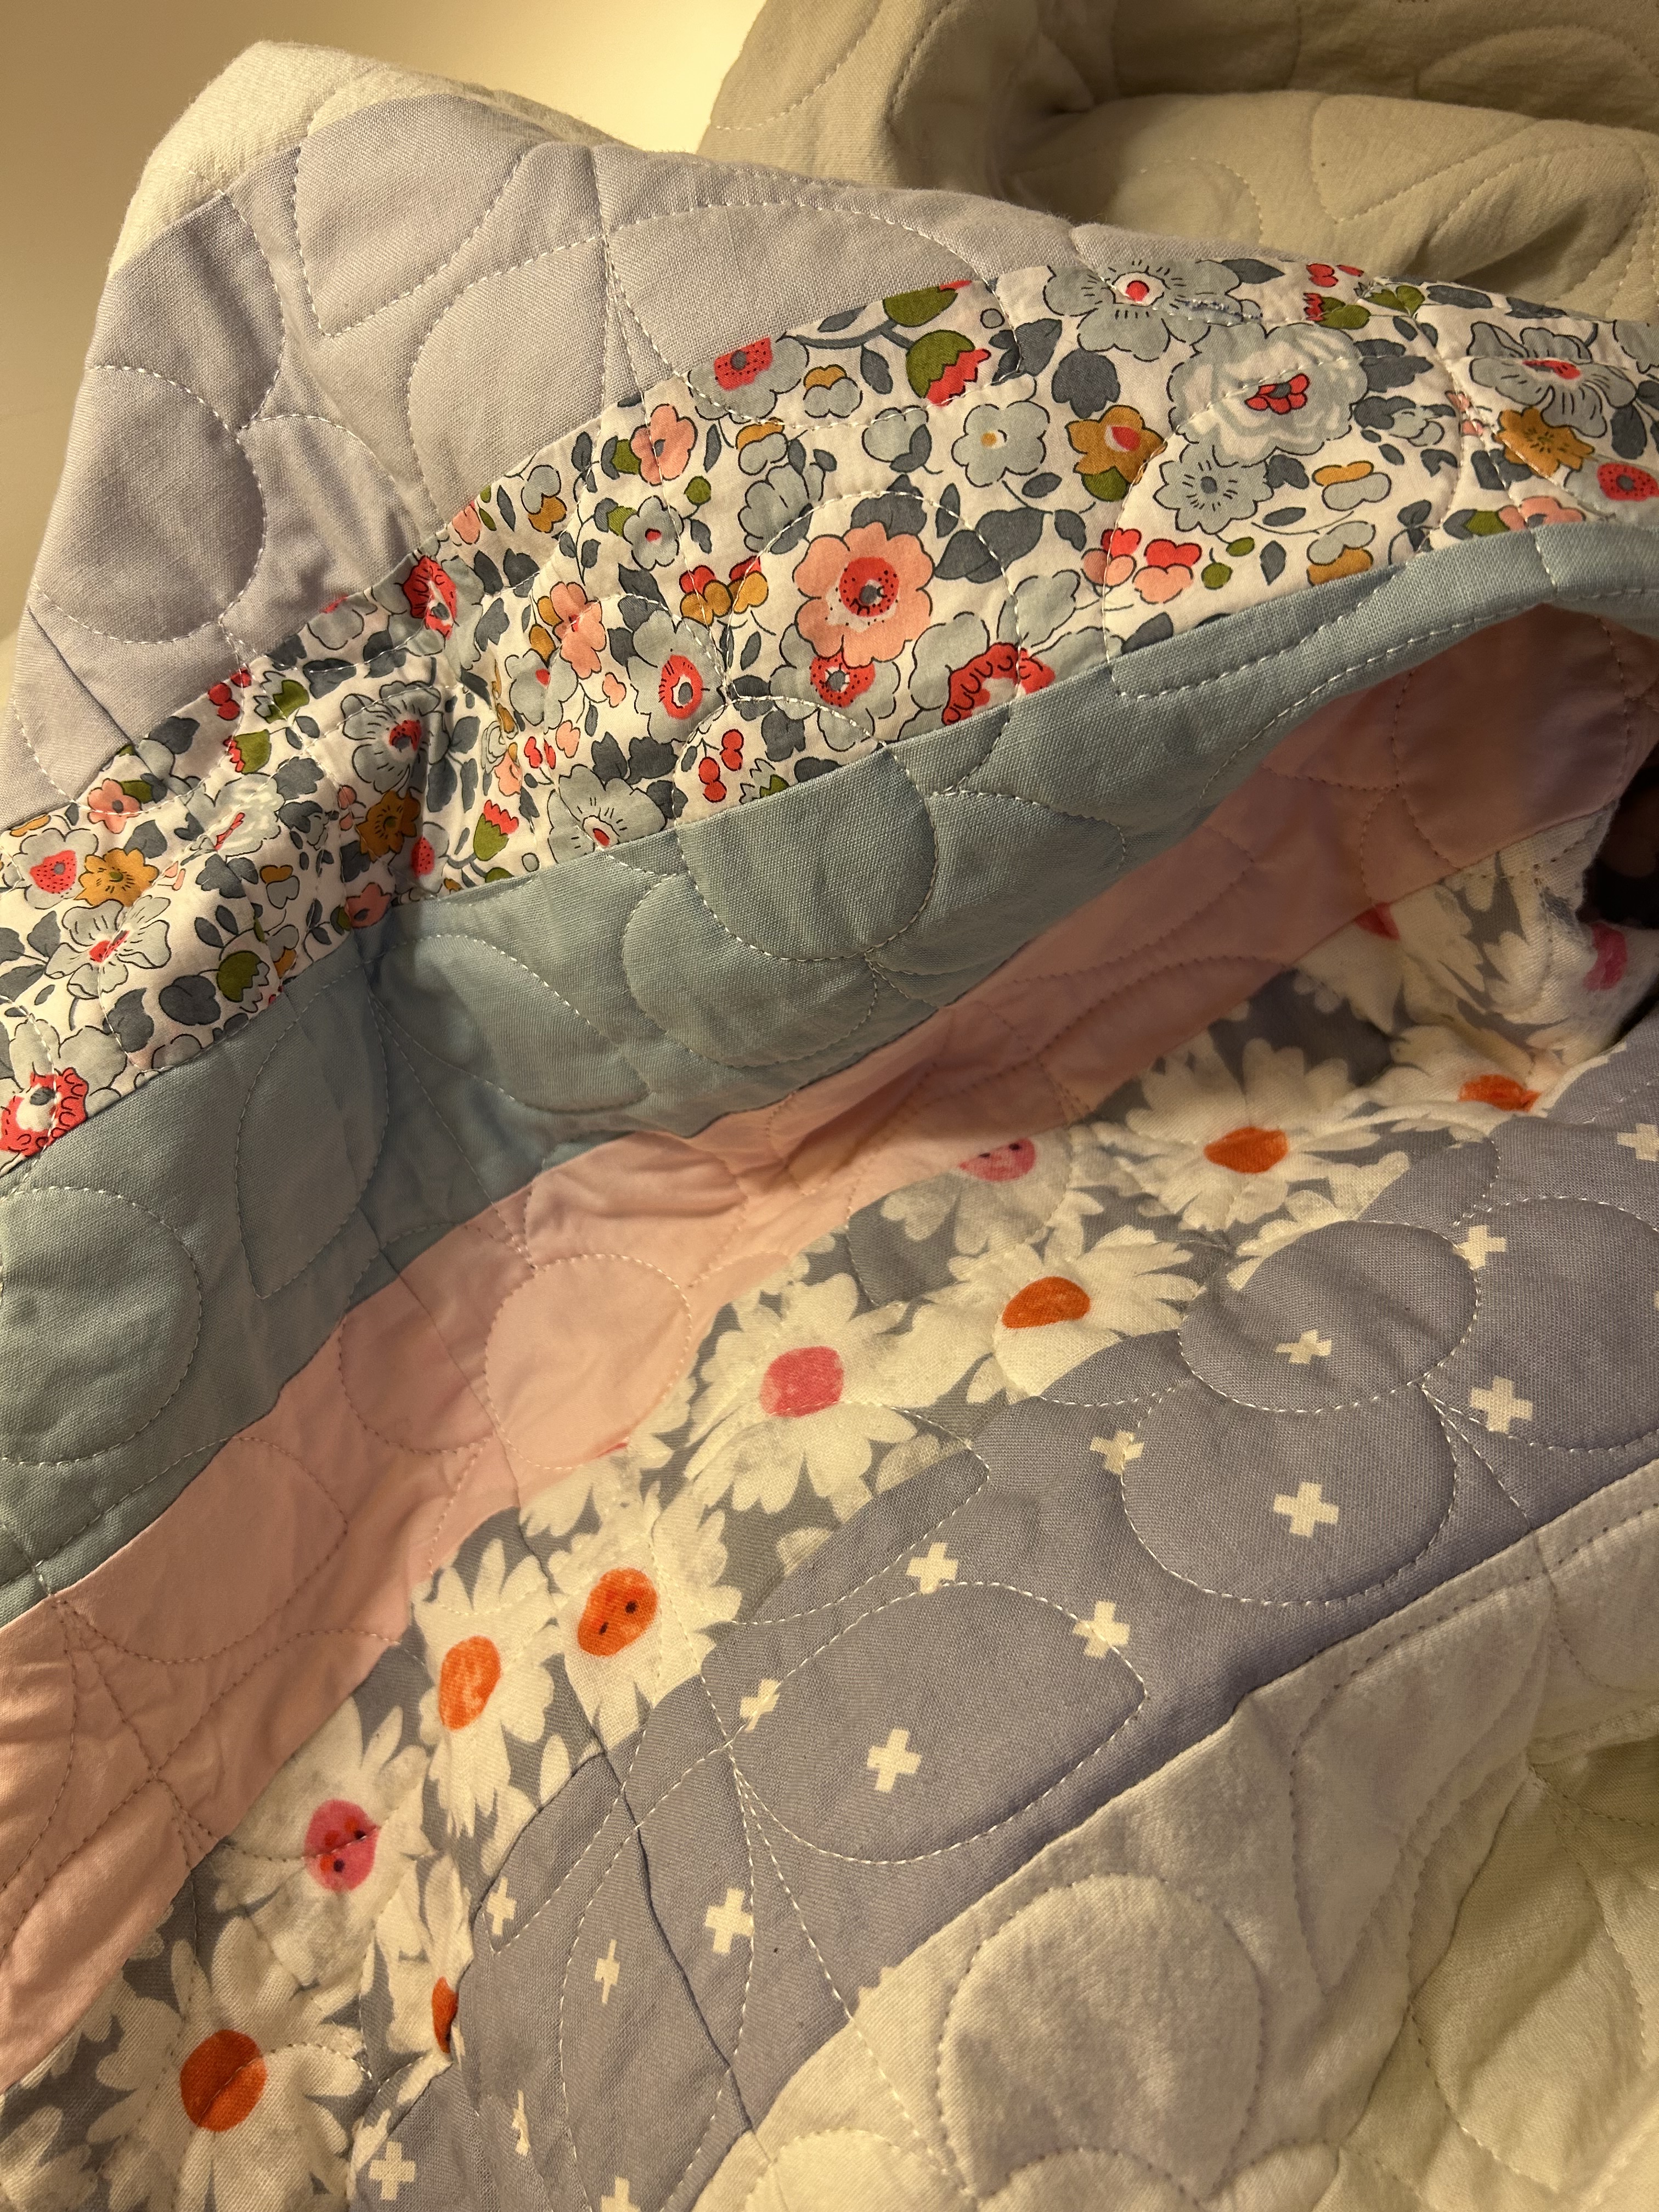
I had wanted to sew a quilt for my youngest child for a long time but couldn’t think of the right pattern for her. The quilt I ended up on was a Looper Quilt sewn with fabric from my stash. It was fun figuring out which fabrics worked together. I backed with what I had left of the OG Cotton and Steel pony fabric, a favorite. I forgot how soft and lovely that substrate is. Between the peppered cotton that I used for the front background and the Cotton and Steel on the back, it washed up very lovely and soft.
All told, I sewed 14 garments (not including underwear) and 4 quilts in 2025 which is surprising given my part time but really almost full-time grad school and my more than full-time work. This is what worked for me:
- I made several patterns more than once and, in some cases, batch sewed them (such as my husband’s T-shirts)
- Other than the baby quilt, I sent all my quilts to Mindy at Wild Phil Quilting. She is amazing and that has made all the difference
- I sewed in chunks, particularly with the scrap quilts. I had the pieces all cut out and I sewed a strip when I had 30 minutes.
- When I had time, I power-sewed, such as in May when I was off from school and yesterday when I started at 8AM and sewed straight through, no breaks, until 9 PM to get D’s Star quilt done before my trip this week. Sometimes, that is what it takes.
- I sewed mostly uncomplicated garment patters such as the Flaneur Pants, the Alessie dress and the Chloe Jeans.
- I started using the Thread Loop app which has helped me focus on finishing WIPs. Can’t say enough good things about it!

On to 2026! I am hoping to sew a Pivot Quilt for my oldest, who will be turning 40! And more garments for me. I am loving the Closet Core Crew subscription and am looking forward to sewing up more of the patterns. They are all bangers.


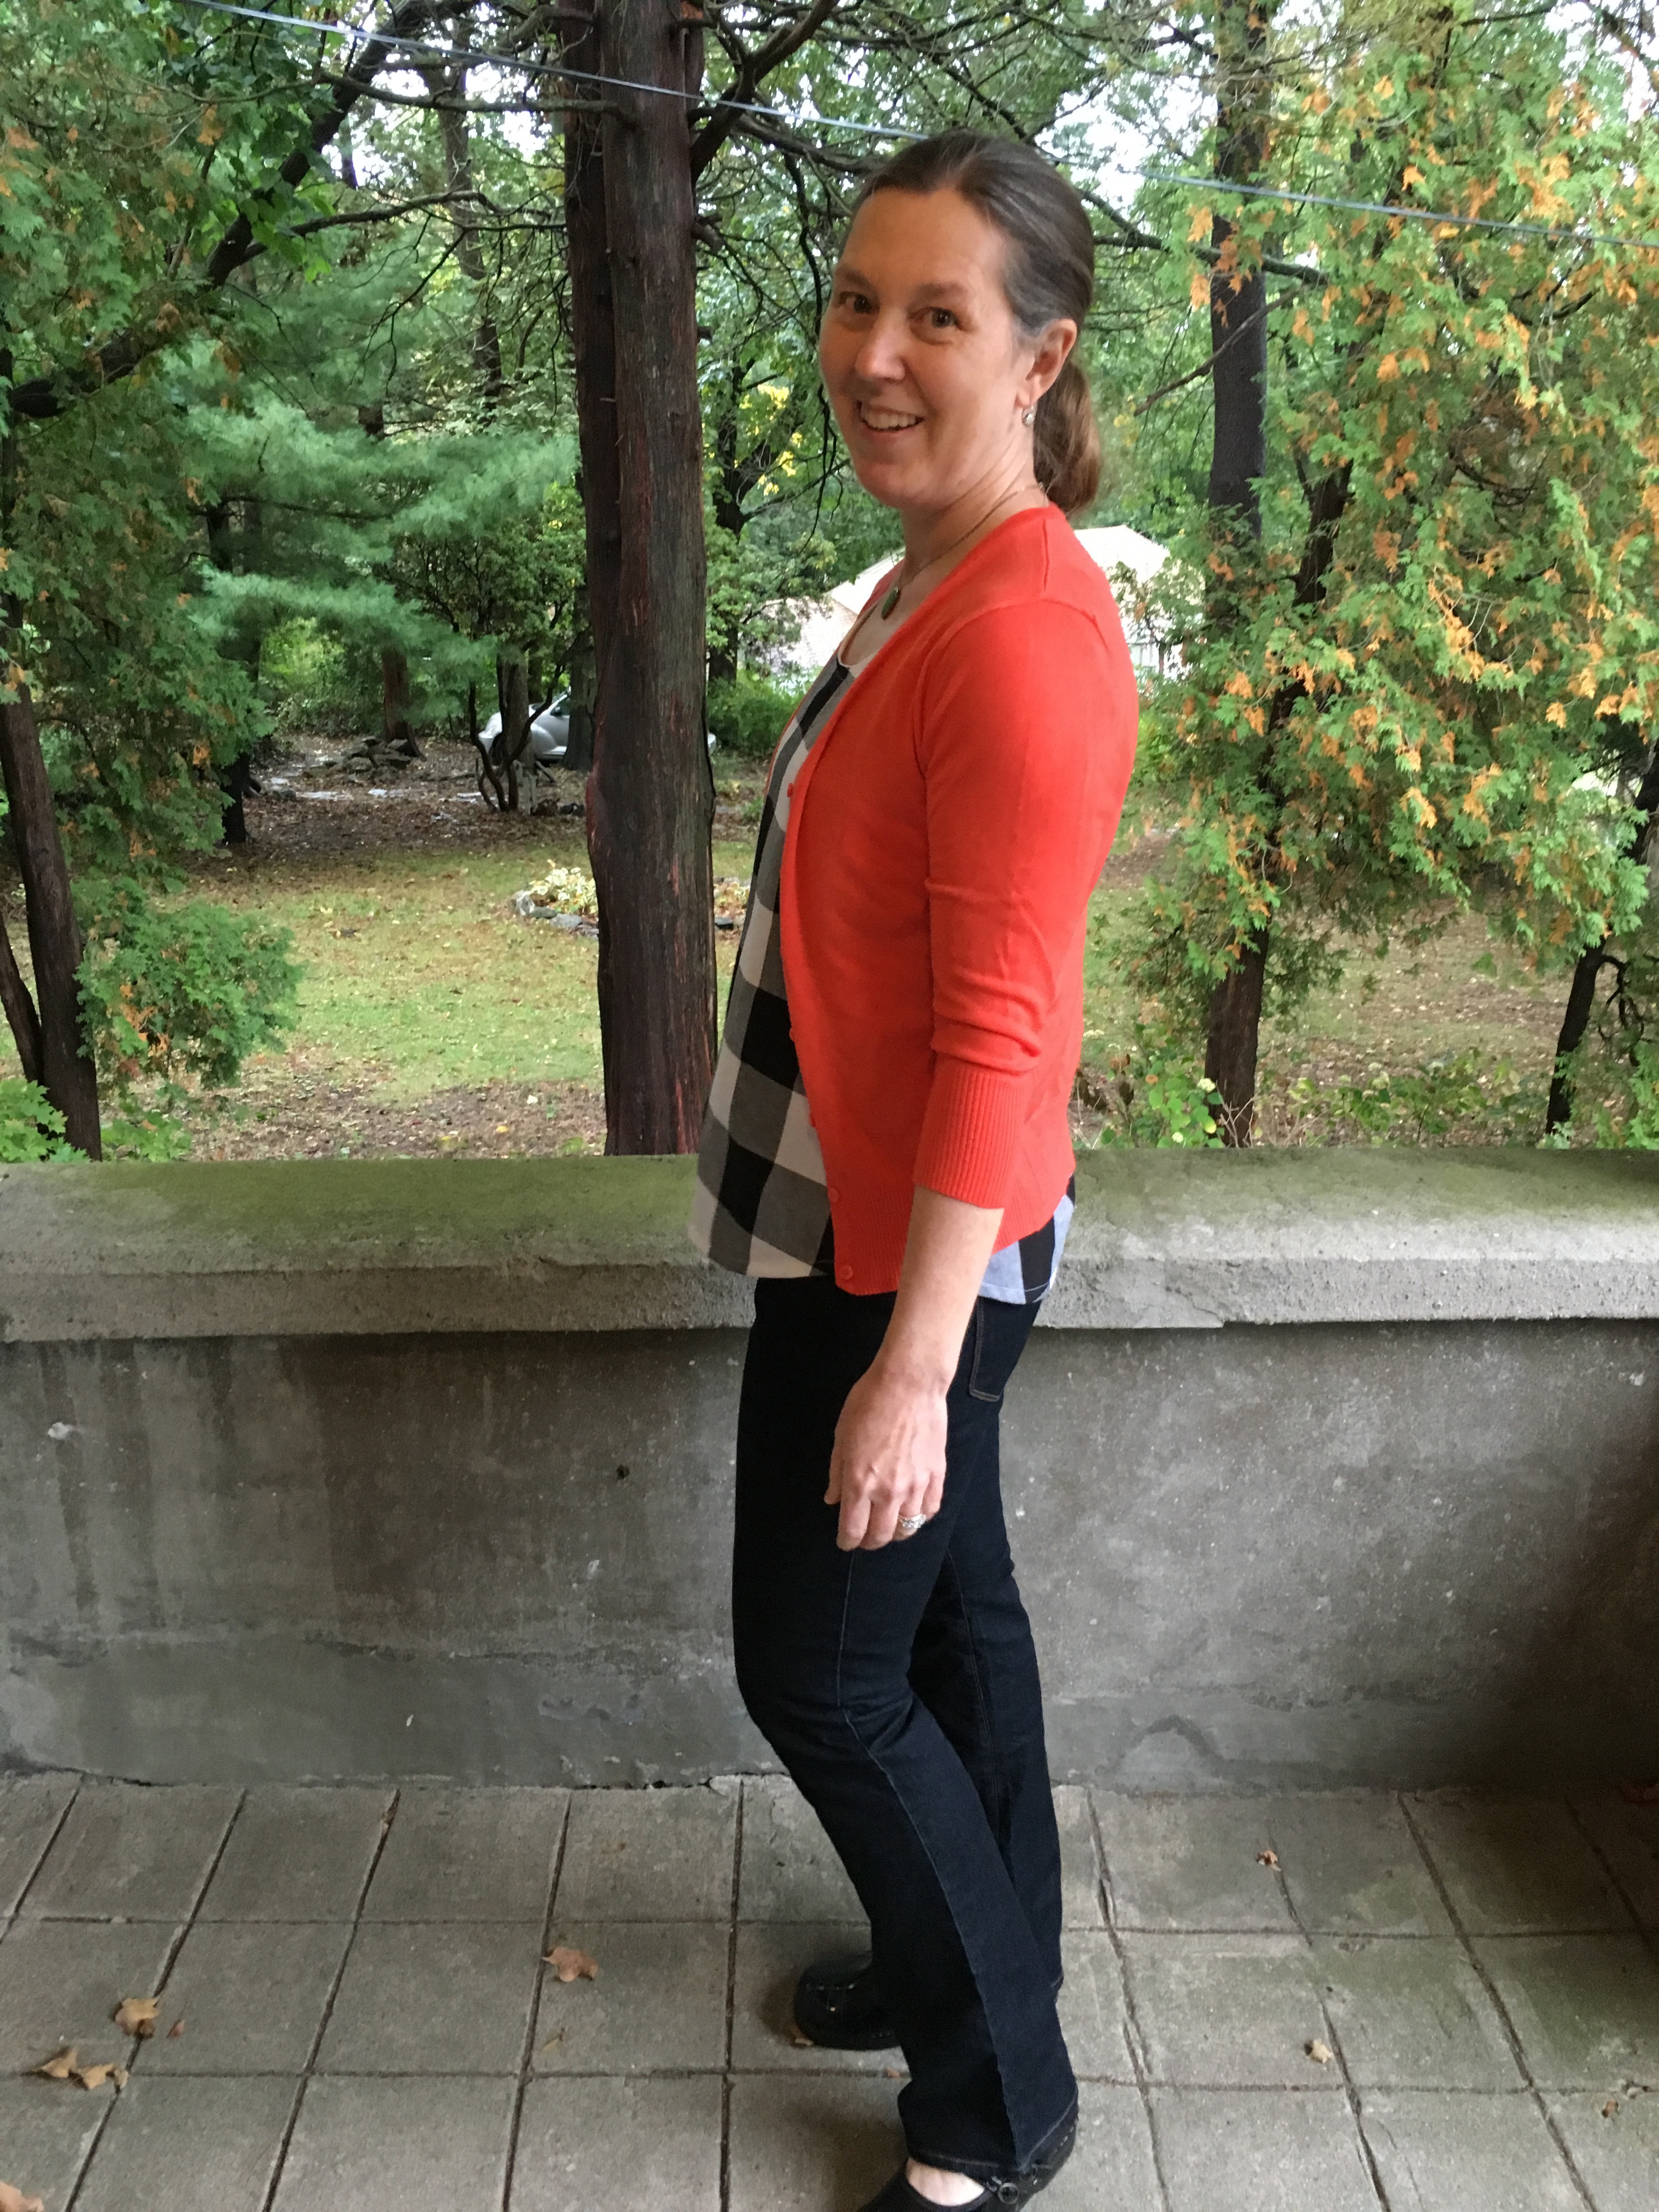
 I wore the Helen’s Closet
 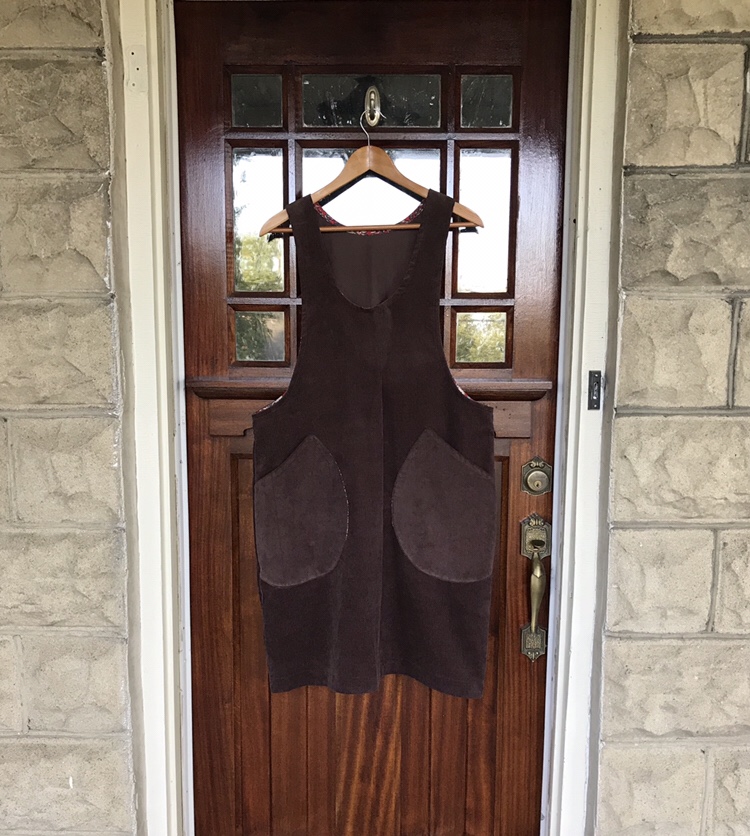 I had some beautiful paisley rayon challis left over from making
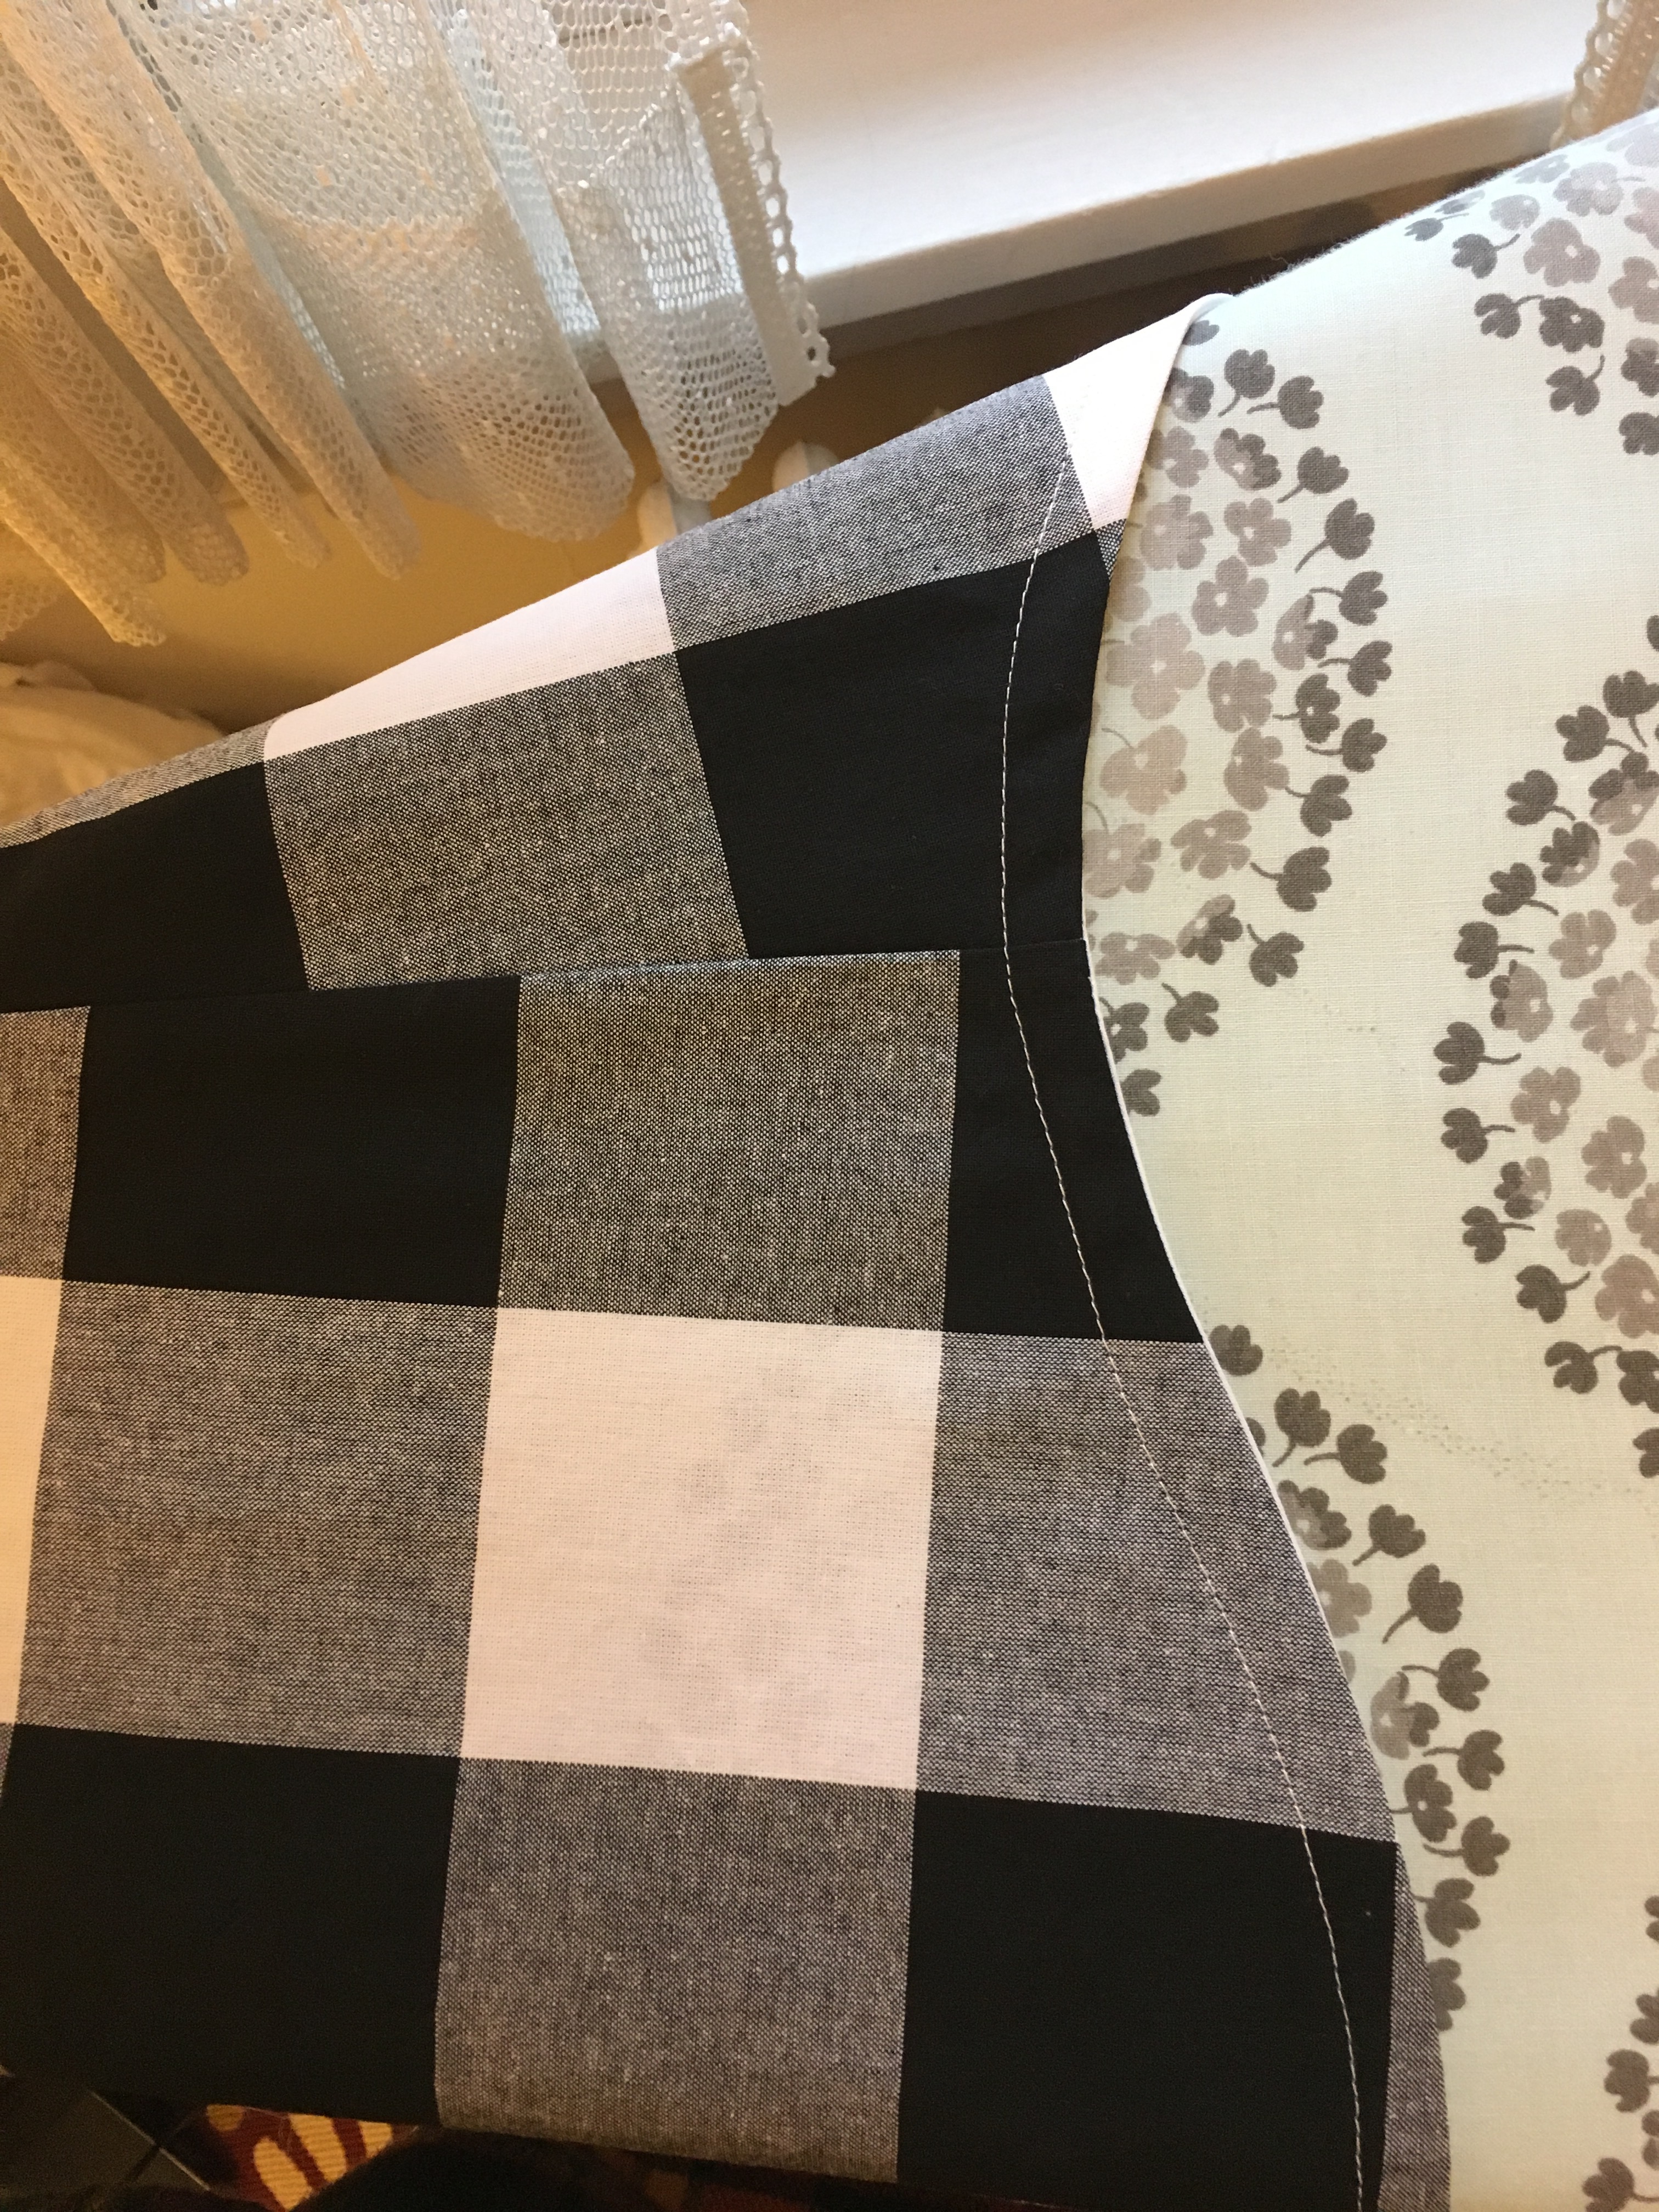
  Bias Binding Close-up
 I love the little pop of patterned fabric
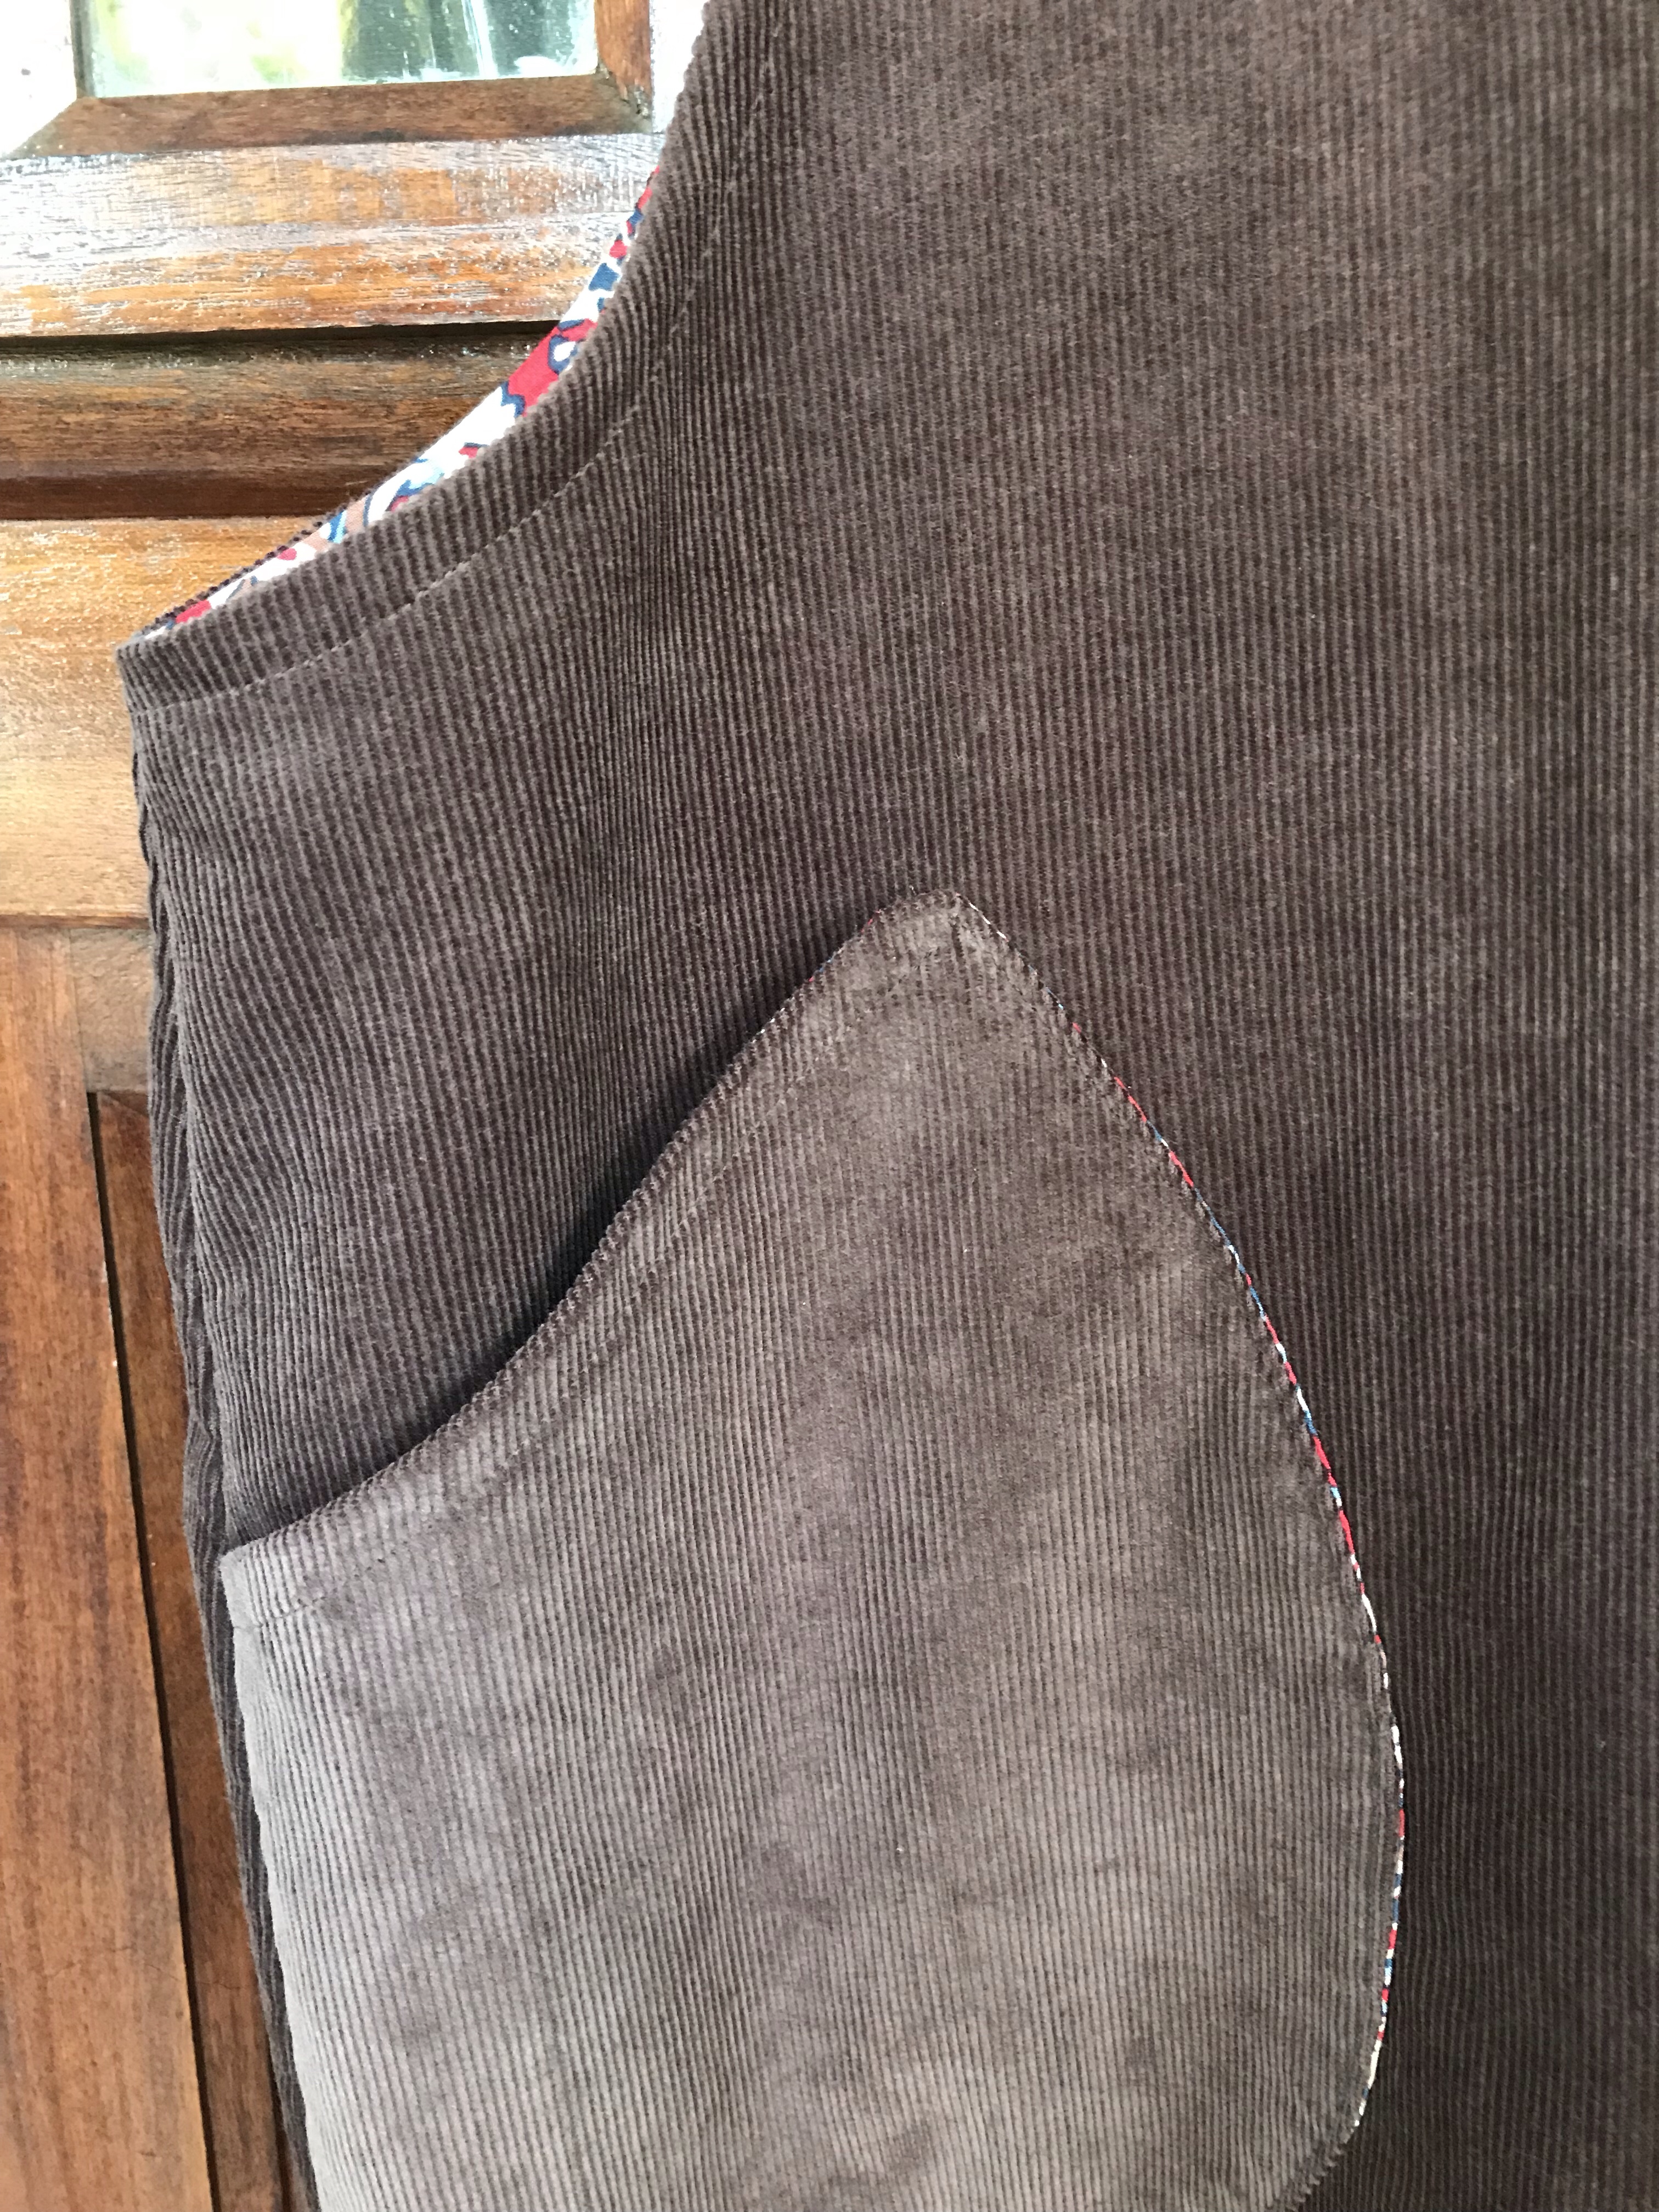 I like to line the pockets and this paisley lining is really lovely, almost feels like silk.
 It was a bit slippery going with the bias binding but worth it. I made a size large as I have been doing but probably could have taken it in a bit because the fabric doesn’t drape like linen. I plan to make several
 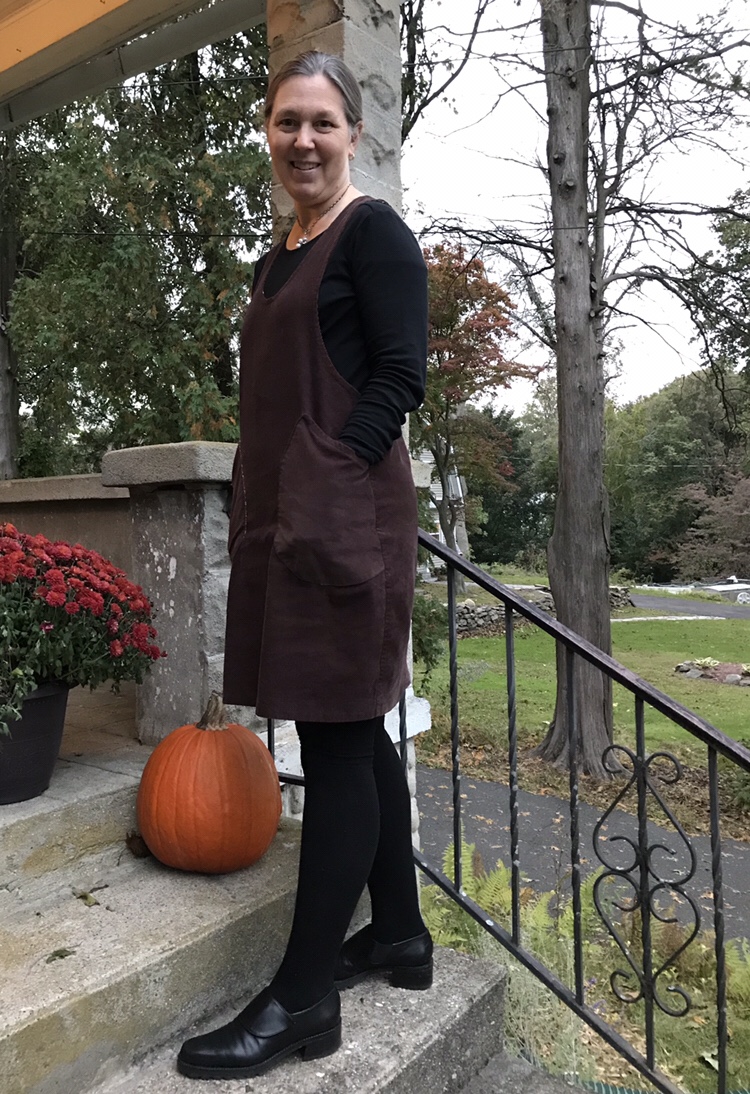 This fall I am busy as I always am in the fall, teaching new nursing students, so I appreciate my go-to patterns that enable me to still make a wearable garment in a day. This was a Sunday project. Probably more versions to come, likely a black wide wale version.
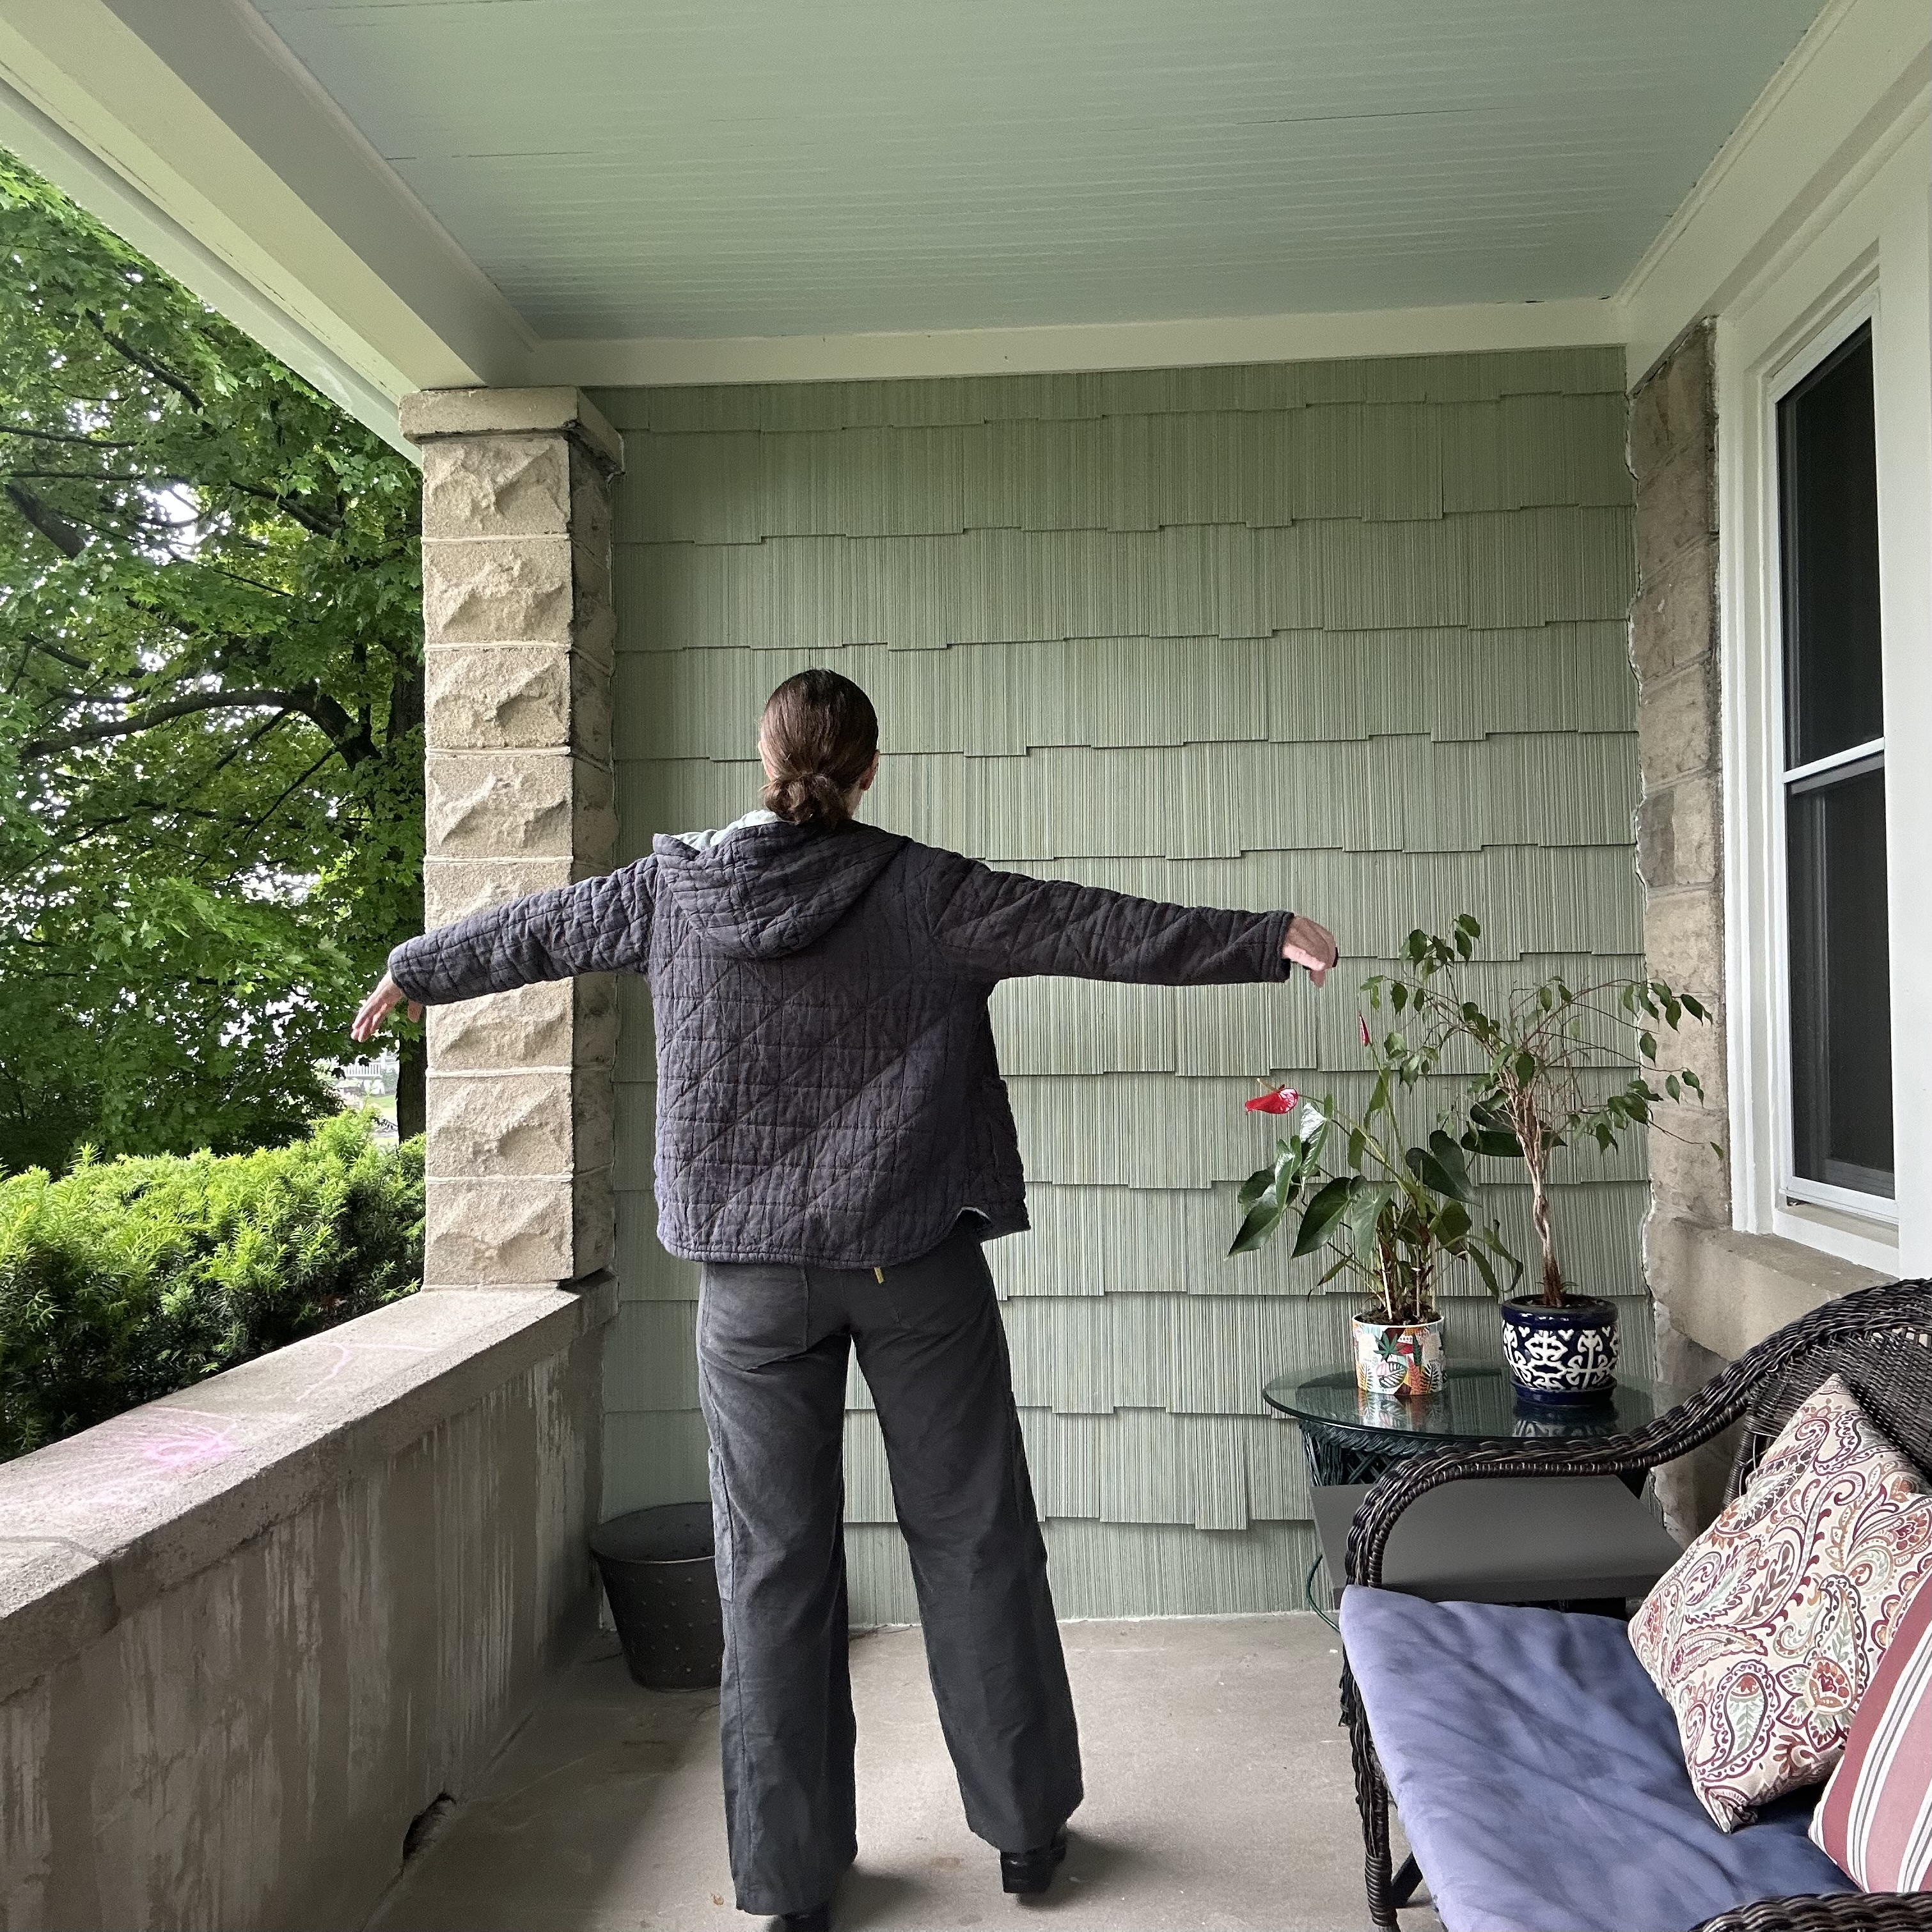
 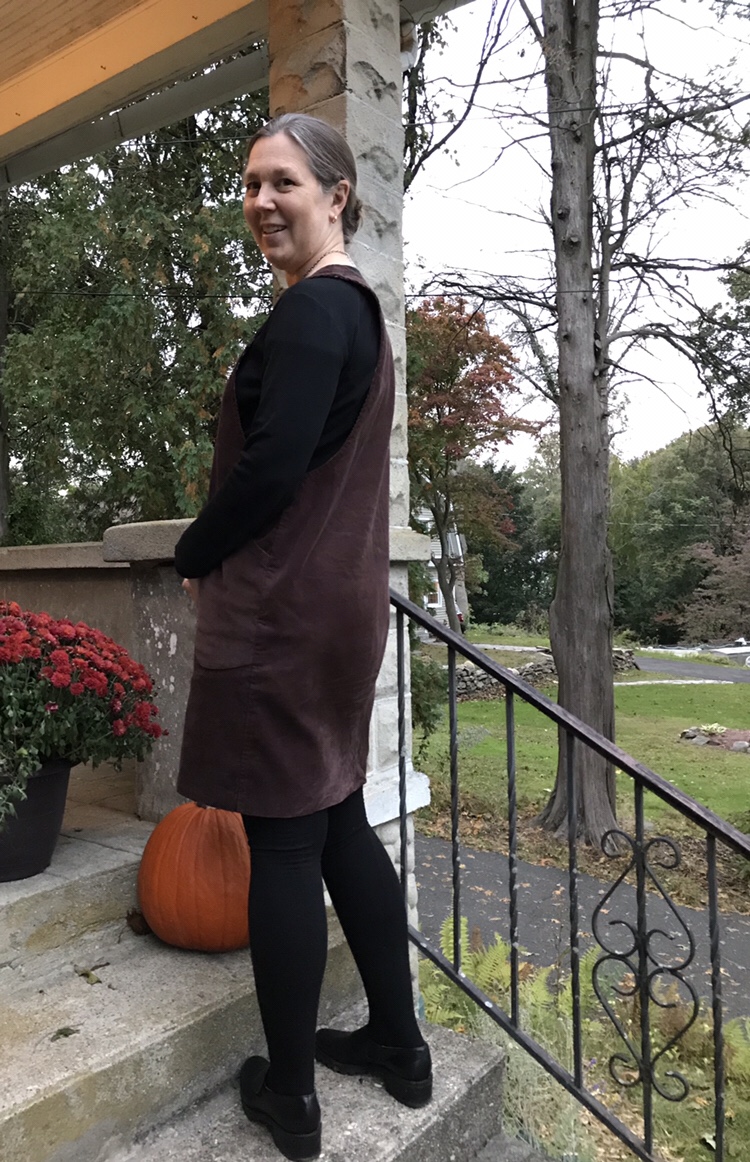 I have to say that my Tamarack Jacket goes with this outfit as it goes with just about everything. I am loving wearing it.
 My pockets were not as neat as I would have liked on the inside and so I cut a large square of the lining fabric and hand-stitched it over each pocket on the inside of the jacket.
 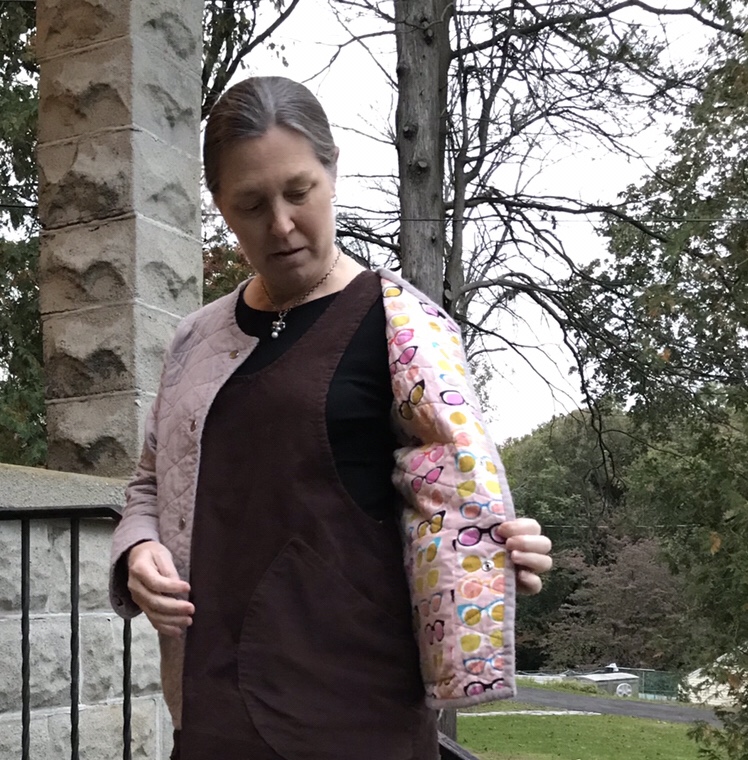 I love the neat look and I think it will be more durable and it doesn’t interfere at all with putting anything in the pocket. I also like that I was able to include some of the selvage with the designers’ names.
  I am slowly building a fall wardrobe of basics that work together. The
 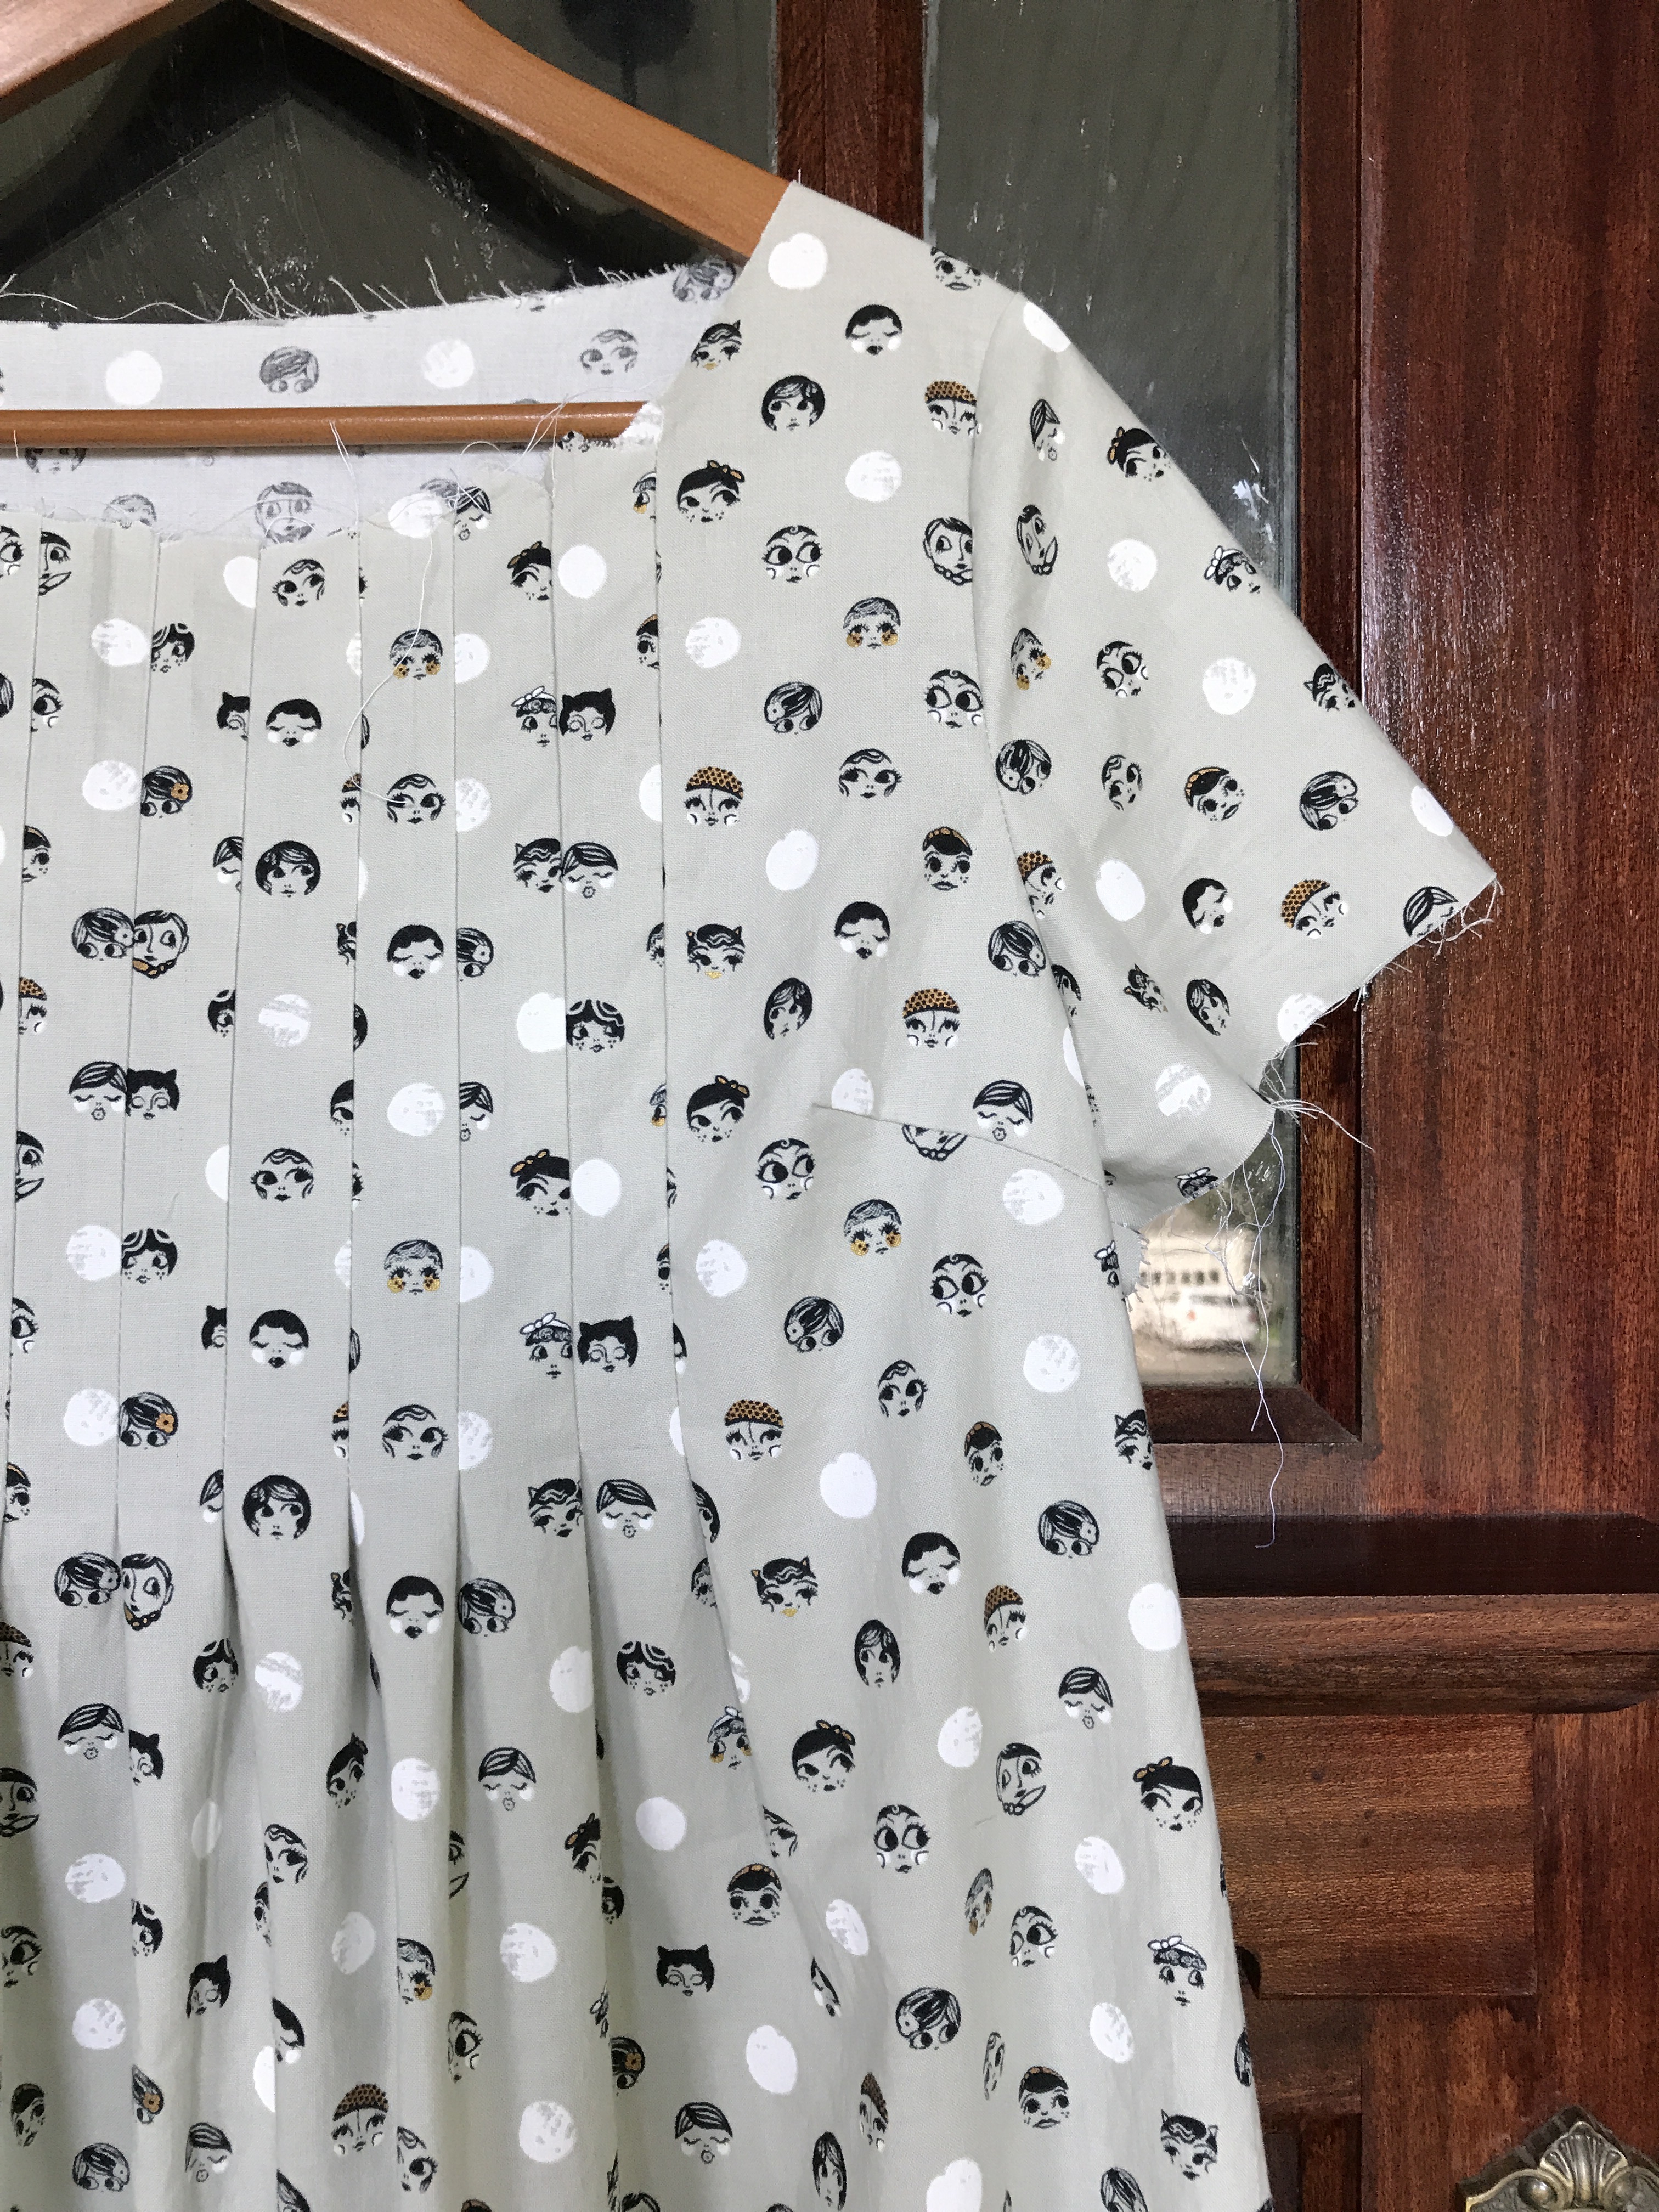 These dotty little ladies are one of my favorite fabric designs from Cotton and Steel although there are so many wonderful designs that it is hard to choose. I bought several yards of this fabric knowing that I would definitely make a
  Hem facing:
 Sleeve Facing:
 and close up of finished sleeves:
  Finished Dress on Place of Honor (front door)-note the fullness:
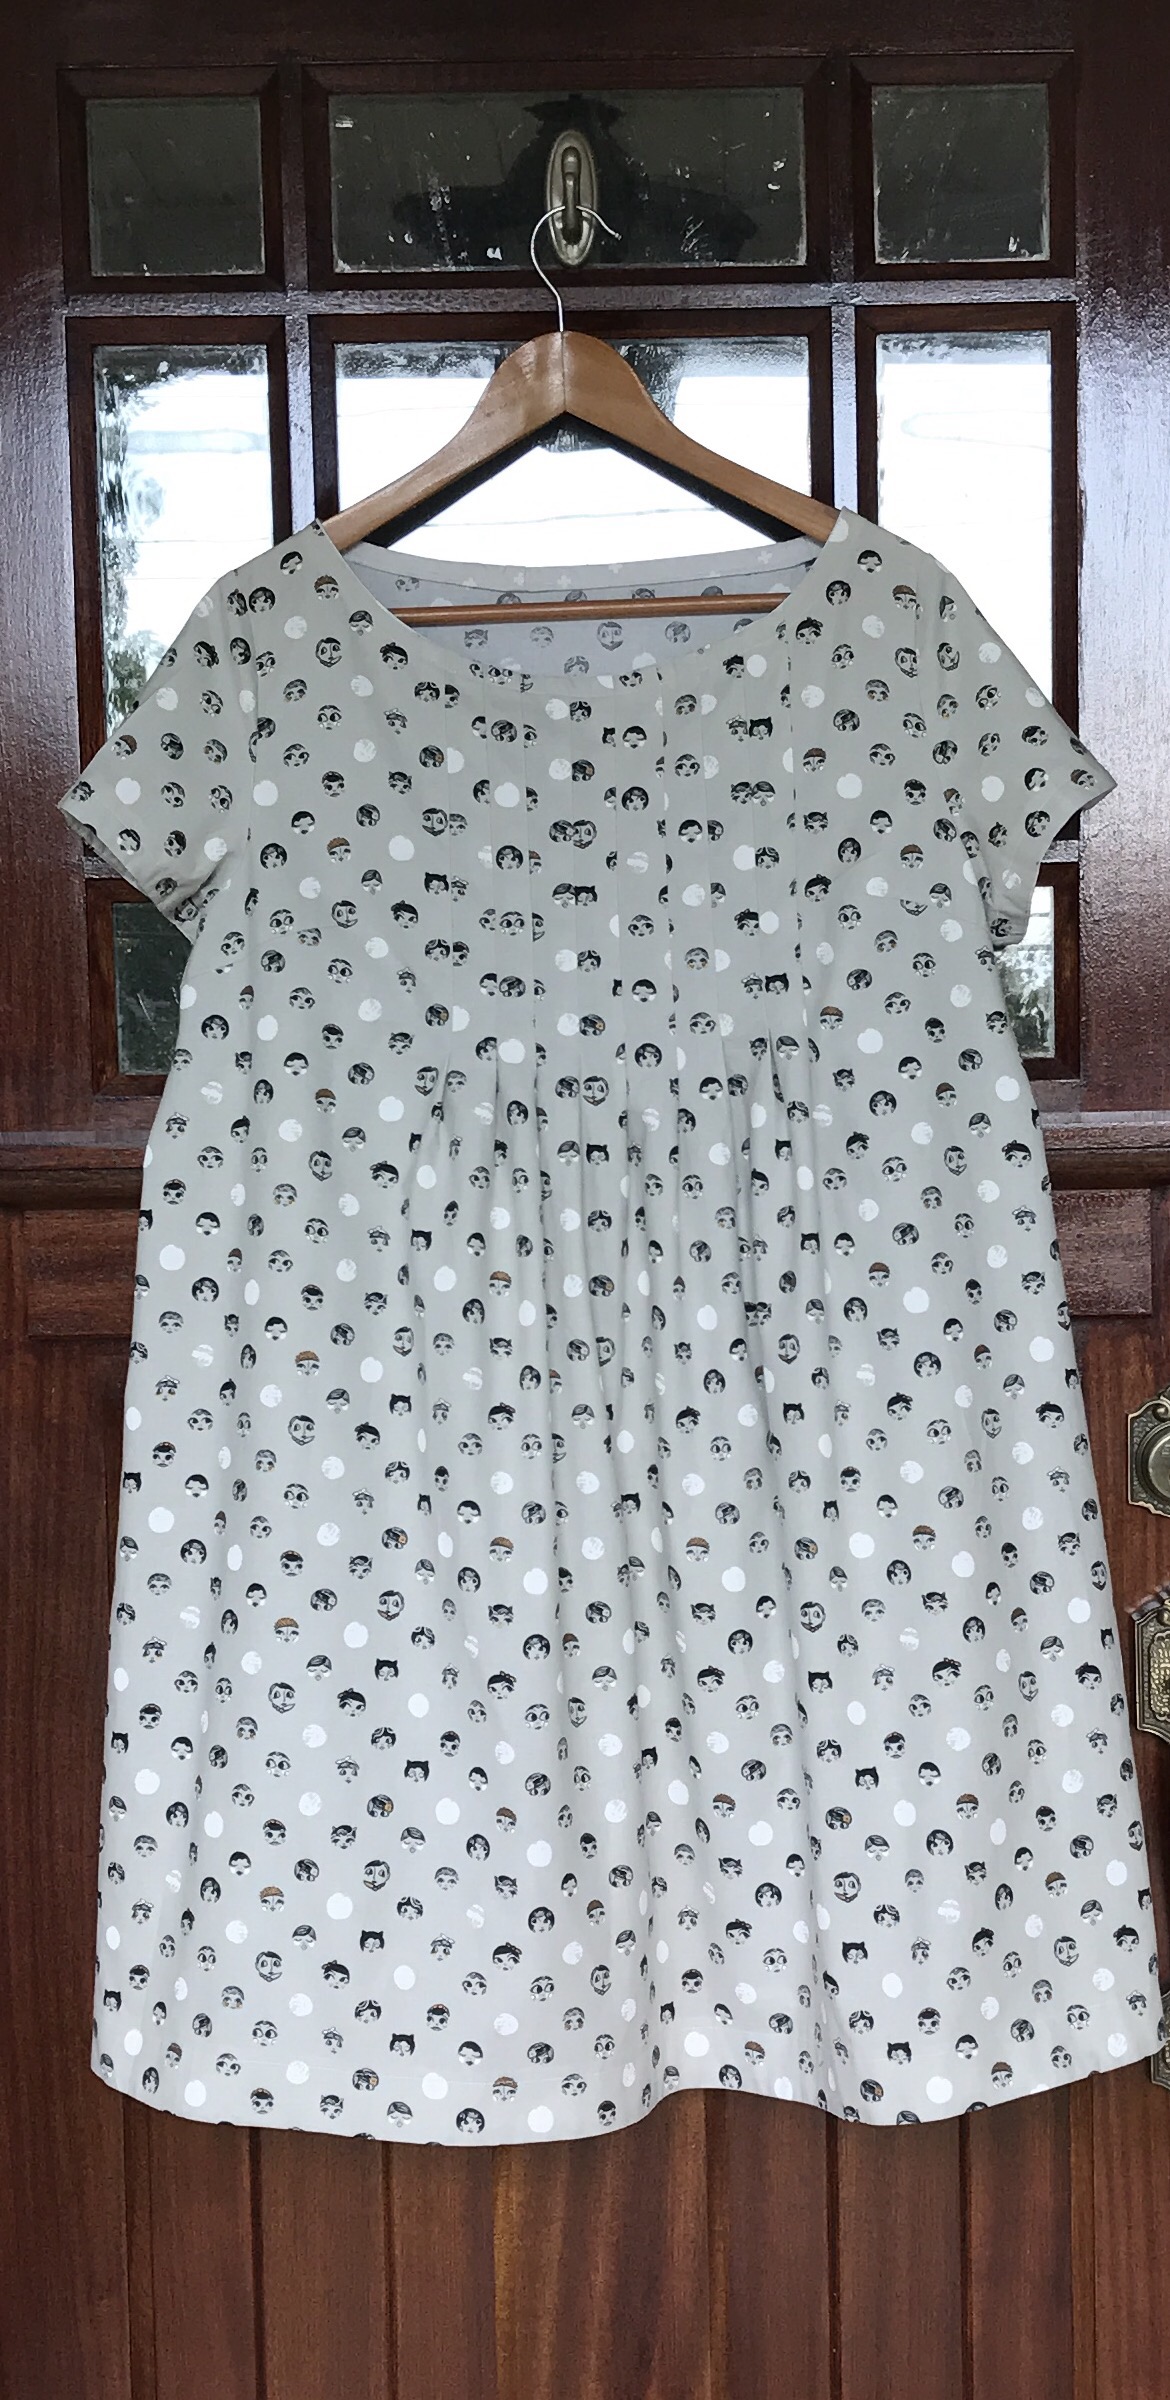 Back of Dress (full, very full):
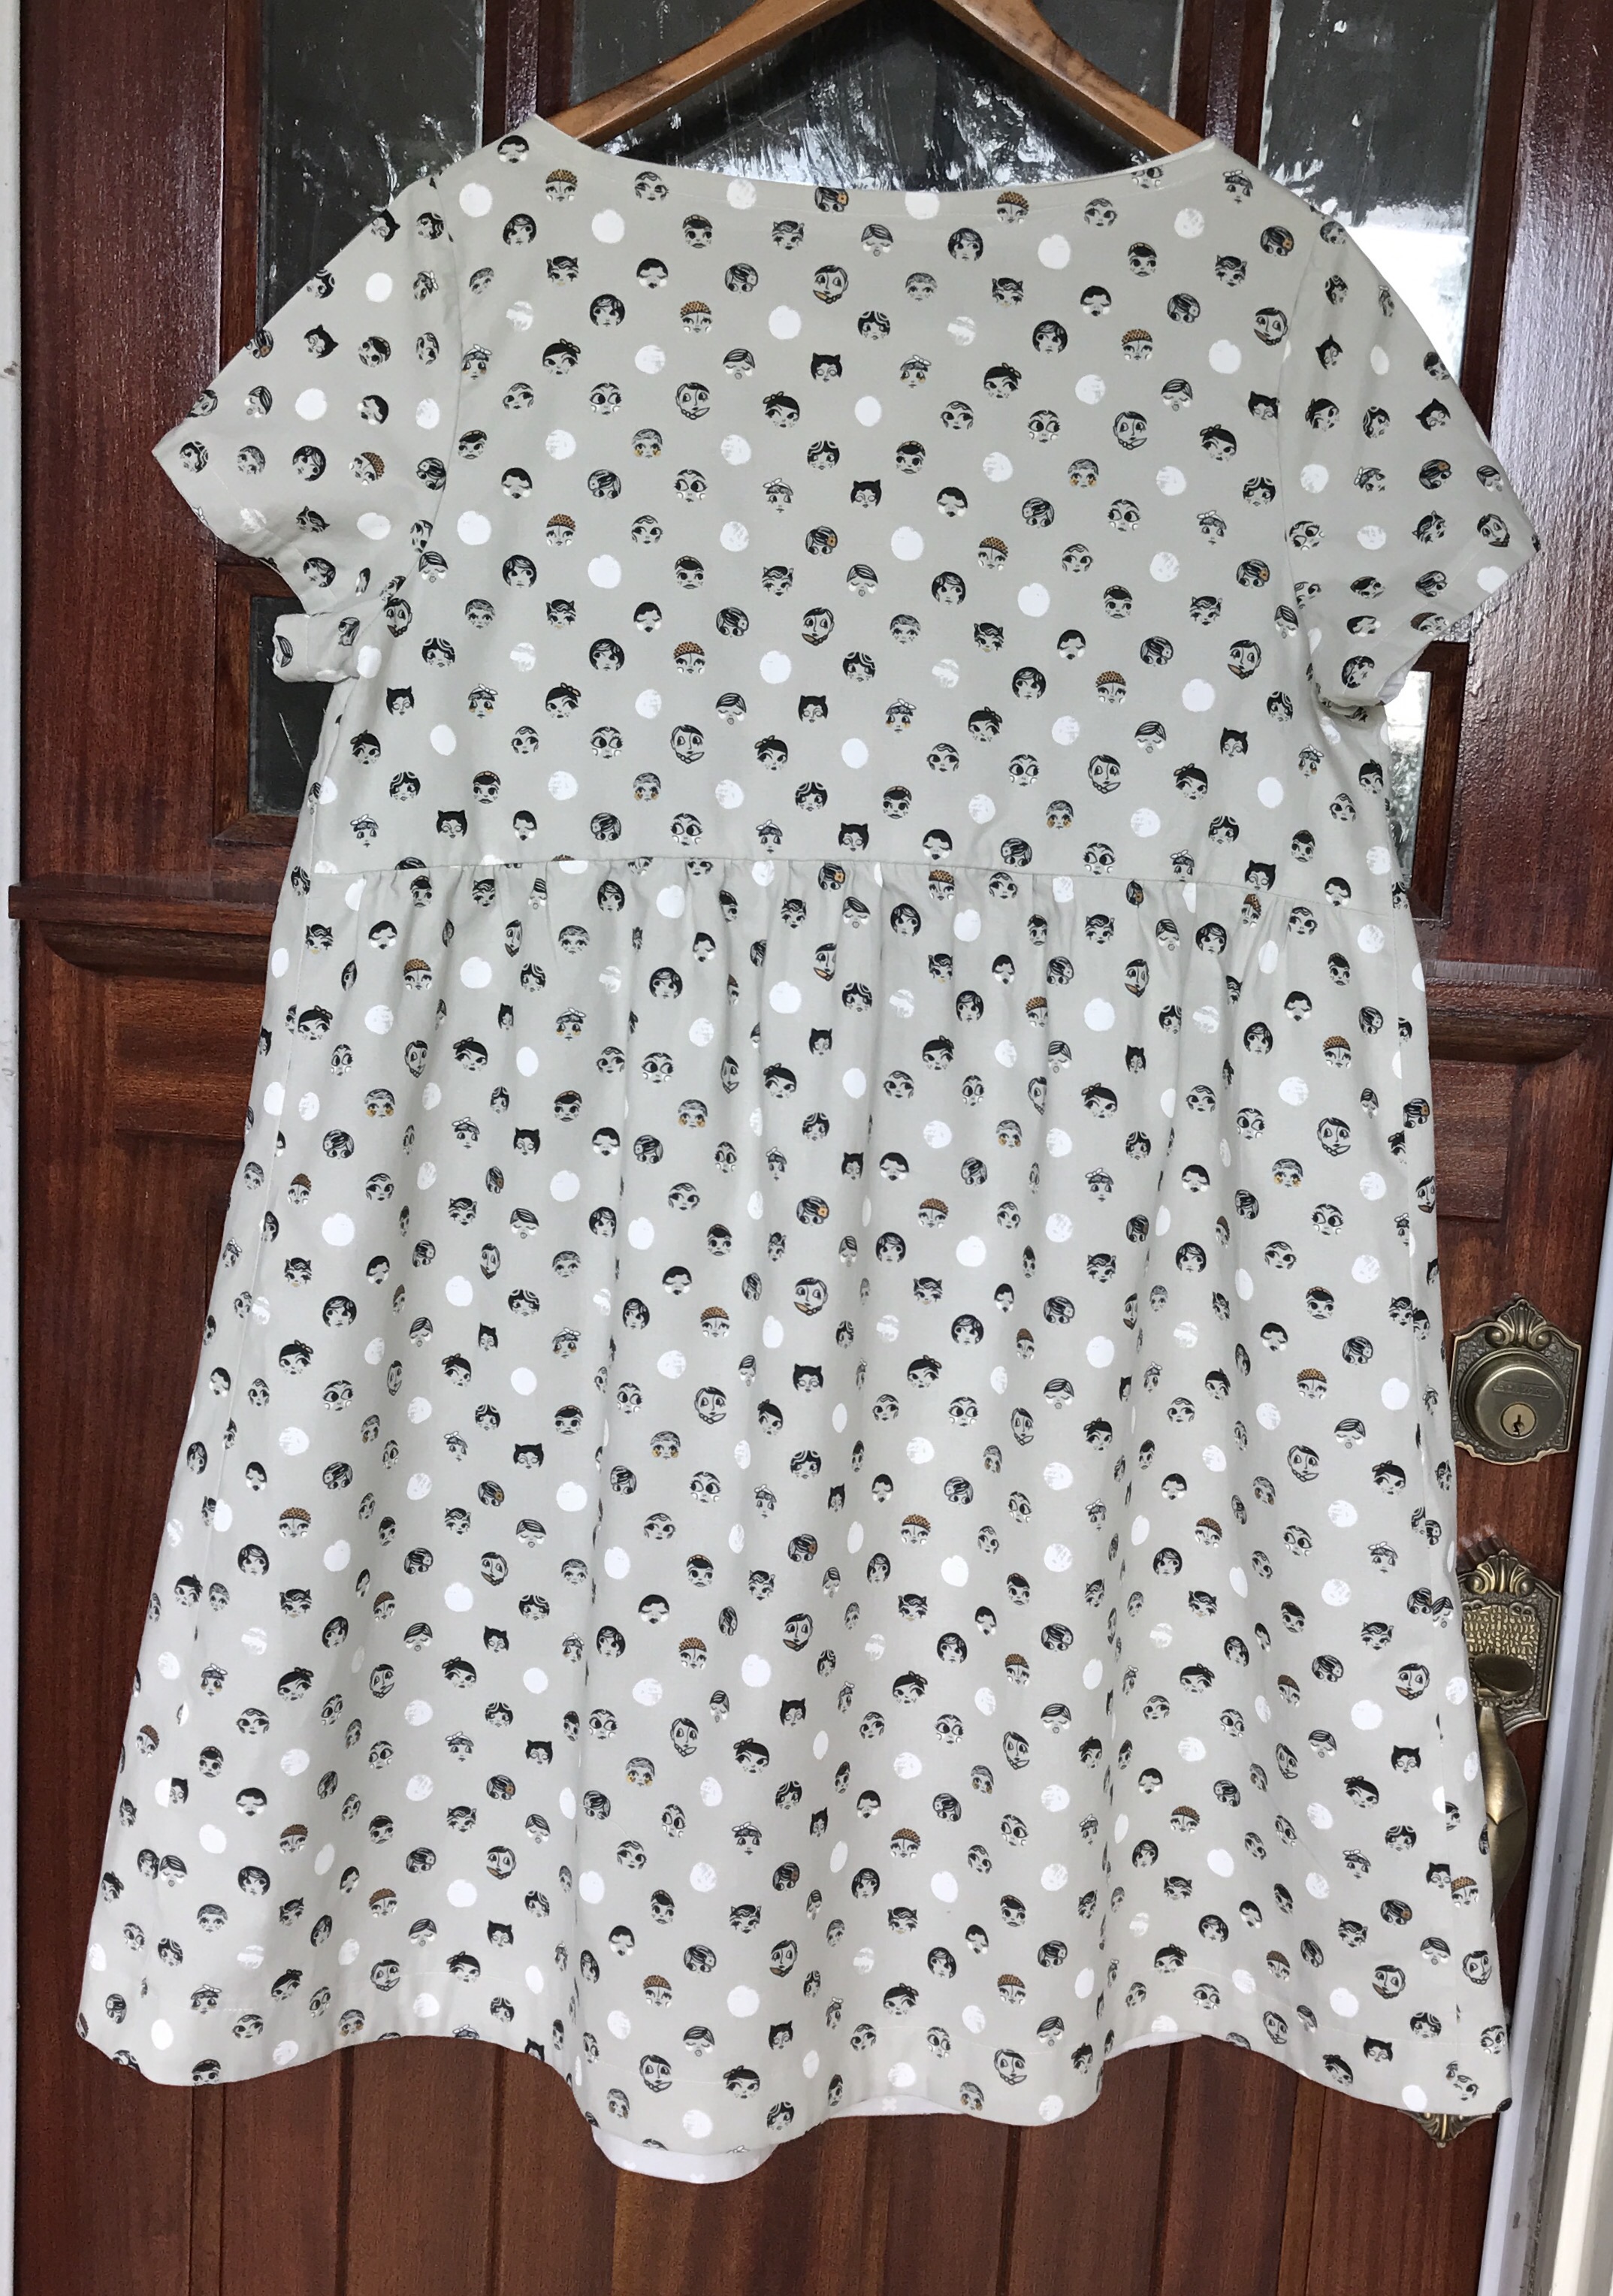 and as worn. Front:
  Side:
Side: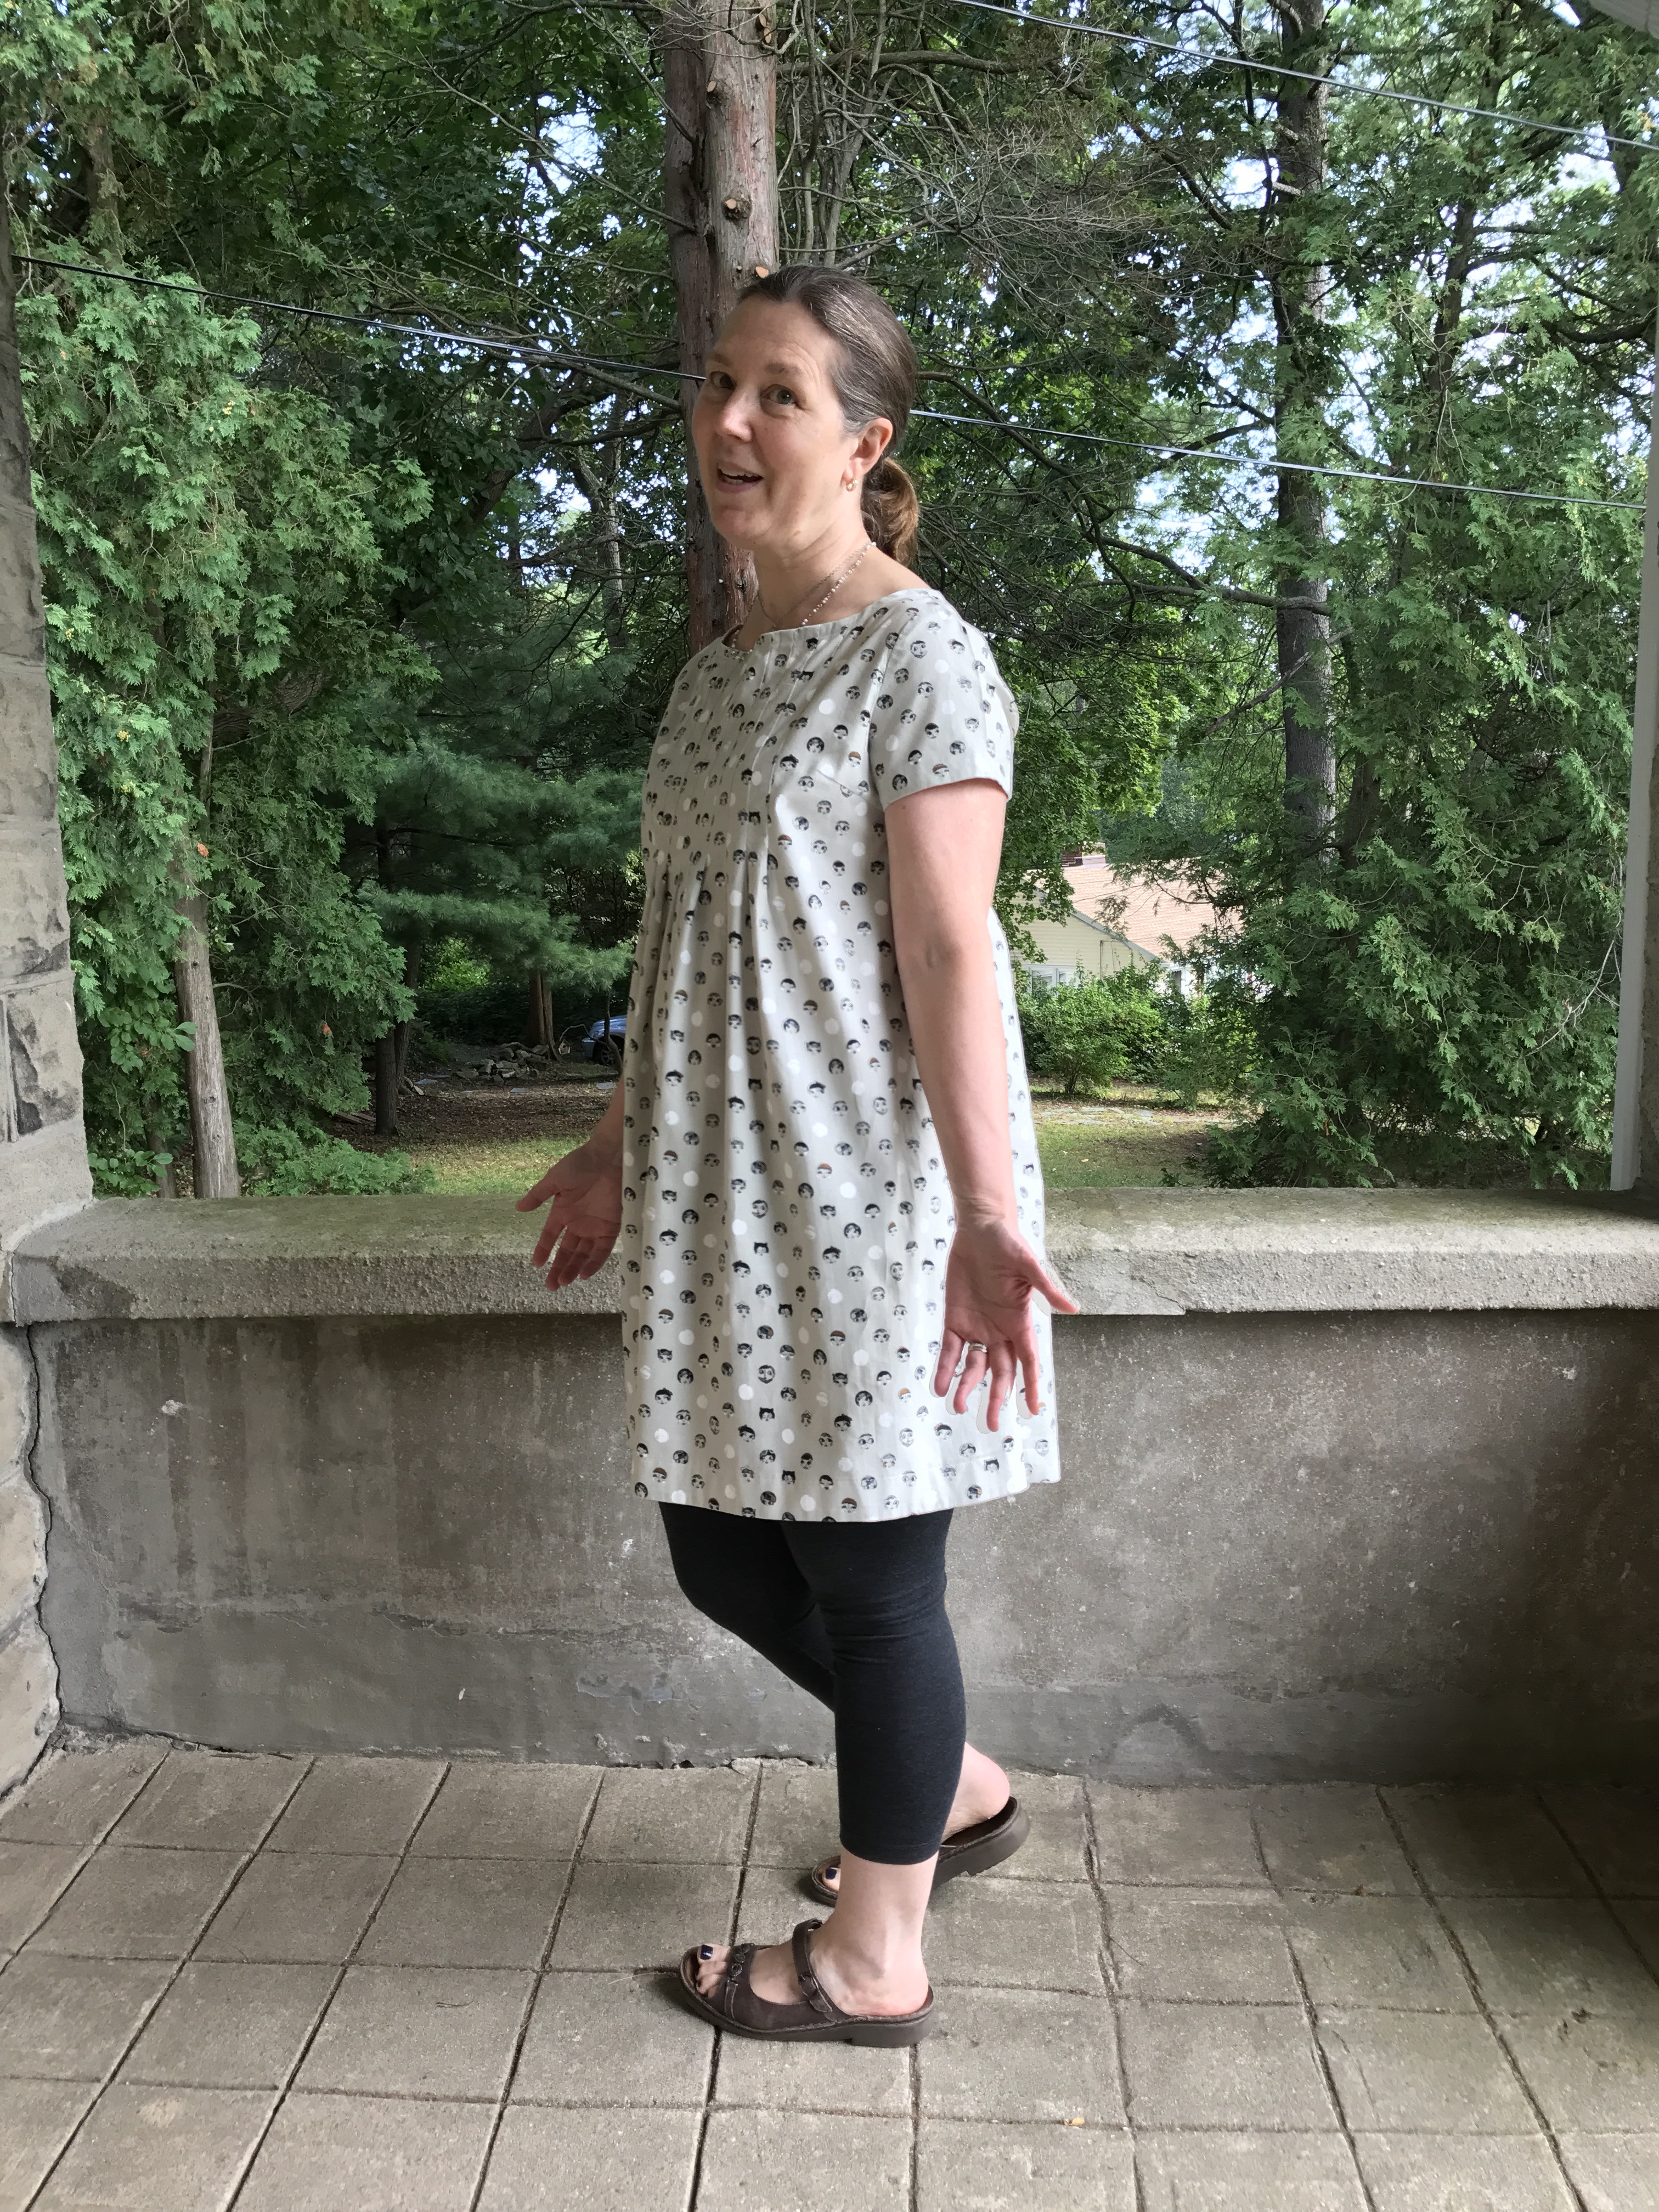 and back:
 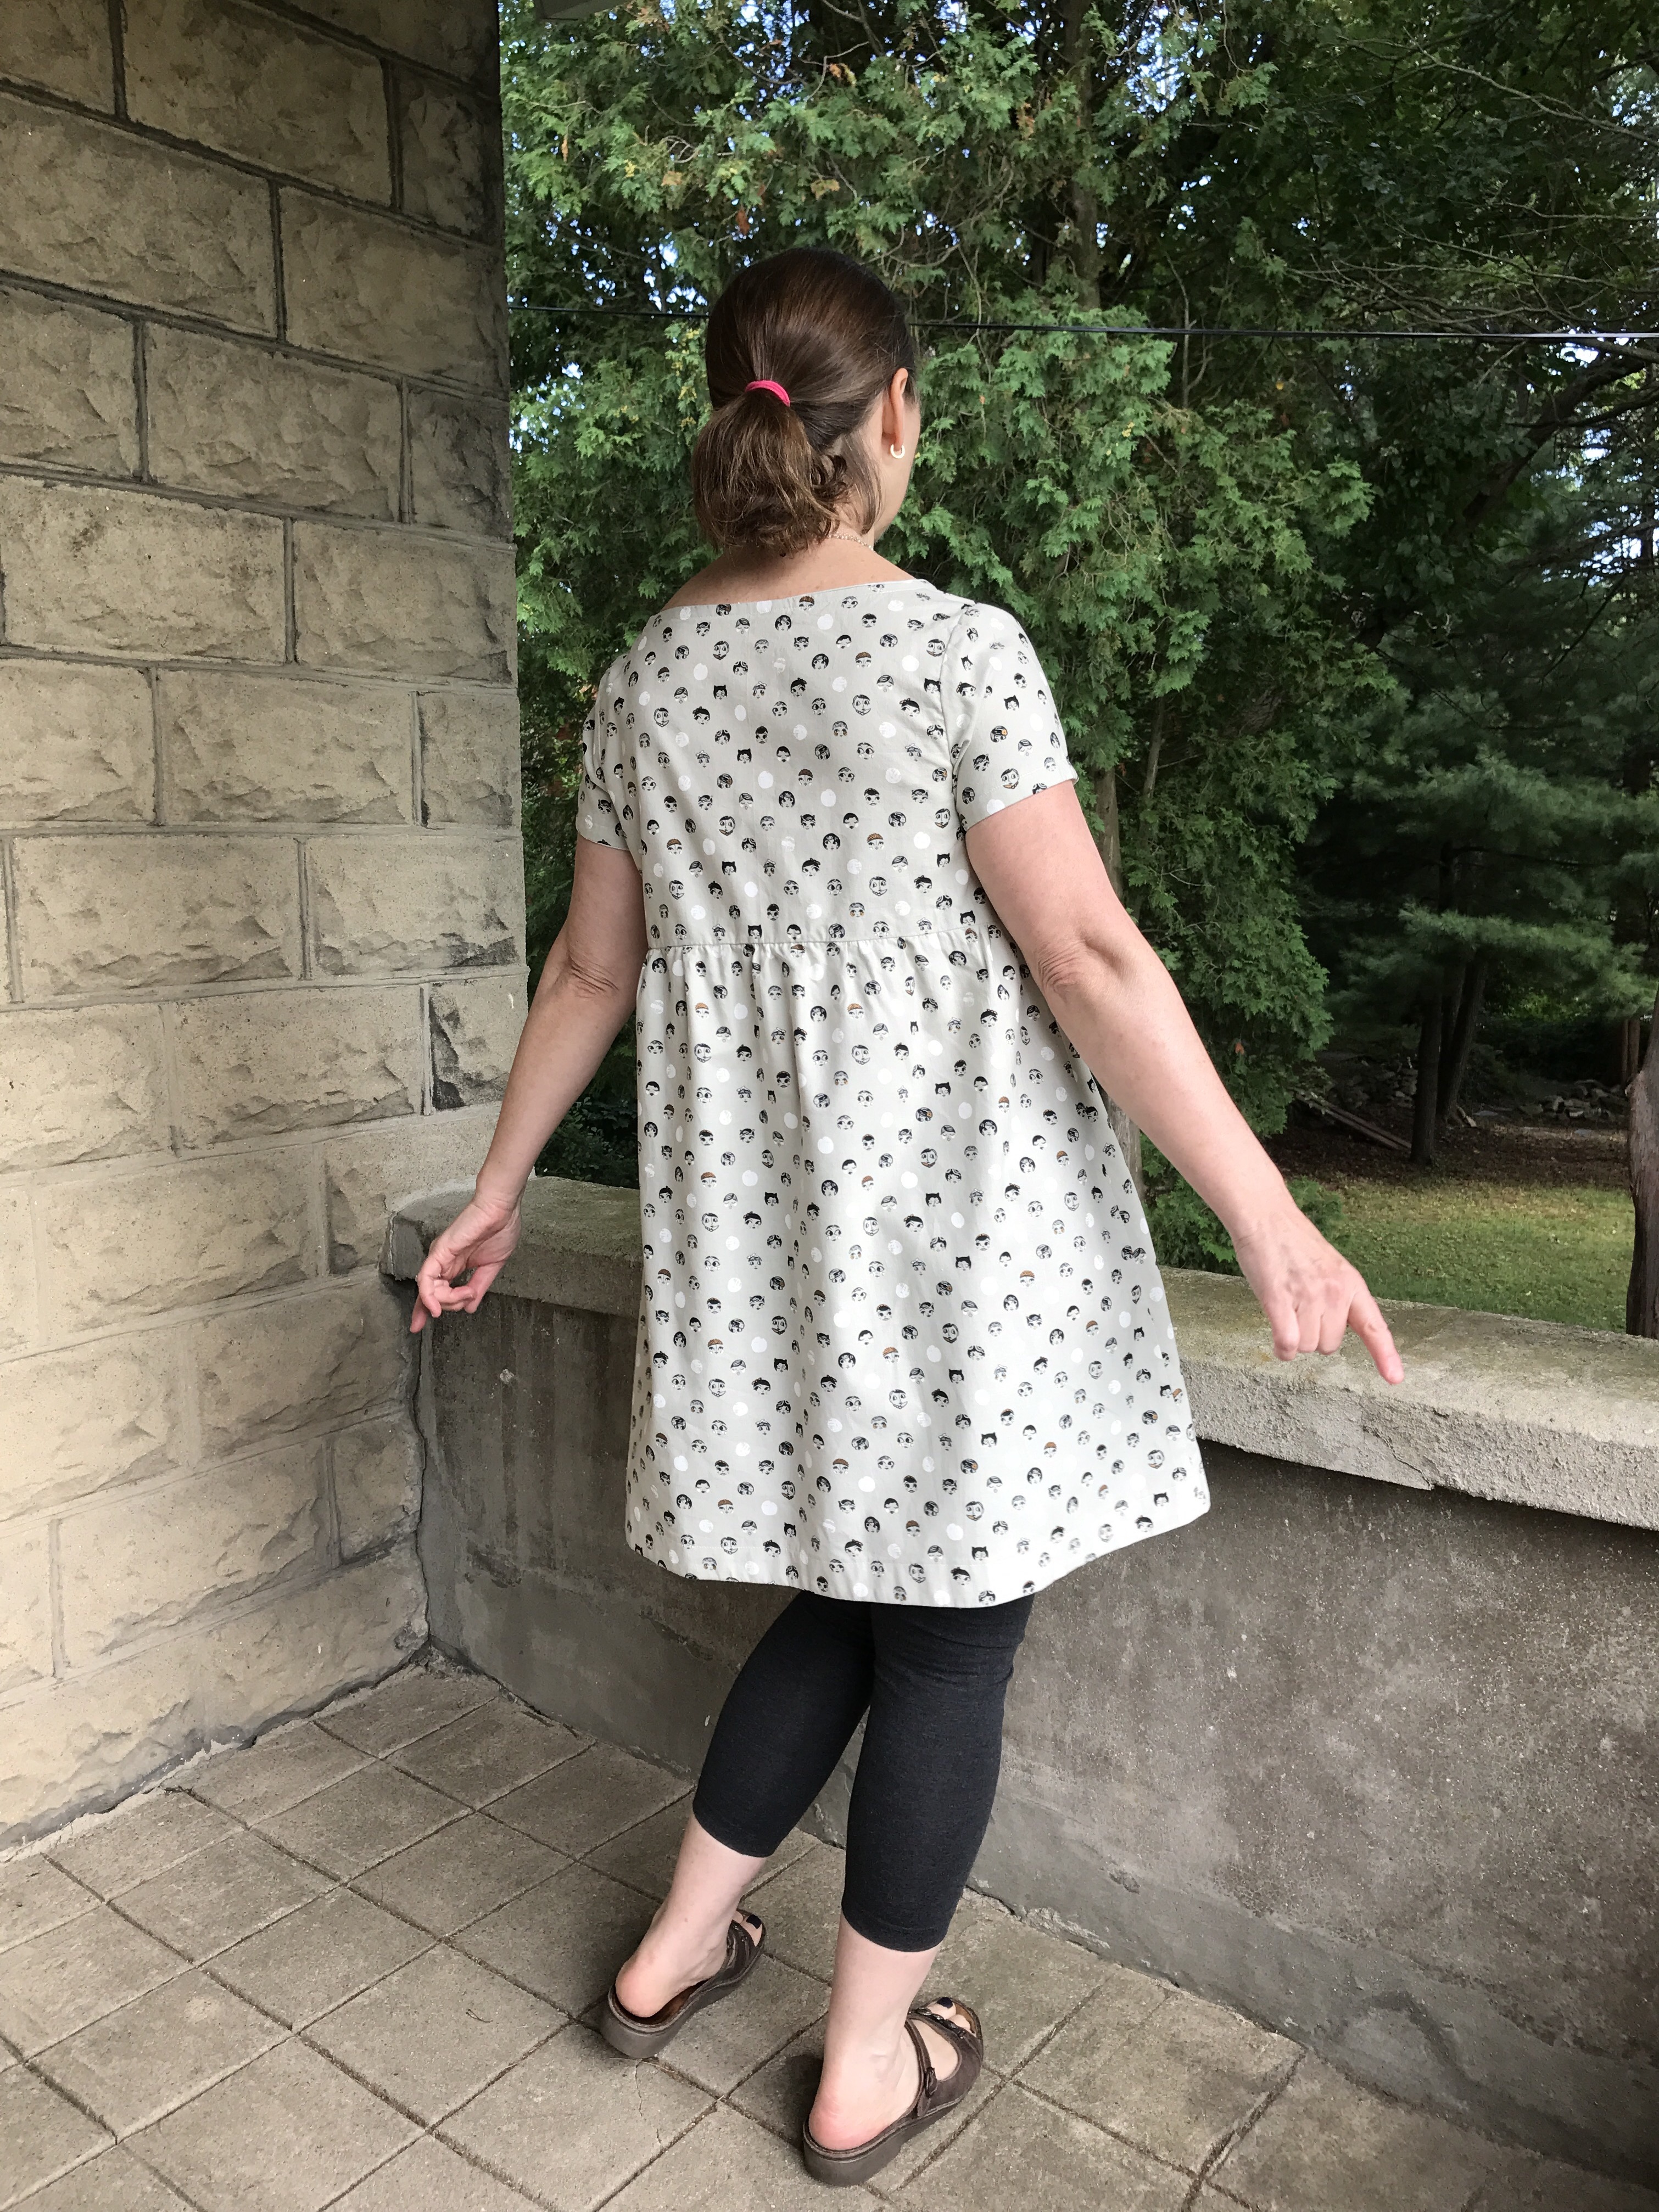 I think this ended up being one stylish dress!
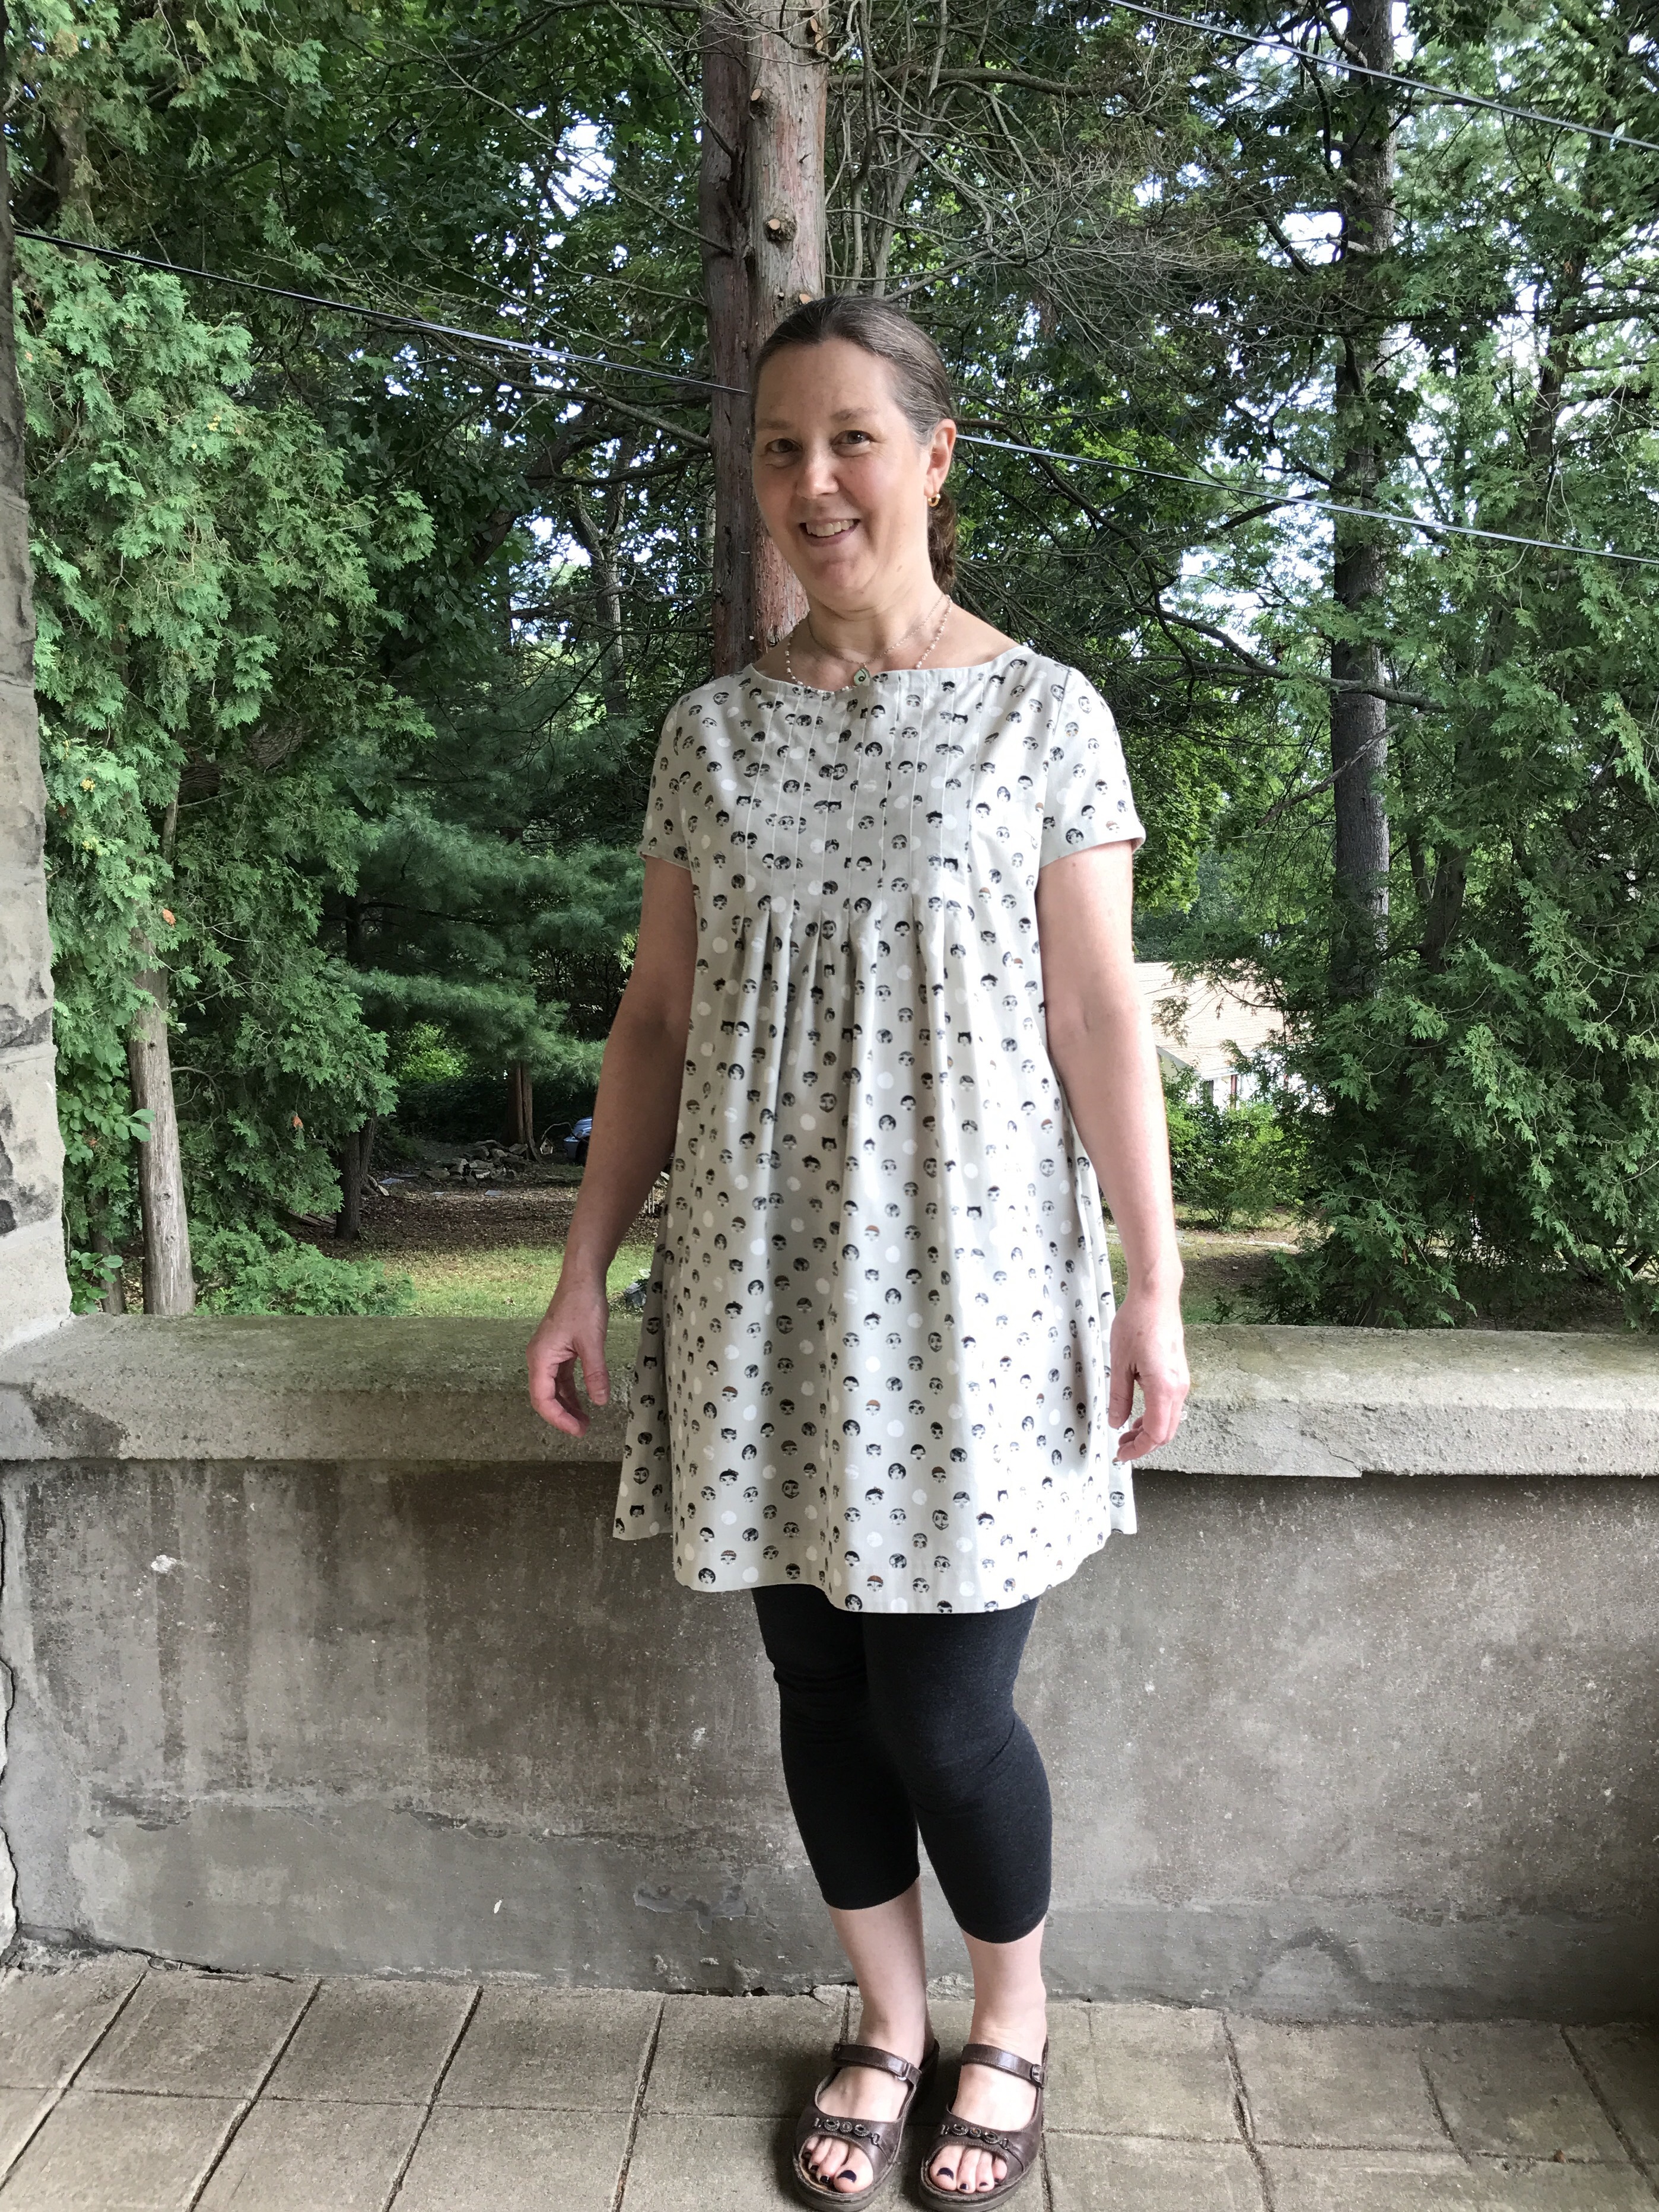
 It is hard to believe that it was
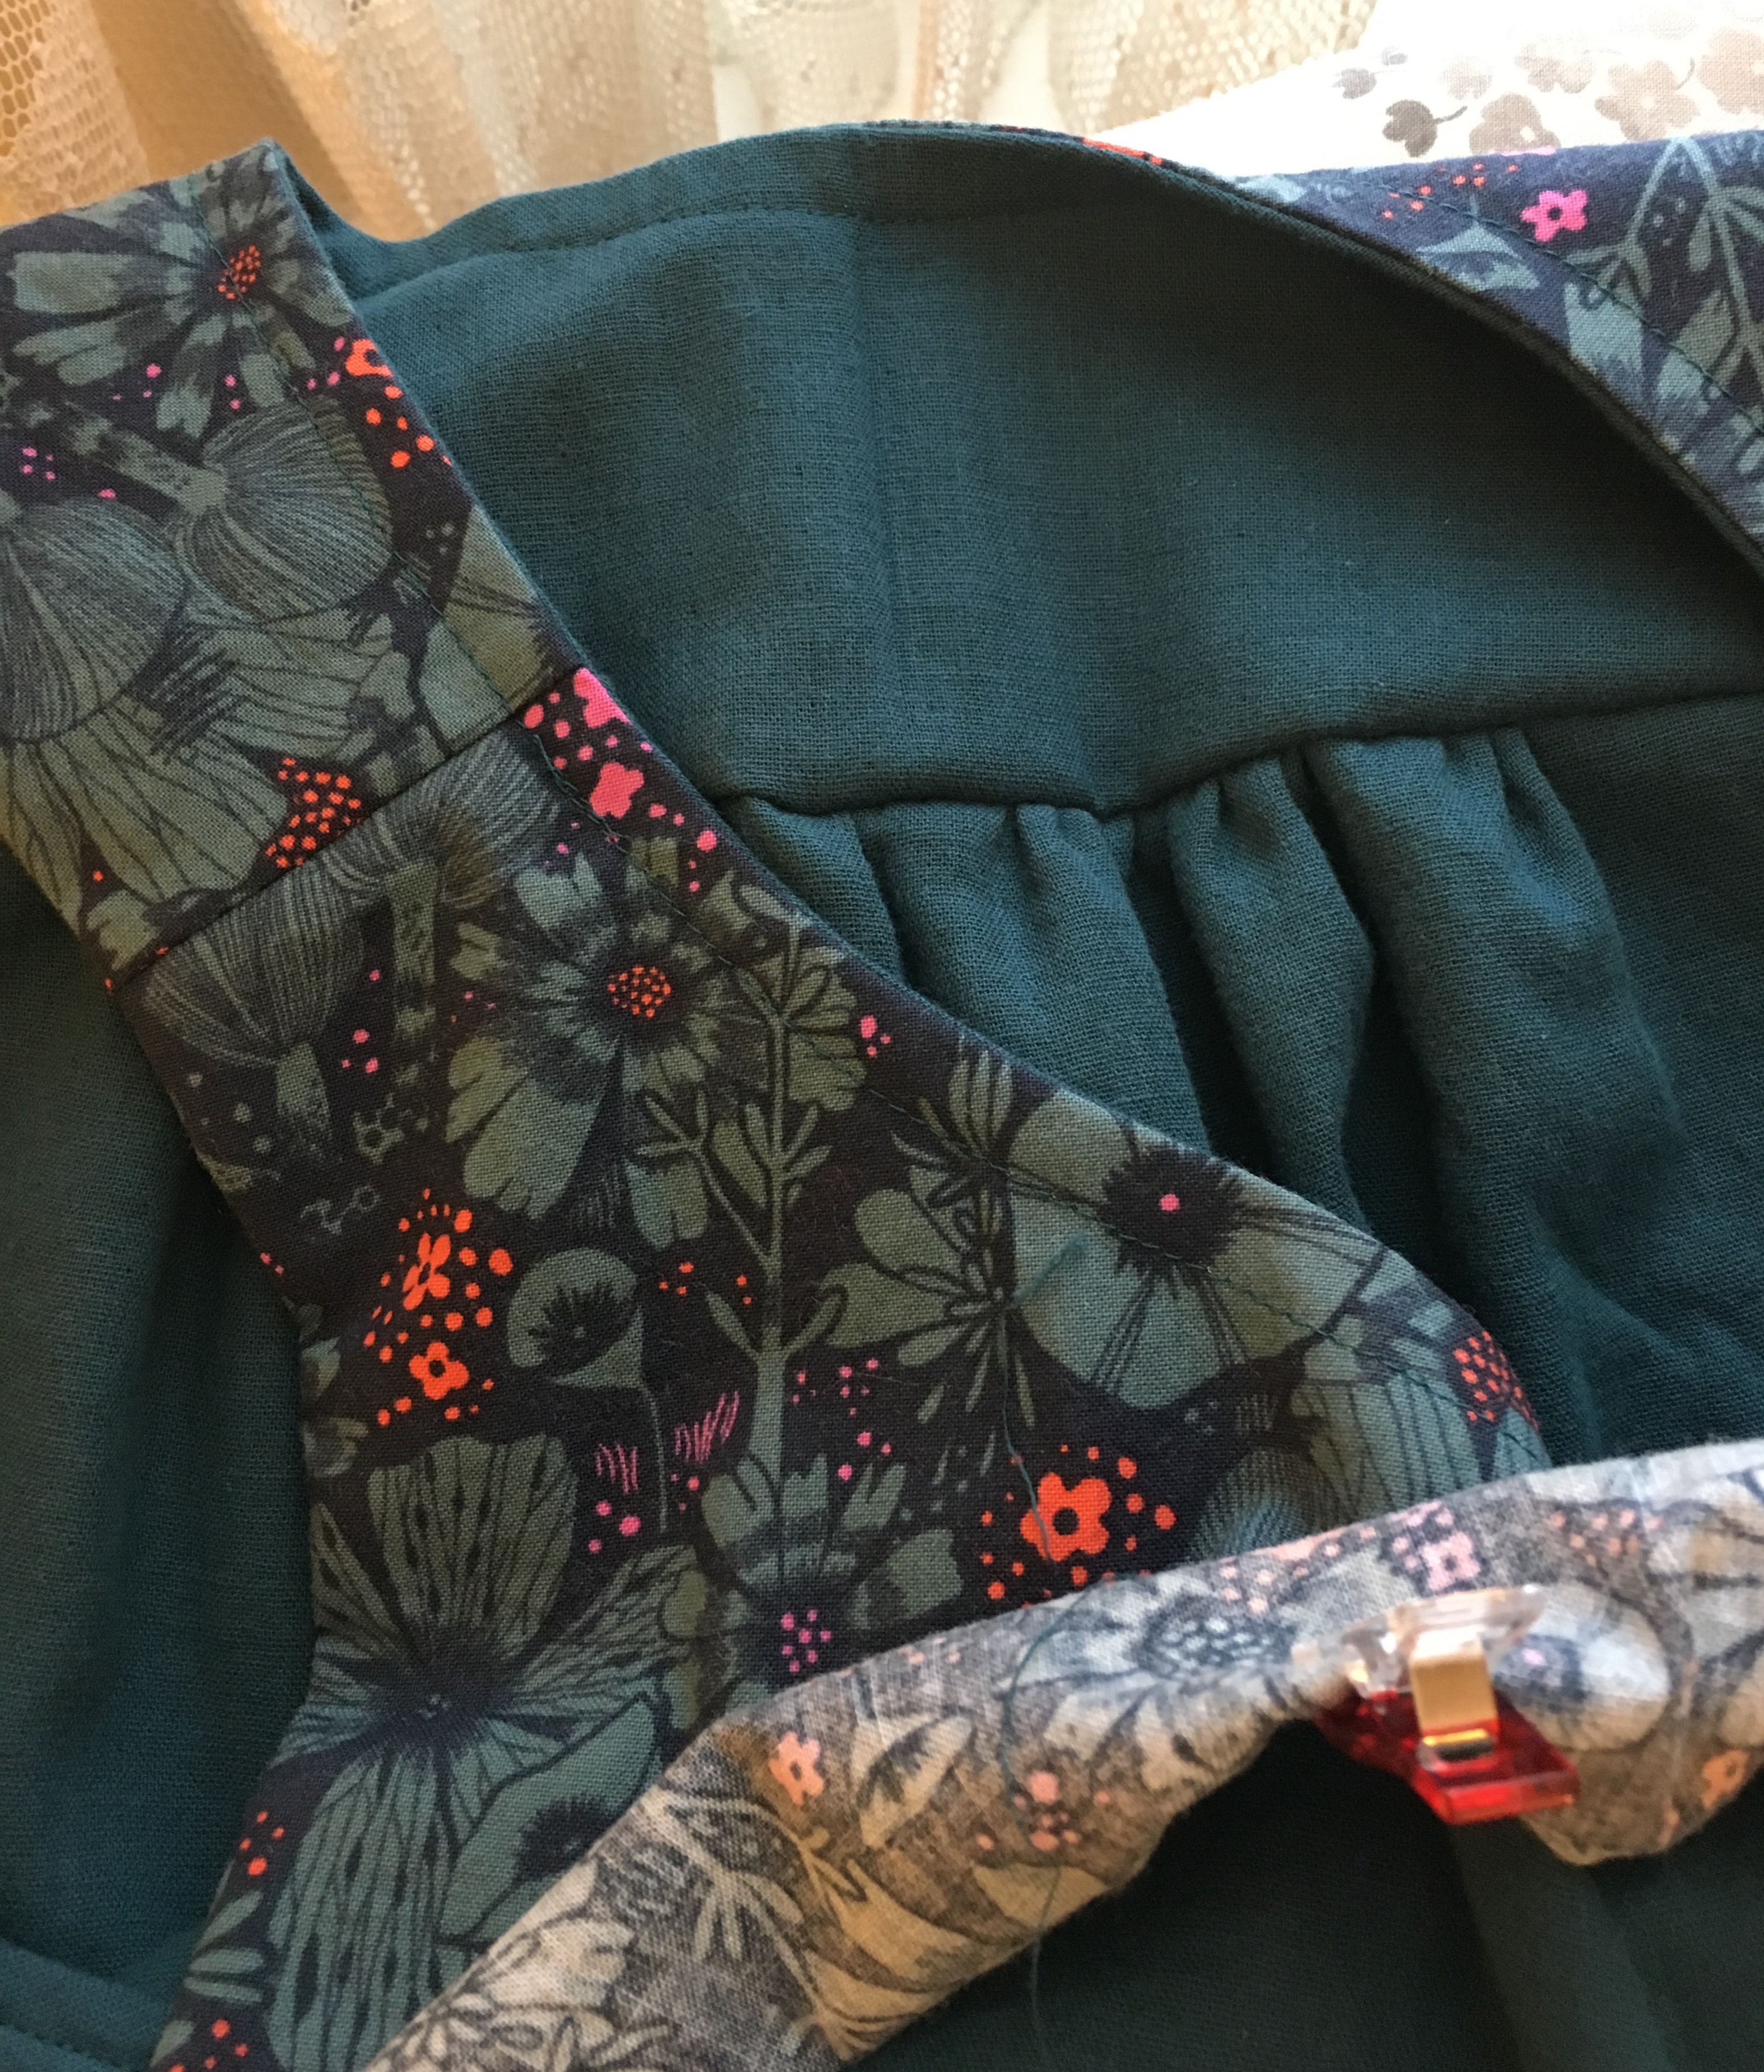
 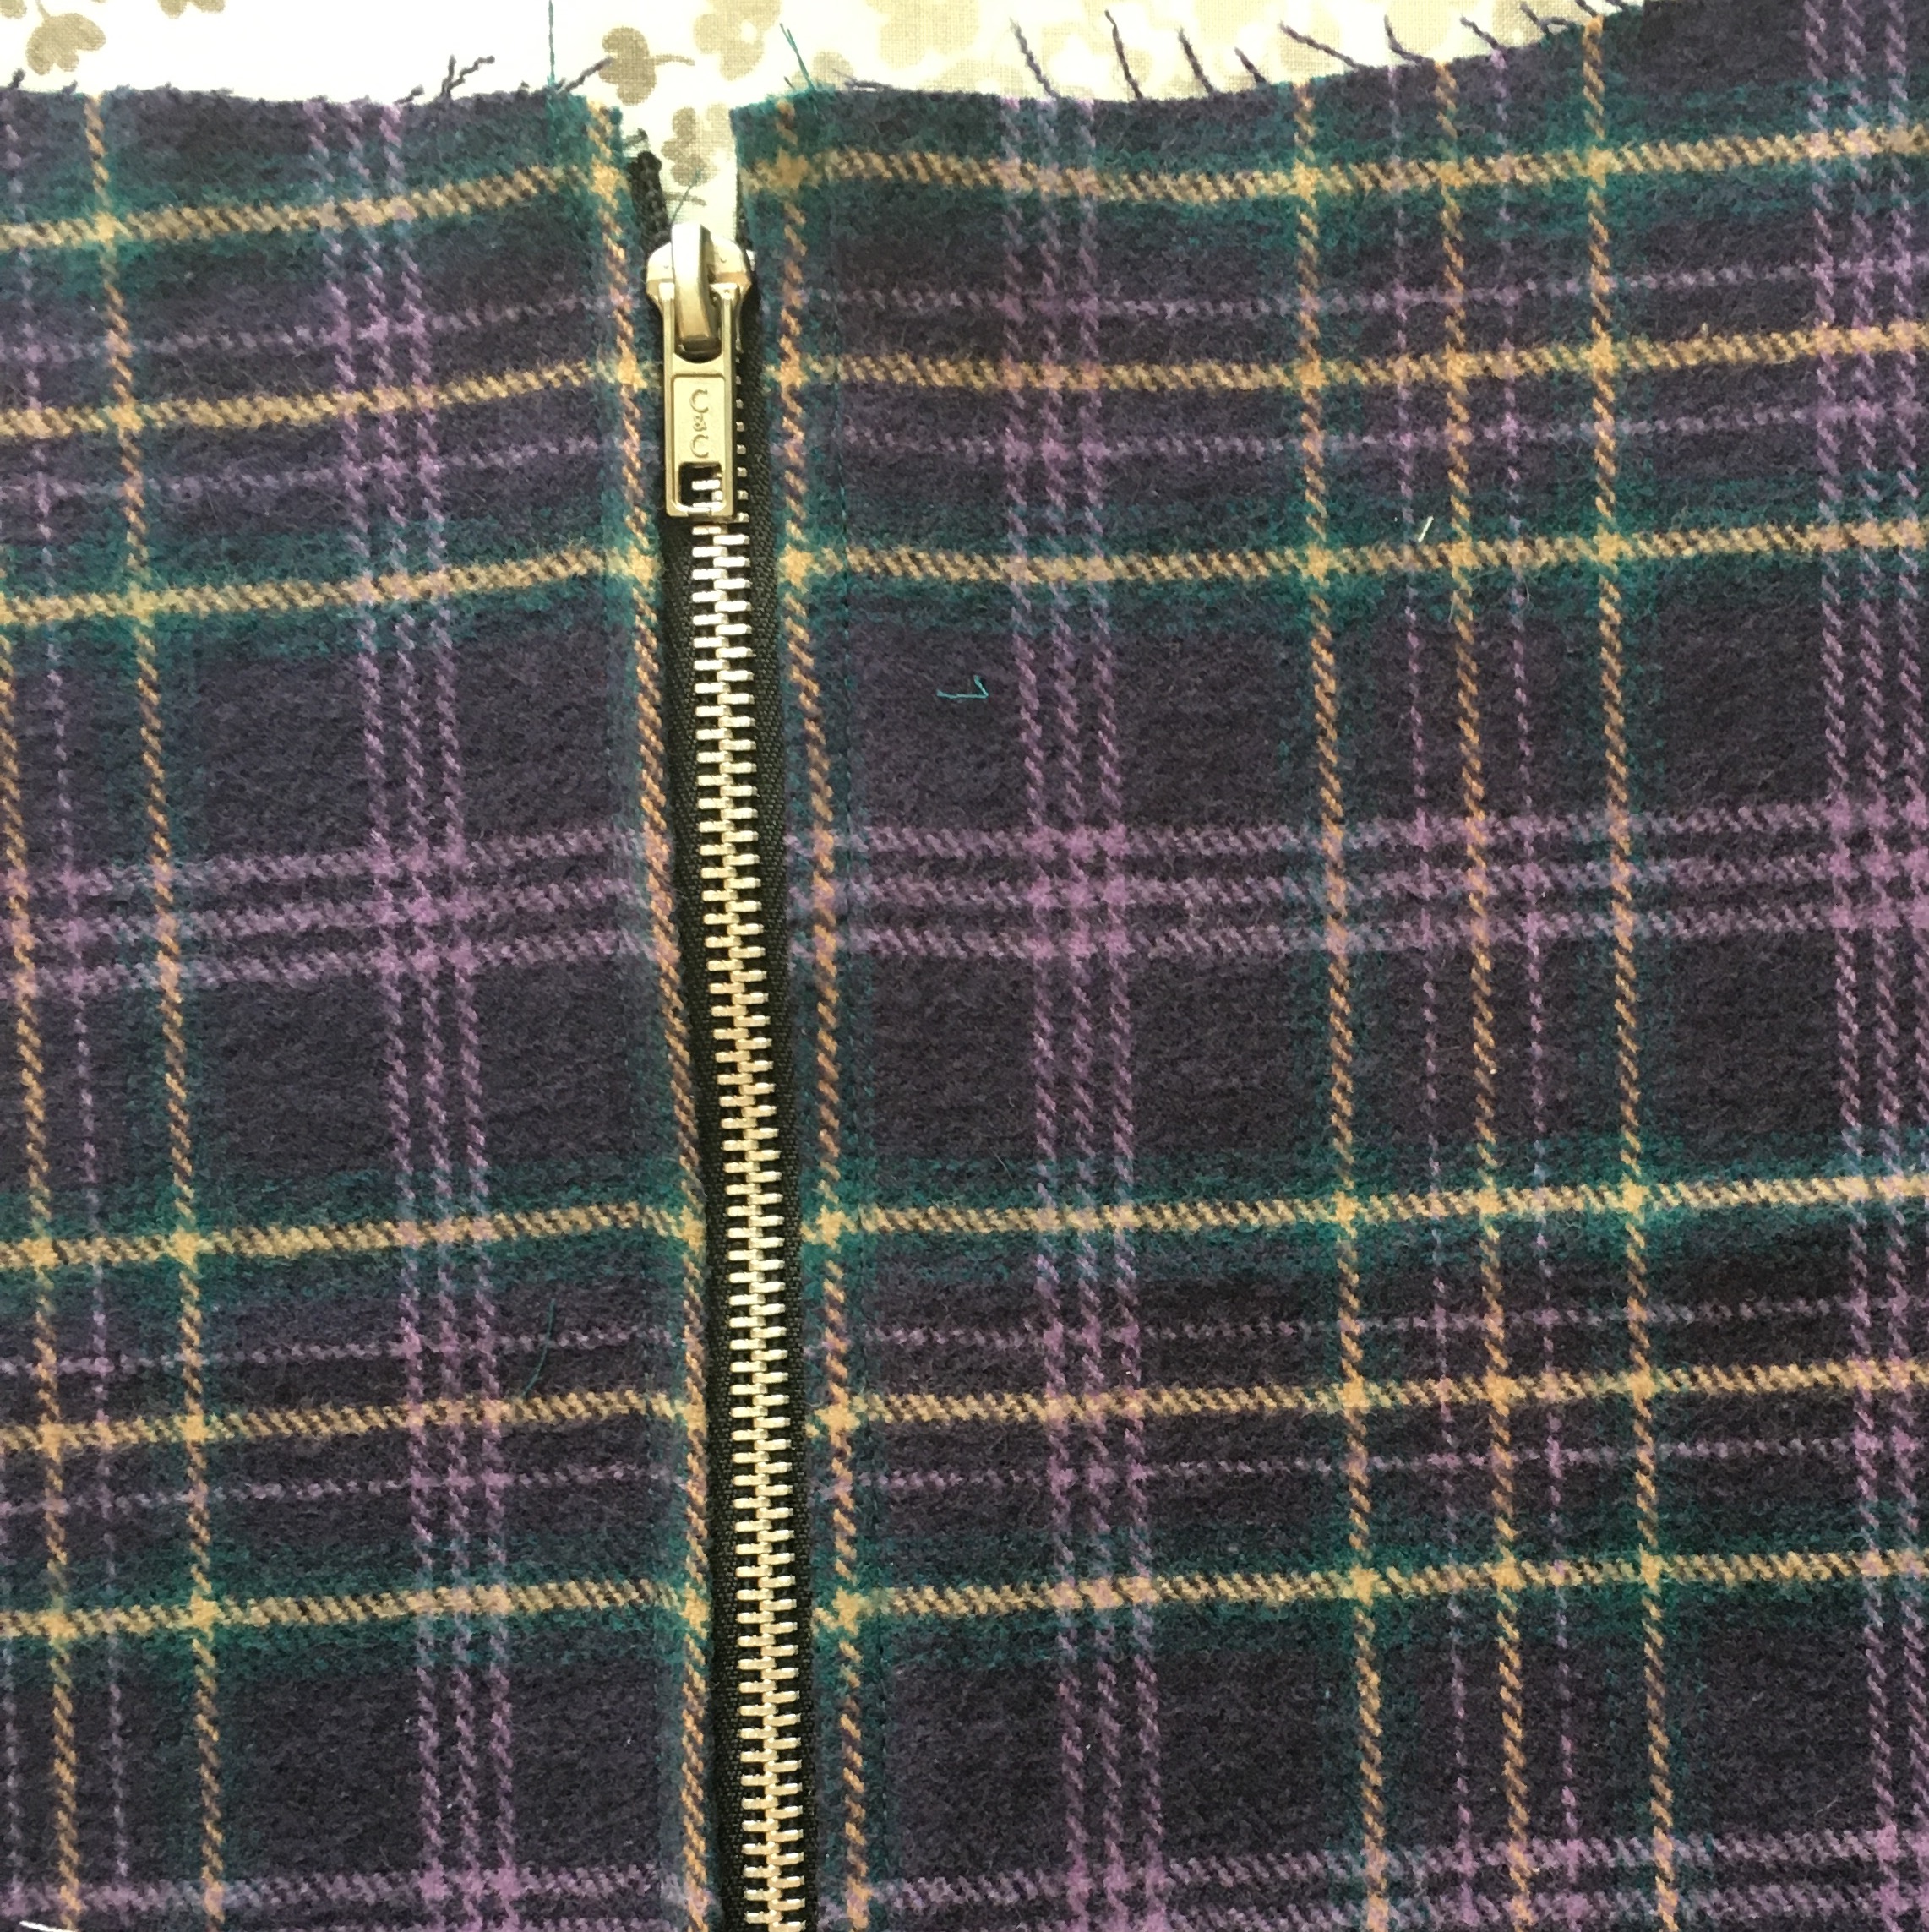 and then, since I had already loaded the machine with a deep teal thread, I decided to sew a up the teal double gauze Ruby blouse that I cut out last July (!)
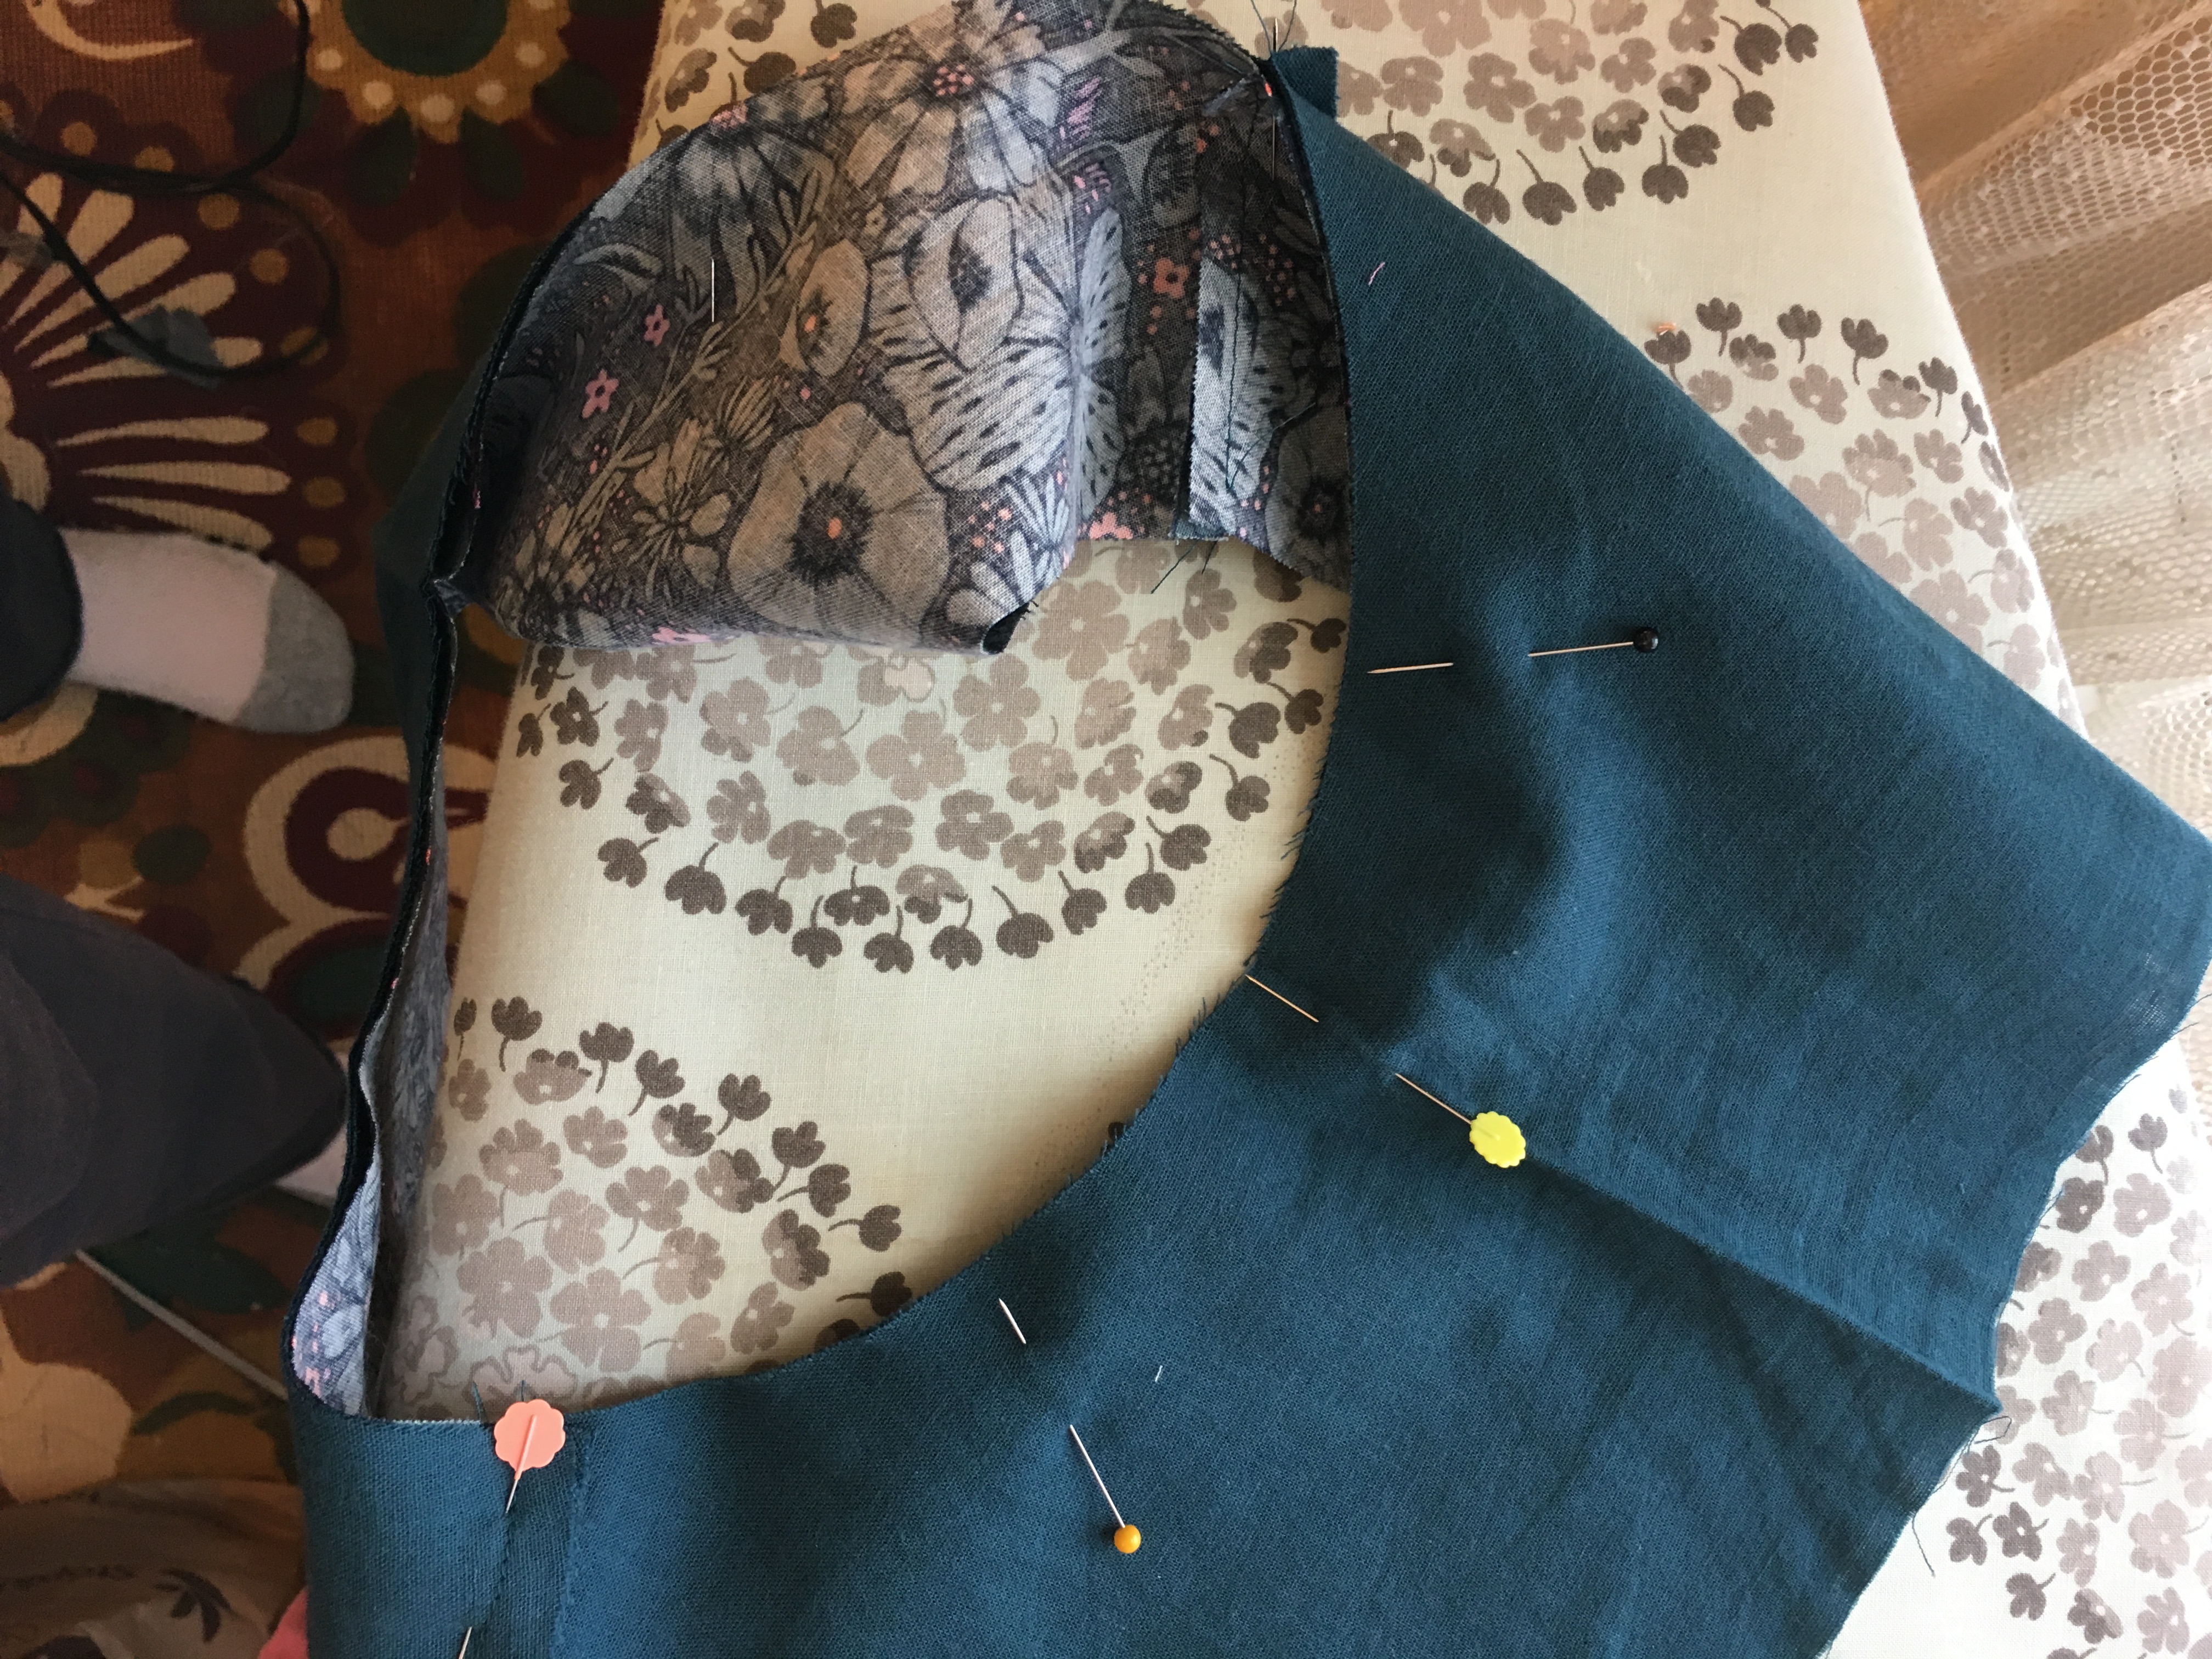 I tend to cut projects out way before I actually sew them, often because I want to use the fabric for more than one project. It works best for me if I lay out the pattern pieces for both projects at the same time so I can be sure to cut the pattern pieces in such a way as to have enough for both projects. In this case, I had used the teal for the pockets and waist facing for my
 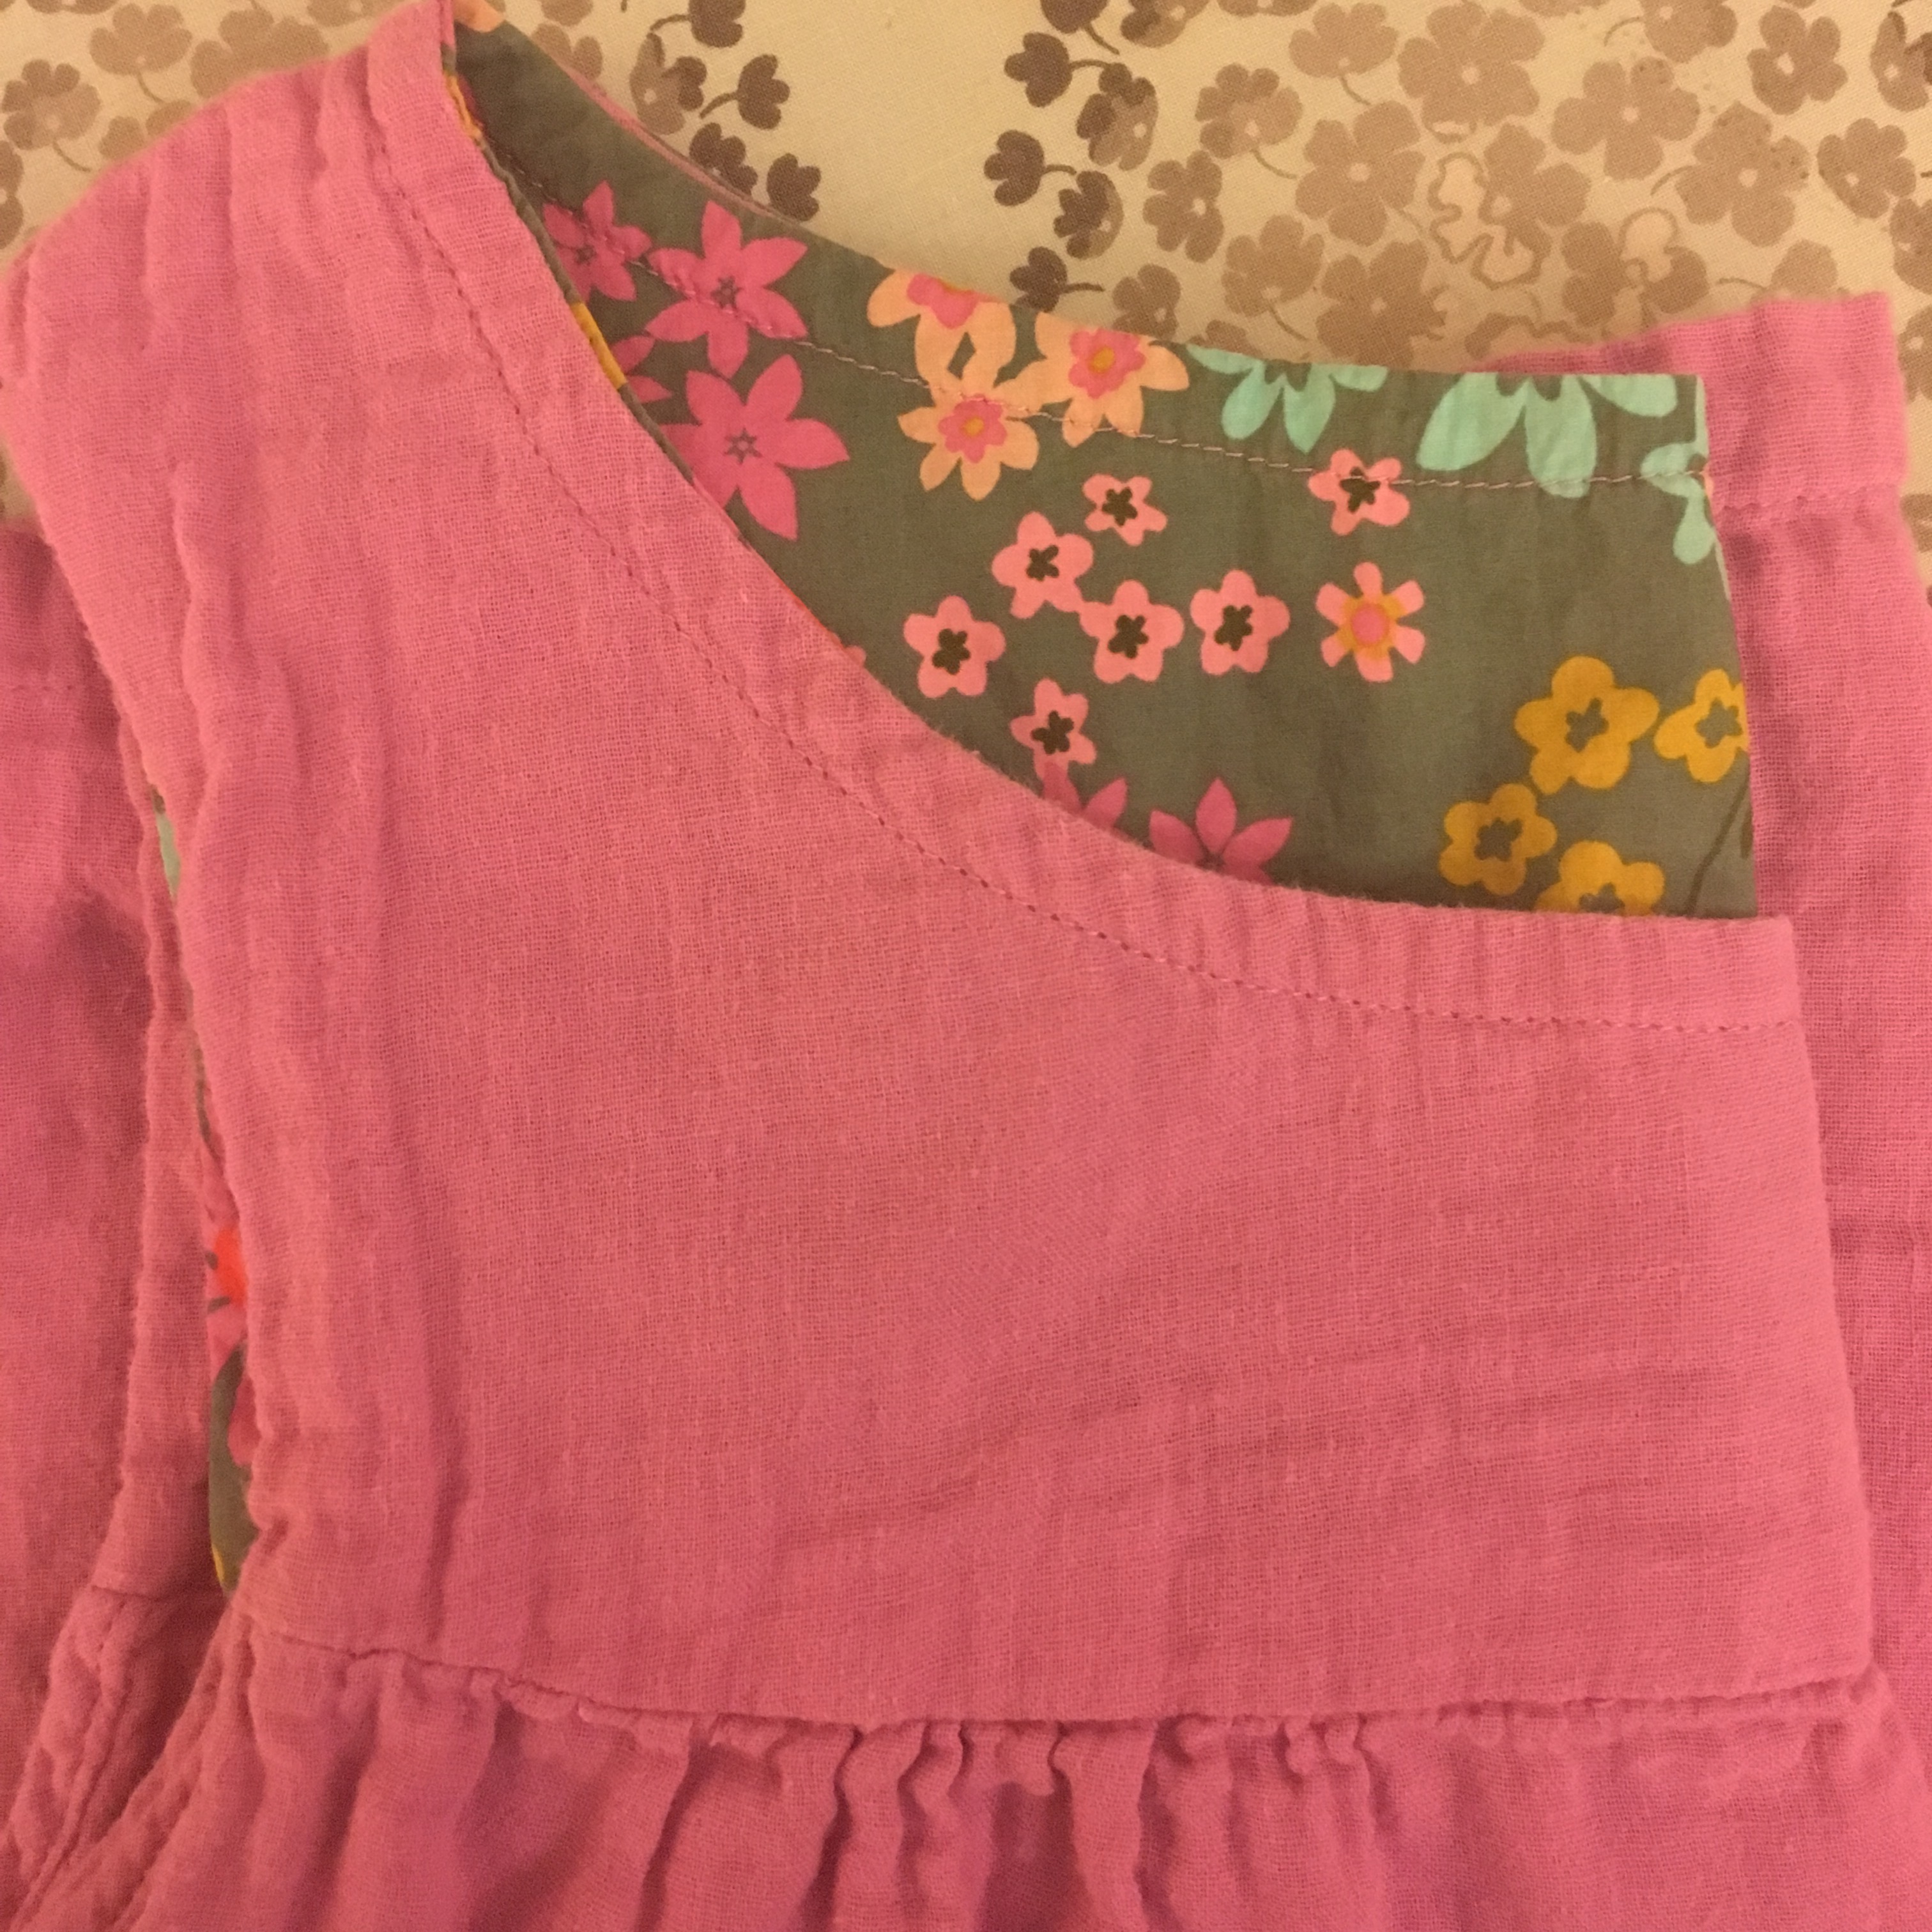 I made it using Rae’s sausage technique for lining the bodice. See this post about a favorite
 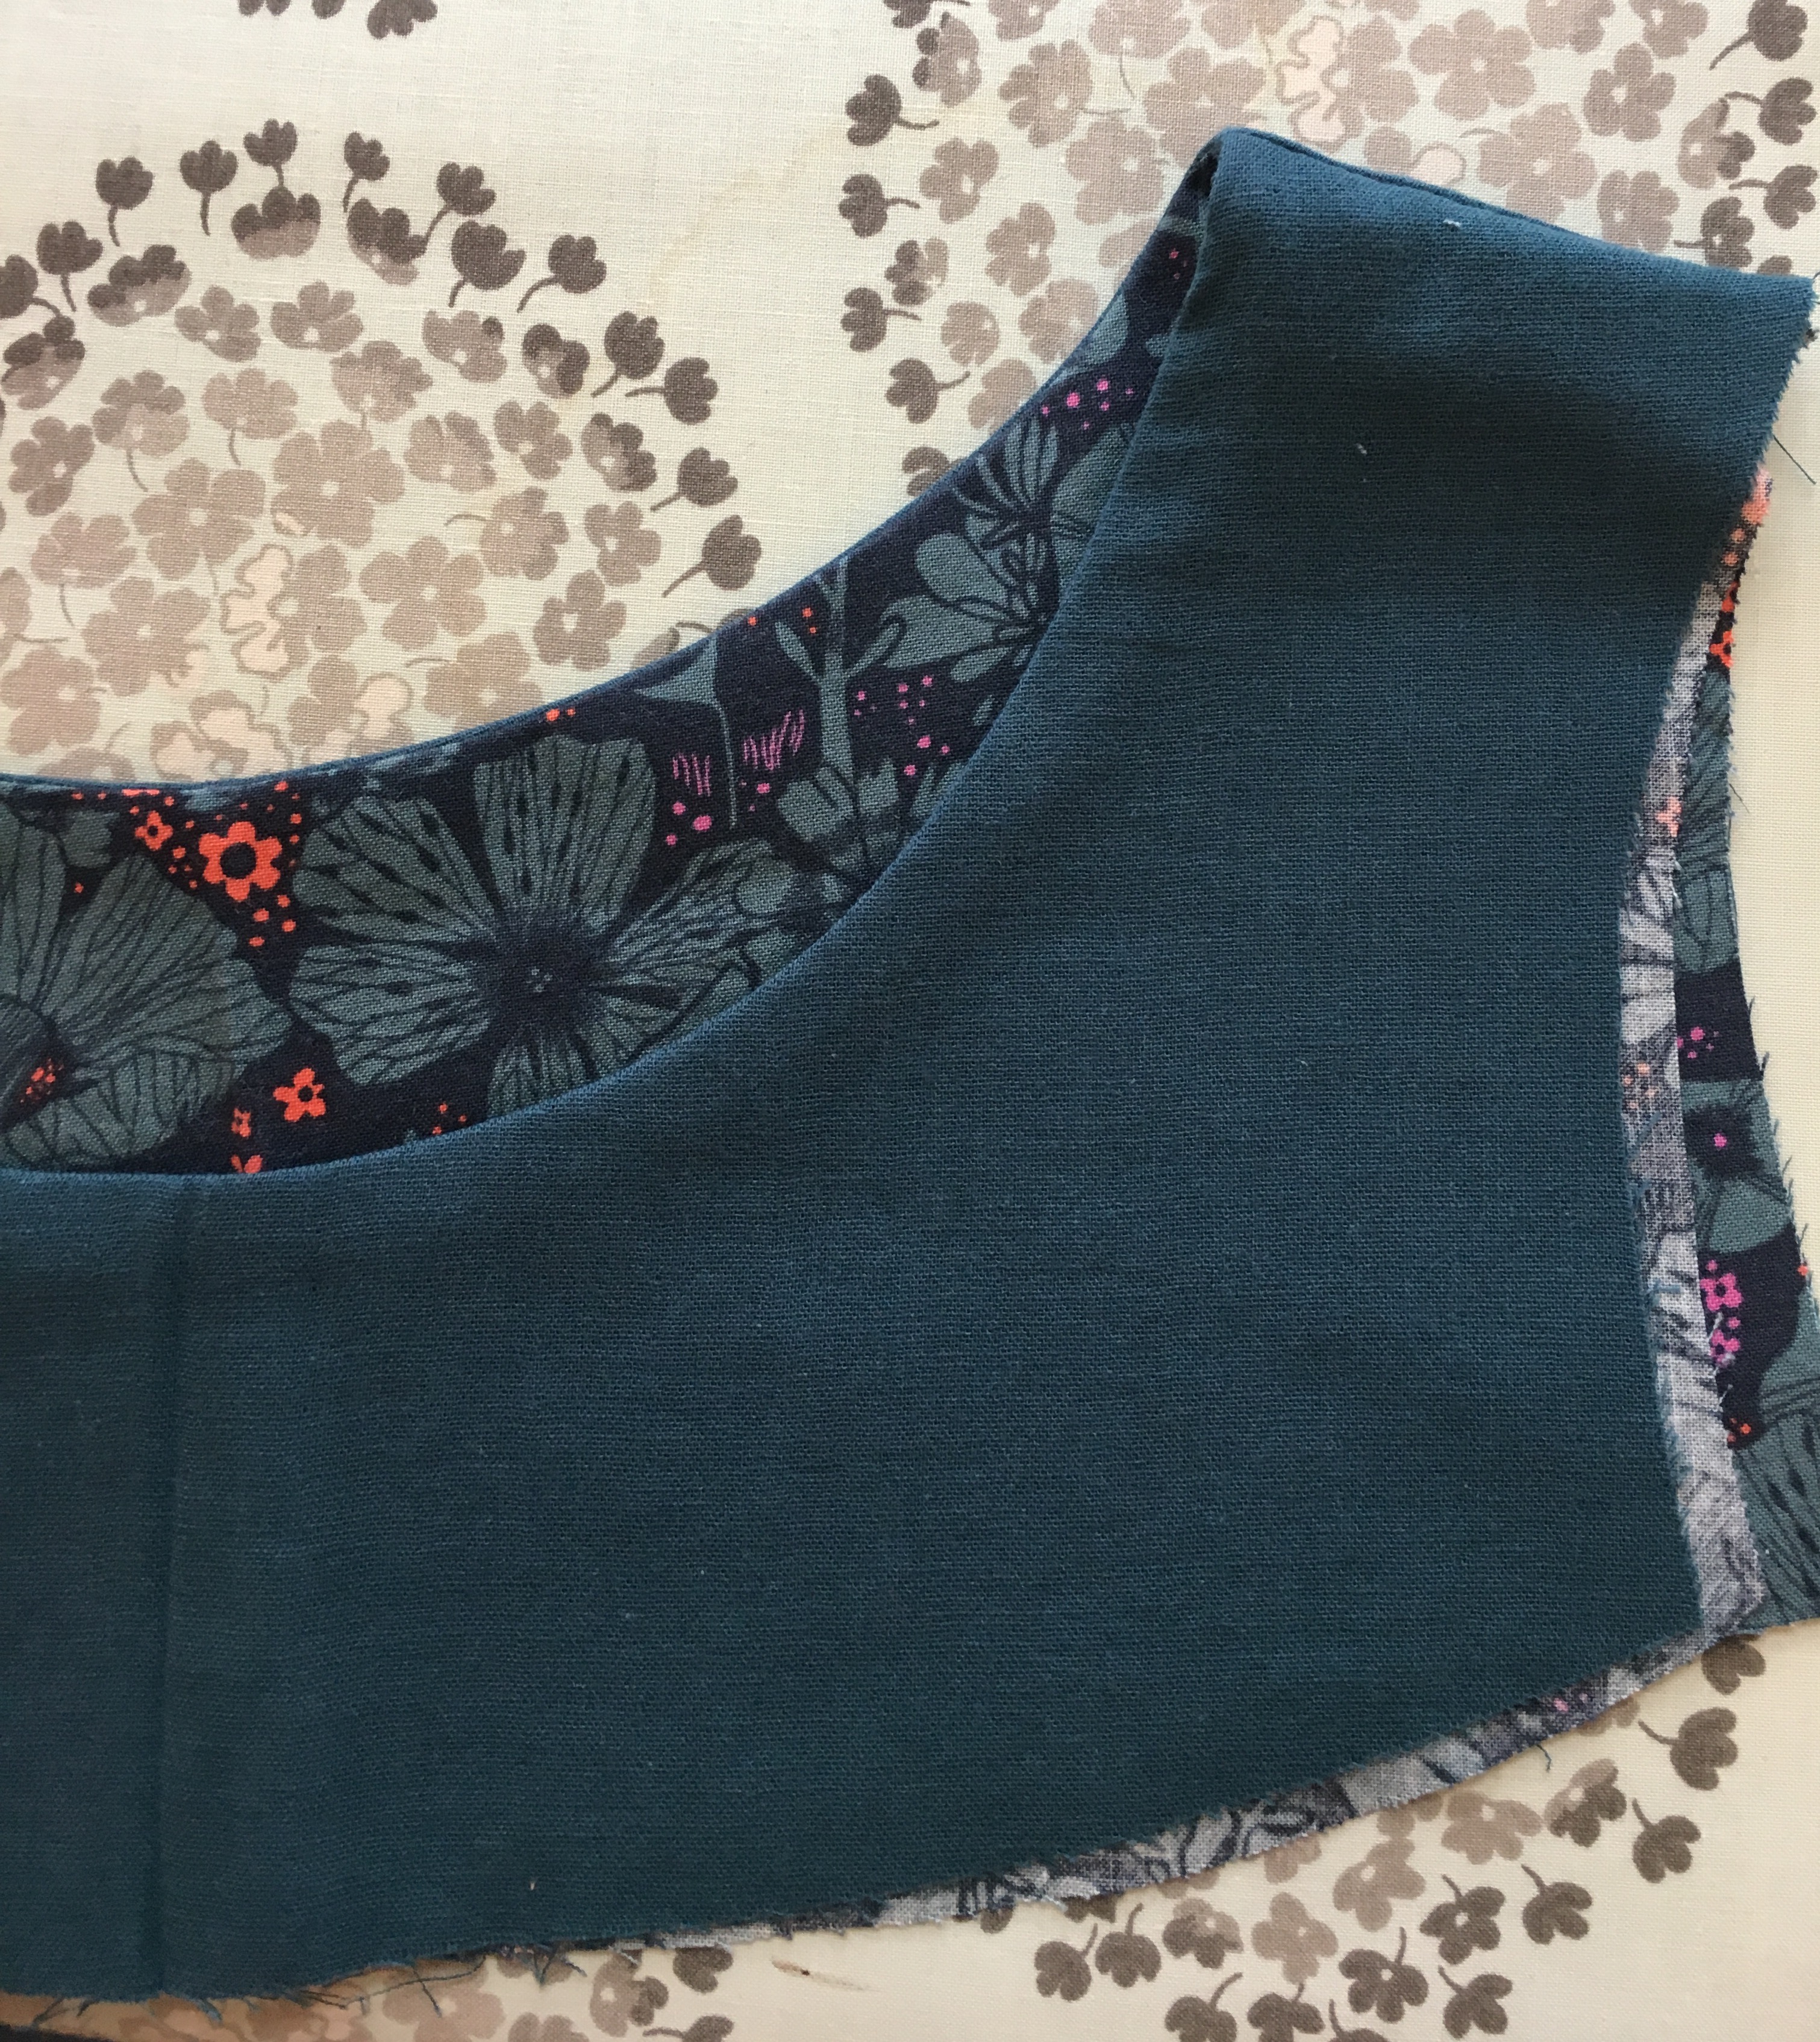 I have used the sausage technique so many times on my many Washi dresses and Ruby dresses and blouses that I didn’t need to refer to the videos but they are awesome.
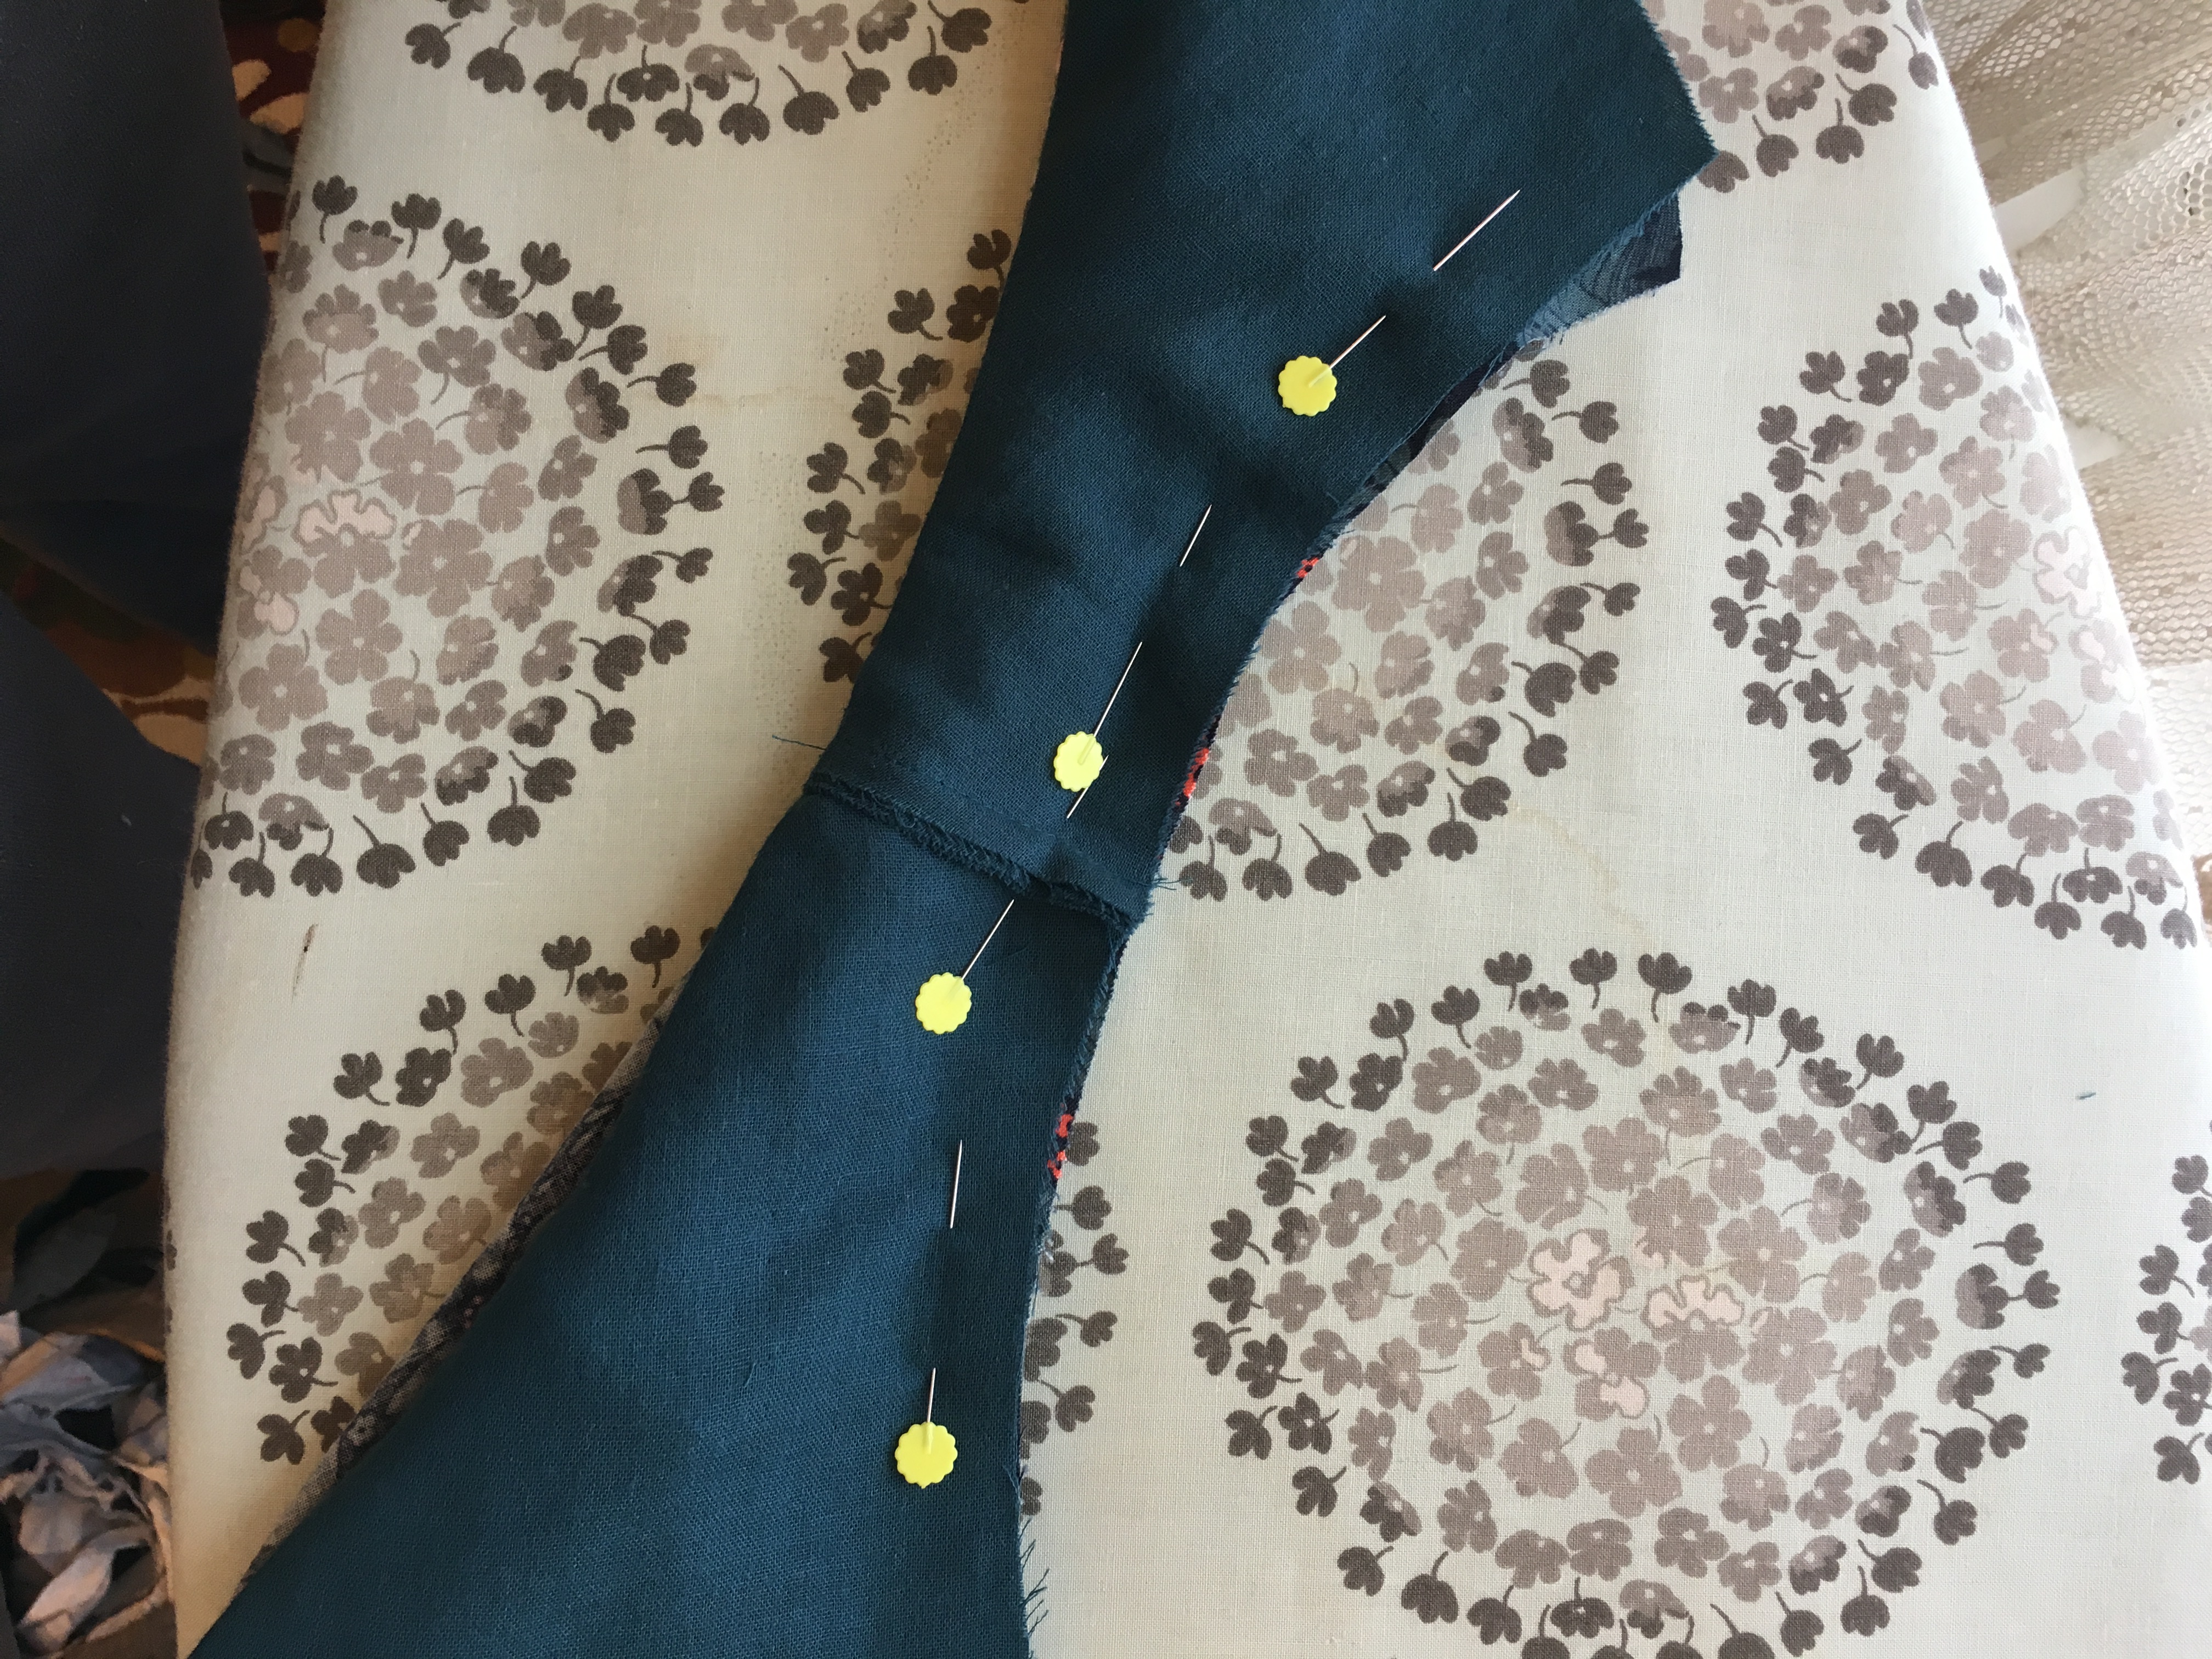 I did look back at the
 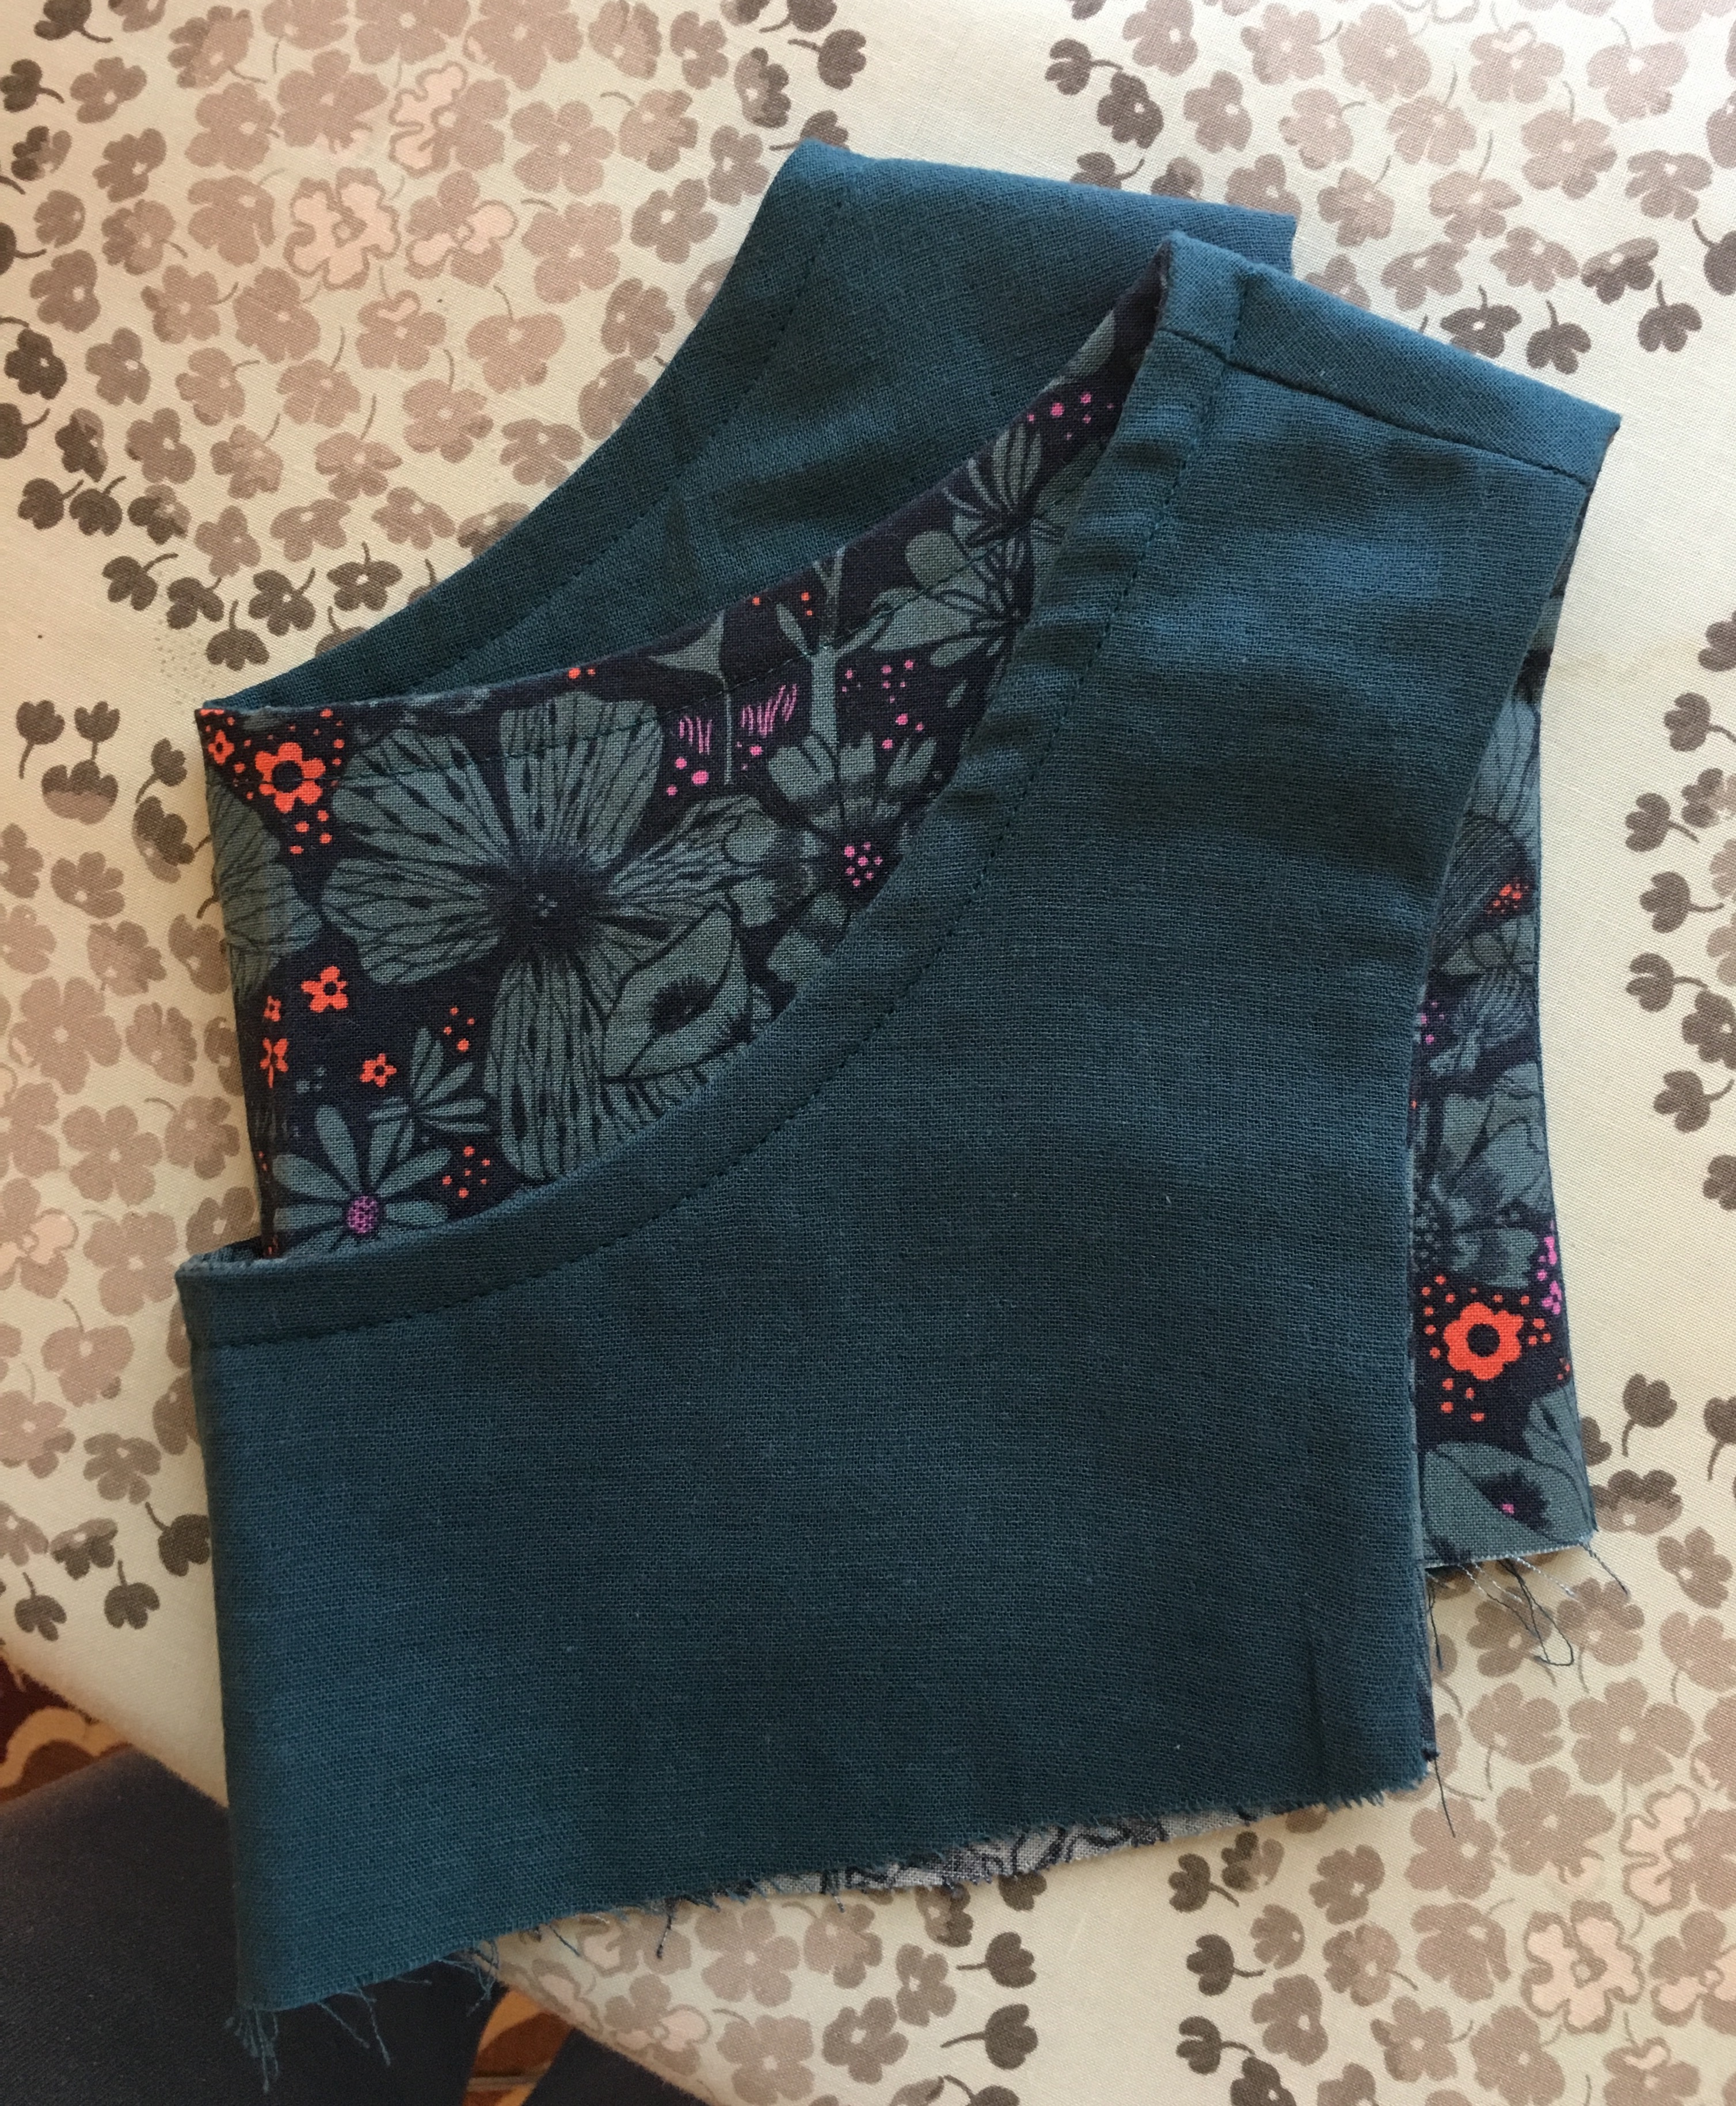 I machine wash my garments and it seems as though that extra stitching gives the neckline a bit more stability and strength.
 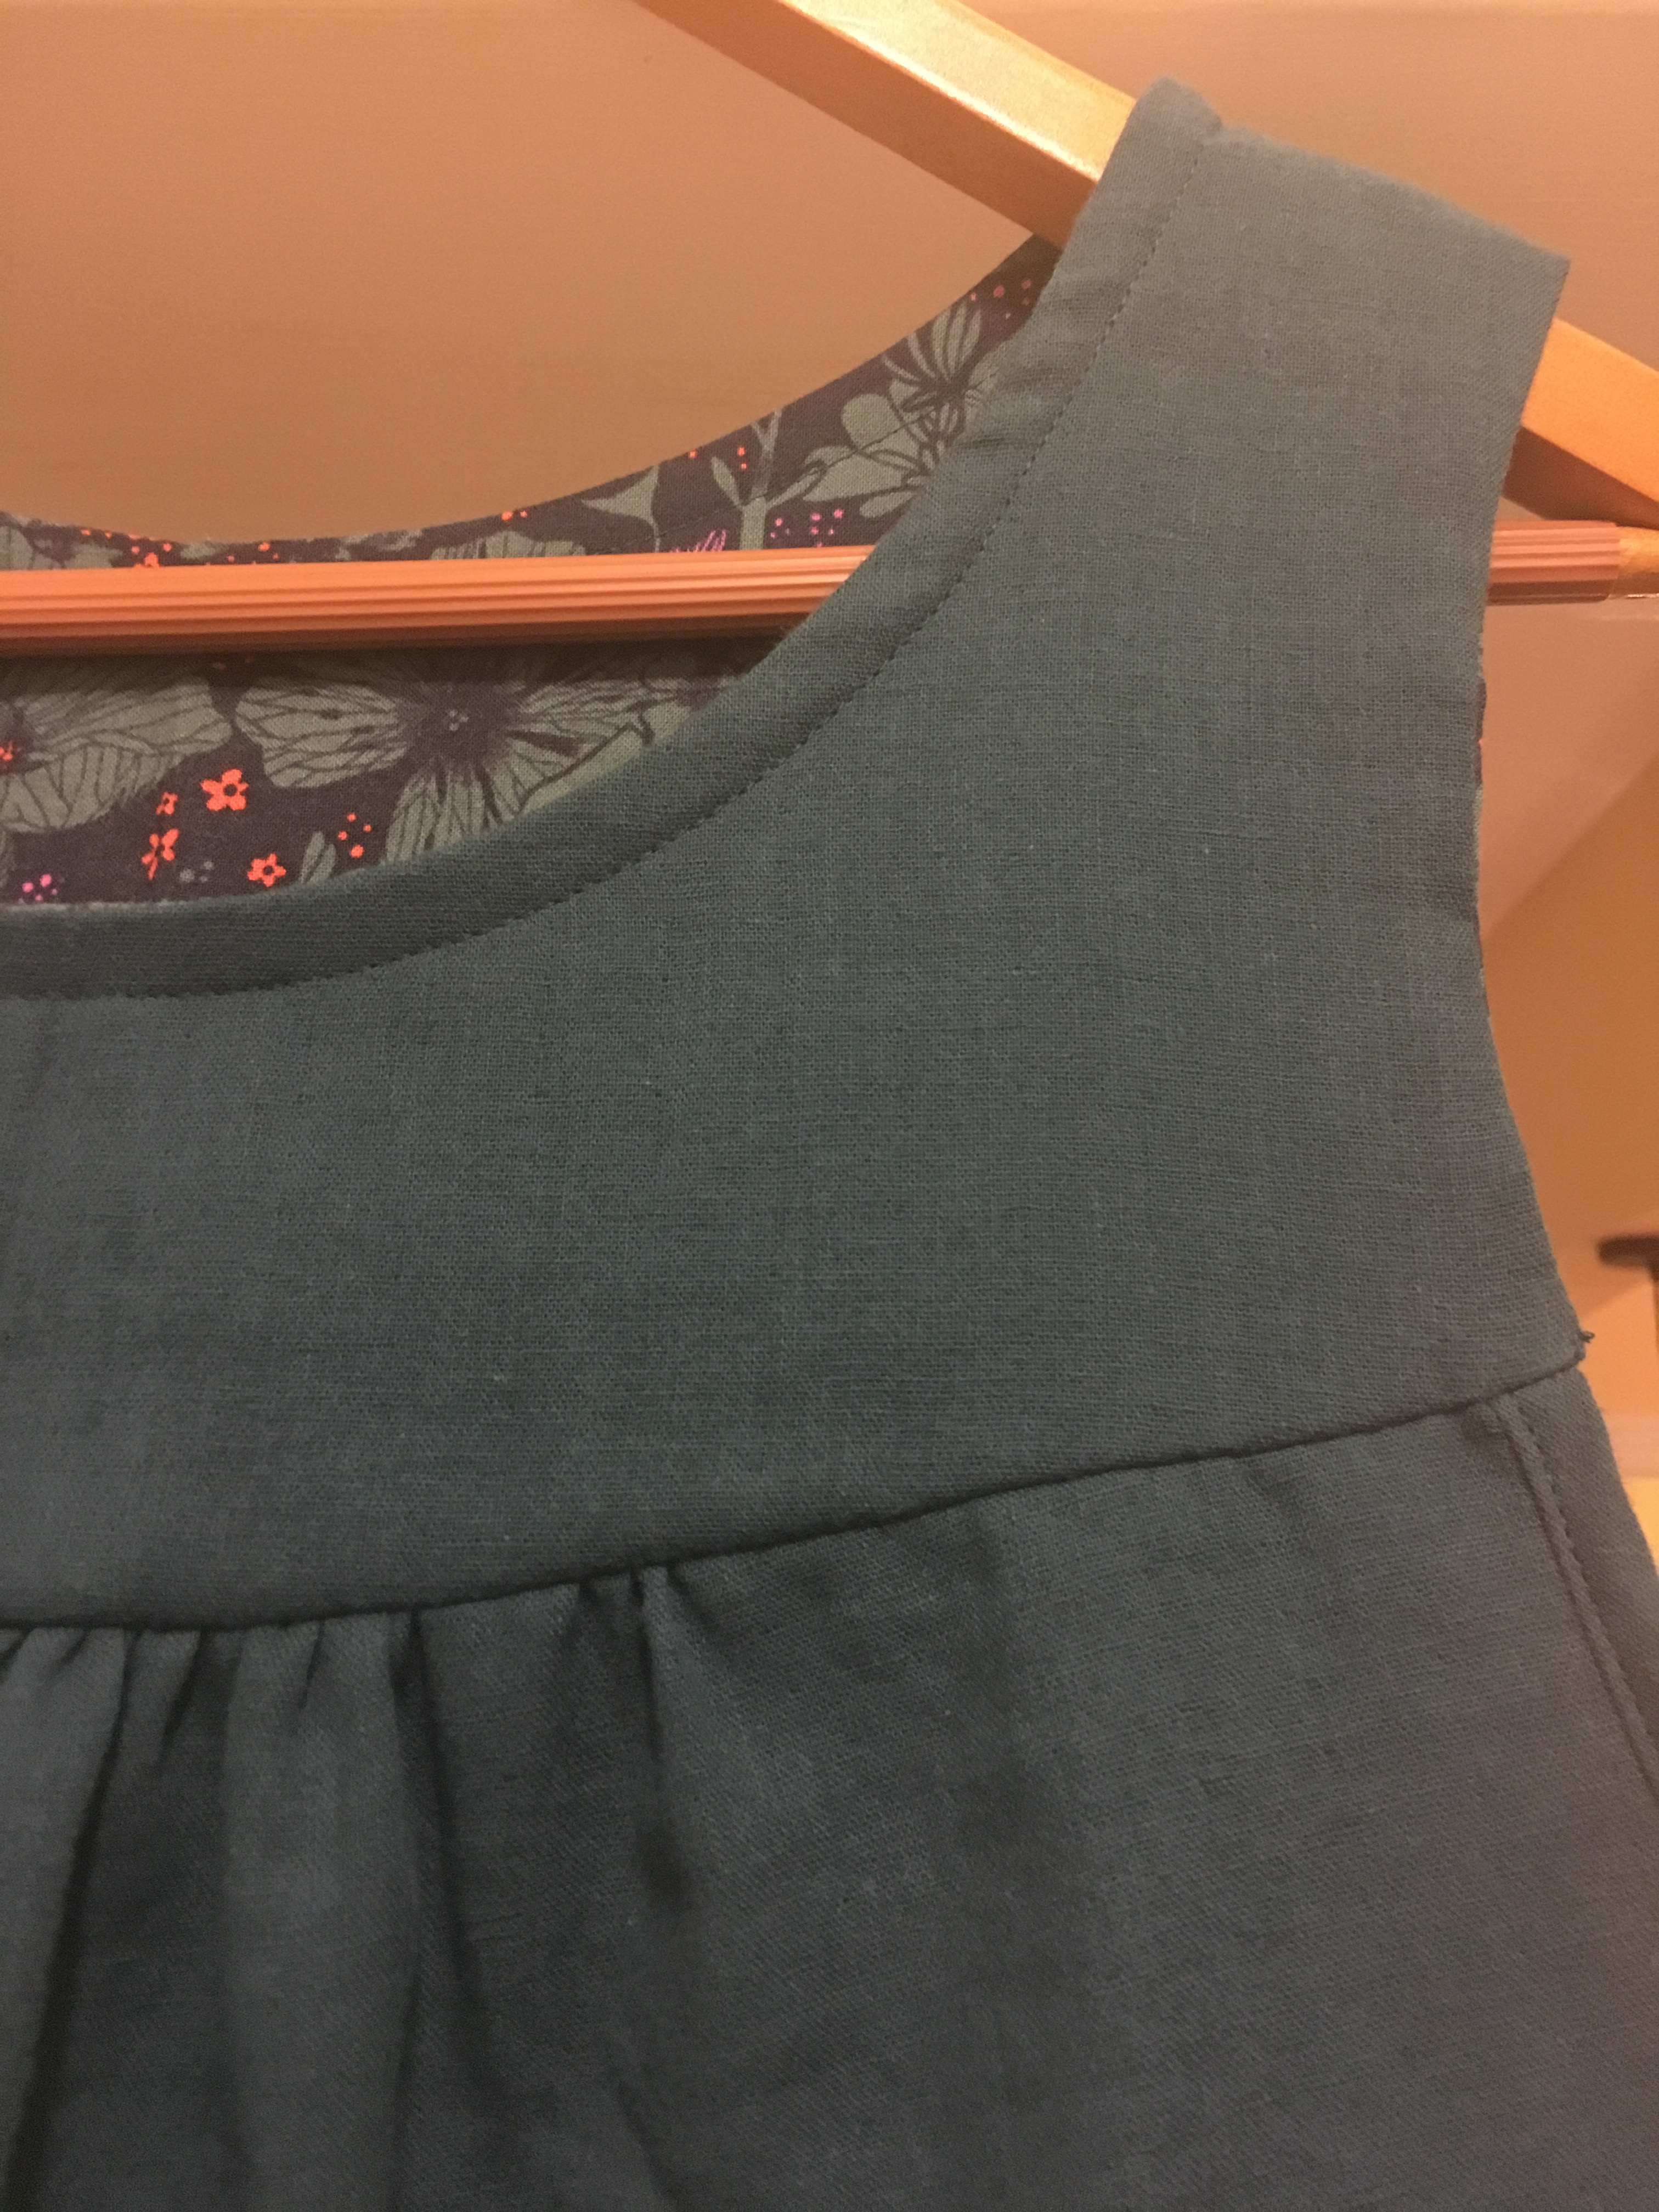 The sausage technique leaves two seams on the inside of the blouse that require hand stitching. I actually enjoy hand stitching so I enjoyed this part of the project. I was able to sew the entire blouse in an afternoon and wear it to work the next day without rushing or cutting corners. It is sometimes very relaxing to just enjoy the process and make something beautiful without worrying about how long it takes.
 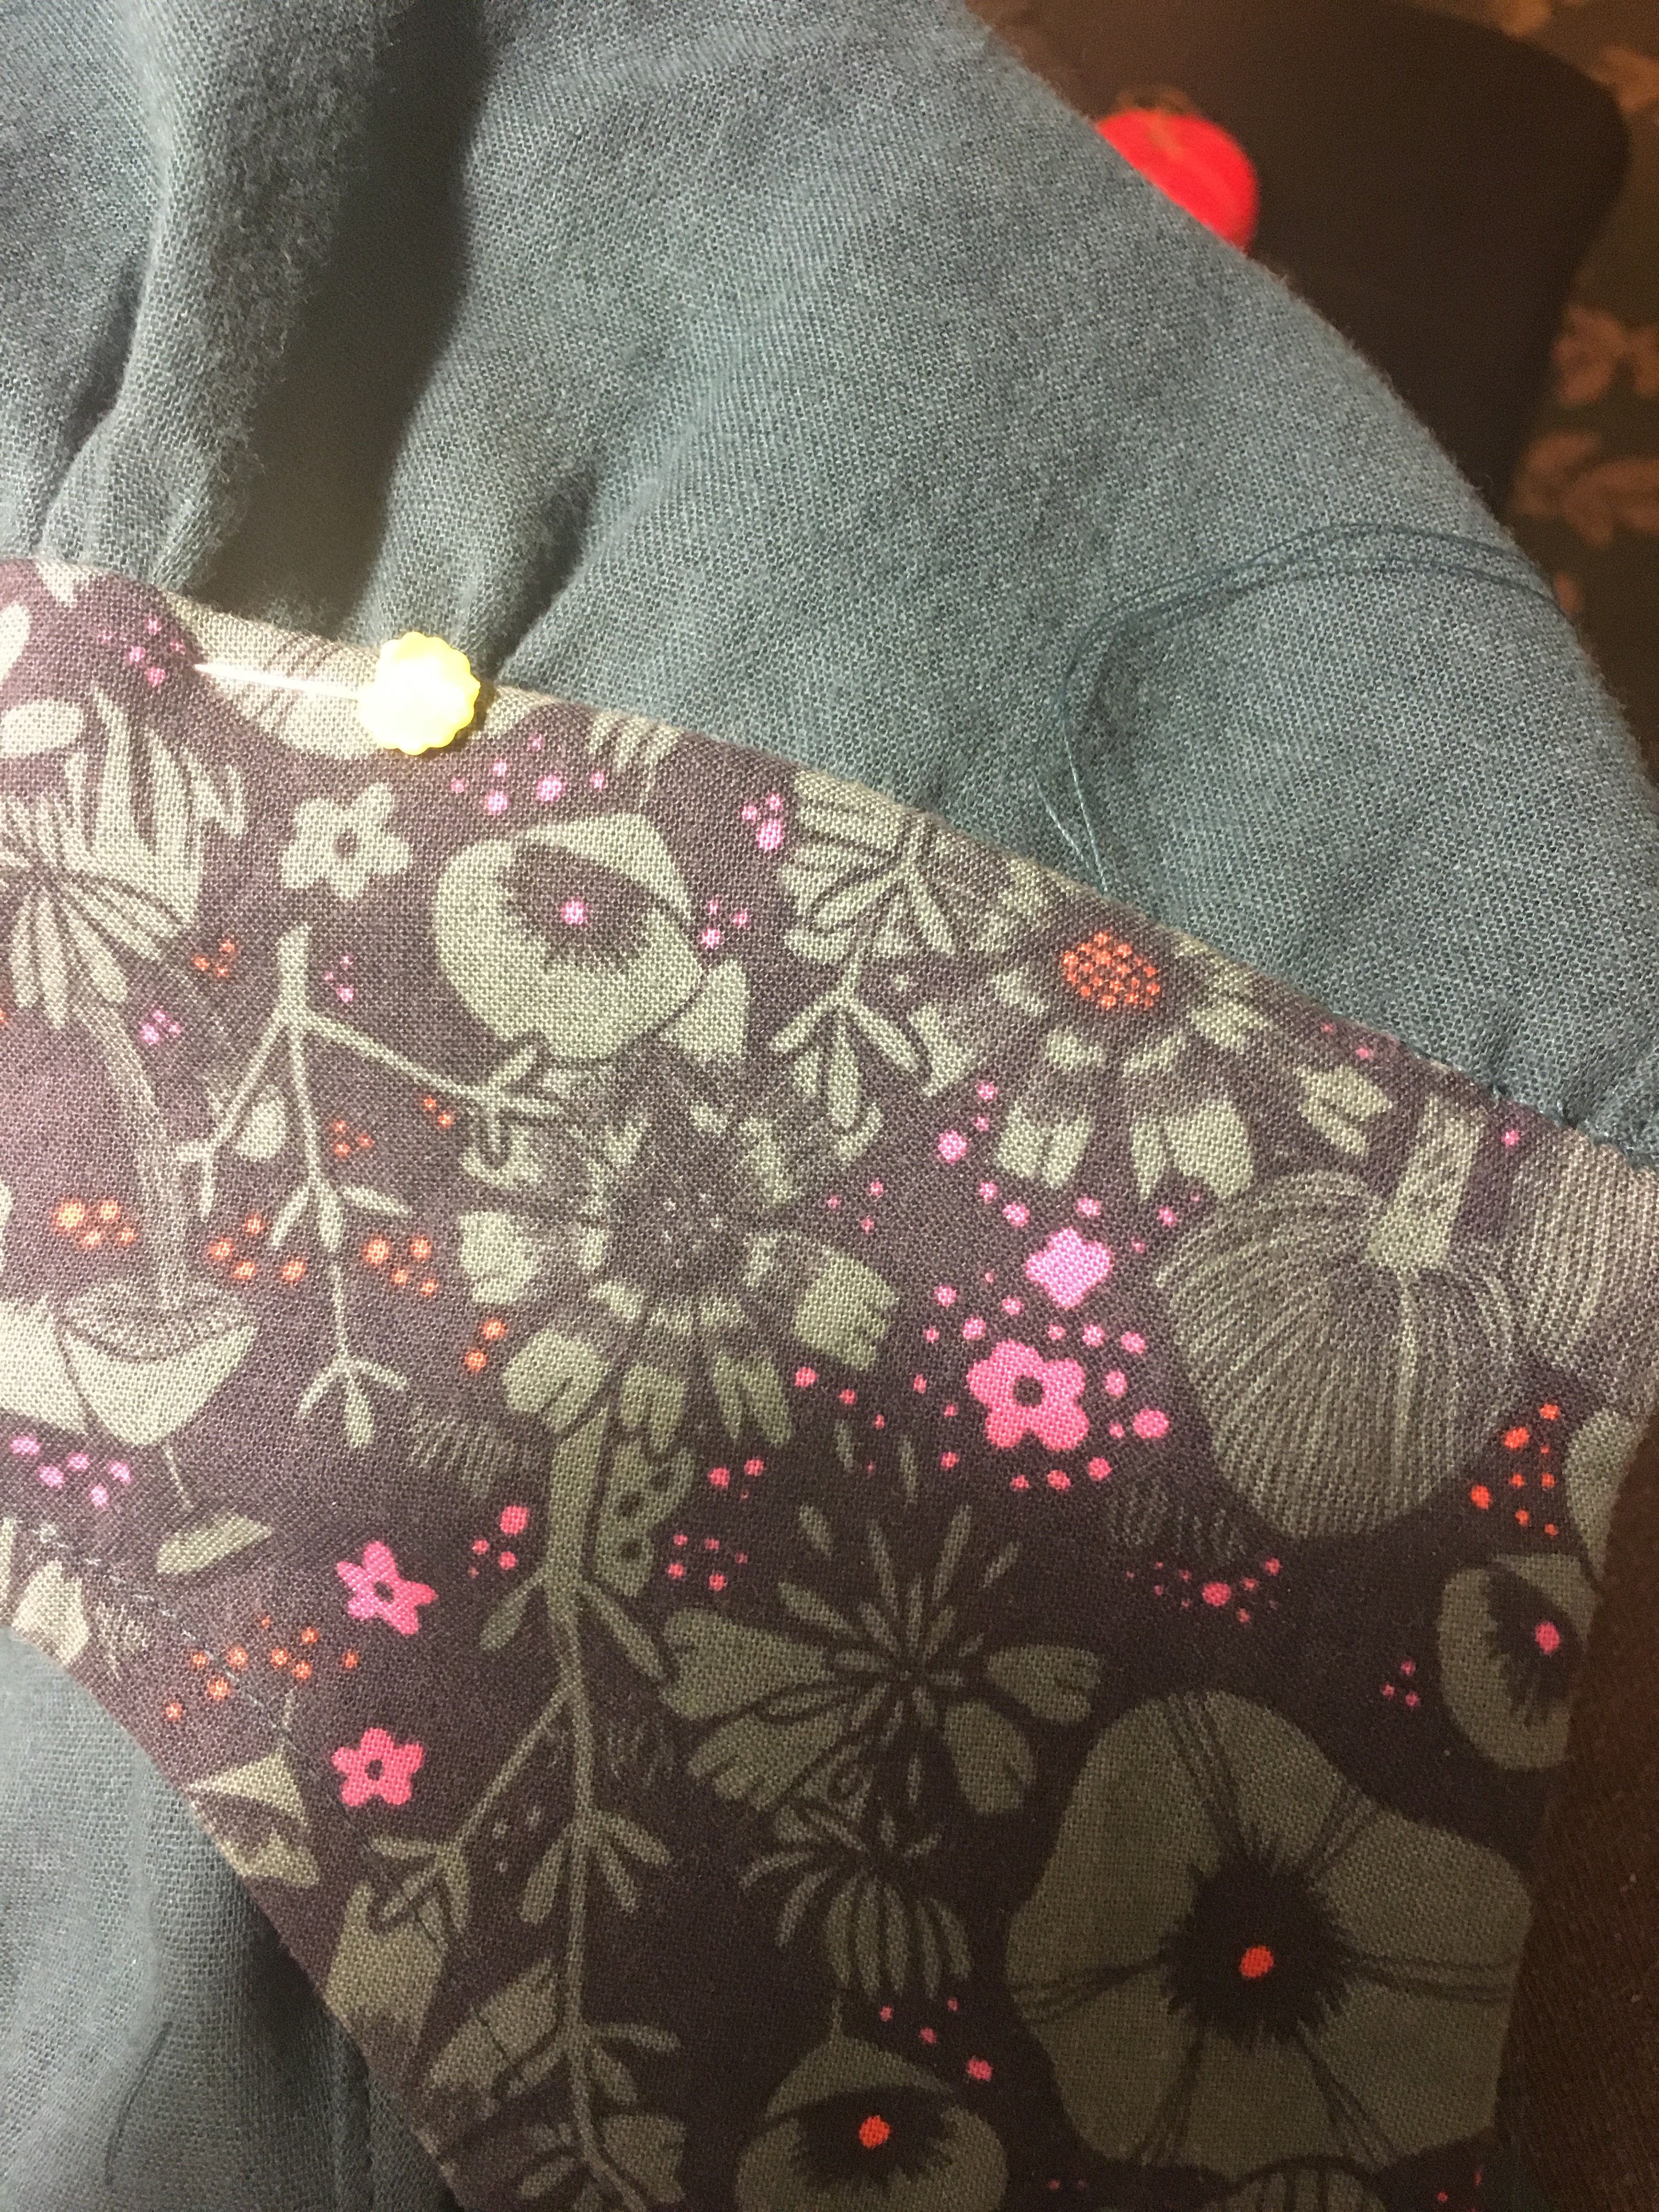 I even had time to make home-made soup for dinner after I finished sewing. I often make what I call “refrigerator soup” where I look in the refrigerator and see what I have and make it into soup. A couple of weeks ago, I had half a butternut squash, a sweet potato and some carrots and I ended up making soup with some sautéed onions, chicken broth, fresh ginger and a little curry for seasoning. It was fantastic so today I made it on purpose. “Vitamin A Soup” below. I think the bright orange and yellow color speaks to me in the dark days of winter.
  I have been drawn to oranges and yellows all winter. I have made several
 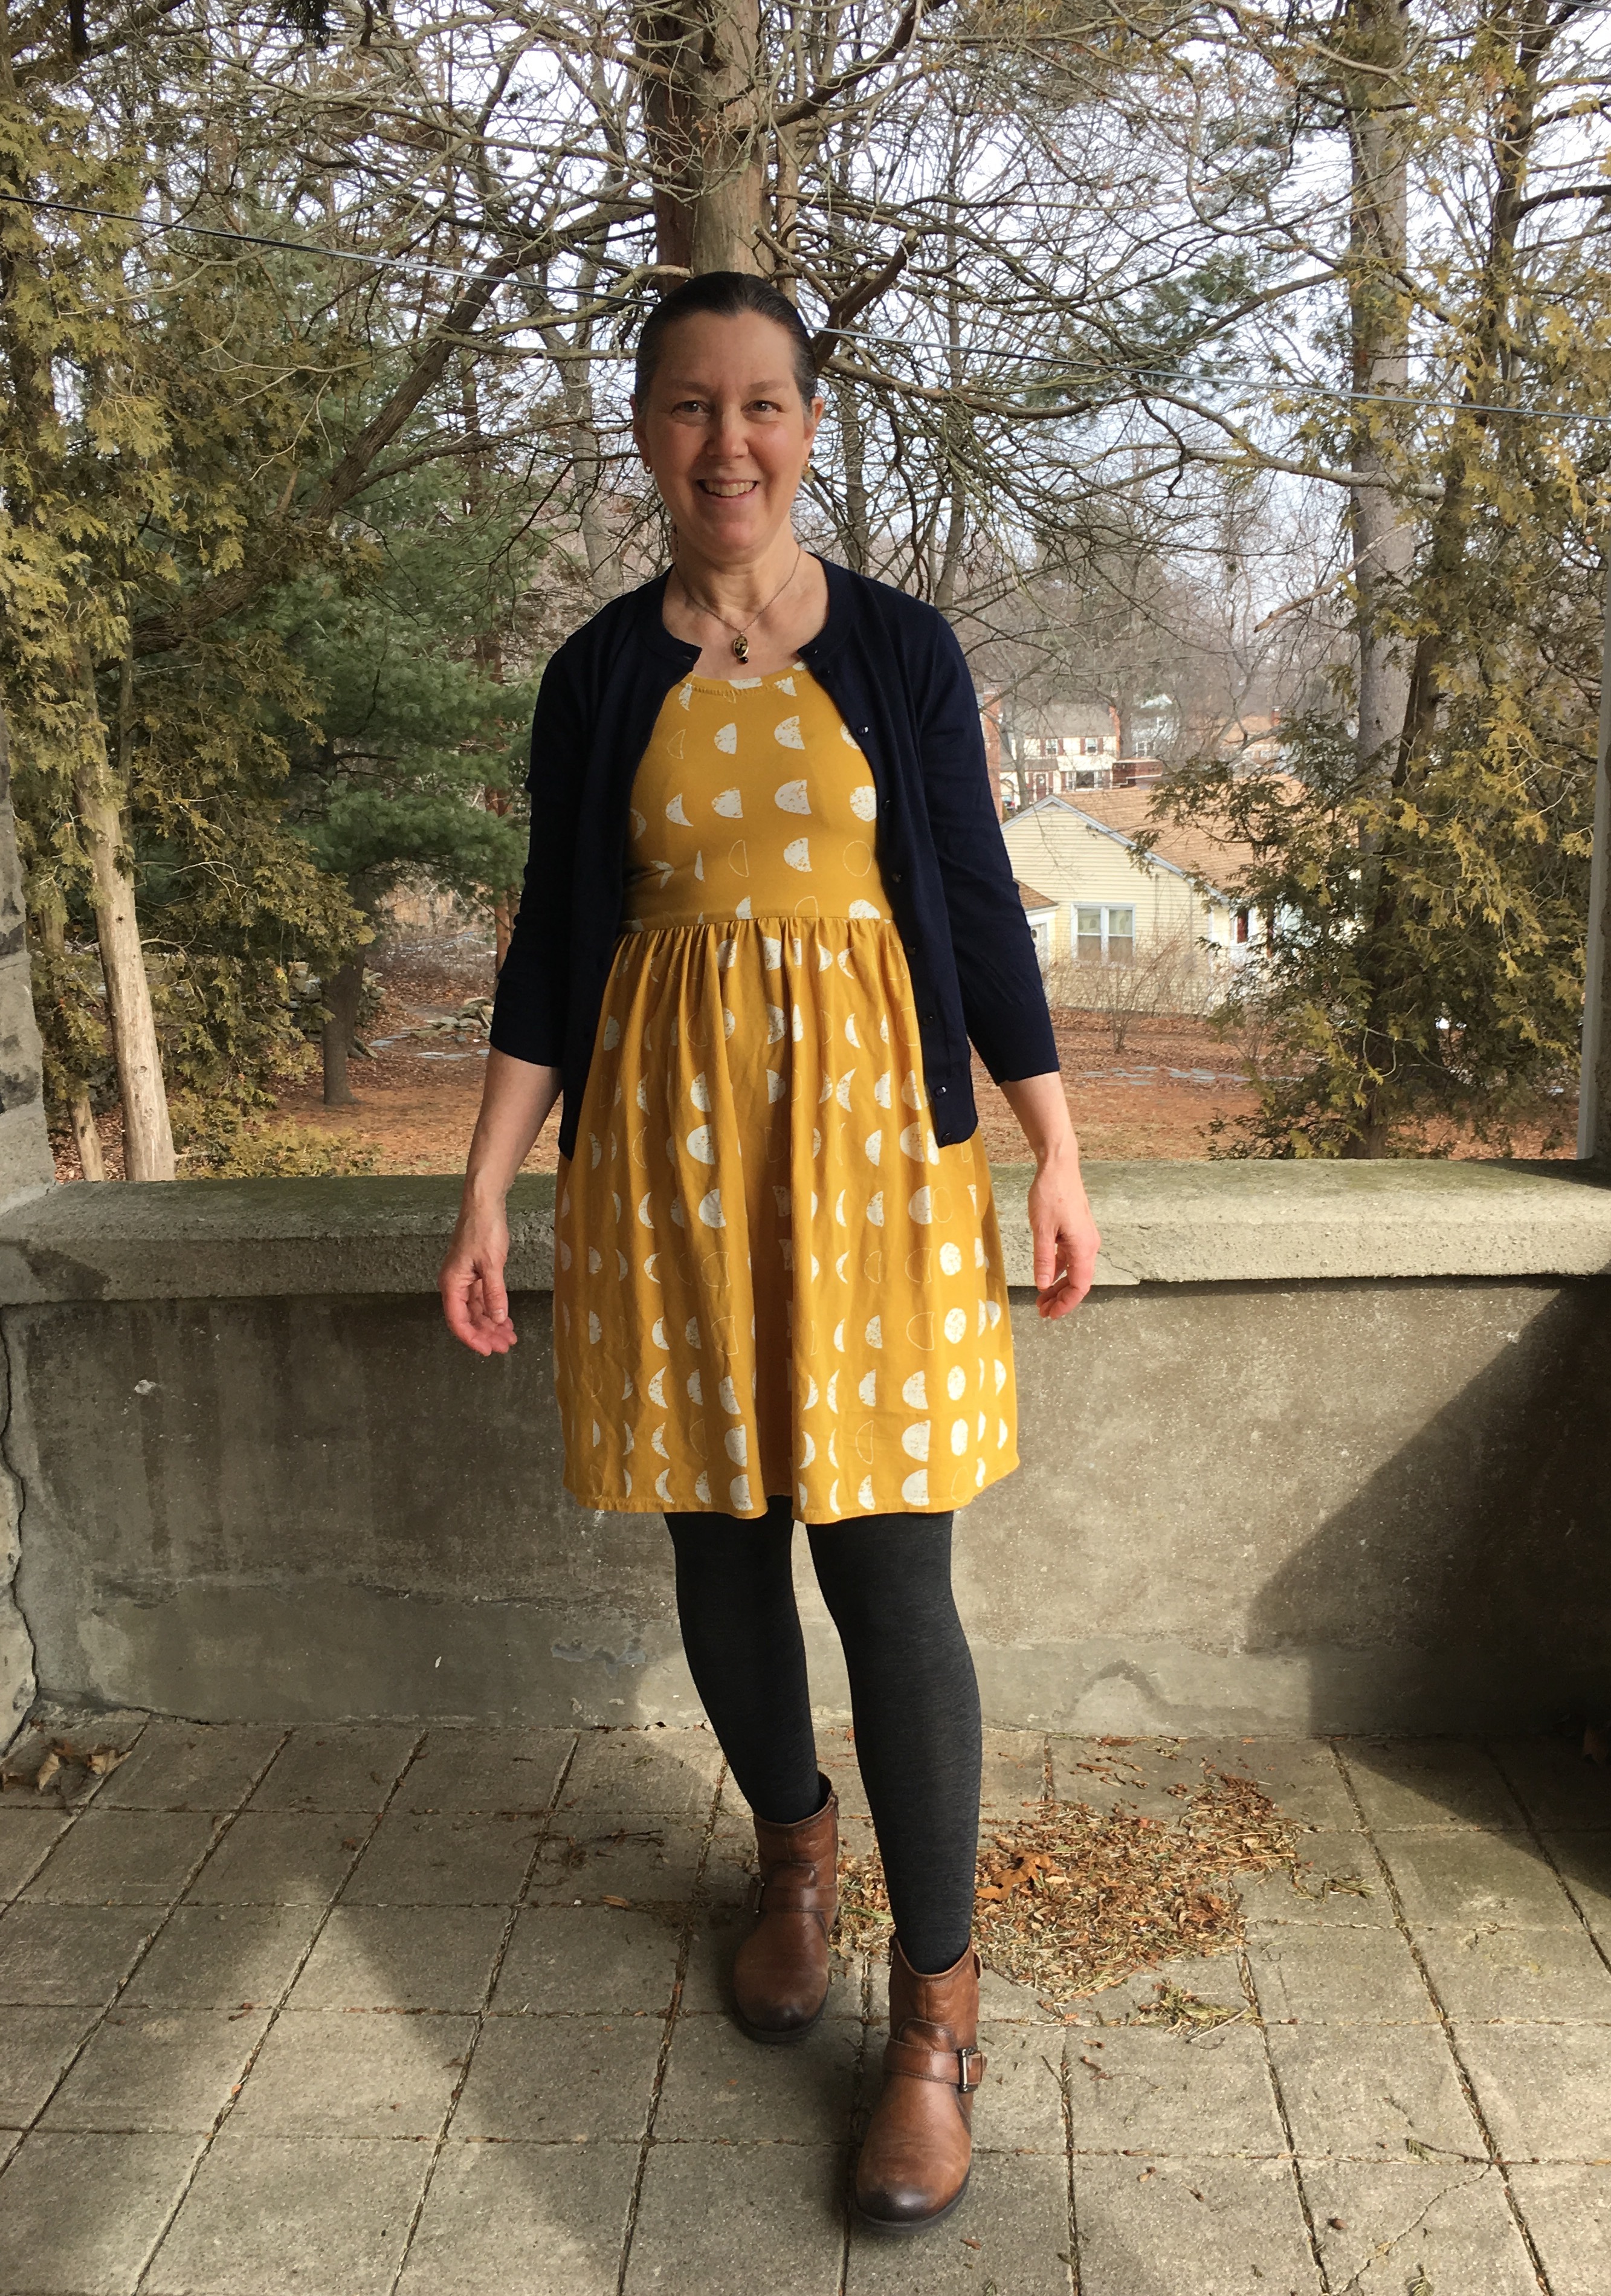 I am also loving
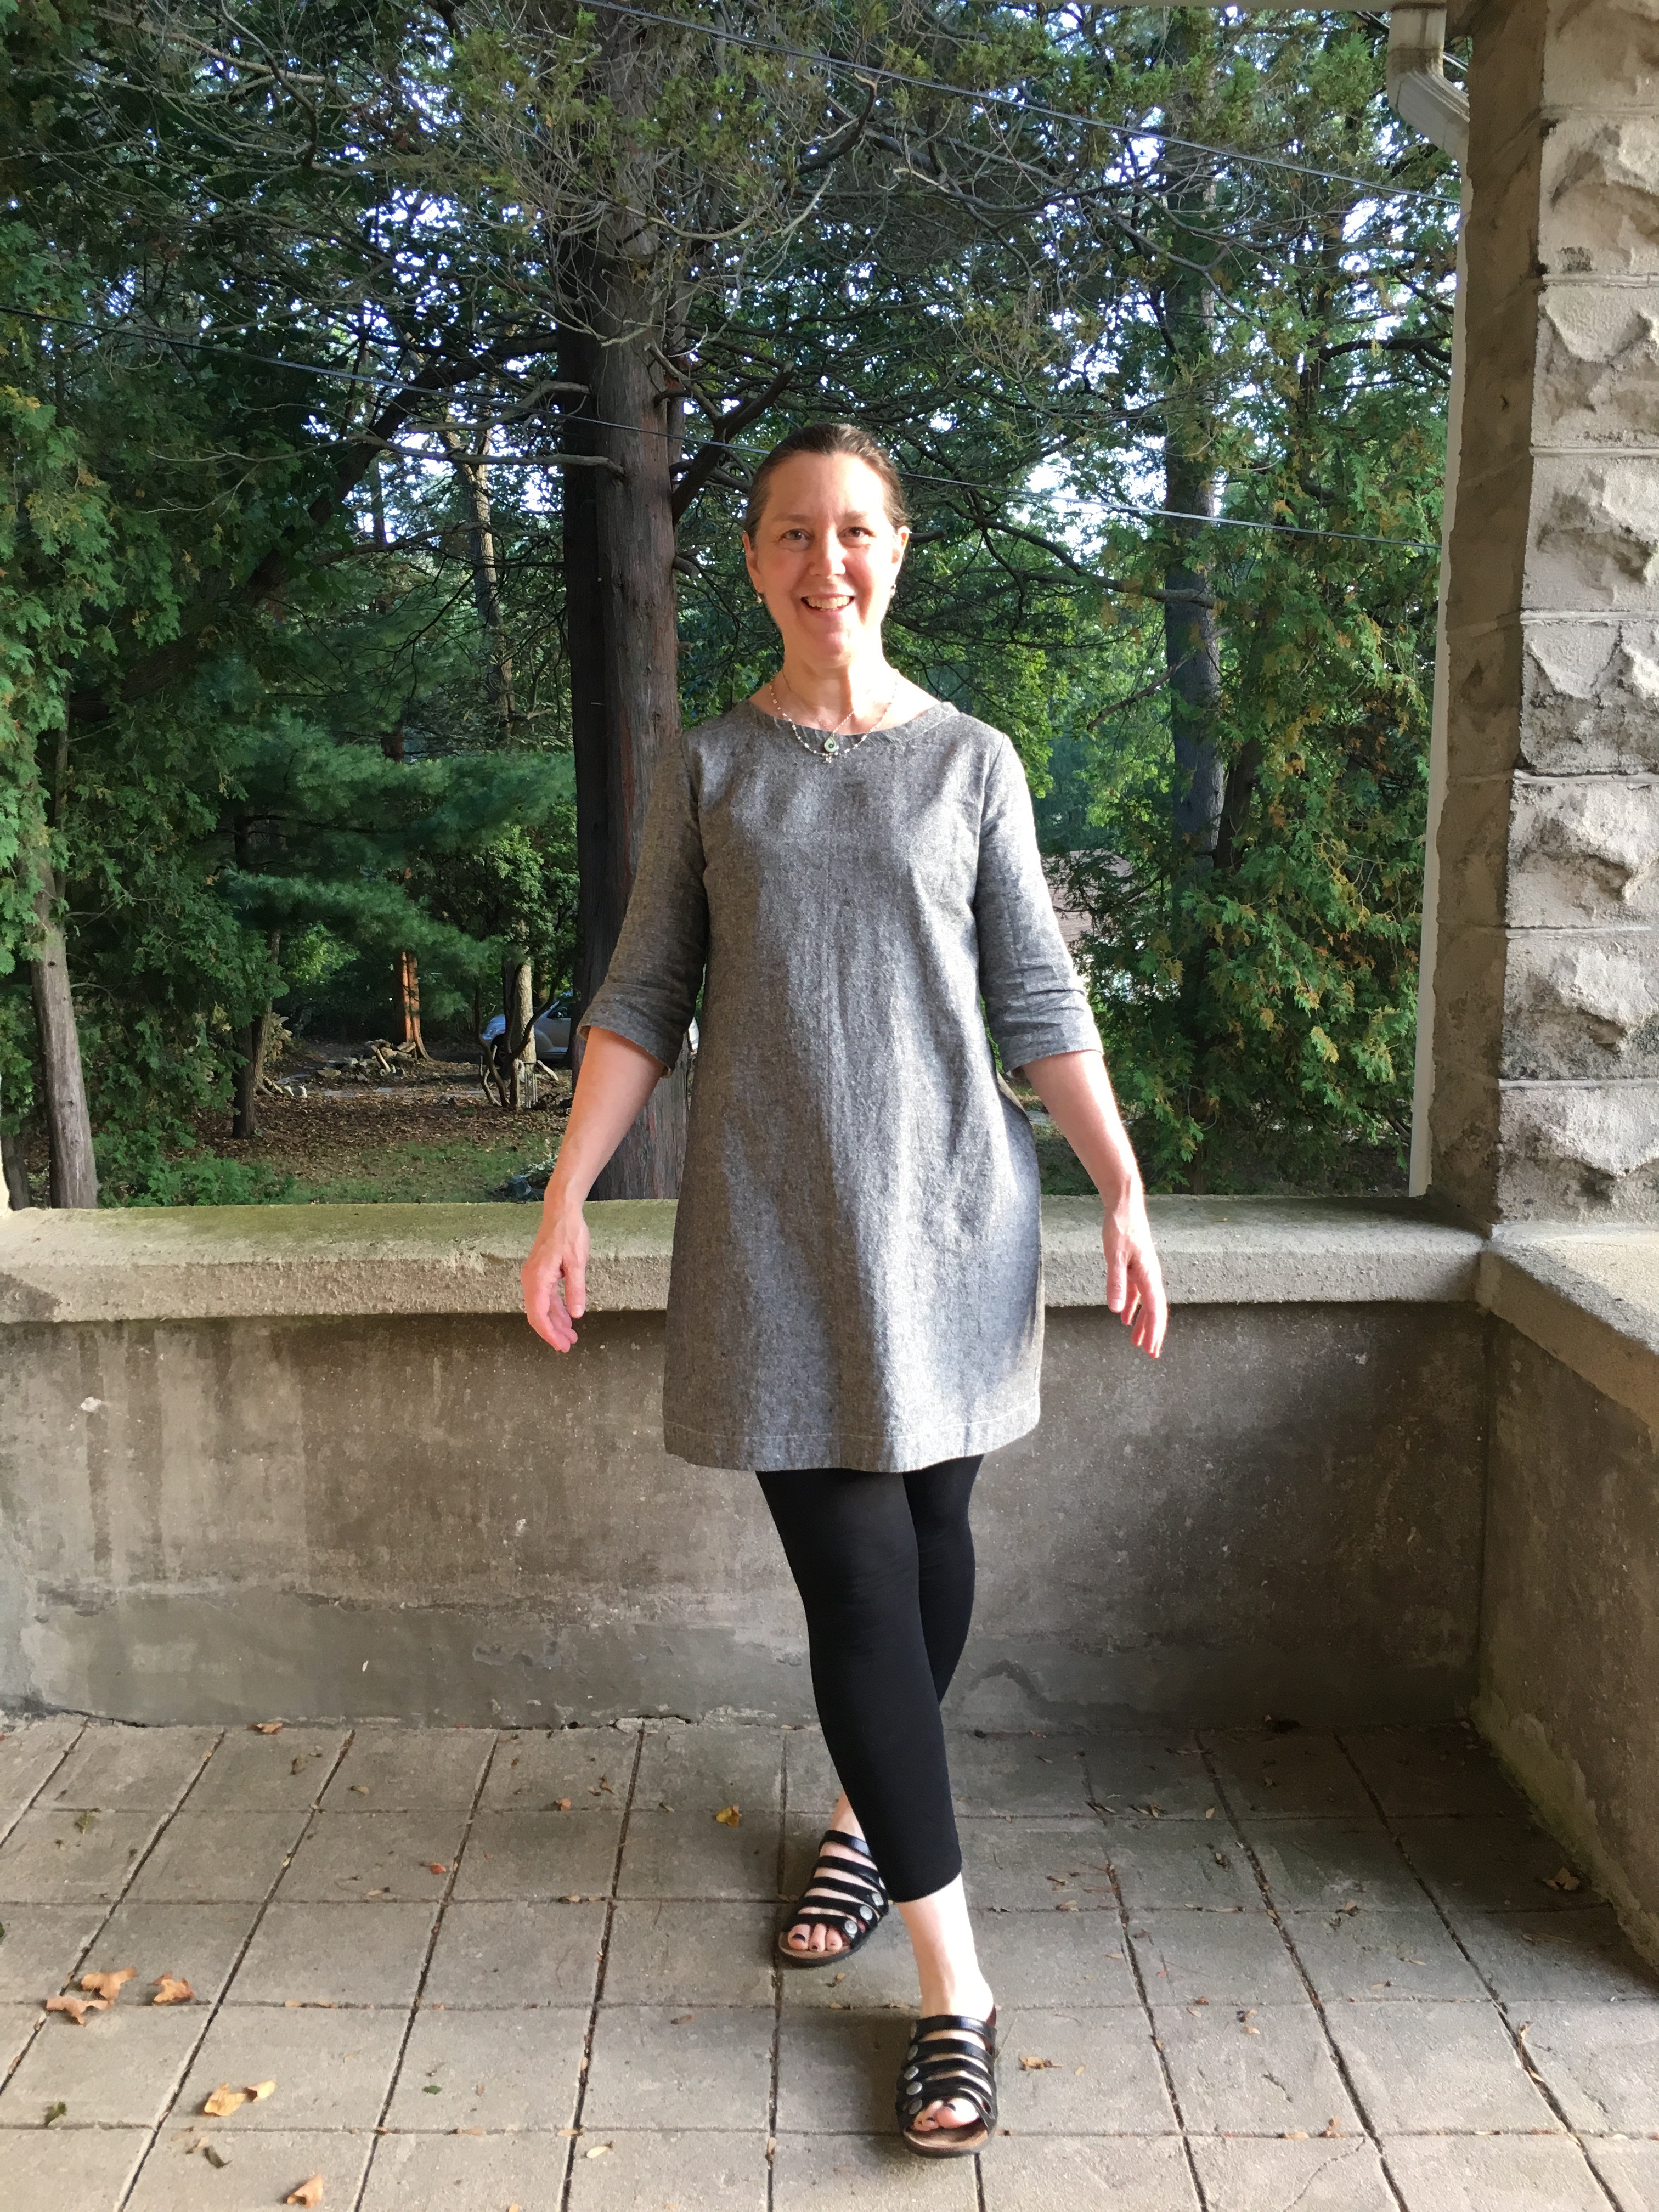
 With the cooler weather, I am turning to the
  When I make changes to patterns, I write notes to myself on the pattern pieces. Ironically, sometimes I forget to read the notes until after cutting out the pattern as I did here. I did not actually add enough to the seam allowance to allow for french seams. Note to self: read notes to self.
  This is a very straight-forward pattern and if I didn’t insist on adding a zipper, it would be even quicker but I think the zipper adds a lot so I used one here. I sewed it using a techinique I modified from
  Sewing the first side:
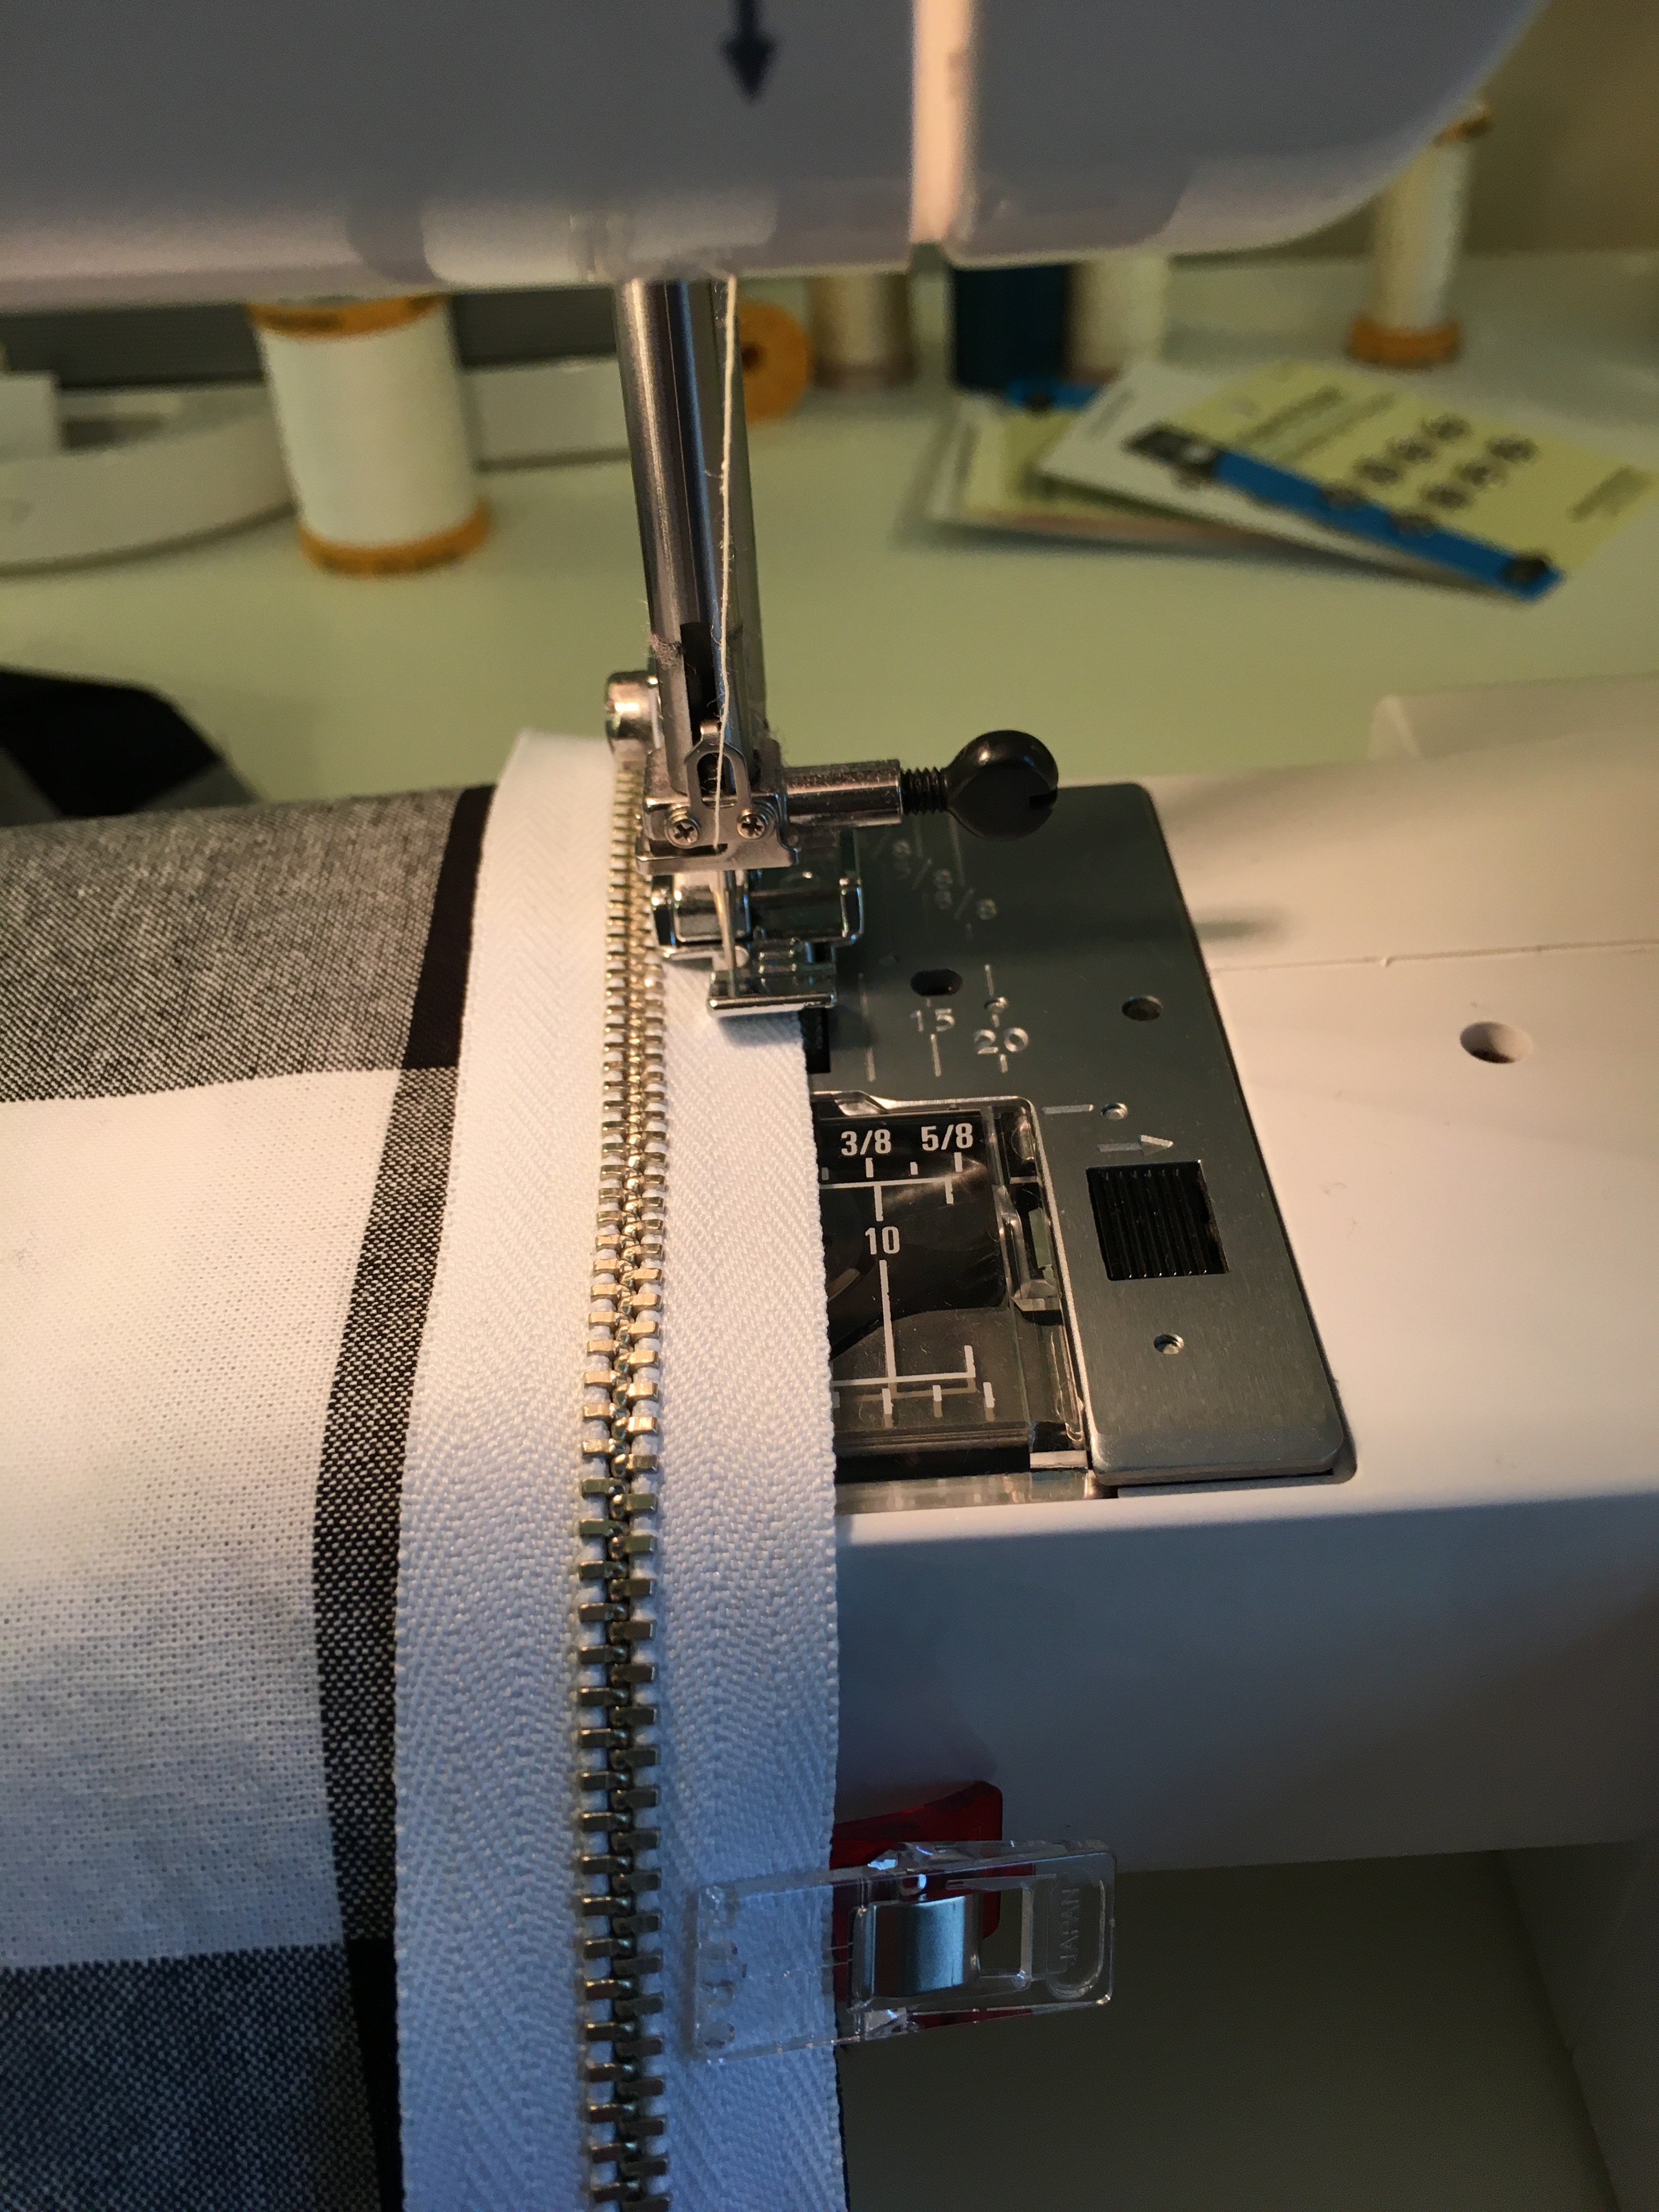 After sewing one side, I do the reverse and then top-stitch. I find it works best to sew the zipper initially going from top to bottom but I have better success with the top-stitching when I start at the bottom of the zipper and sew to the top maintaining some tension on the fabric to prevent puckers.
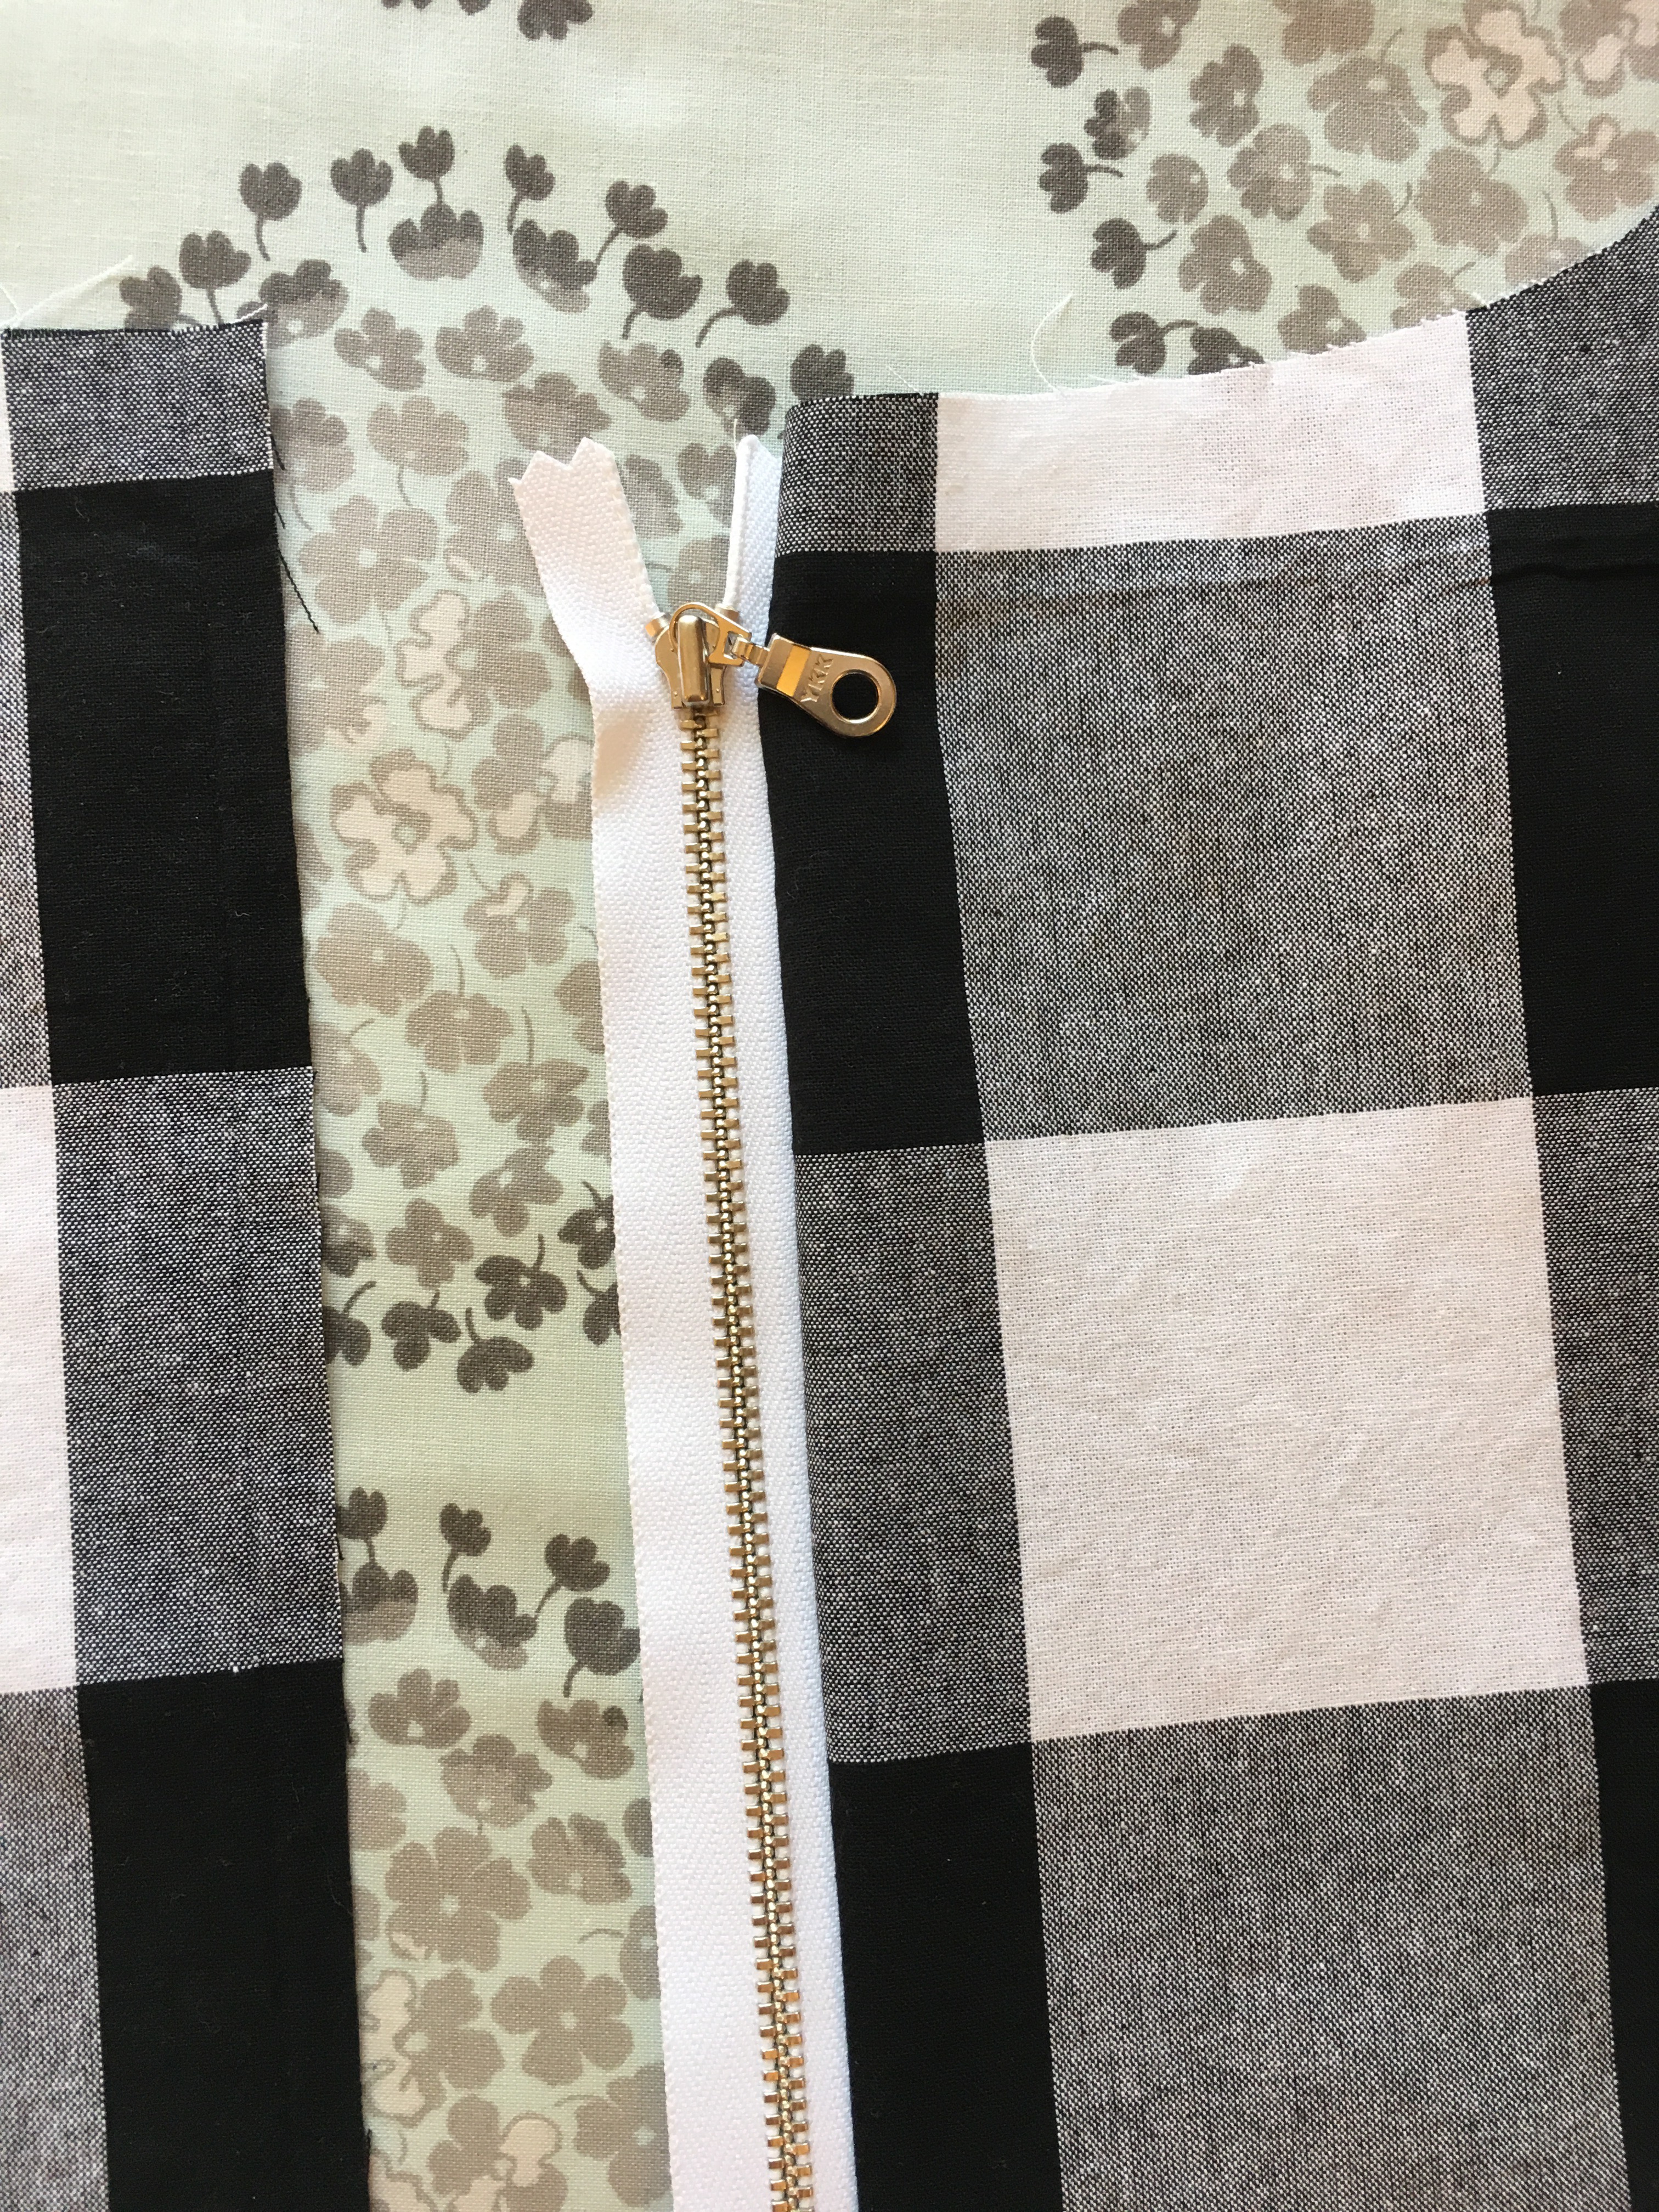 Lining up the second side.
 Ready for top-stitching.
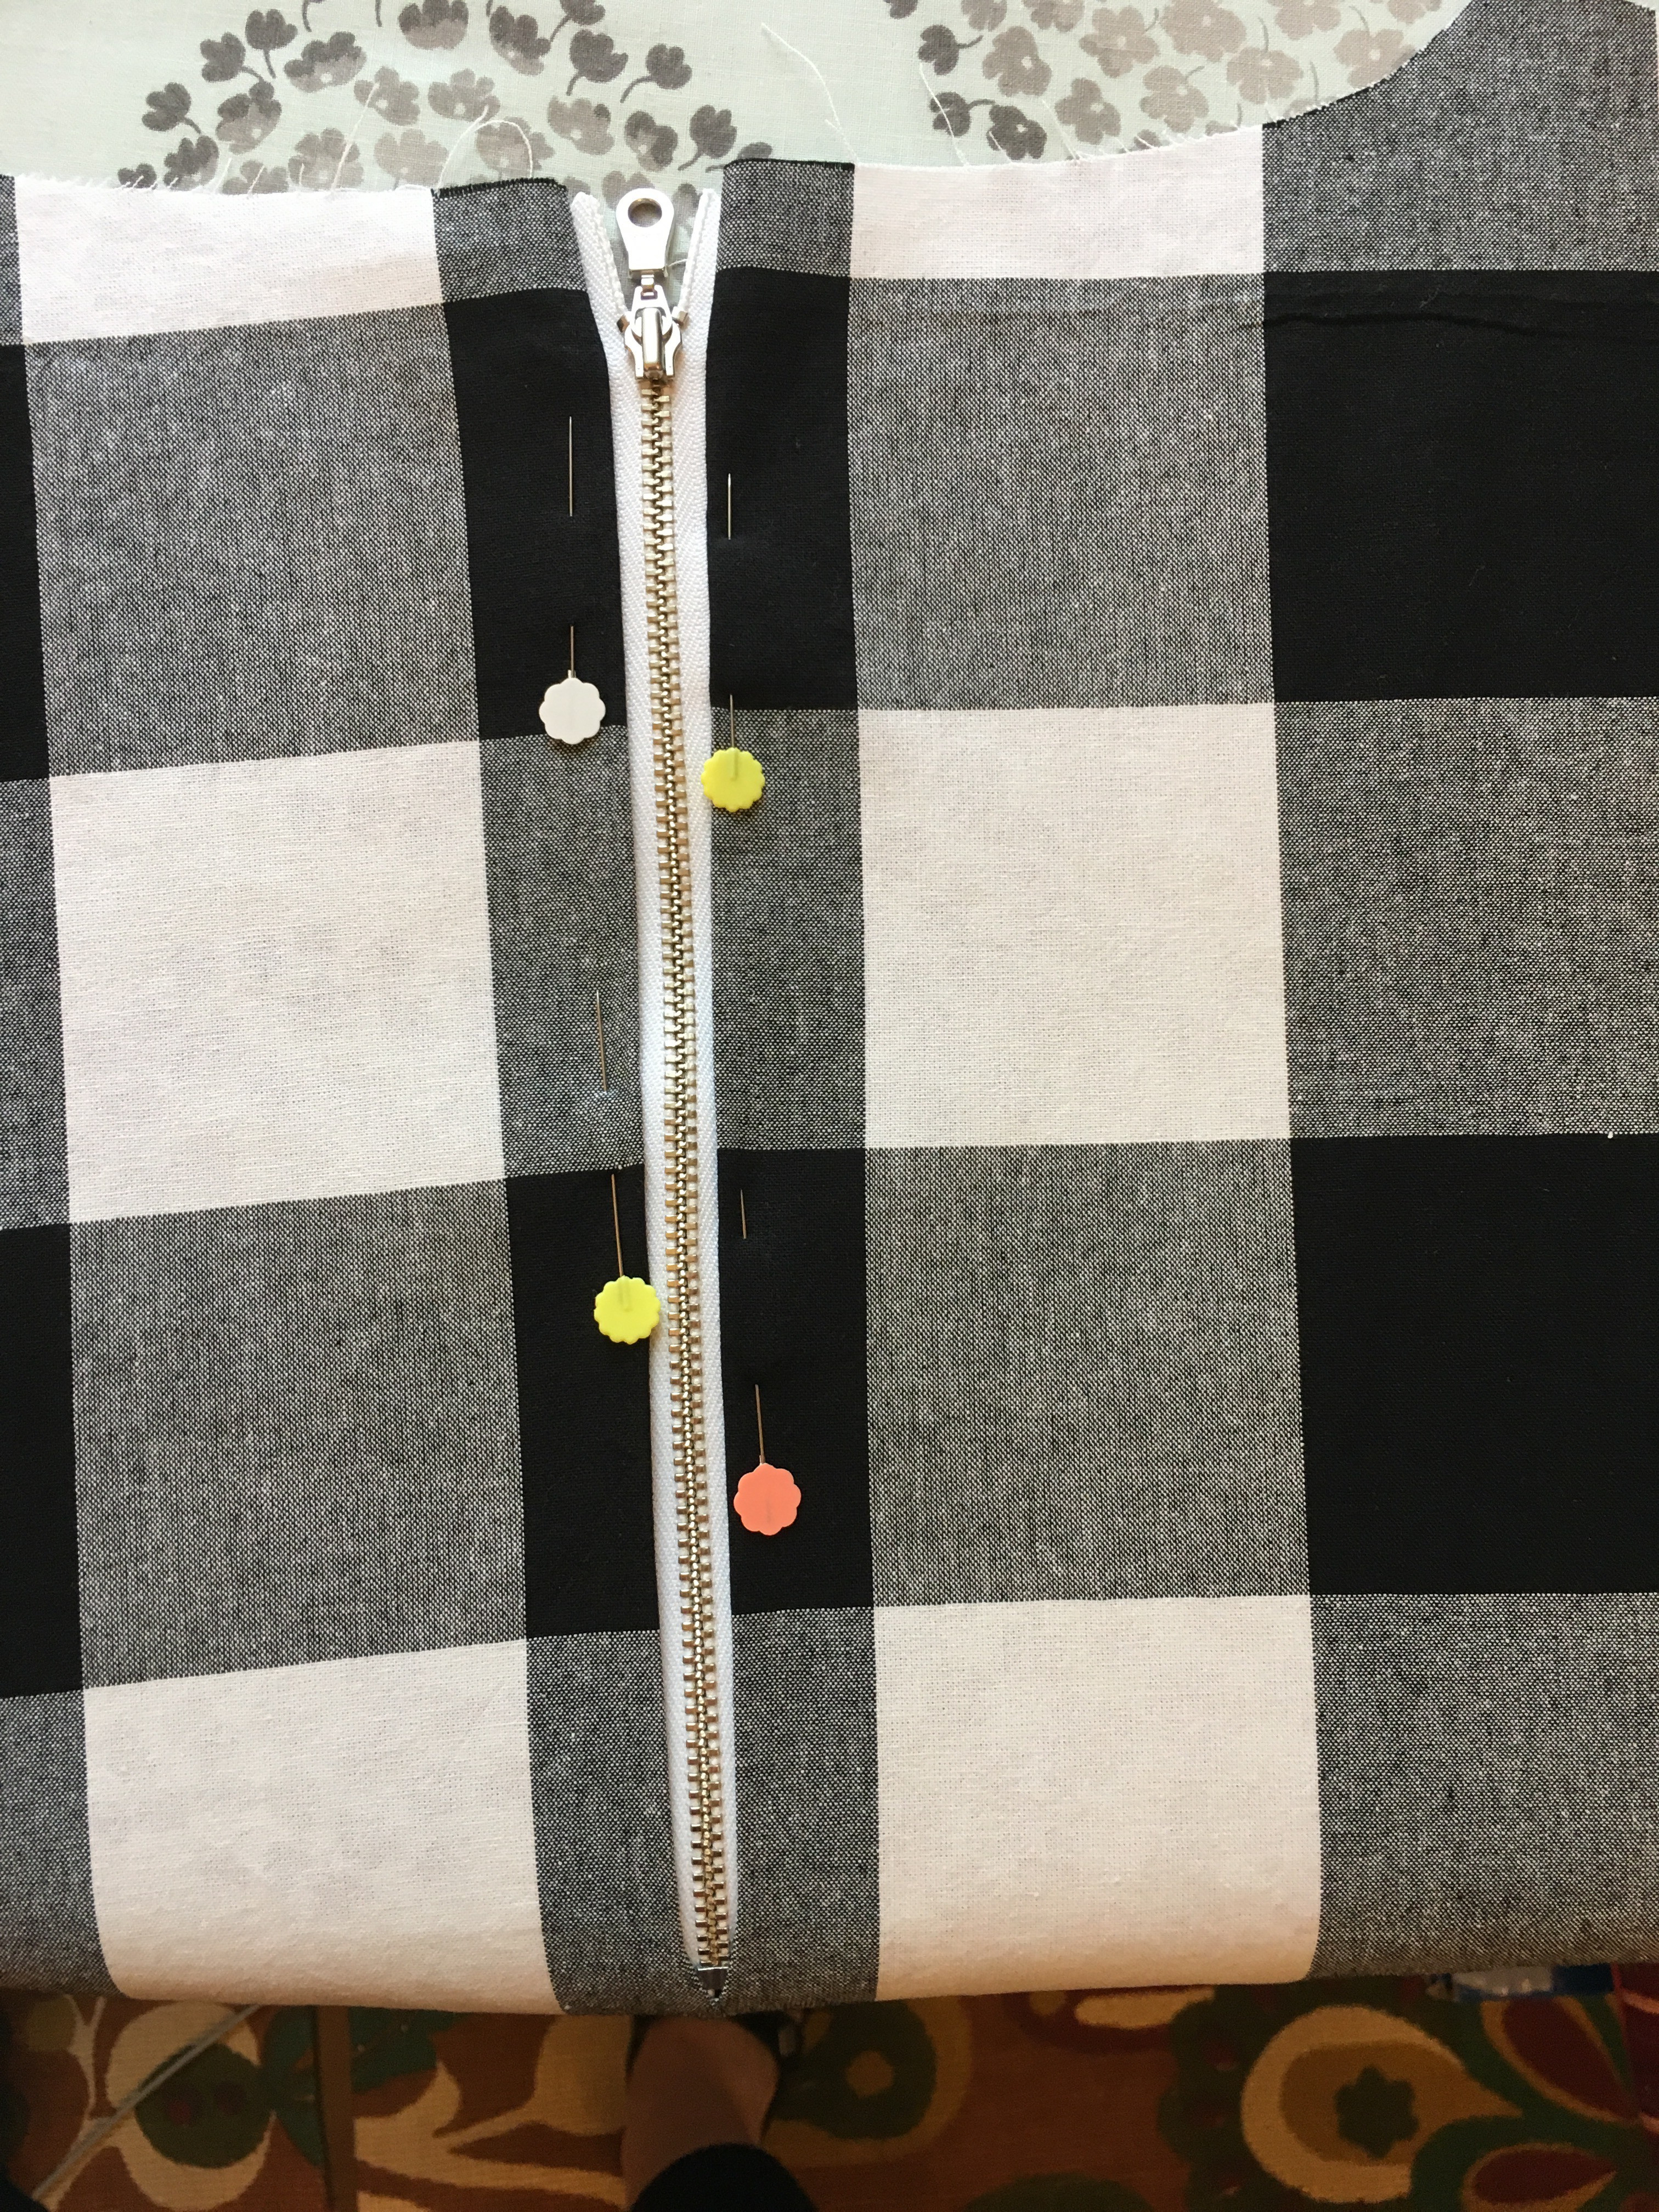 After top-stitching. It took three tries to get this. Sewing from the bottom of the zipper to the top was the key in the end.
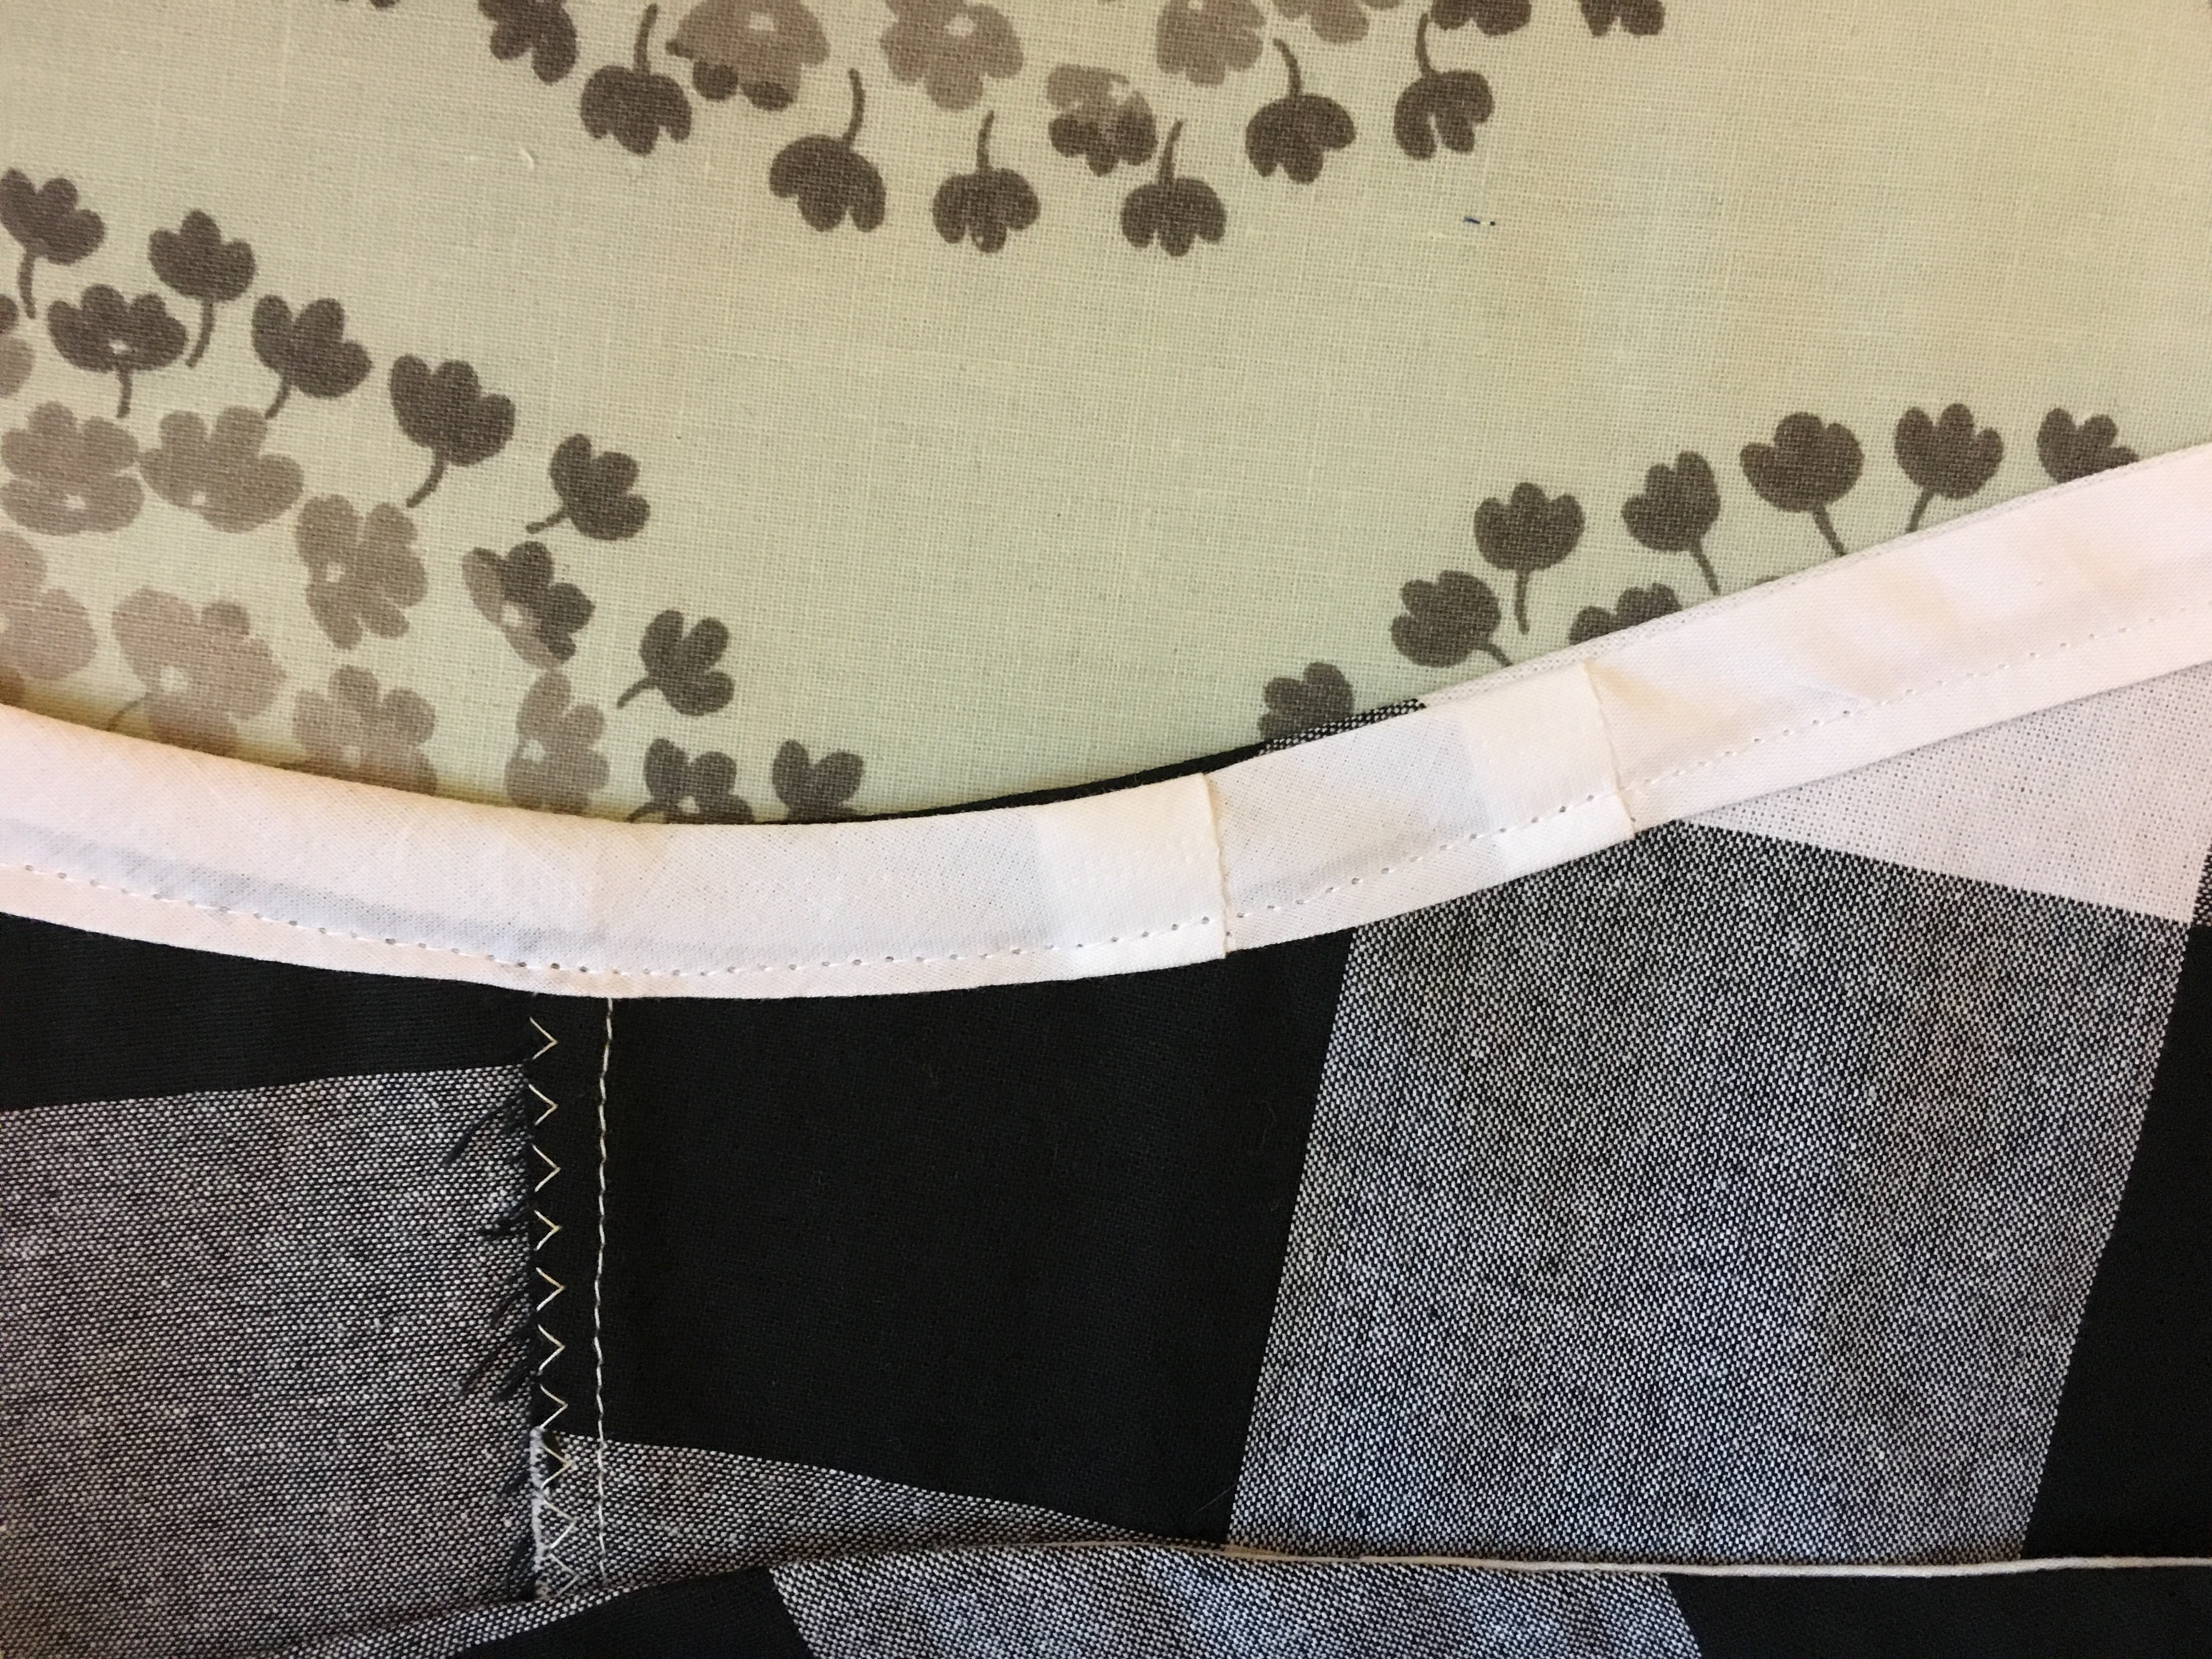
 I used my usual hem facing technique. I cut up an old muslin into 3 inch strips. I have described this technique in my prior Pearl posts
  I am able to use the metal plate edge as the perfect guide to sew the hem when I use the 3 inch strips.
 Since I had extra of the 3 inch strips, I finished the sleeves the same way. I bound the neck using 1.5 inch bias binding leftover from my
 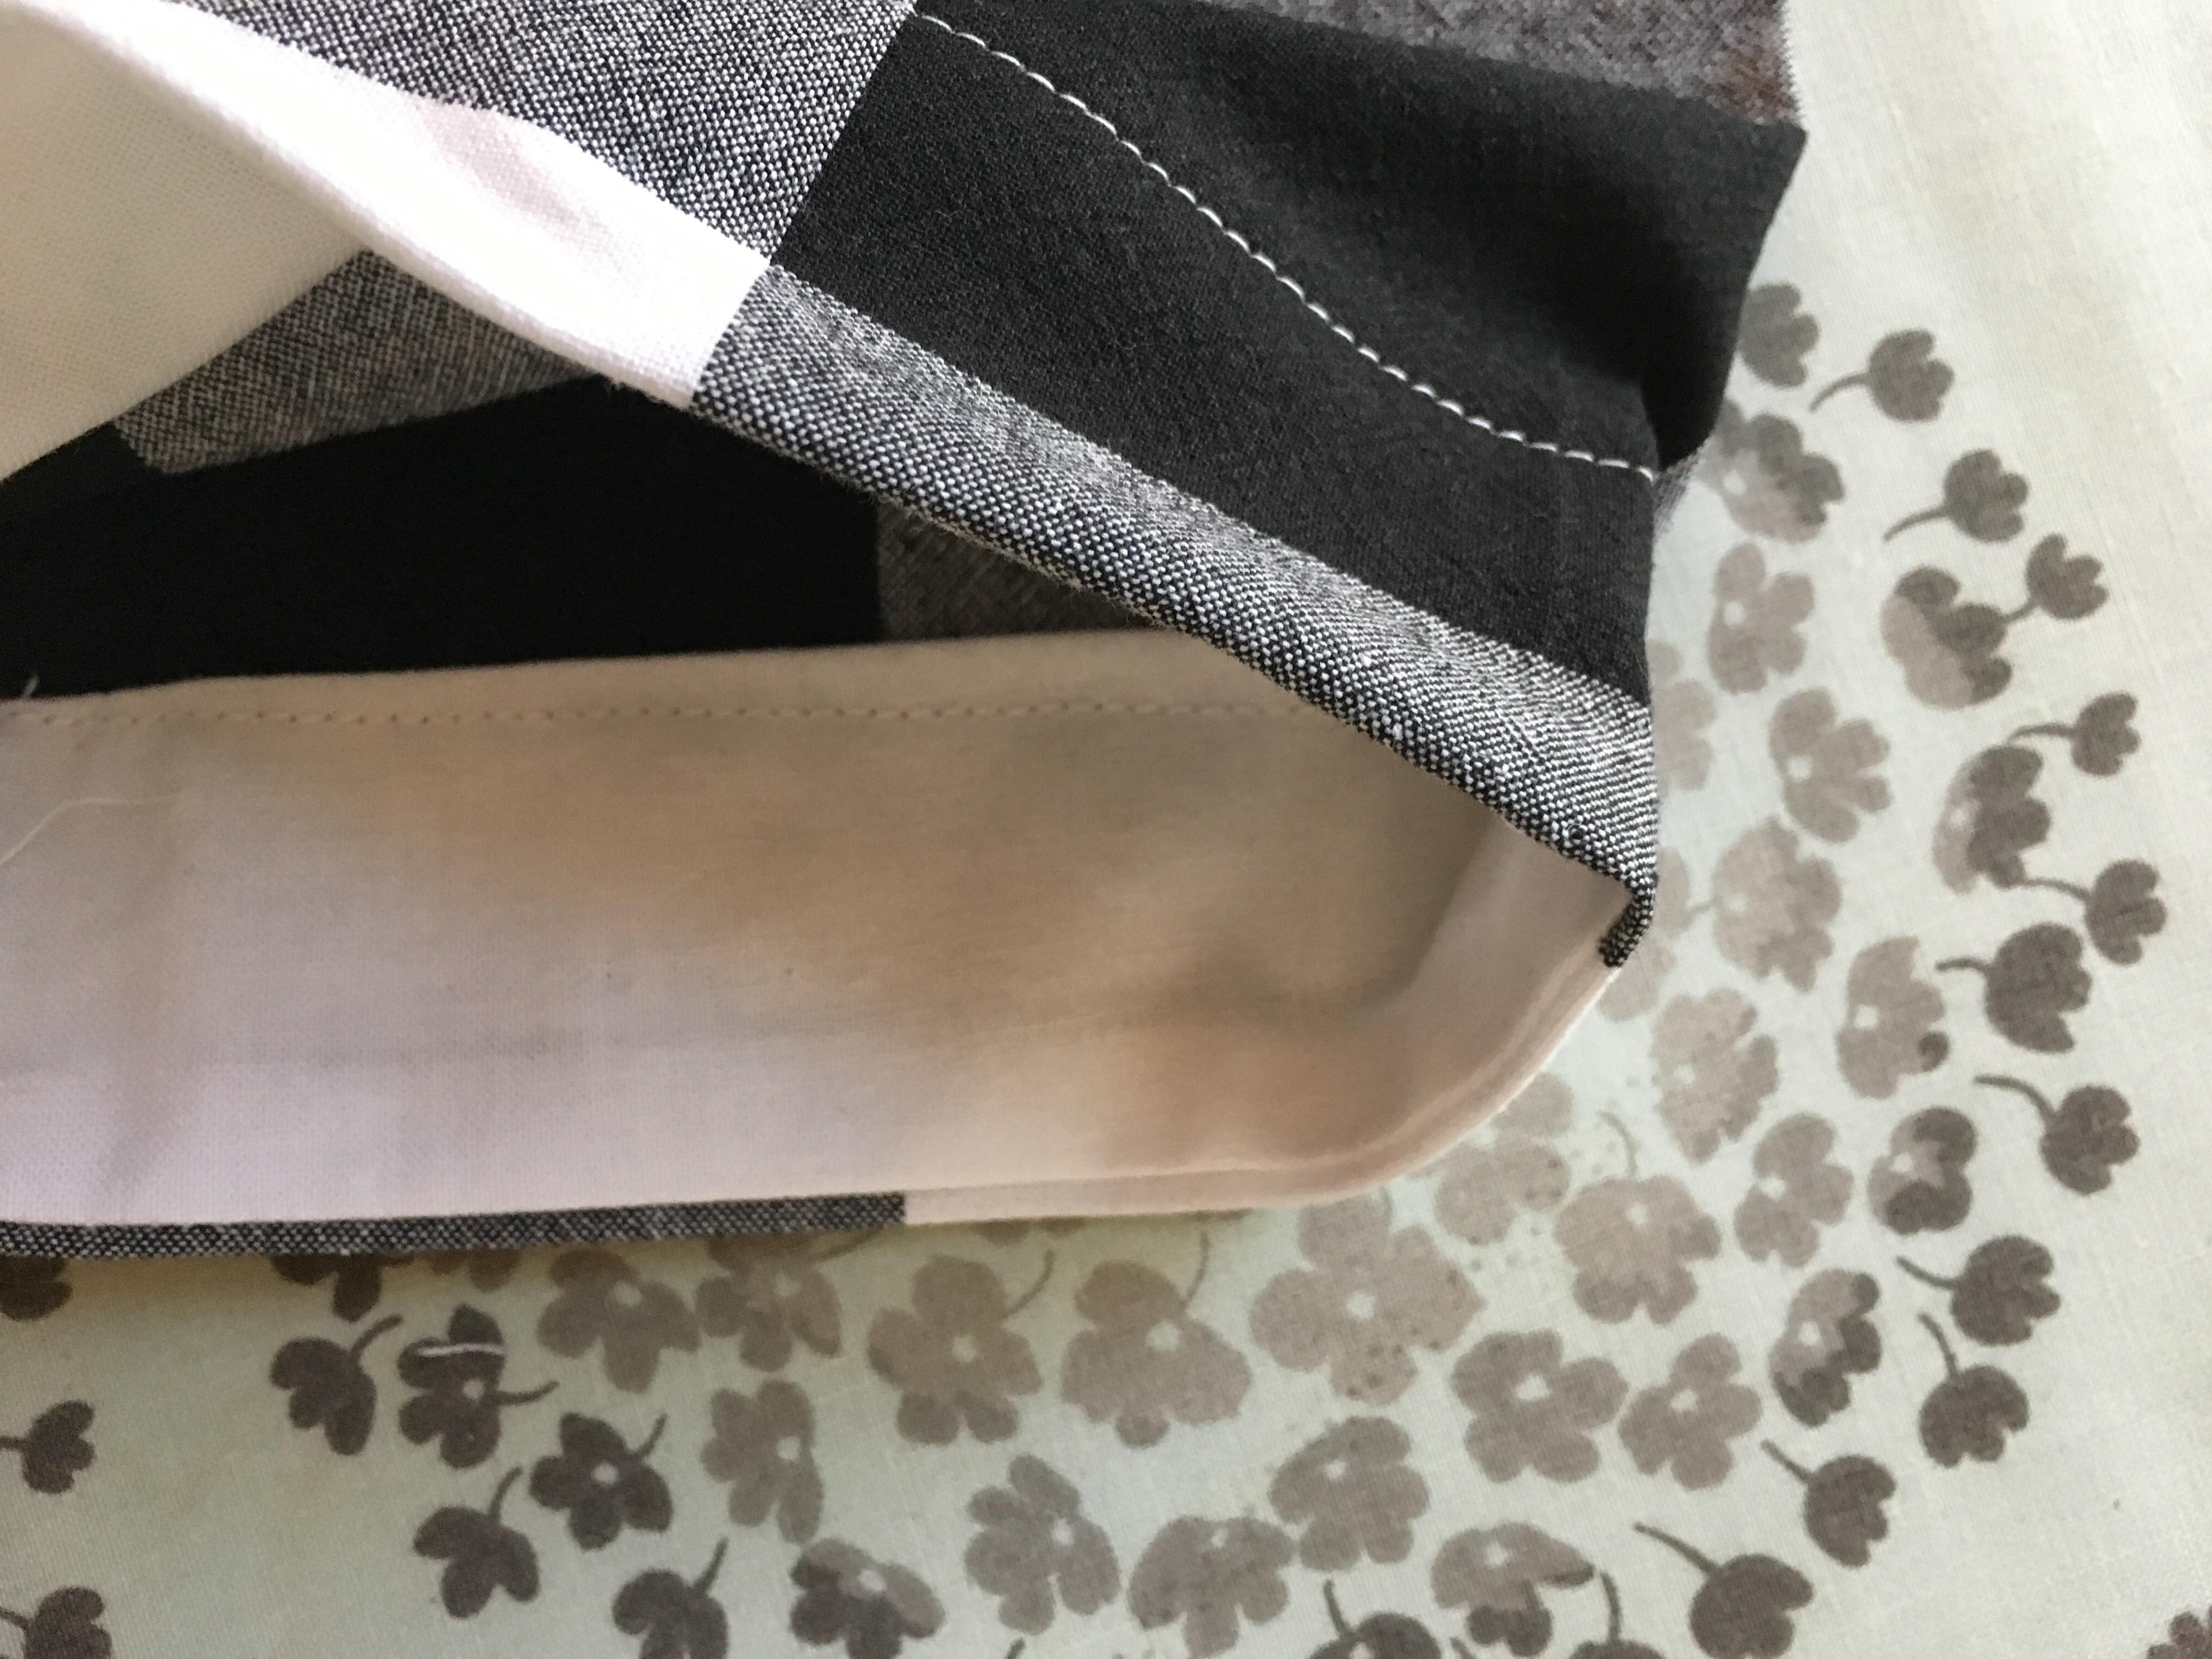 Finished dress on the front door.
 Back of dress.
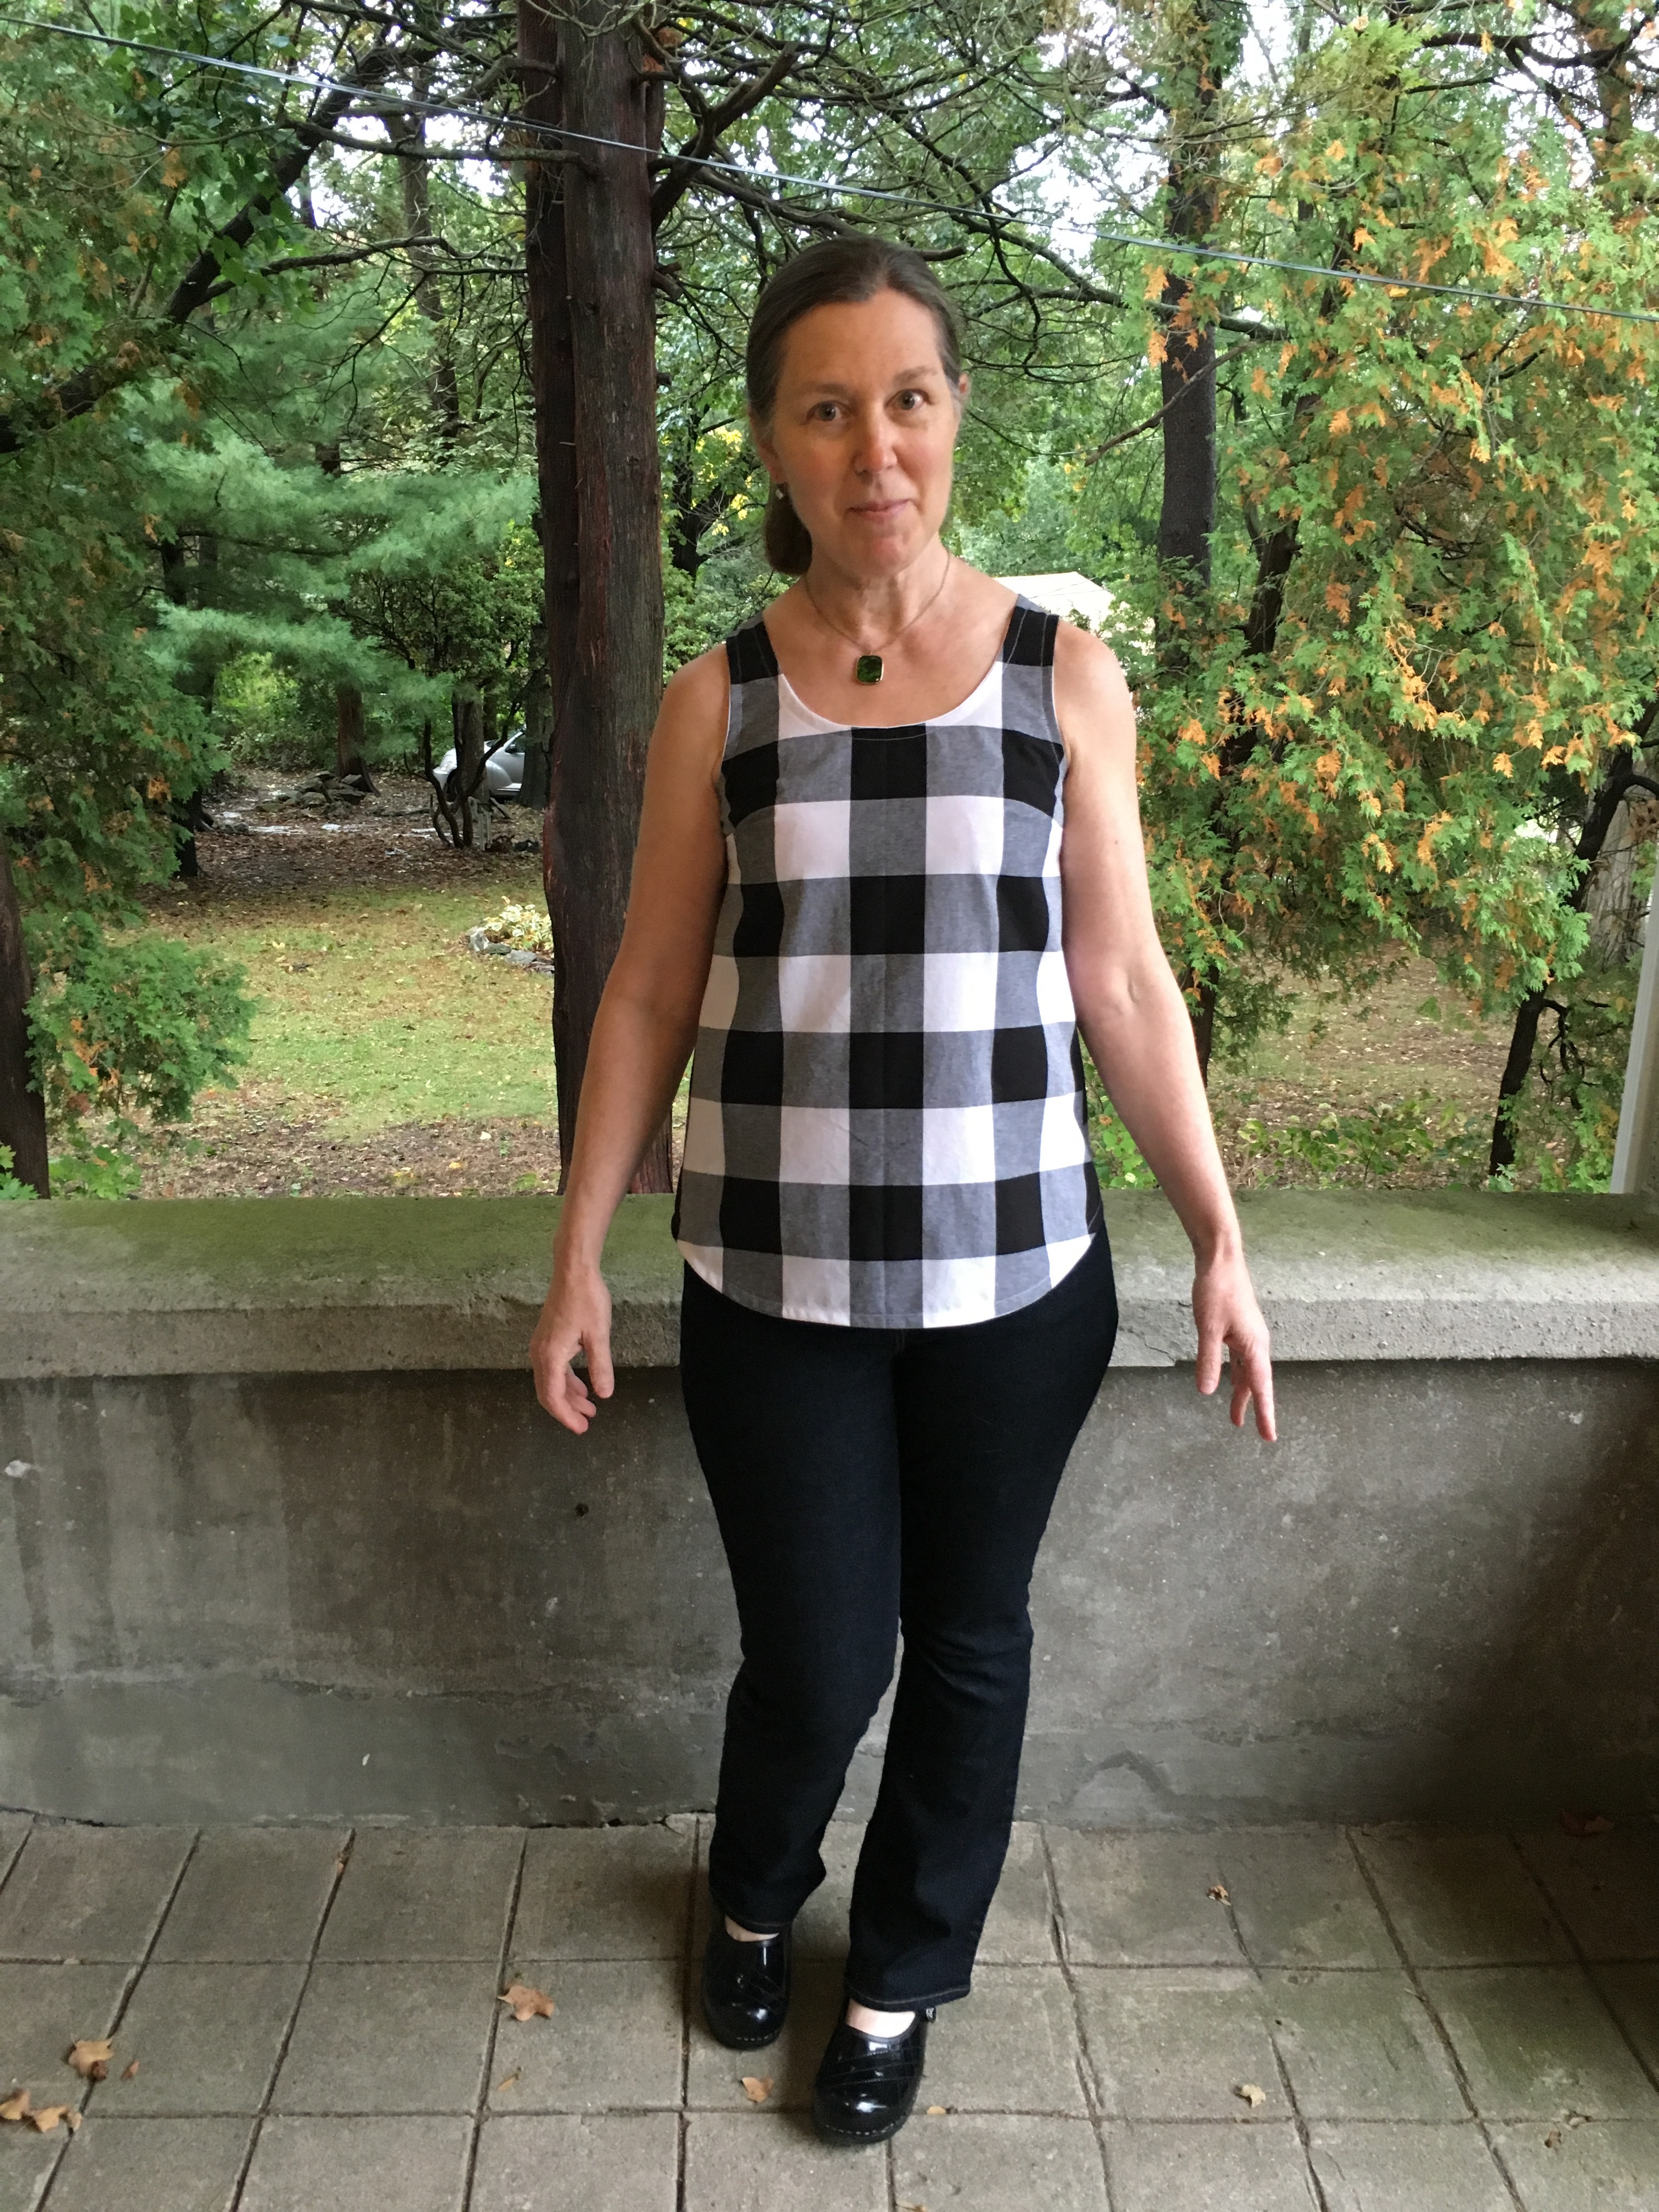
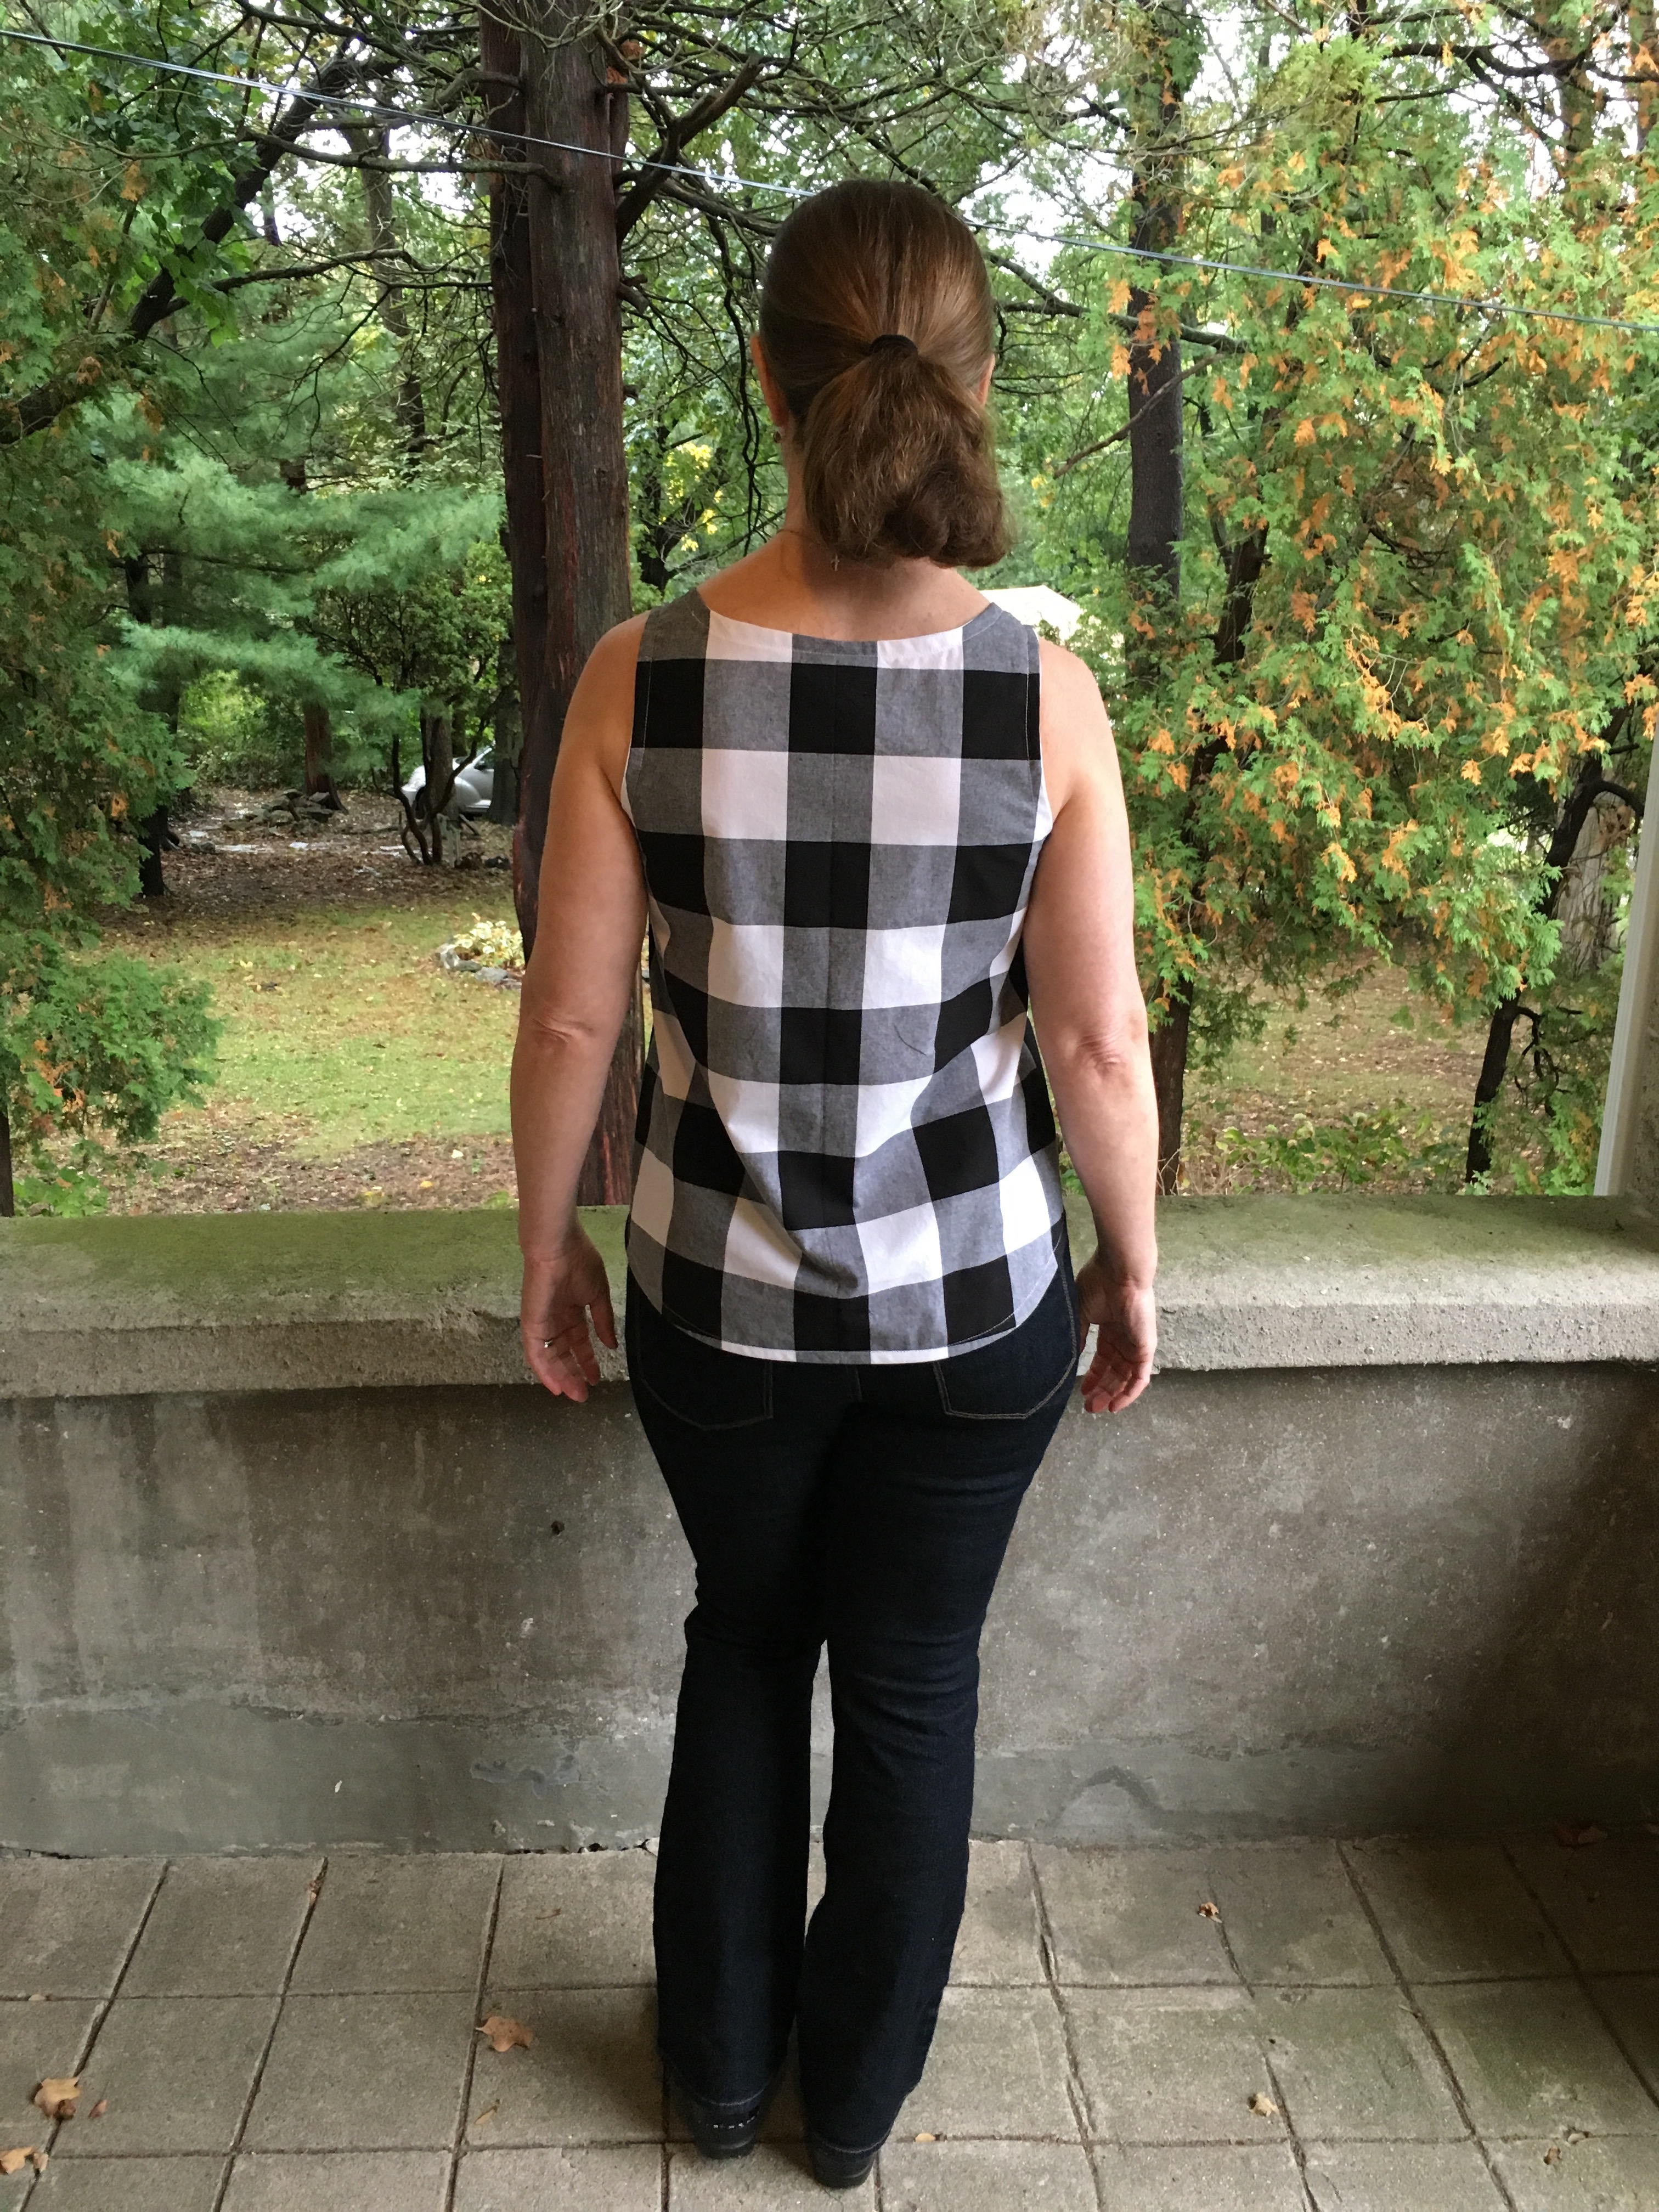
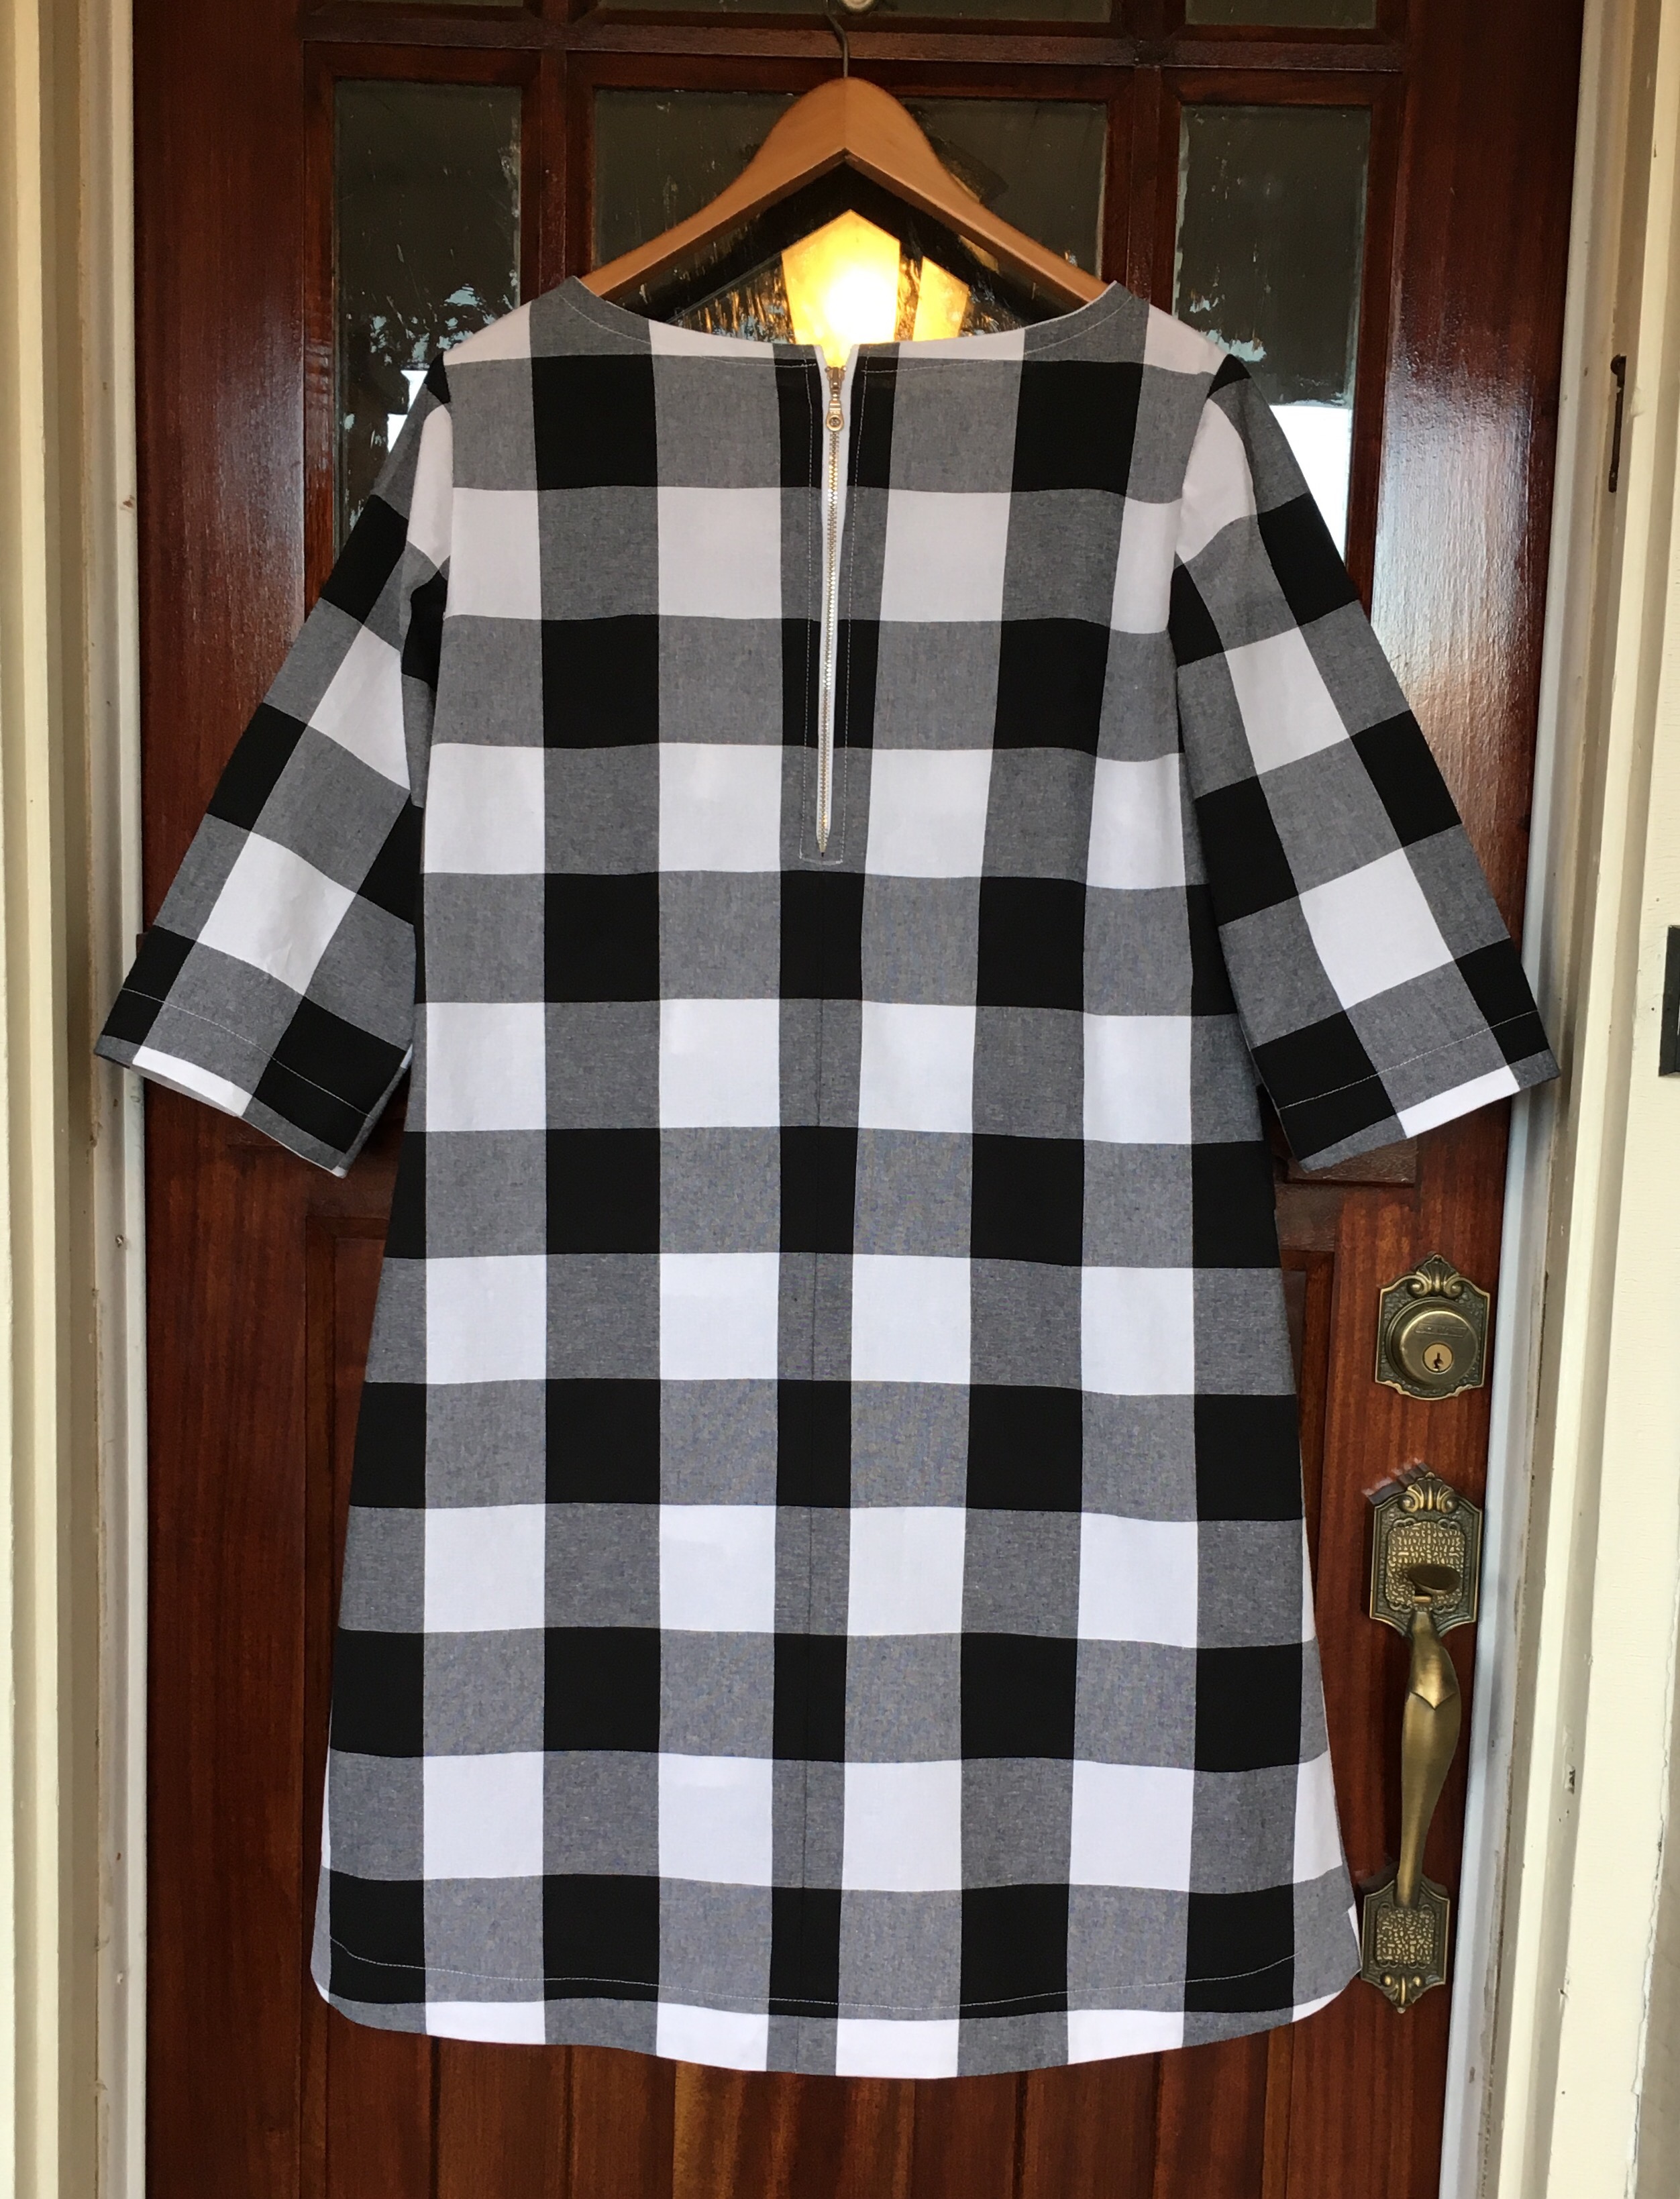 And as worn. Although I thought I cut it the same length as my previous versions, this one is a little longer. I am not sure how I feel about it. I really like the way the linen one fits but I also find that when there is less heft to the fabric as in my Alison Glass version, the tunic rides up. I will have to wear this for a while and see what I think about the length. I think on me, the shorter version is a little more flattering but time will tell.
 Side view.
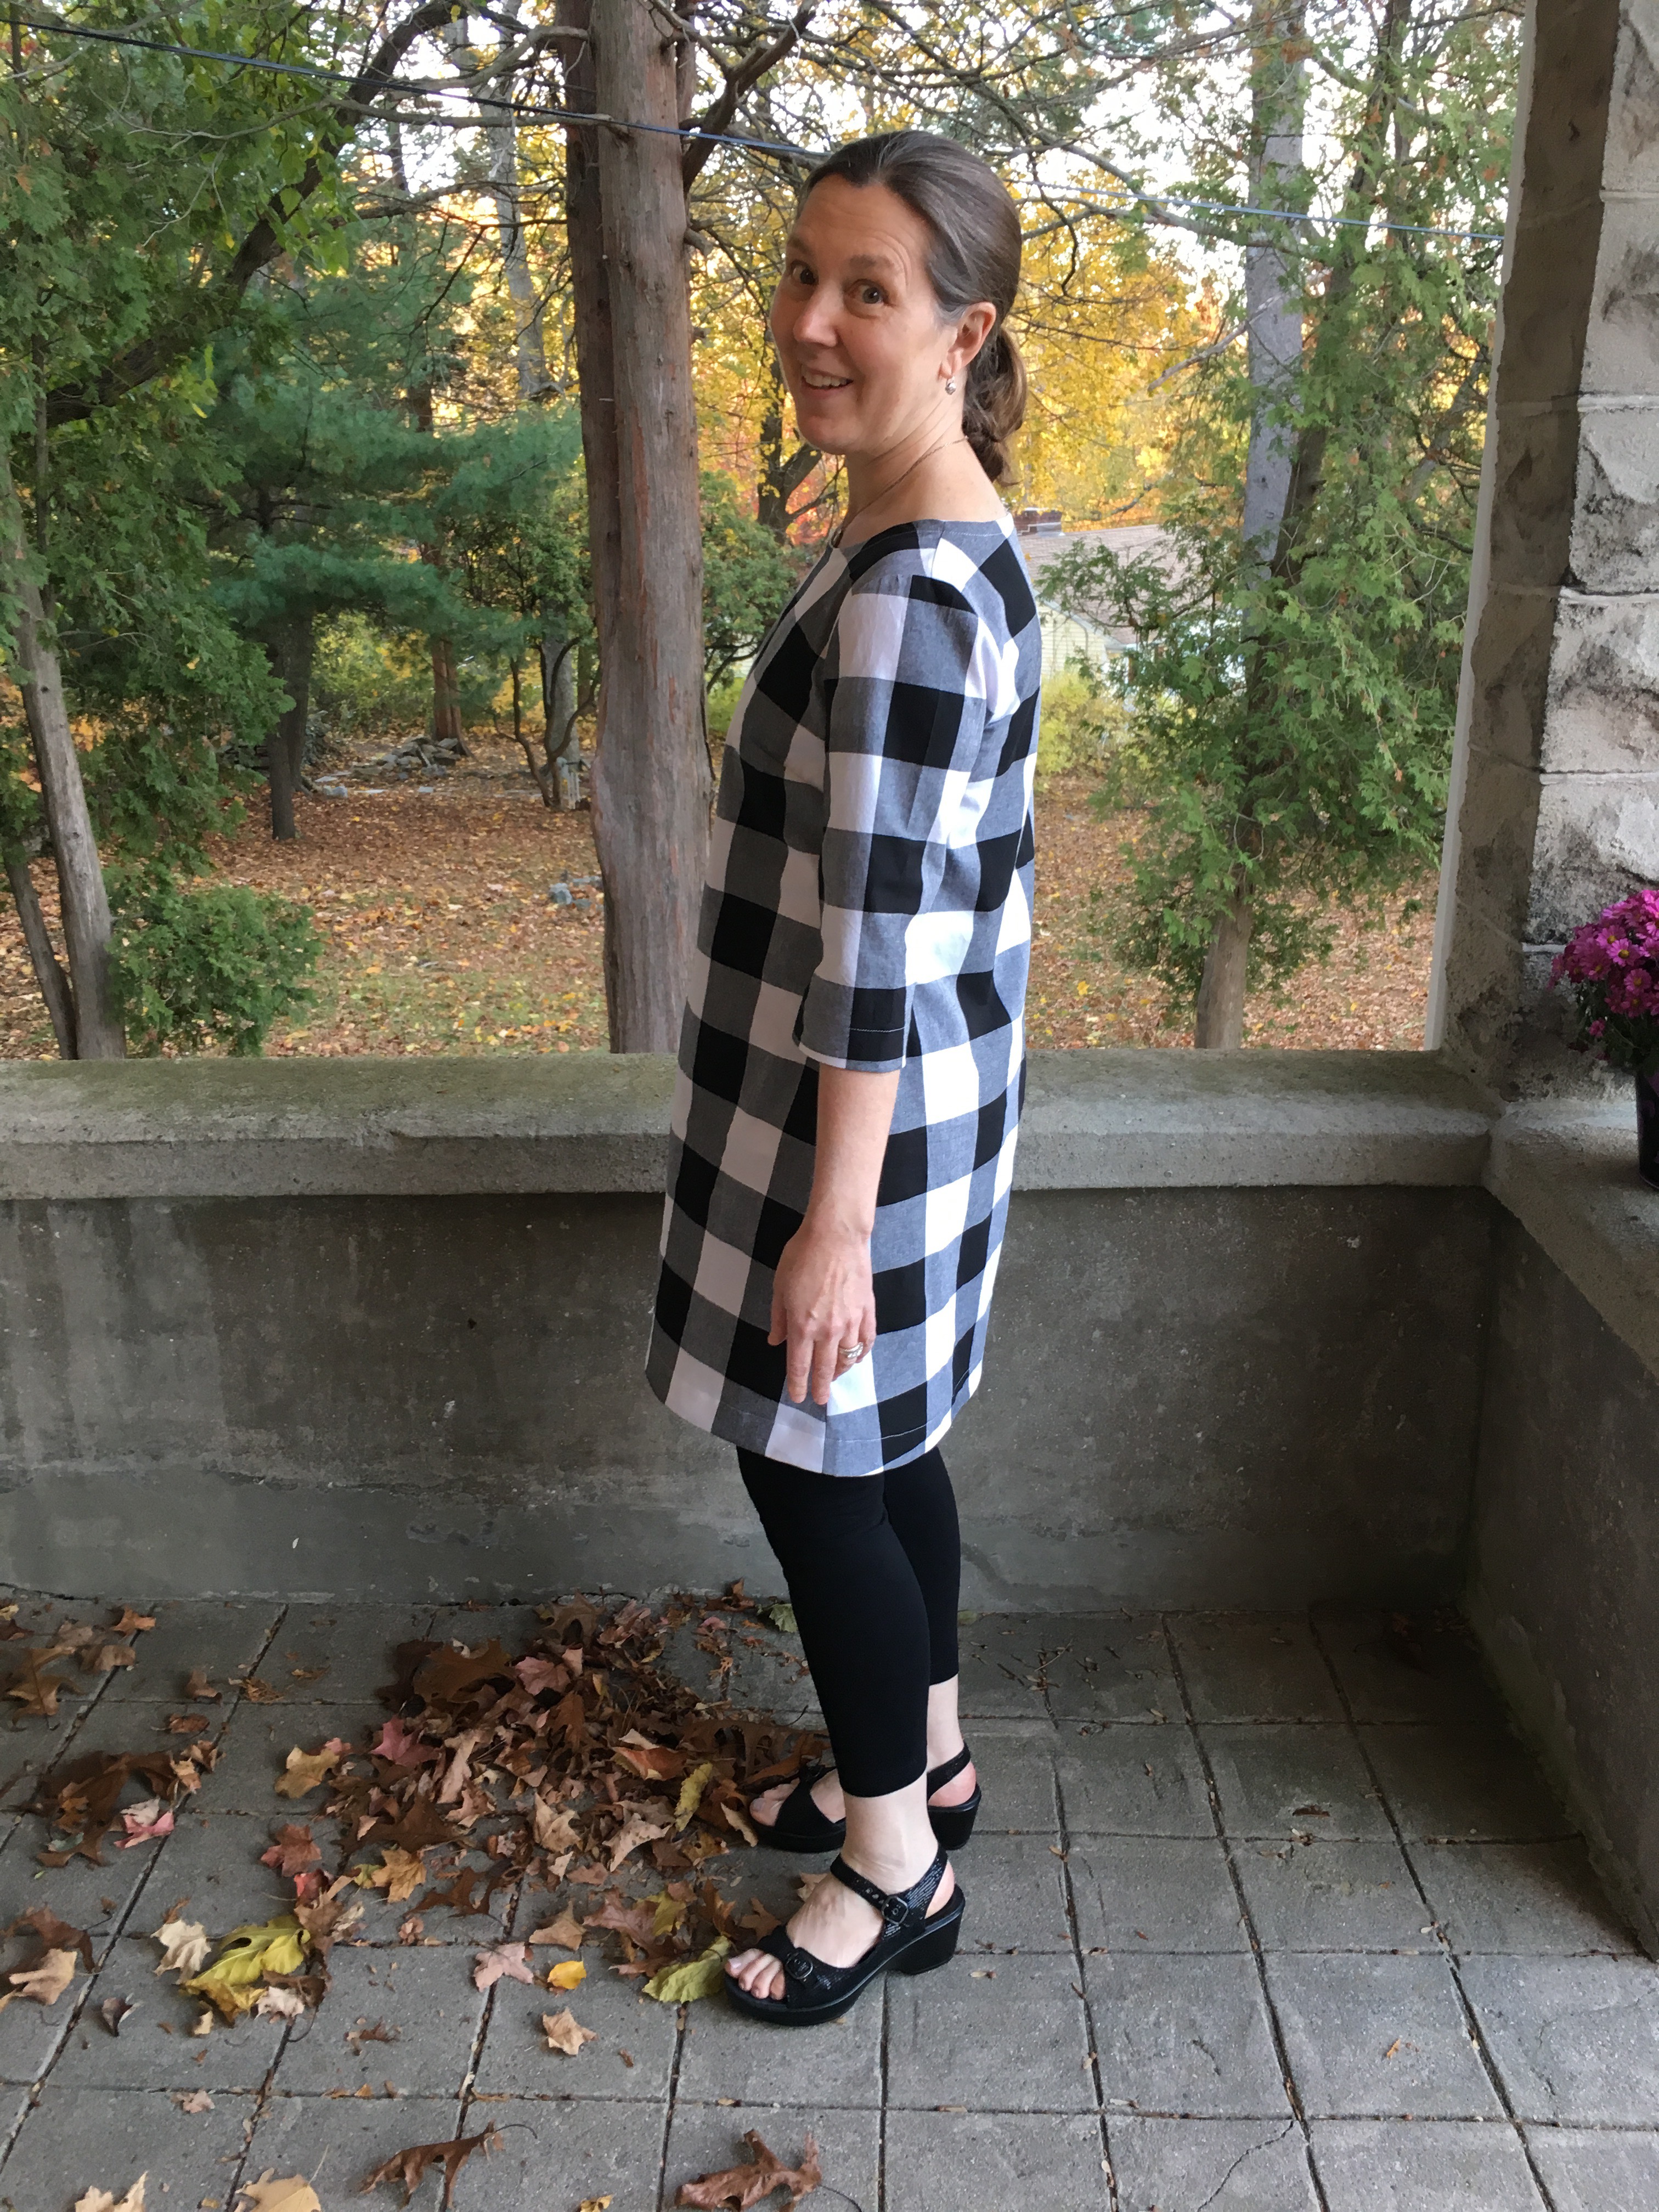 Back view.
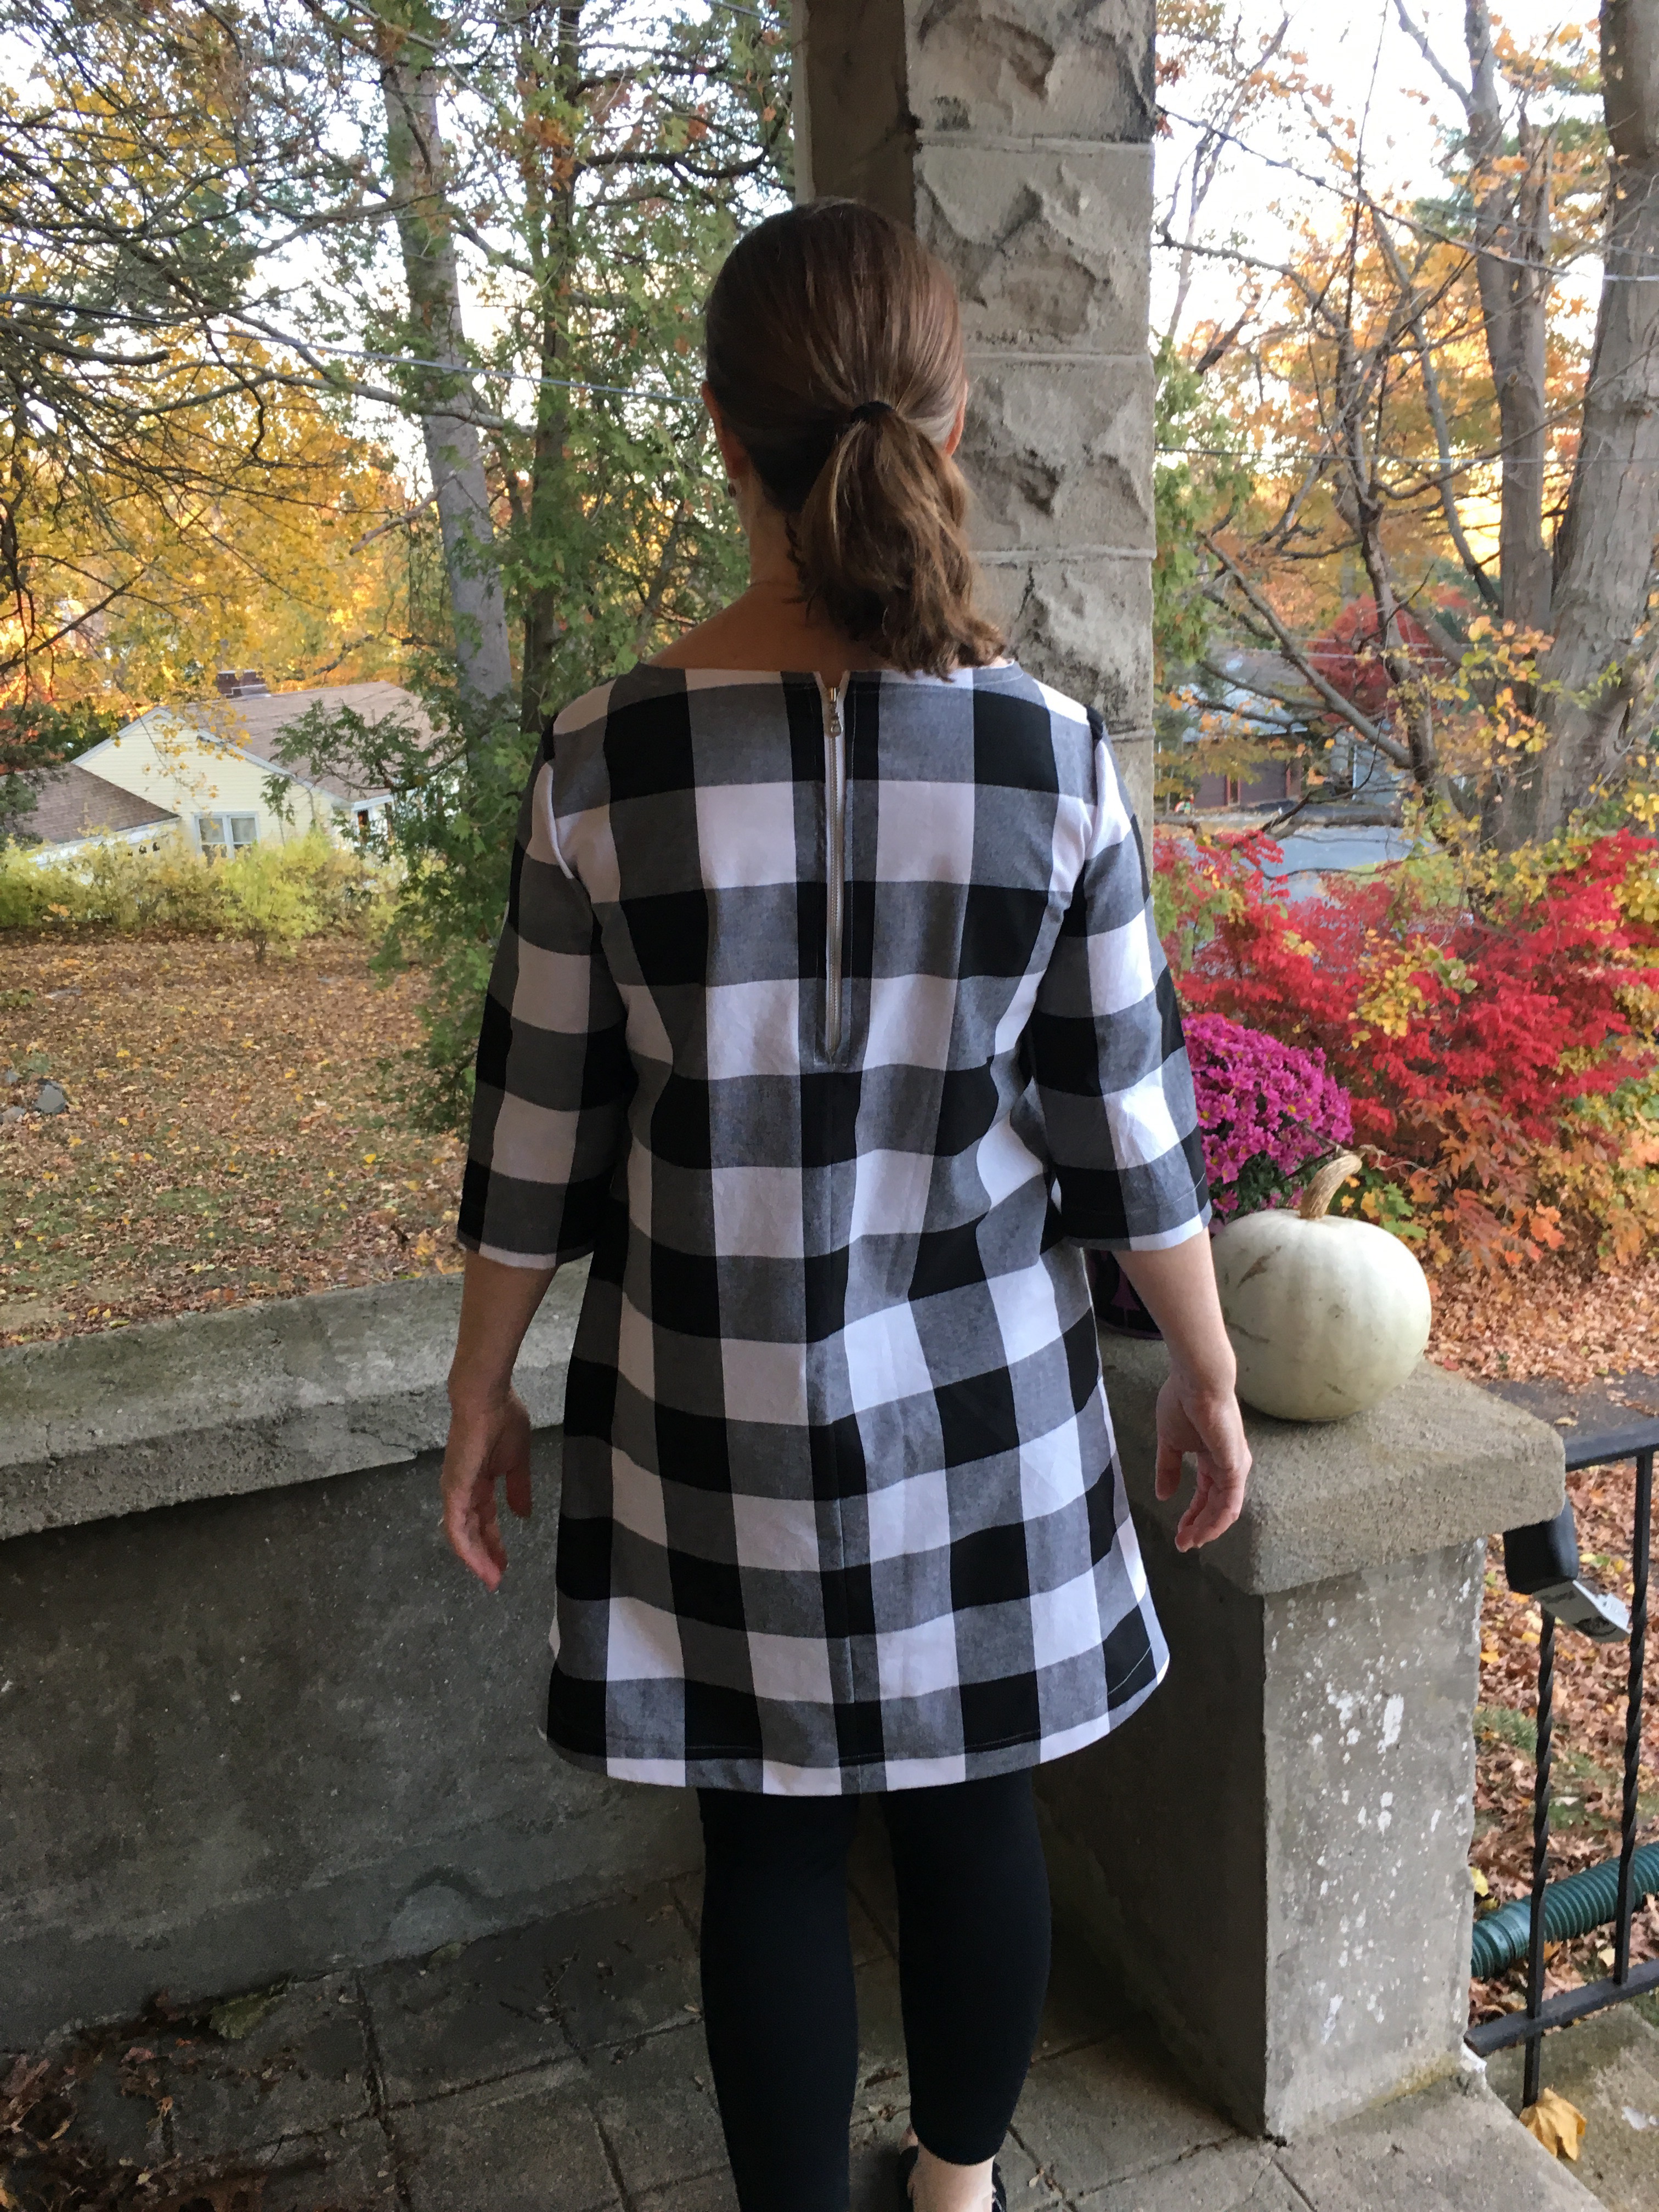
 One more picture with fall foliage.
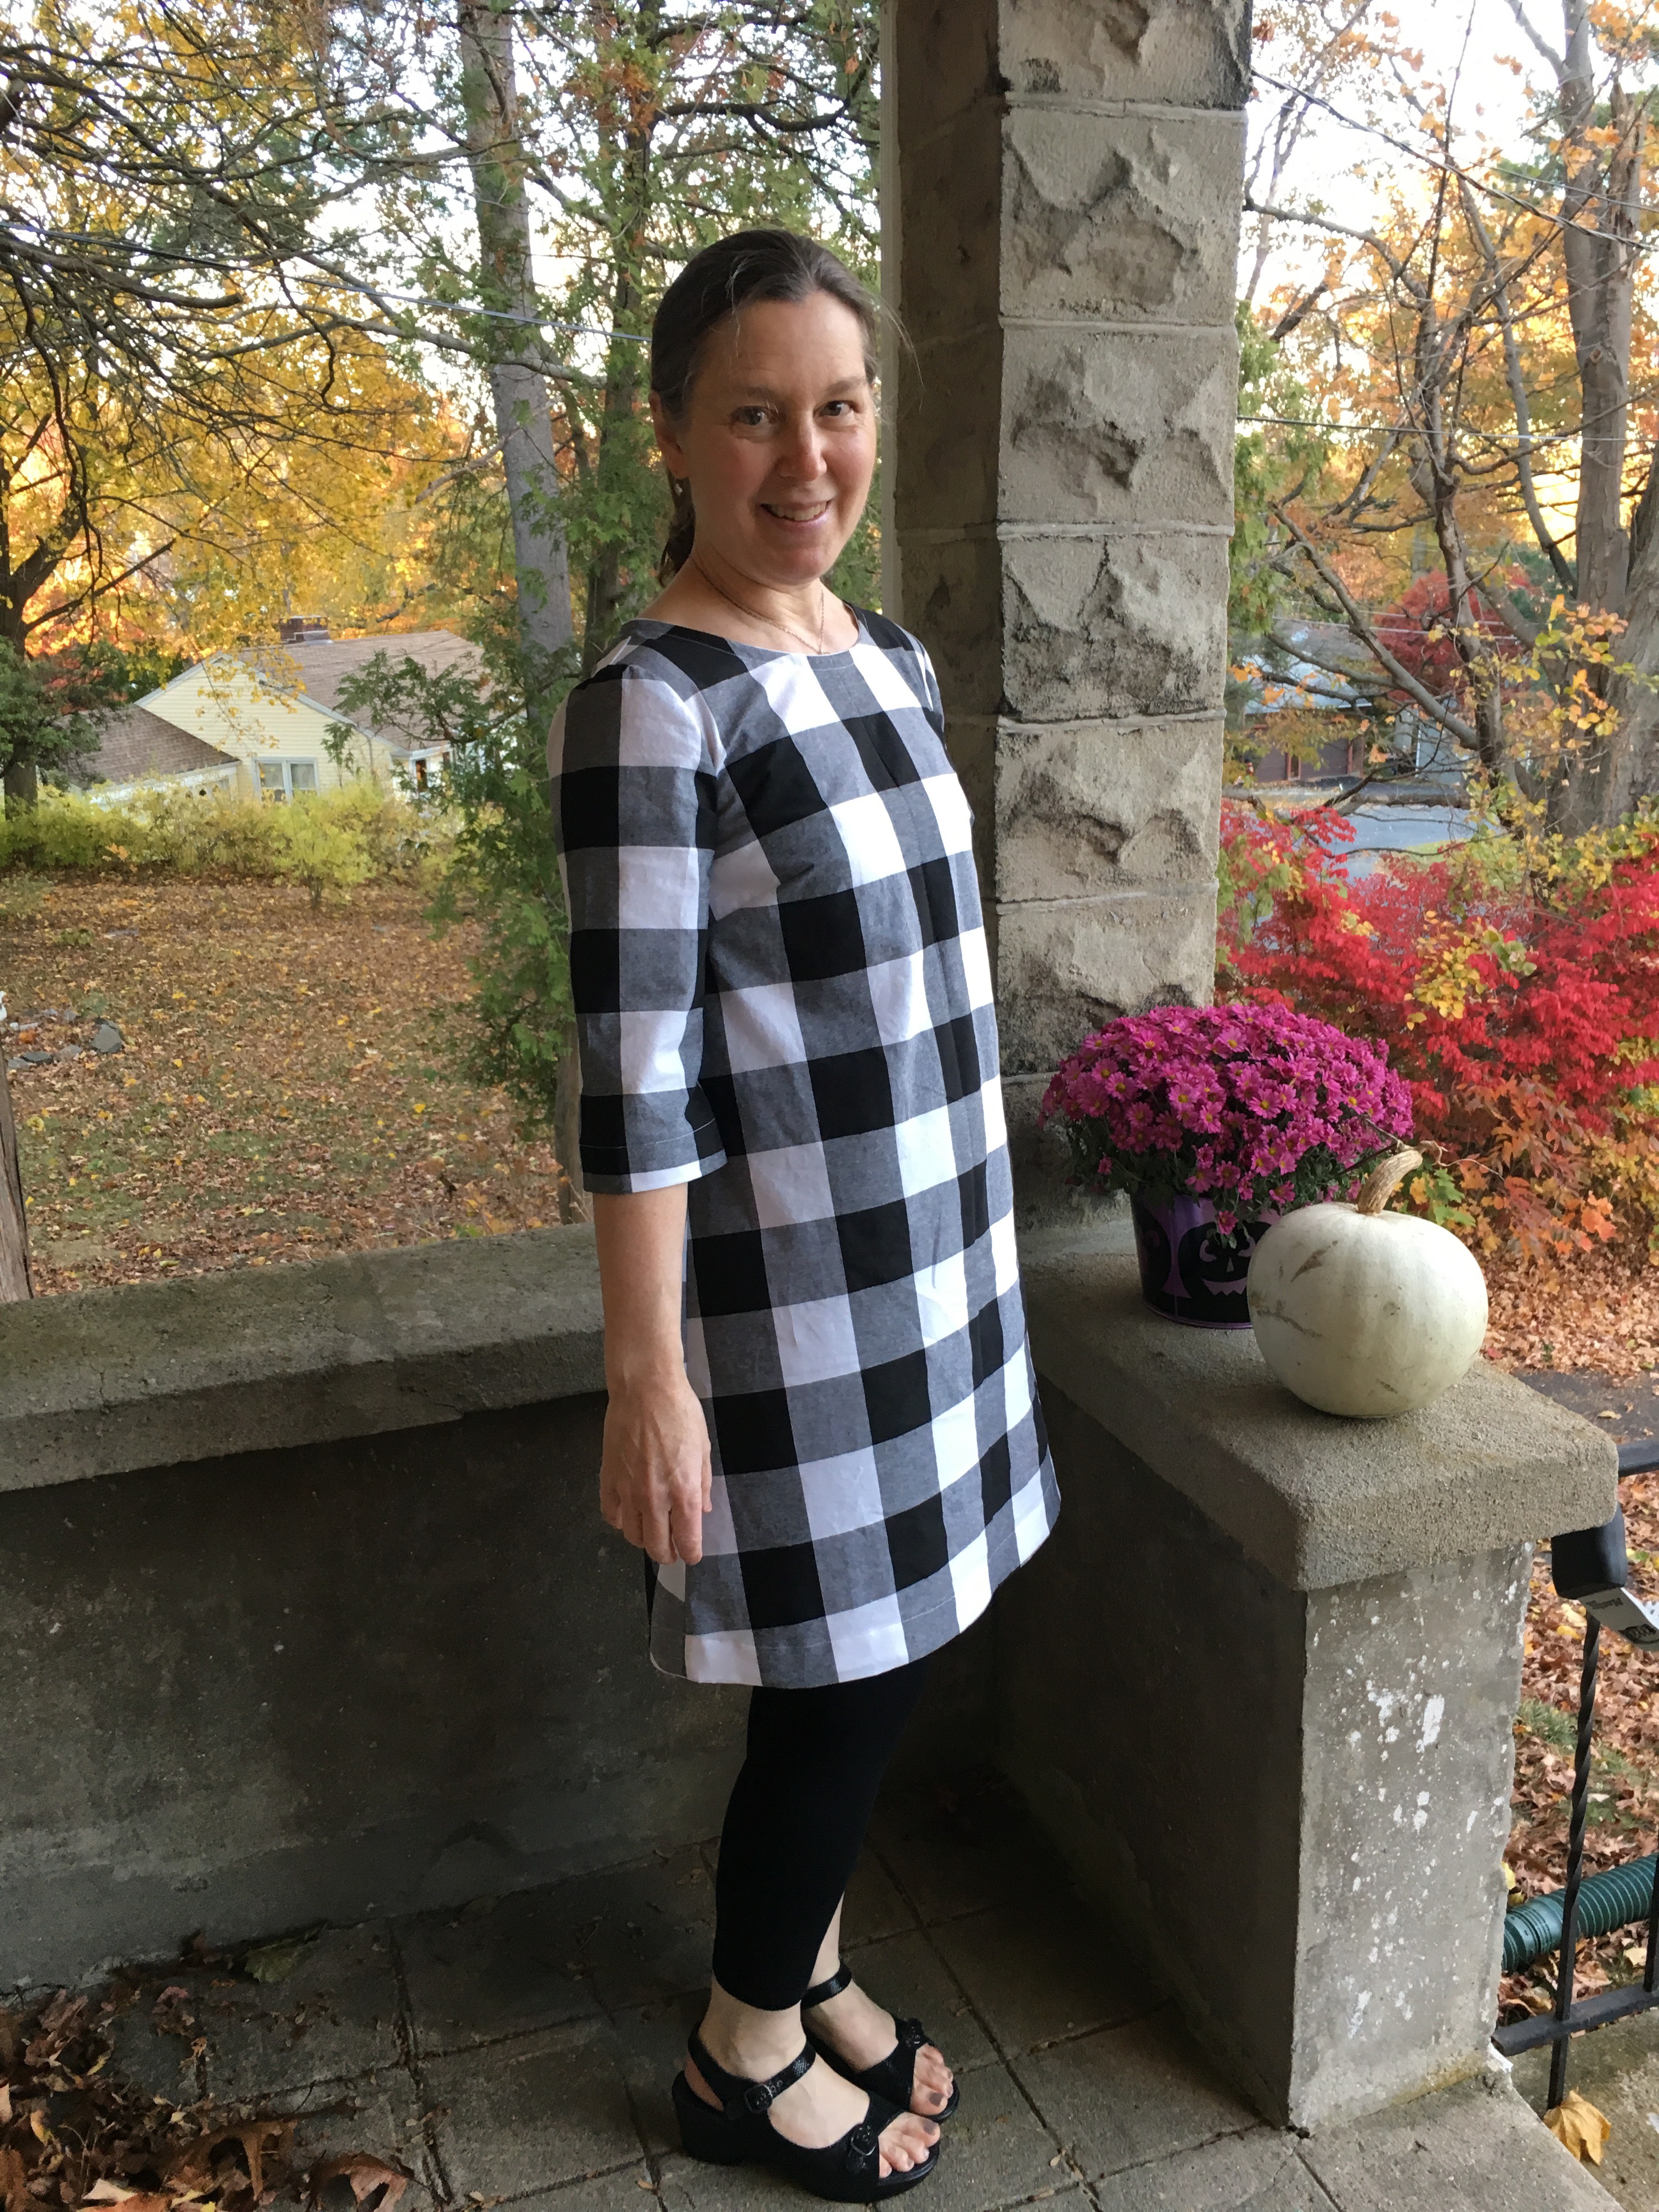 Other things we have been enjoying here in Connecticut: a tour of a
  A beautiful sunrise. I love watching the sun come up and I miss the sunrises when I have to leave for work in the dark. (I am not a fan of shorter winter days.)
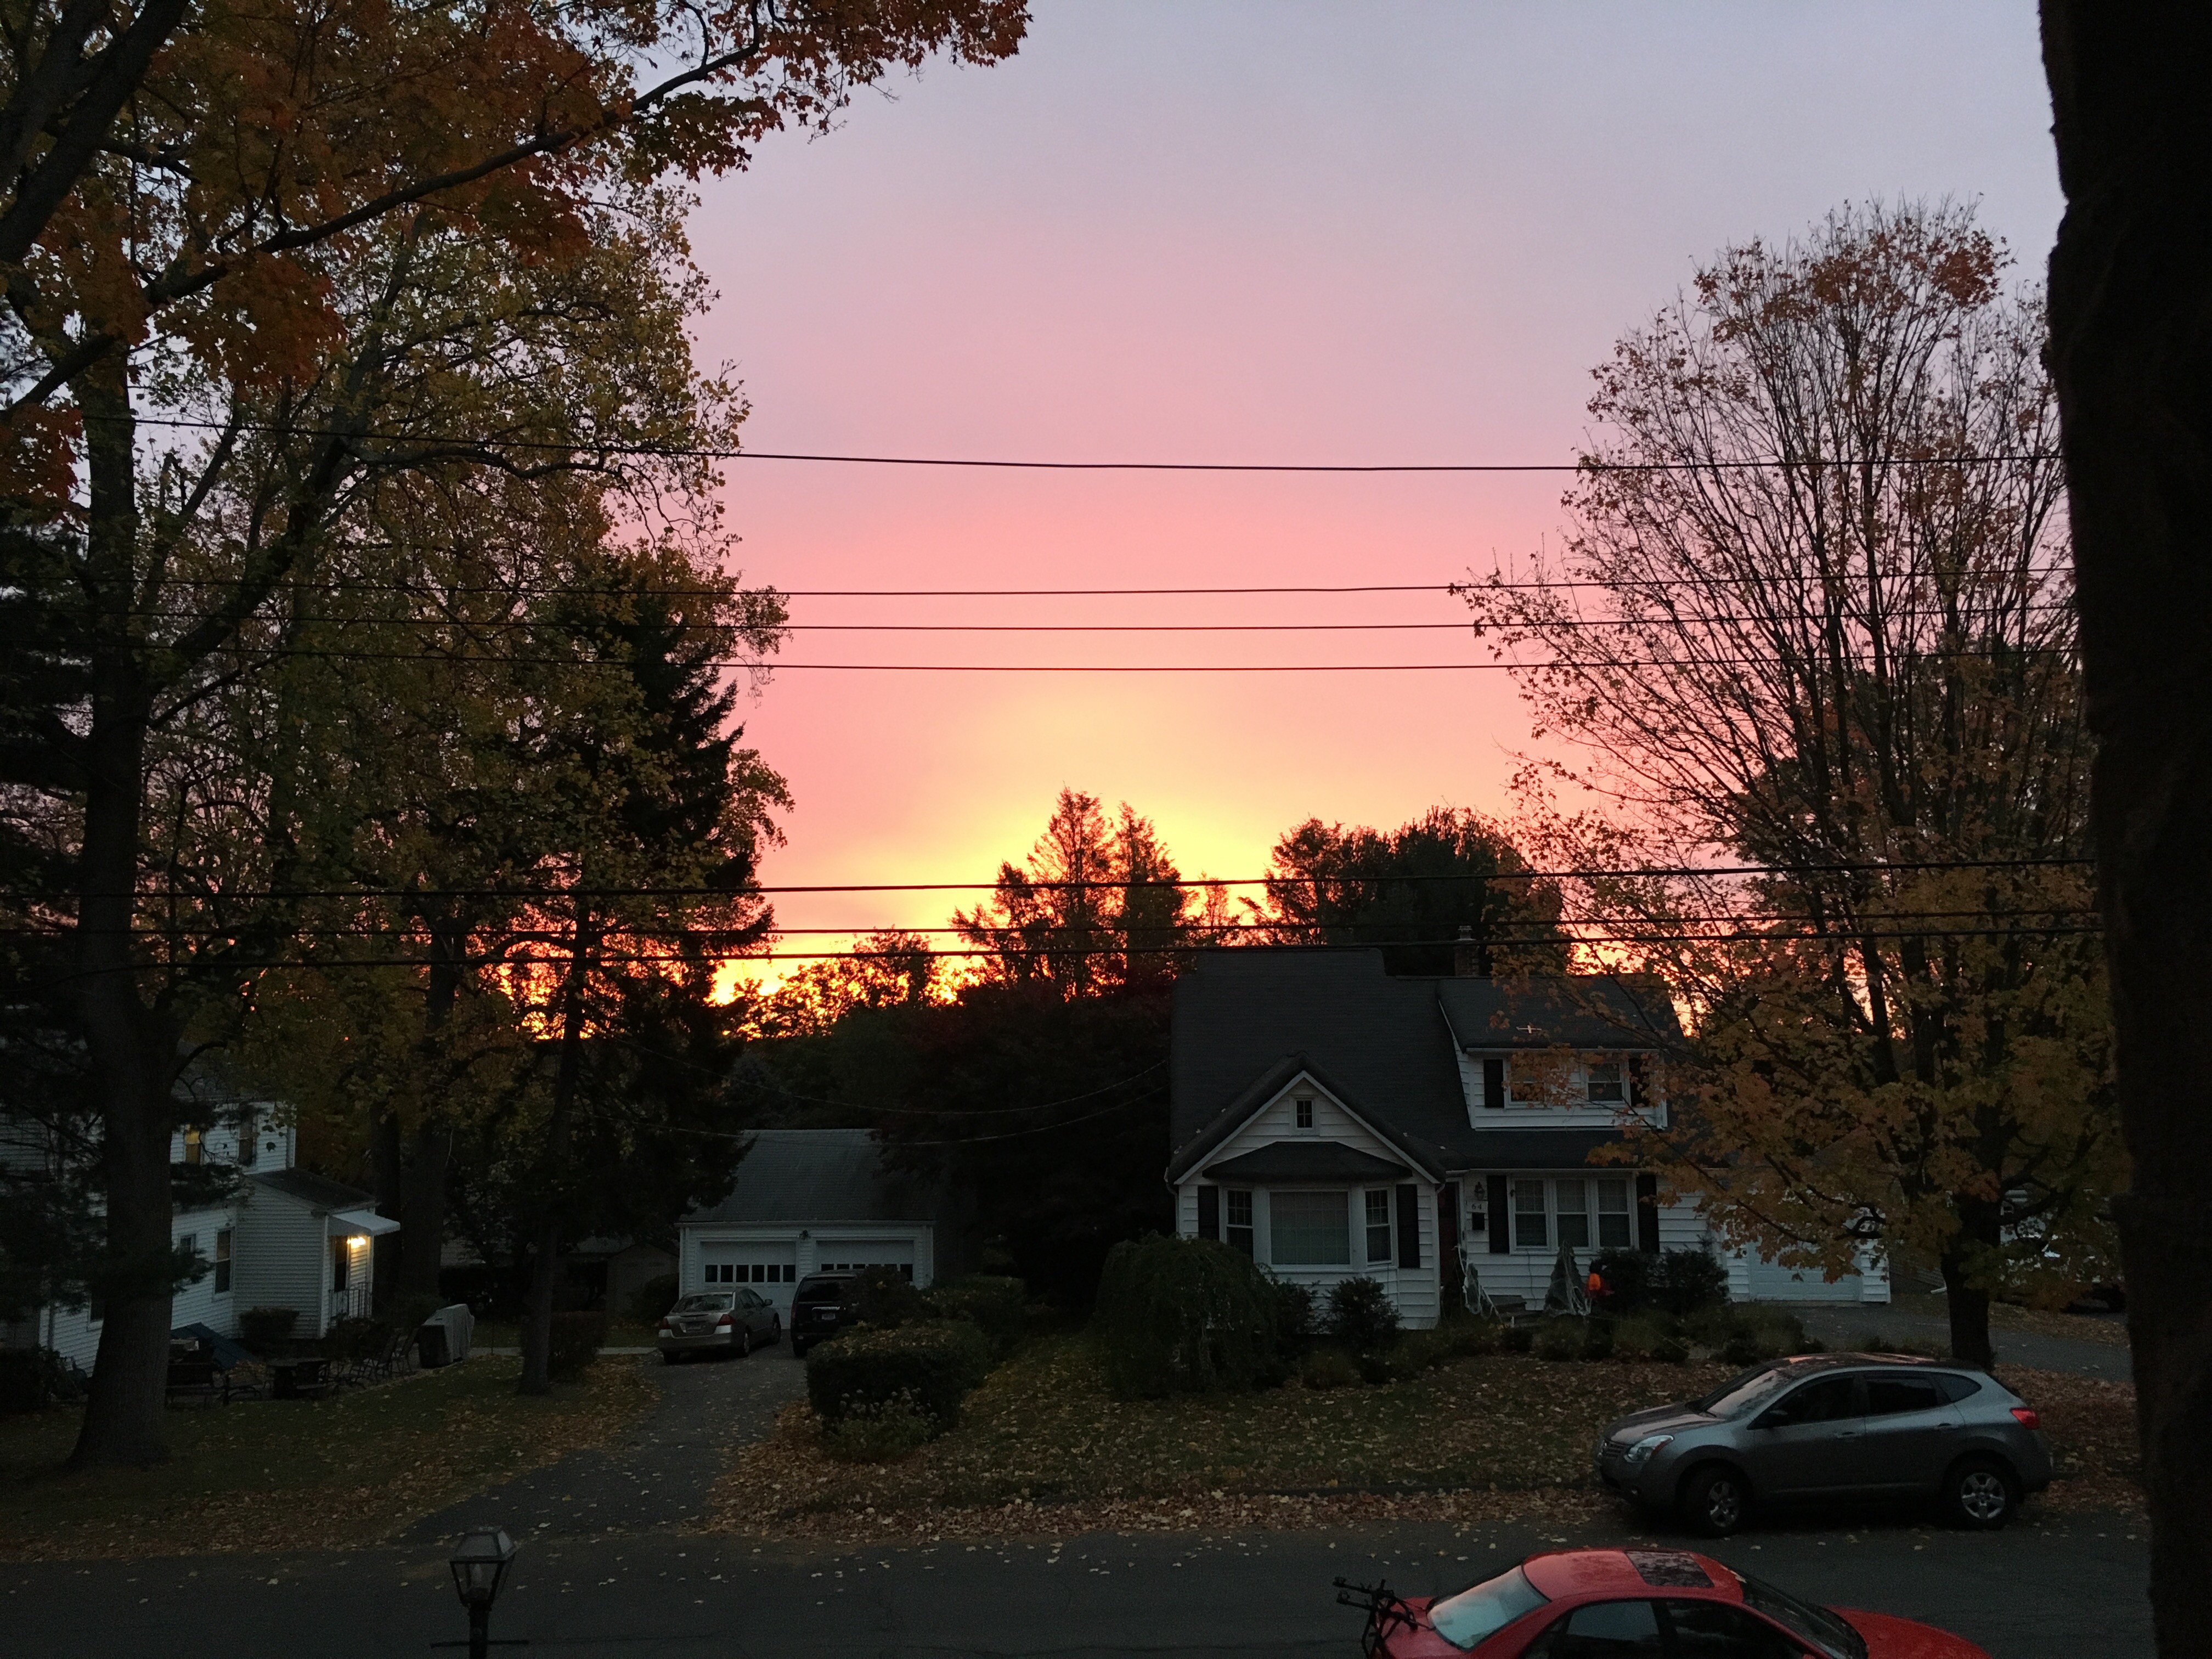 My nasturtiums finally bloomed (in October). Note to self: plant earlier next year. They were cheap and maintenance free and pretty.
  Fall is soup and muffin weather chez Nursebean. My usual modus operandi is to make what I call refrigerator soup. It is when you open the refrigerator and see what you have and make soup. It is a great way to take those leftovers and make a meal.
  I have had this pot and this bowl for over 25 years.
 I get nostalgic cooking on Sunday afternoons thinking about how many pots of chili, soup and even lasagnas have been made in this blue Le Creuset pot which was a wedding gift over 30 years ago. I remember buying the bowl as a young broke new mom. It was a big splurge at the time. I don’t think it was actually very expensive but all purchases felt like big purchases at that point in my life (and in many ways still do). I still love it. Many muffins and cookies have started in this bowl. Mr. Nursebean has found that he feels better when he avoids gluten so I made some adjustments to the cornmeal muffin recipe from
 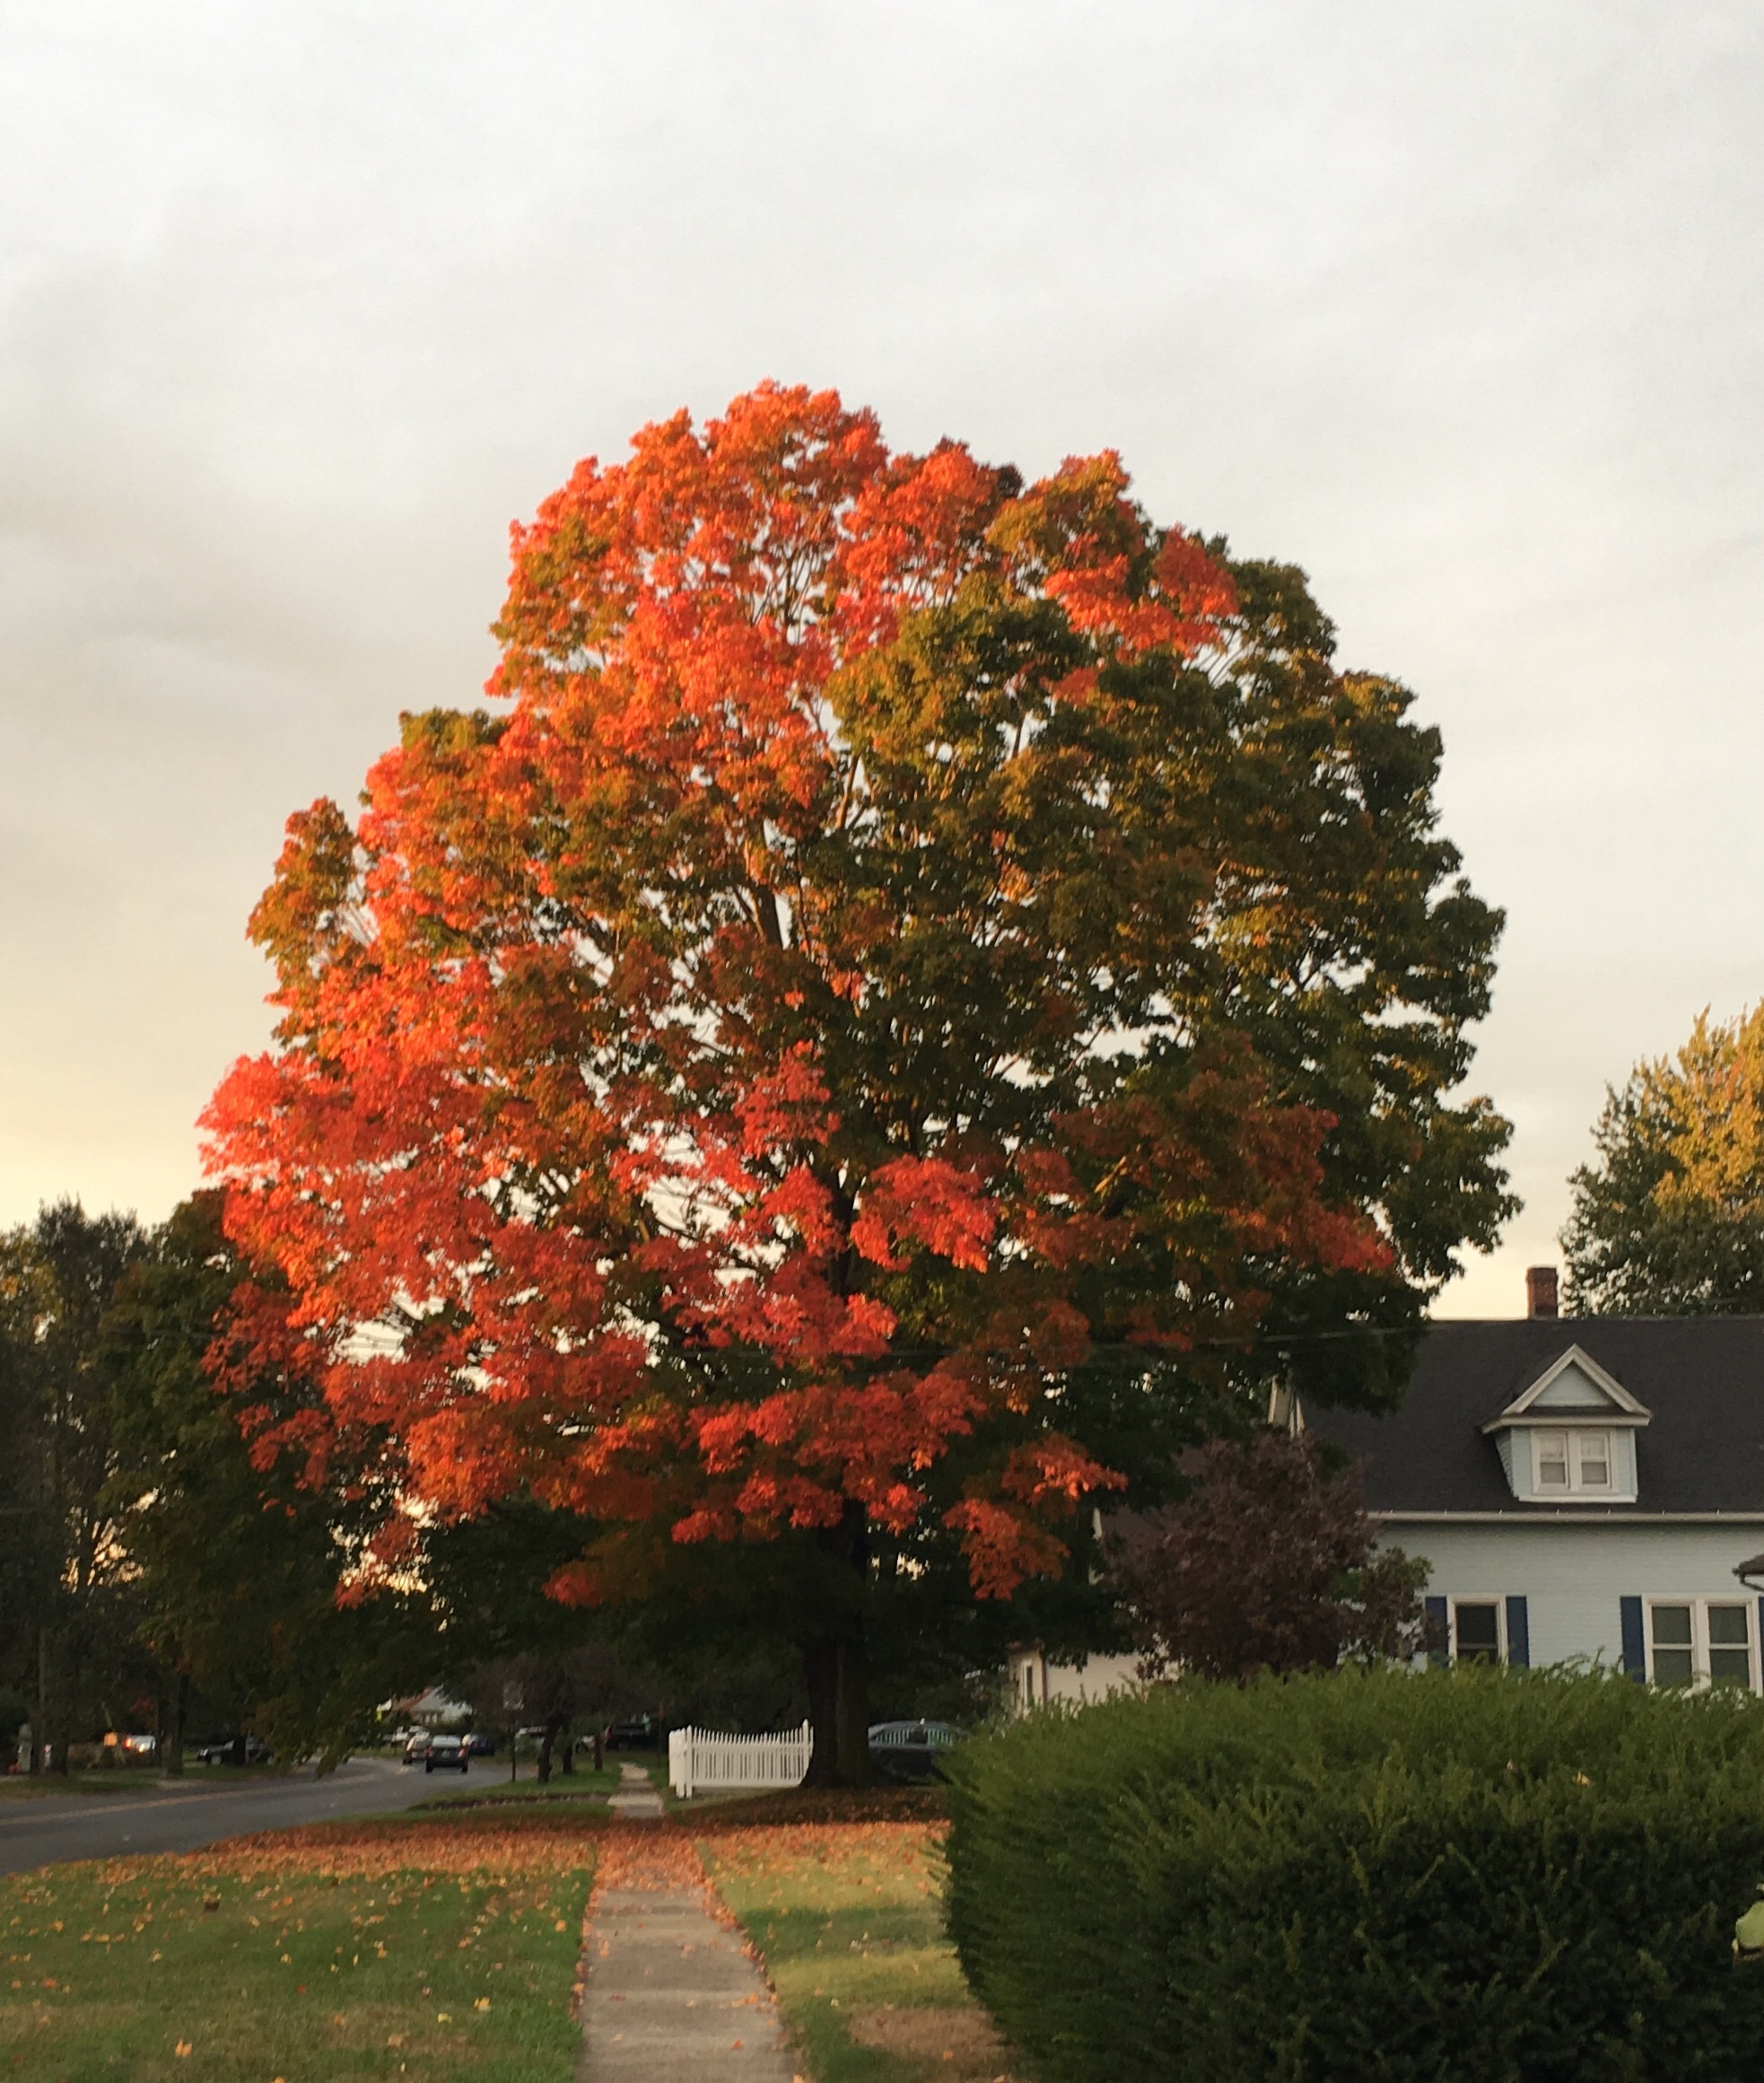 I have been doing a lot of reading. I inhaled
  Next up are two more Pearl shifts in plain flannel purchased last year at Jo-Ann’s.
  This time I remembered to add the extra seam allowance for french seams. This is why I often make more than one of a pattern in a row. It takes a couple times to work out the bugs! One of these will be for me and one for my daughter who I will see (yay!) for Thanksgiving. I have a lot to be thankful for. Wishing everyone a beautiful fall!
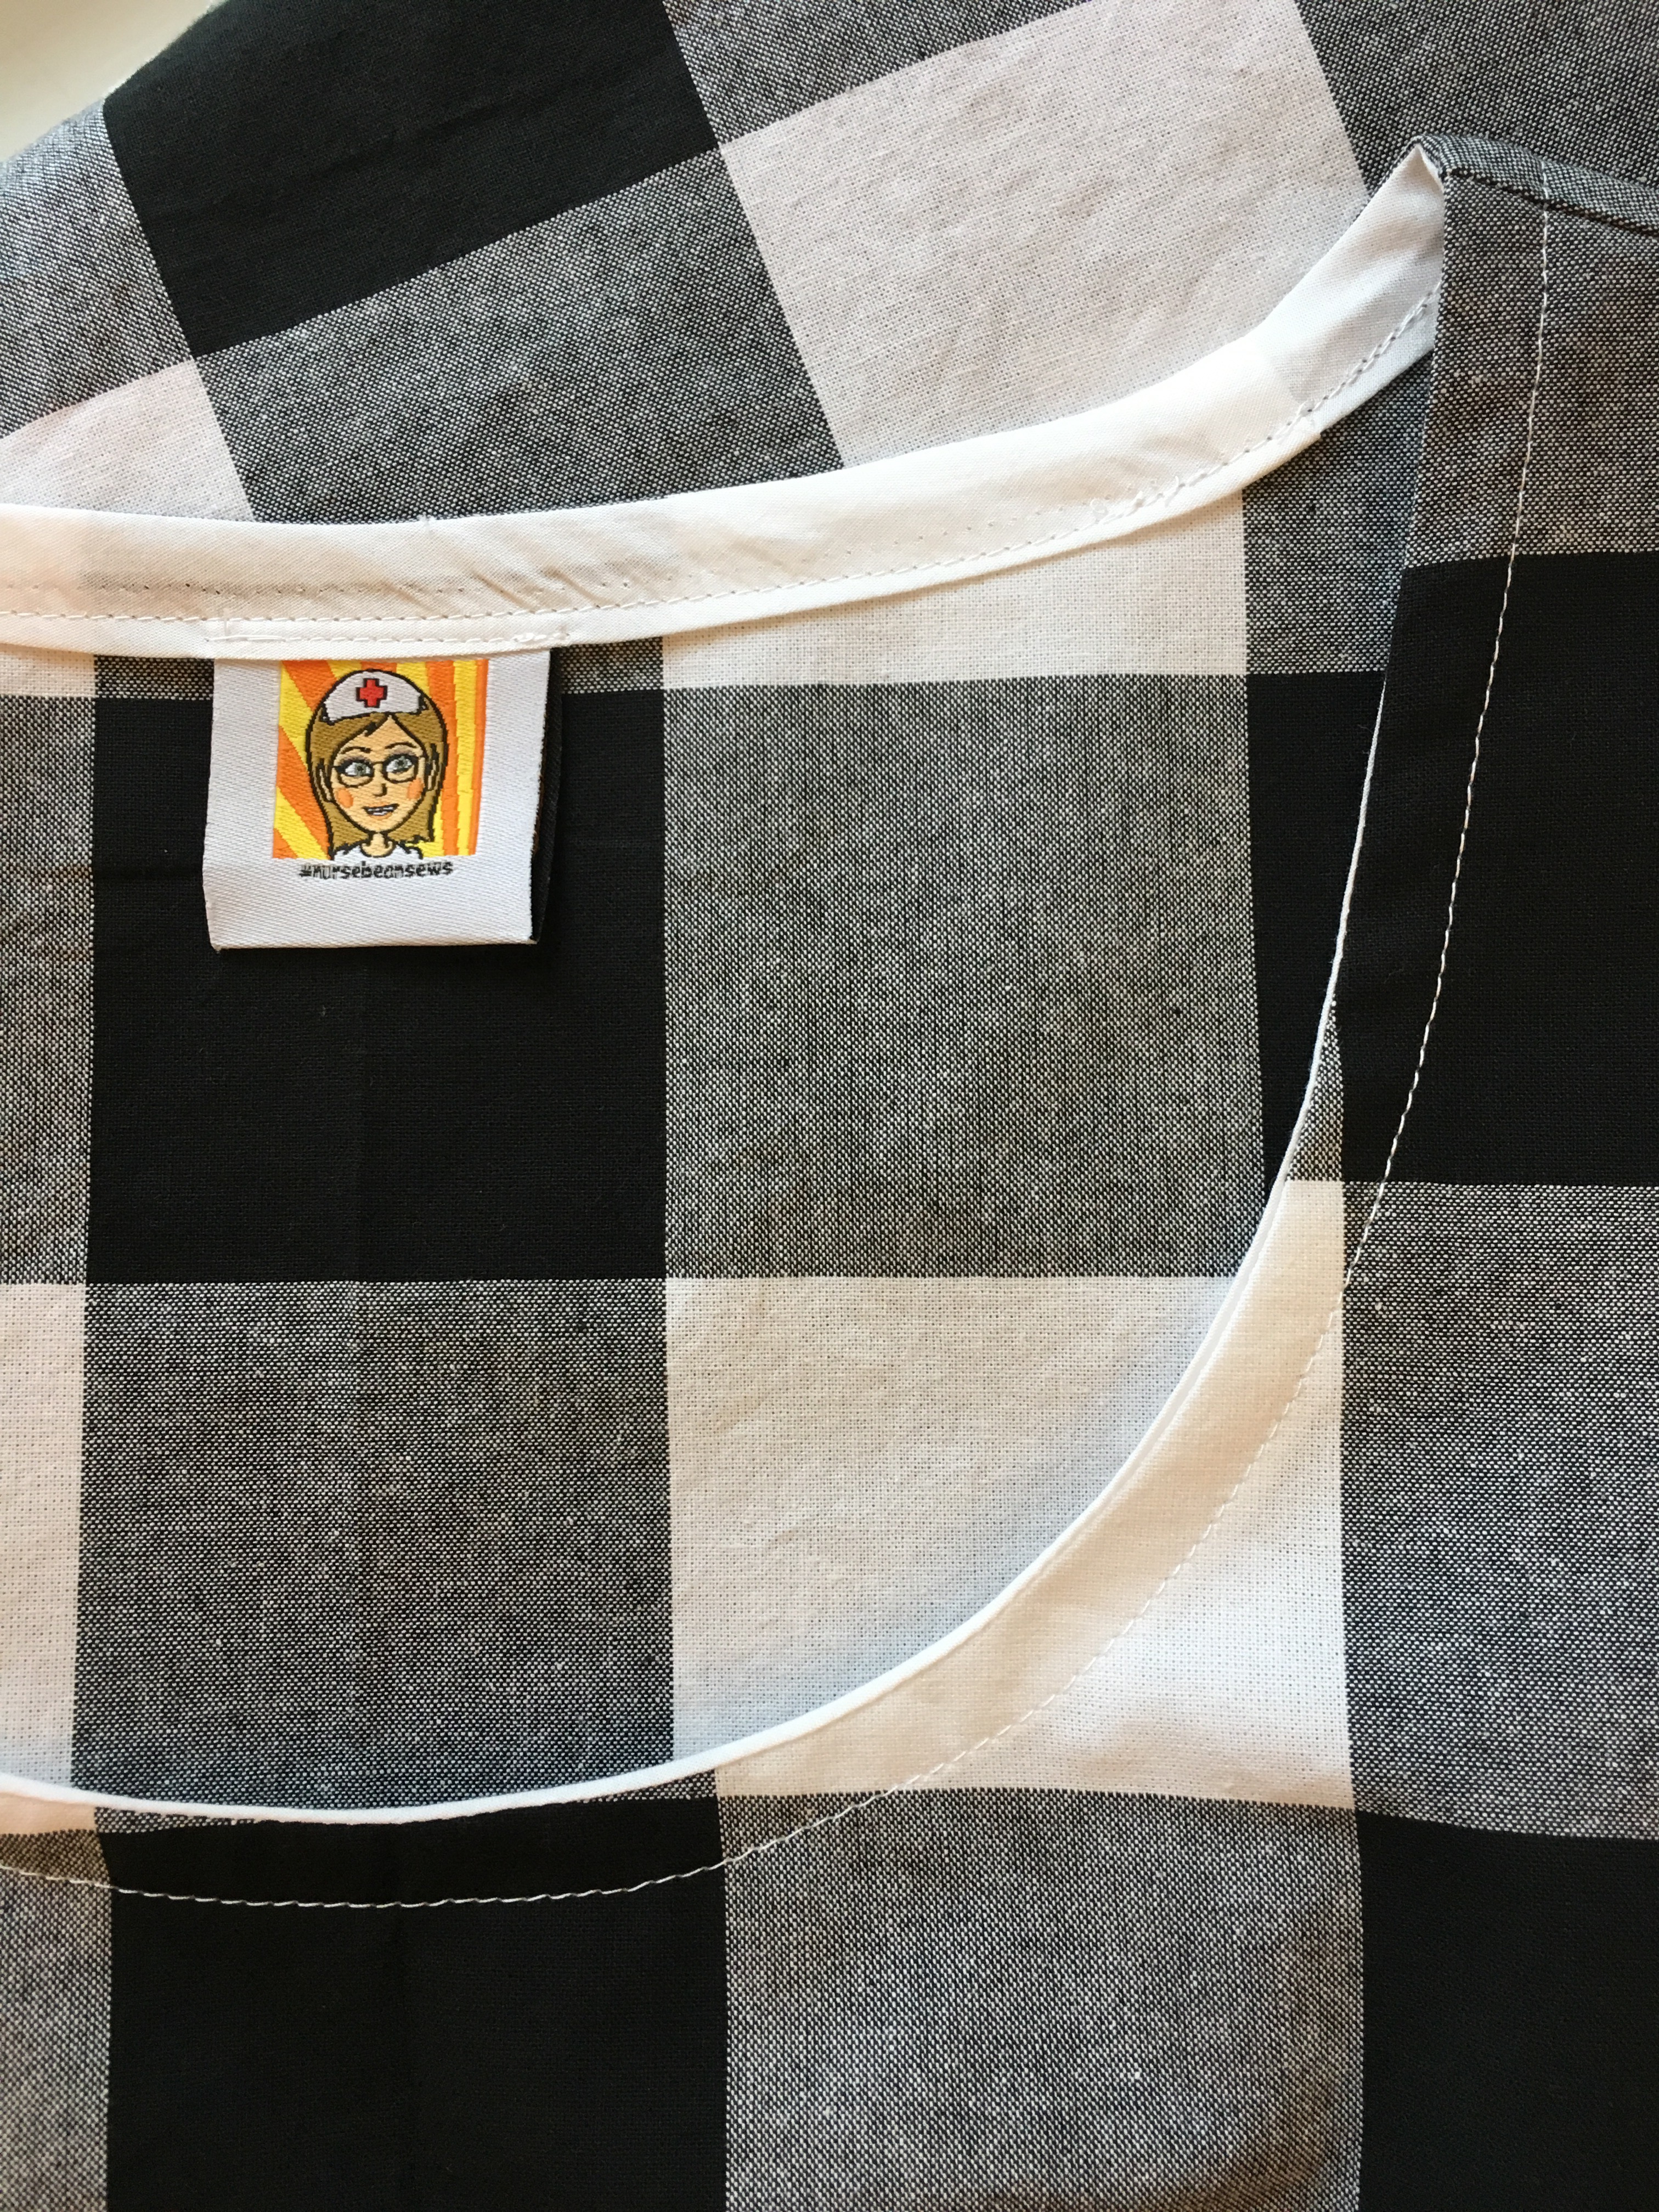


 Summer can sometimes be a challenging time for me. Social media is flooded with vacation photos of beaches and mountains and faraway places (the pictures of Norway and Sweden are amazing) but probably the hardest pictures to see are pictures of cabins in the woods on beautiful clean lakes. It makes me want to just jump into the picture. This one is from a real estate listing is exactly the kind that gives me pangs.
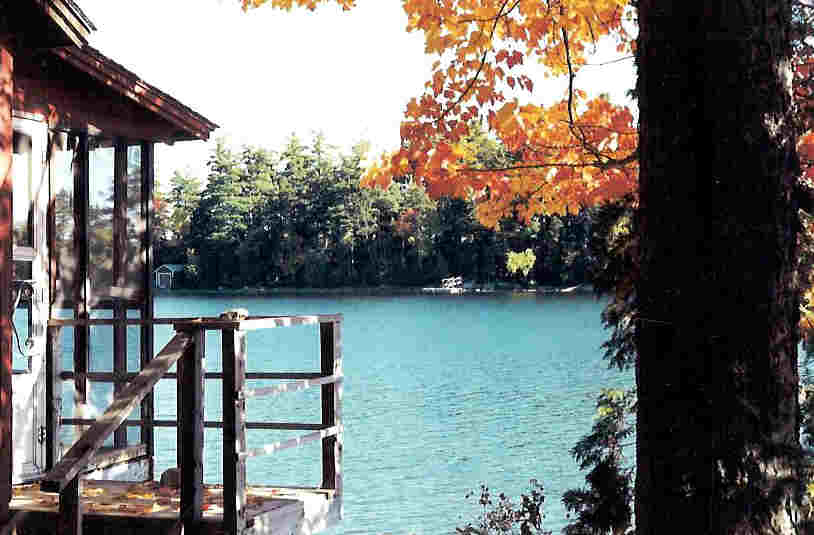 But it turns out that


 I made a nice breakfast with home made berry muffins for my family, most of whom were with us. It was great to have a big group around the table. I used the pretty china and picked wild flowers from the garden. I love big family gatherings centered around a nice meal and my kids live far away so this was a treat for me. We also had a taco night with part of the group the night before and a dinner out at a favorite restaurant with my two daughters and son in law. It is a place we had gone to many times when they were younger so that was a special evening.
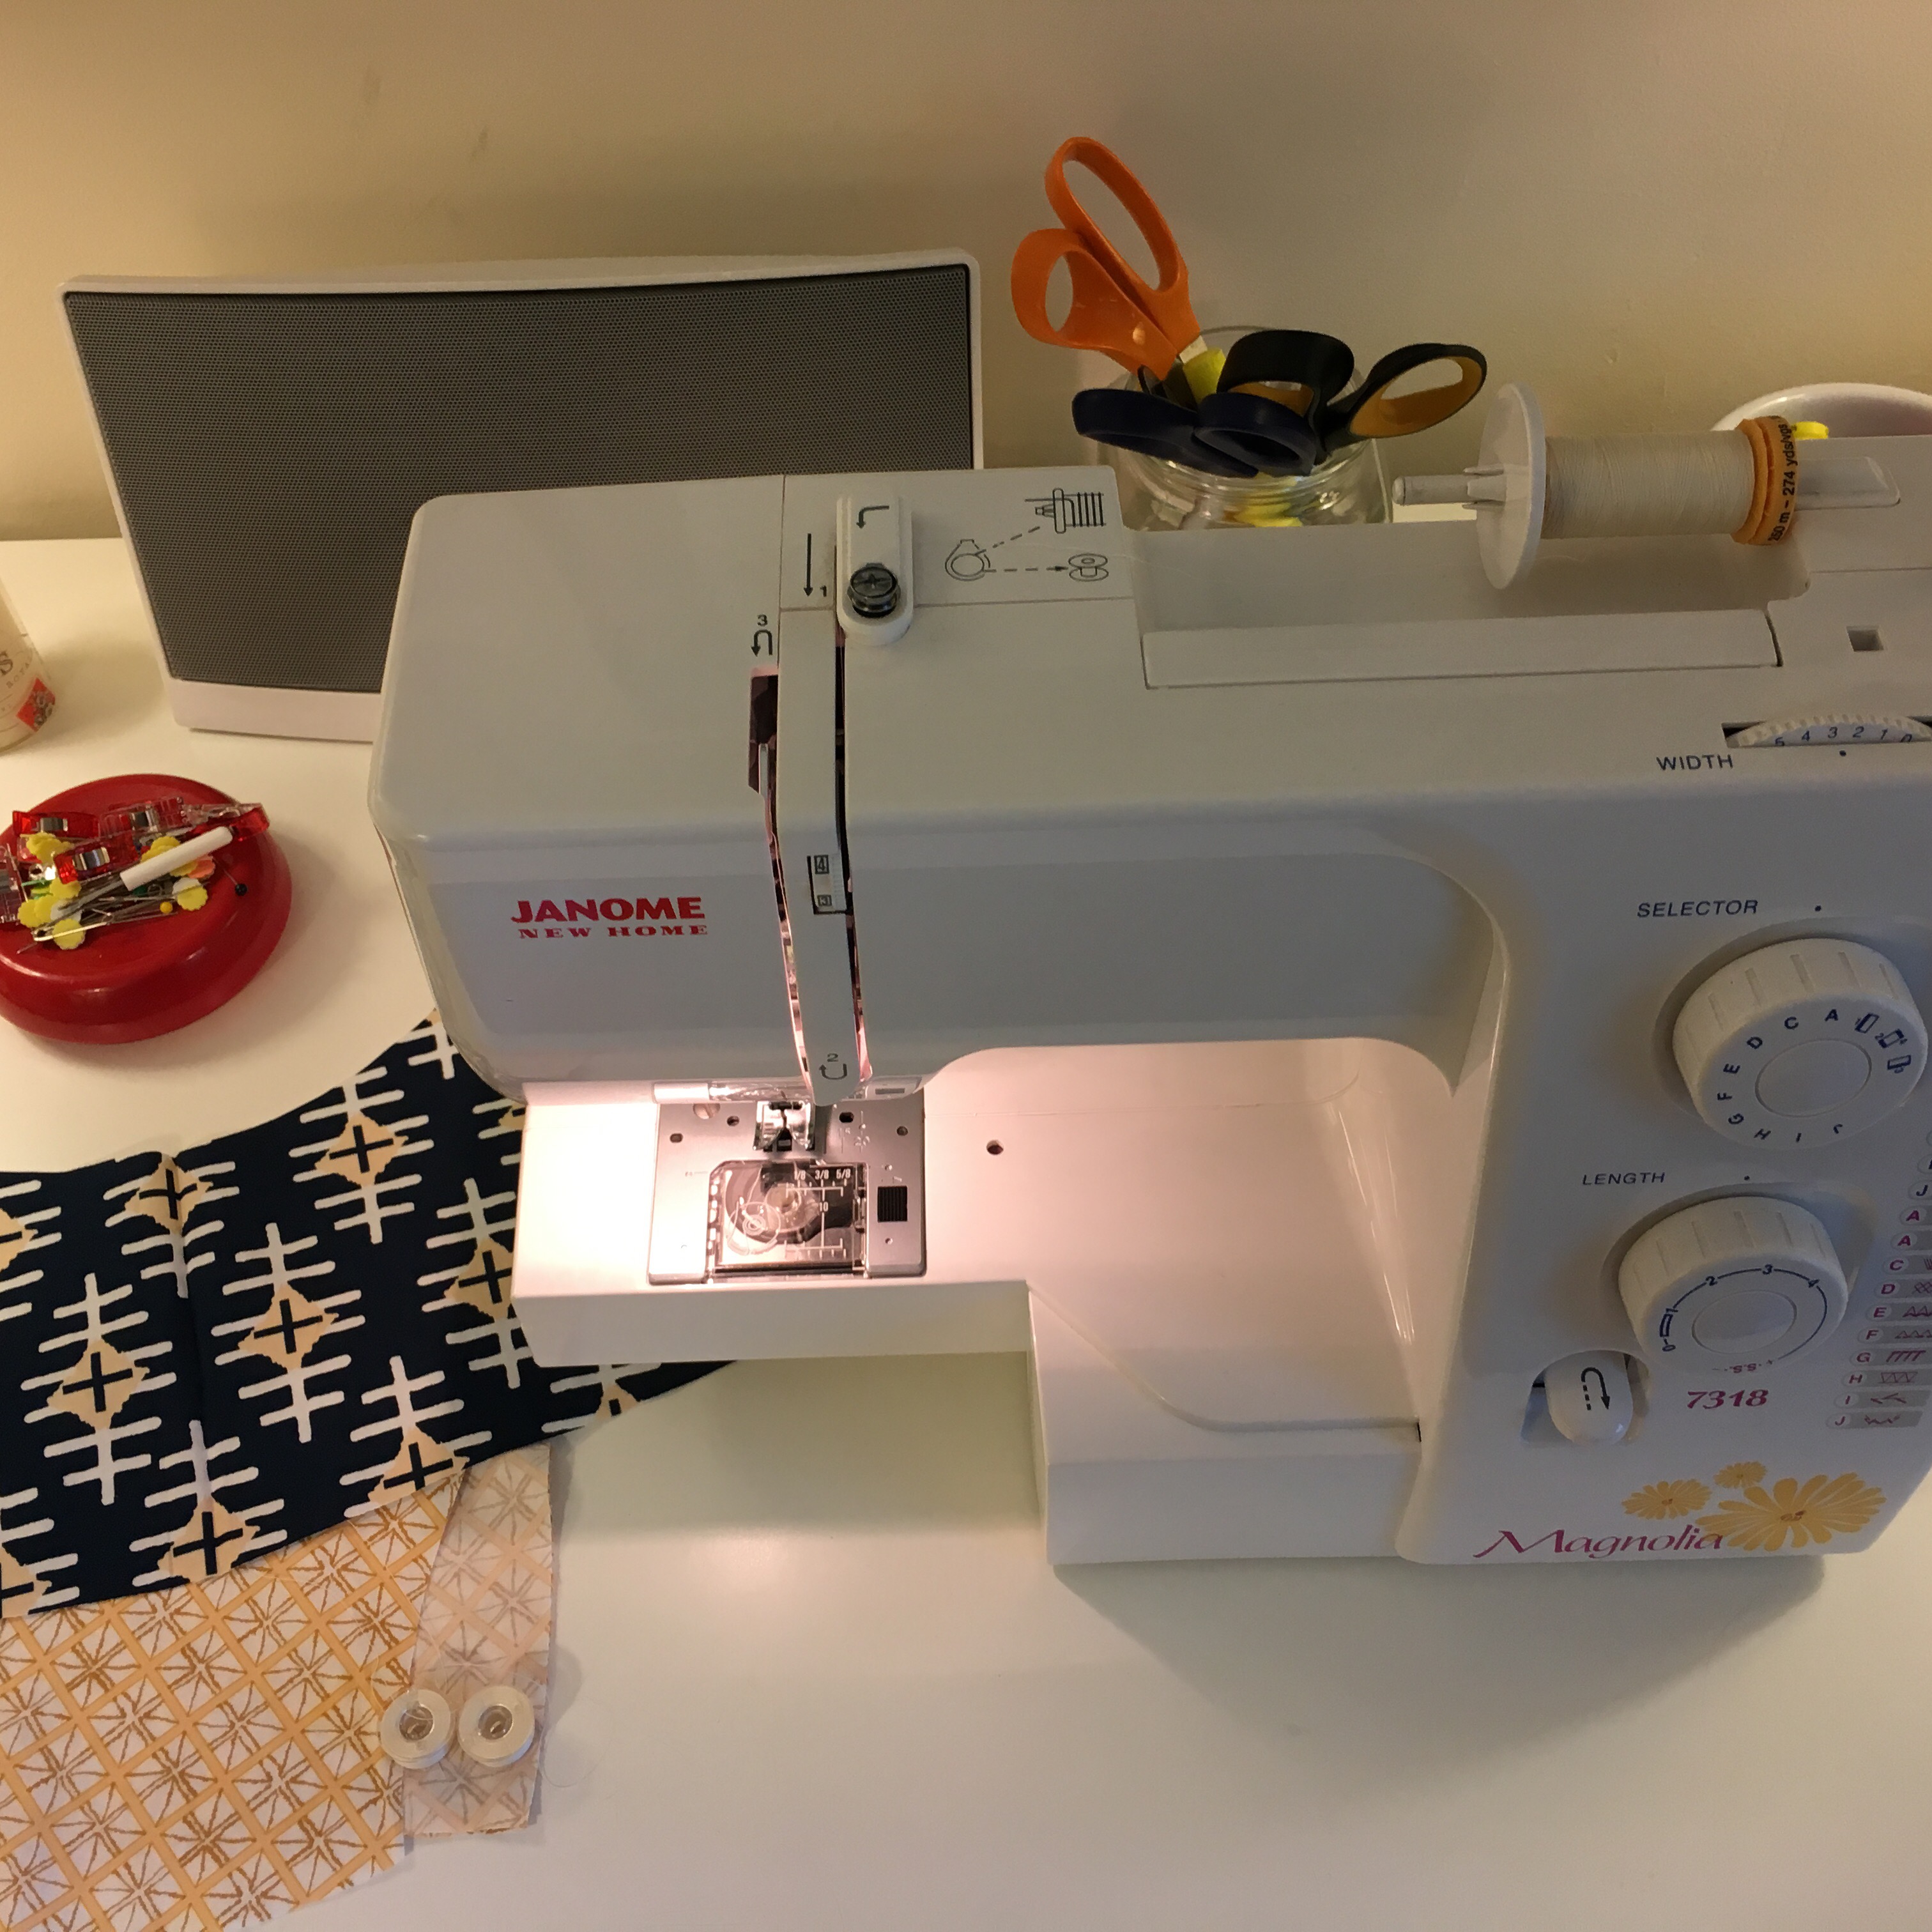 I sewed, sewed, sewed. But I didn’t treat the sewing as a chore. I did a couple of hours of sewing every day. I listened to music while I sewed. When it started to feel like a chore, I switched gears and read or did yoga. I completed three garments: a


 I had a diner breakfast with my daughter and son in law and then my daughter and I got our toenails painted in summer colors before they flew back home to the mid-west. I miss her already. New Luna pants in the wild below. And then it was back to reality.
 At least I had a new dress to wear my first day back.
