Made By Rae Patterns, Sewing

Heritage Rayon Challis Beatrix Dress

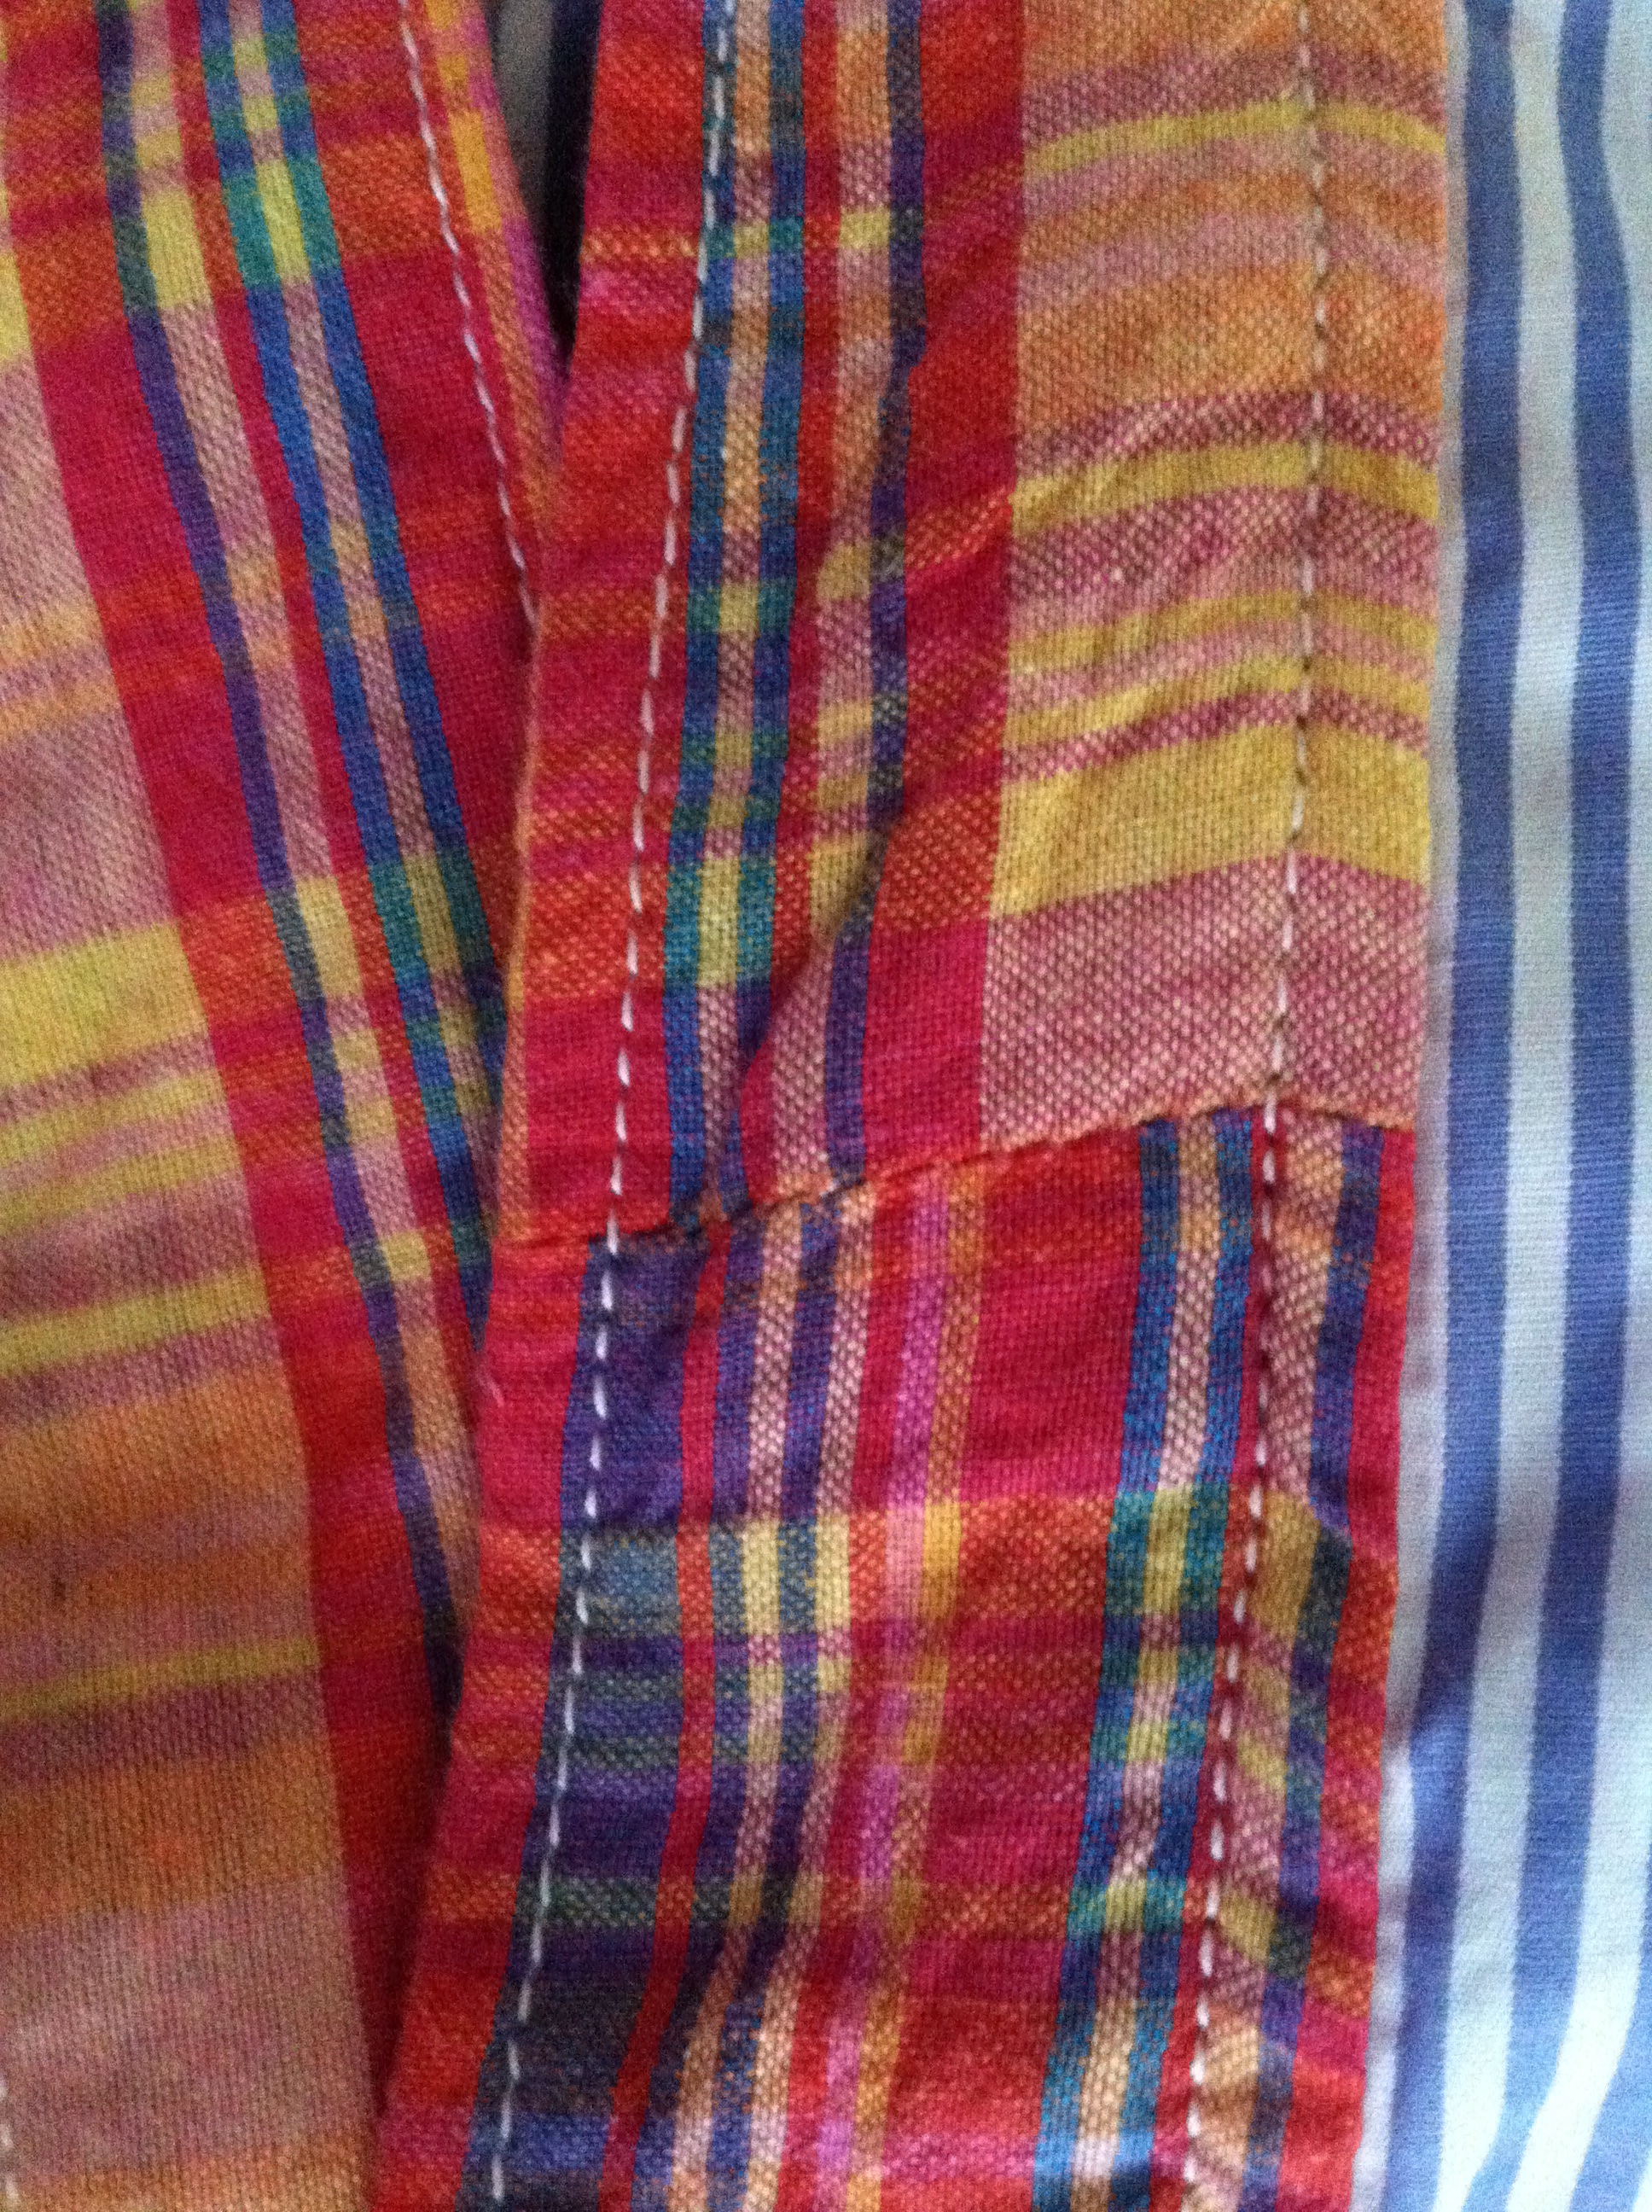
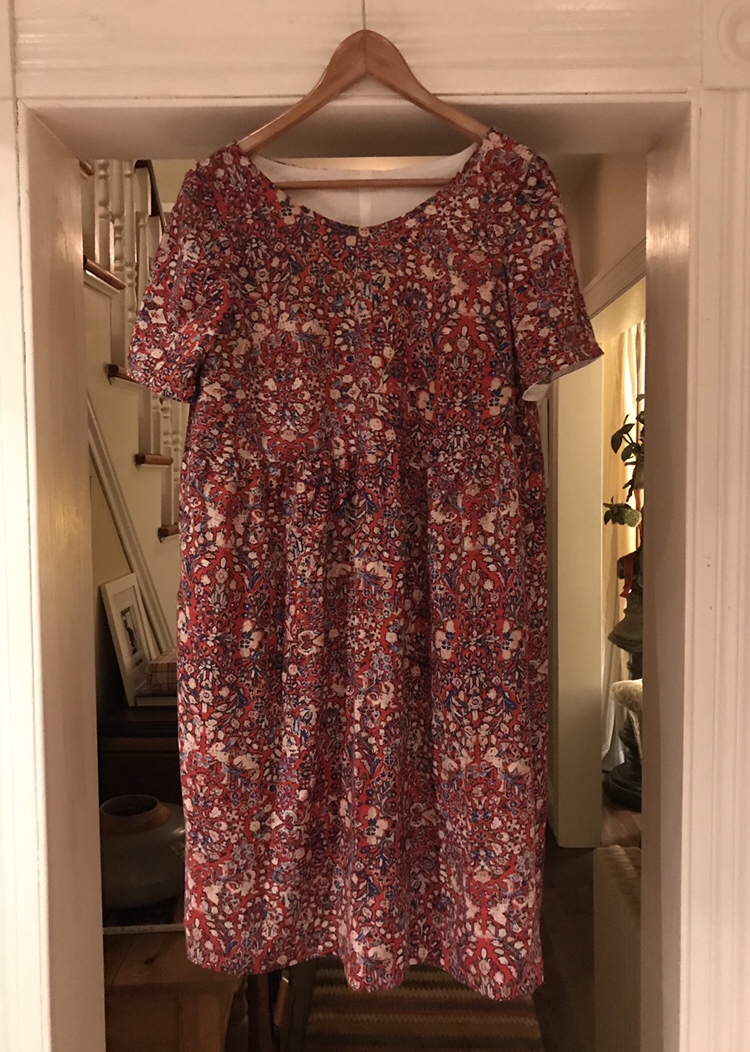
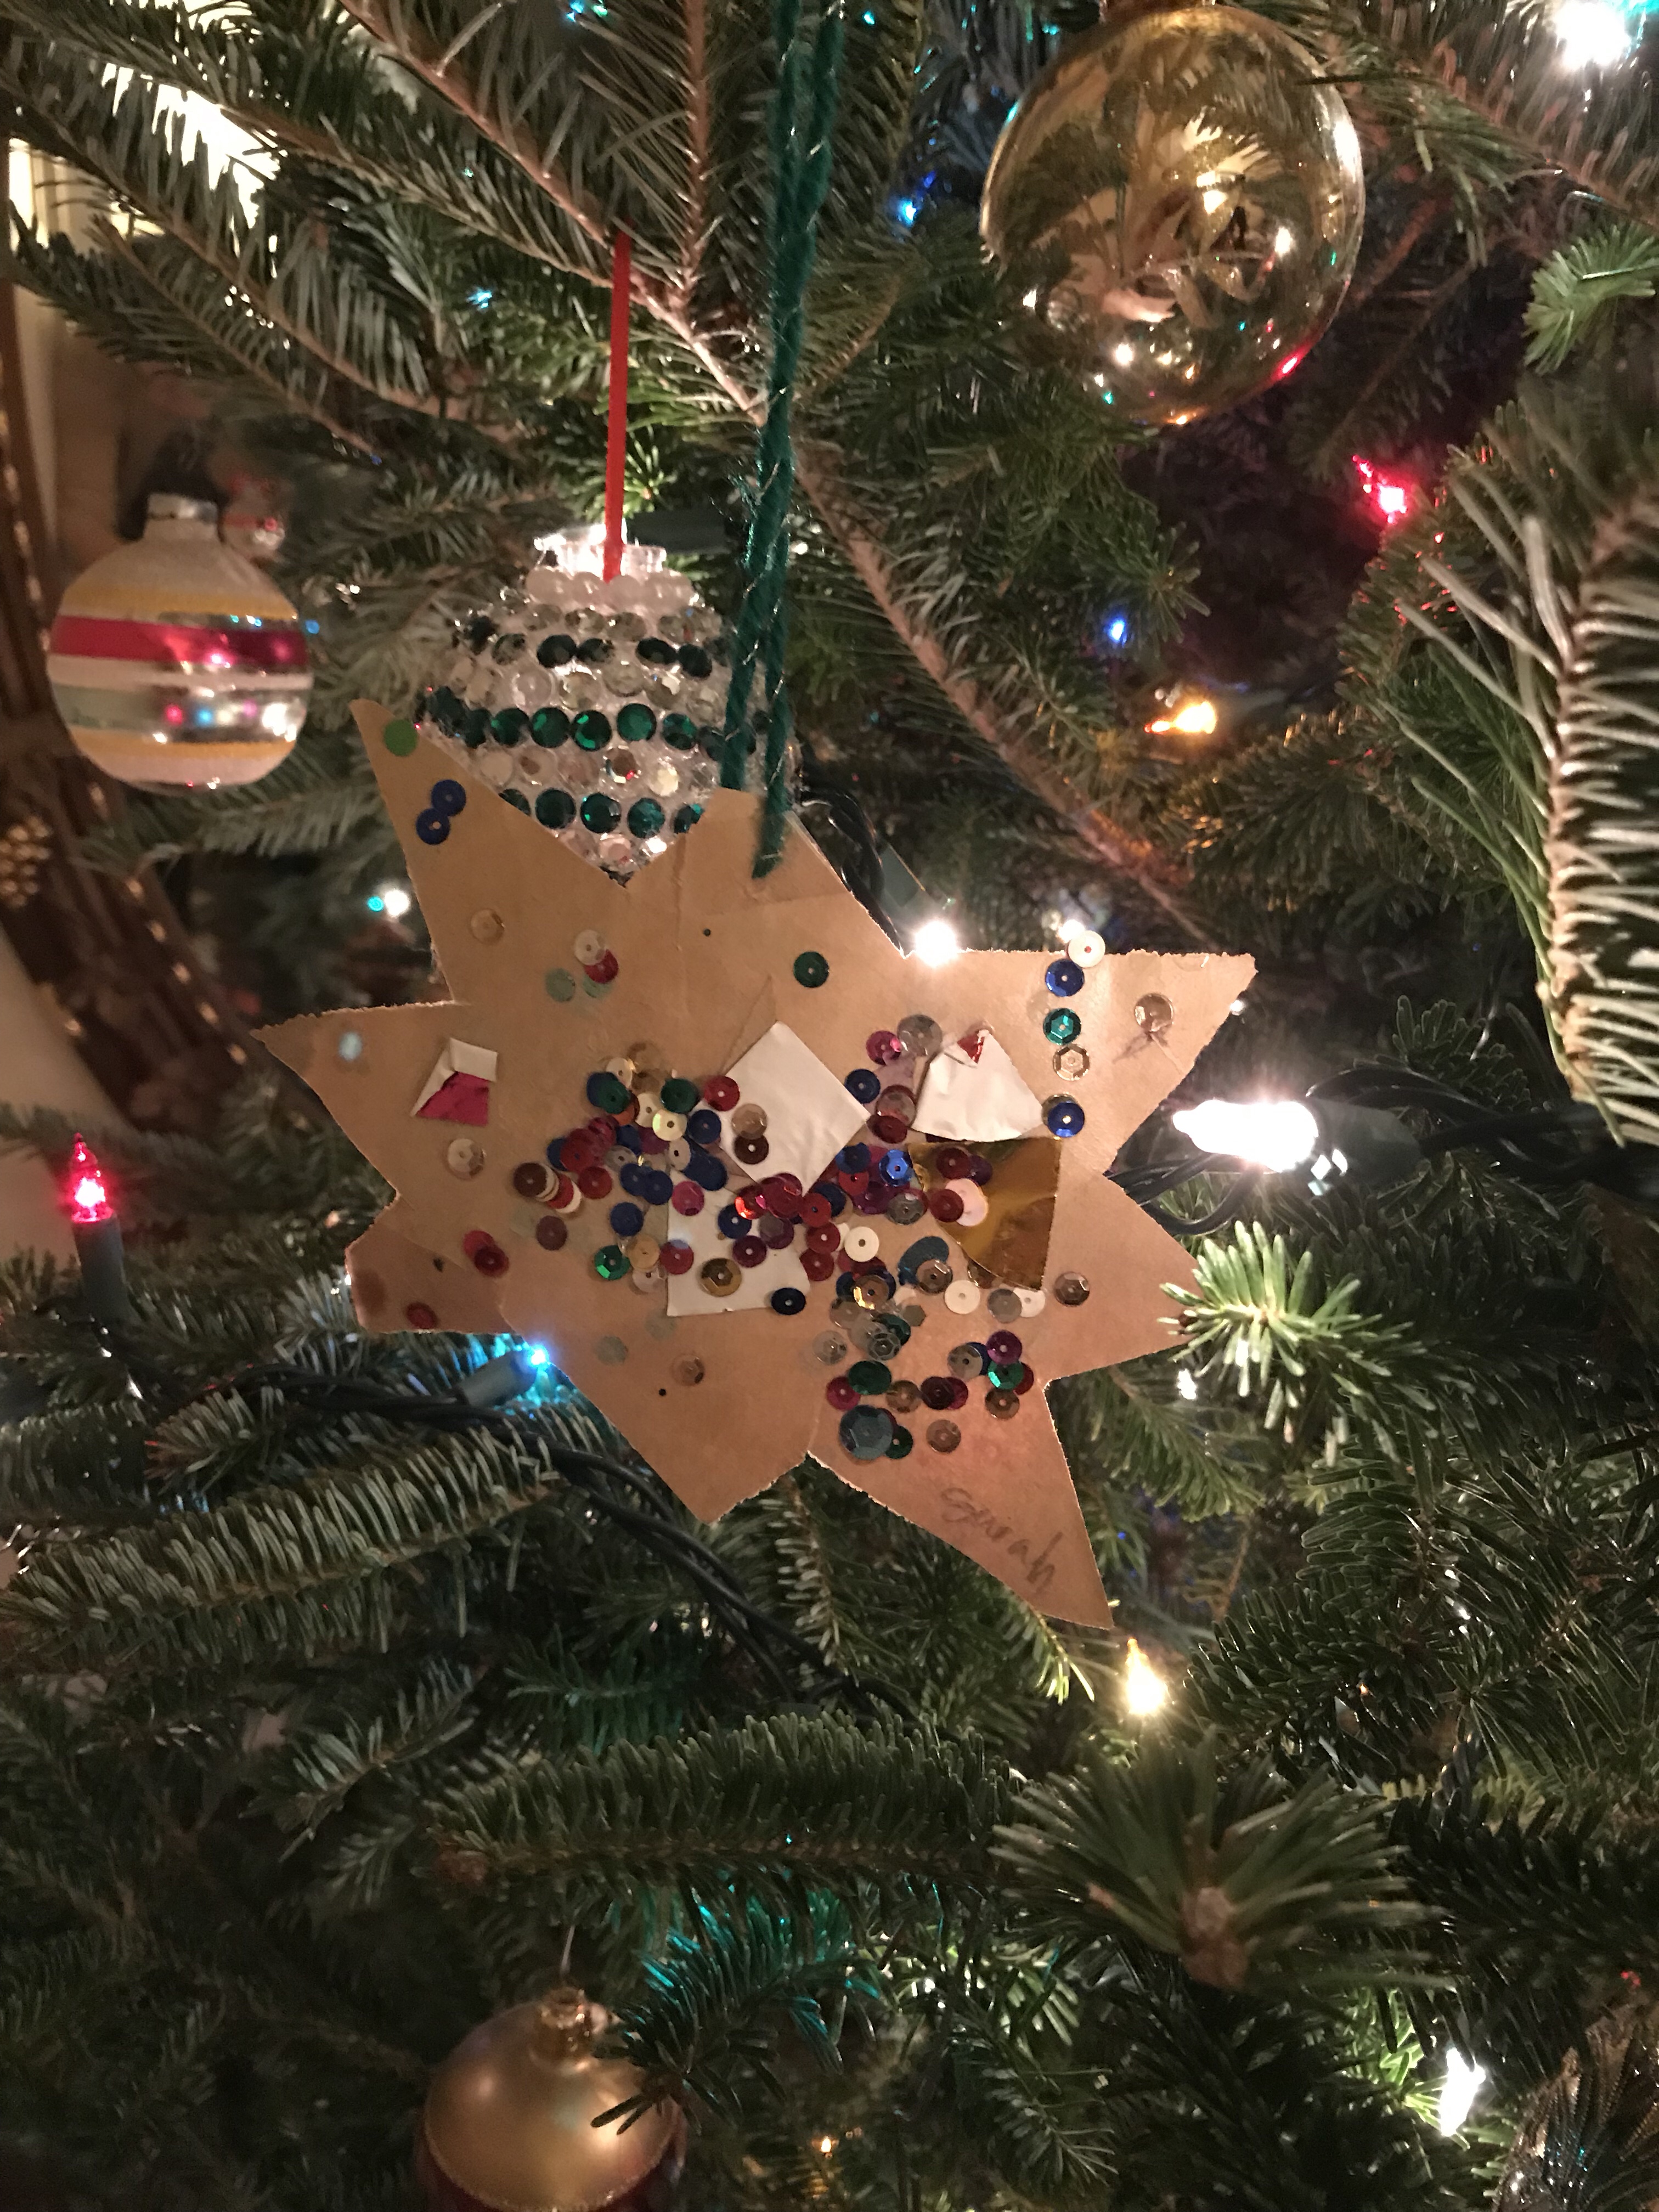
When I first saw this beautiful April Rhodes fabric last summer, I knew that I wanted to make something with it. Red is not normally a color I gravitate to. Most of my handmade garments are blue or yellow but I loved the fabric so I bought a couple of yards. I thought it would be perfect for a holiday garment (tree close-up with ornament made 25 years ago when my daughter was in preschool, sob.)

Then life got busy, as it usually does. I teach nursing students for 12 weeks in the fall in addition to my regular Monday-Friday job and there isn’t time for much sewing. That gave me a lot of time to think about what to make. This summer I made this dress.

I liked the general shape of the dress but the shoulders and neckline didn’t fit me well: too loose in the neck and too tight in the shoulders. I decided to try using the Beatrix Blouse pattern by Made by Rae as the starting point to make a loose dress that was similar.  I had made the Beatrix several times and knew that the shoulders and bodice fit perfectly. I thought if I cropped it and added a gently gathered skirt that I would end up with a dress I would really enjoy dressing wearing.

I first made the  Beatrix when the pattern was released. It was one of the first patterns I sewed after the Washi Dress and I learned a lot in the process because Rae did a series of blog posts that walk you through making the pattern from start to finish. I learned so much going through that process. She literally explained how to tape the pattern, how to take your own measurements and how to make adjustments for your body type. I learned so many great sewing techniques. When I first made the blouse, the medium fit pretty well with a couple of inches added to the length (I am 5’9″ with a very long torso) but there was a bit of gaping at the neckline. Rae told me how to do a hollow chest adjustment and once I did that, the fit was perfect. It is a really subtle adjustment but it makes all the difference. I just fold a tiny bit of the pattern at the center front and then shift it back once I cut the neckline.

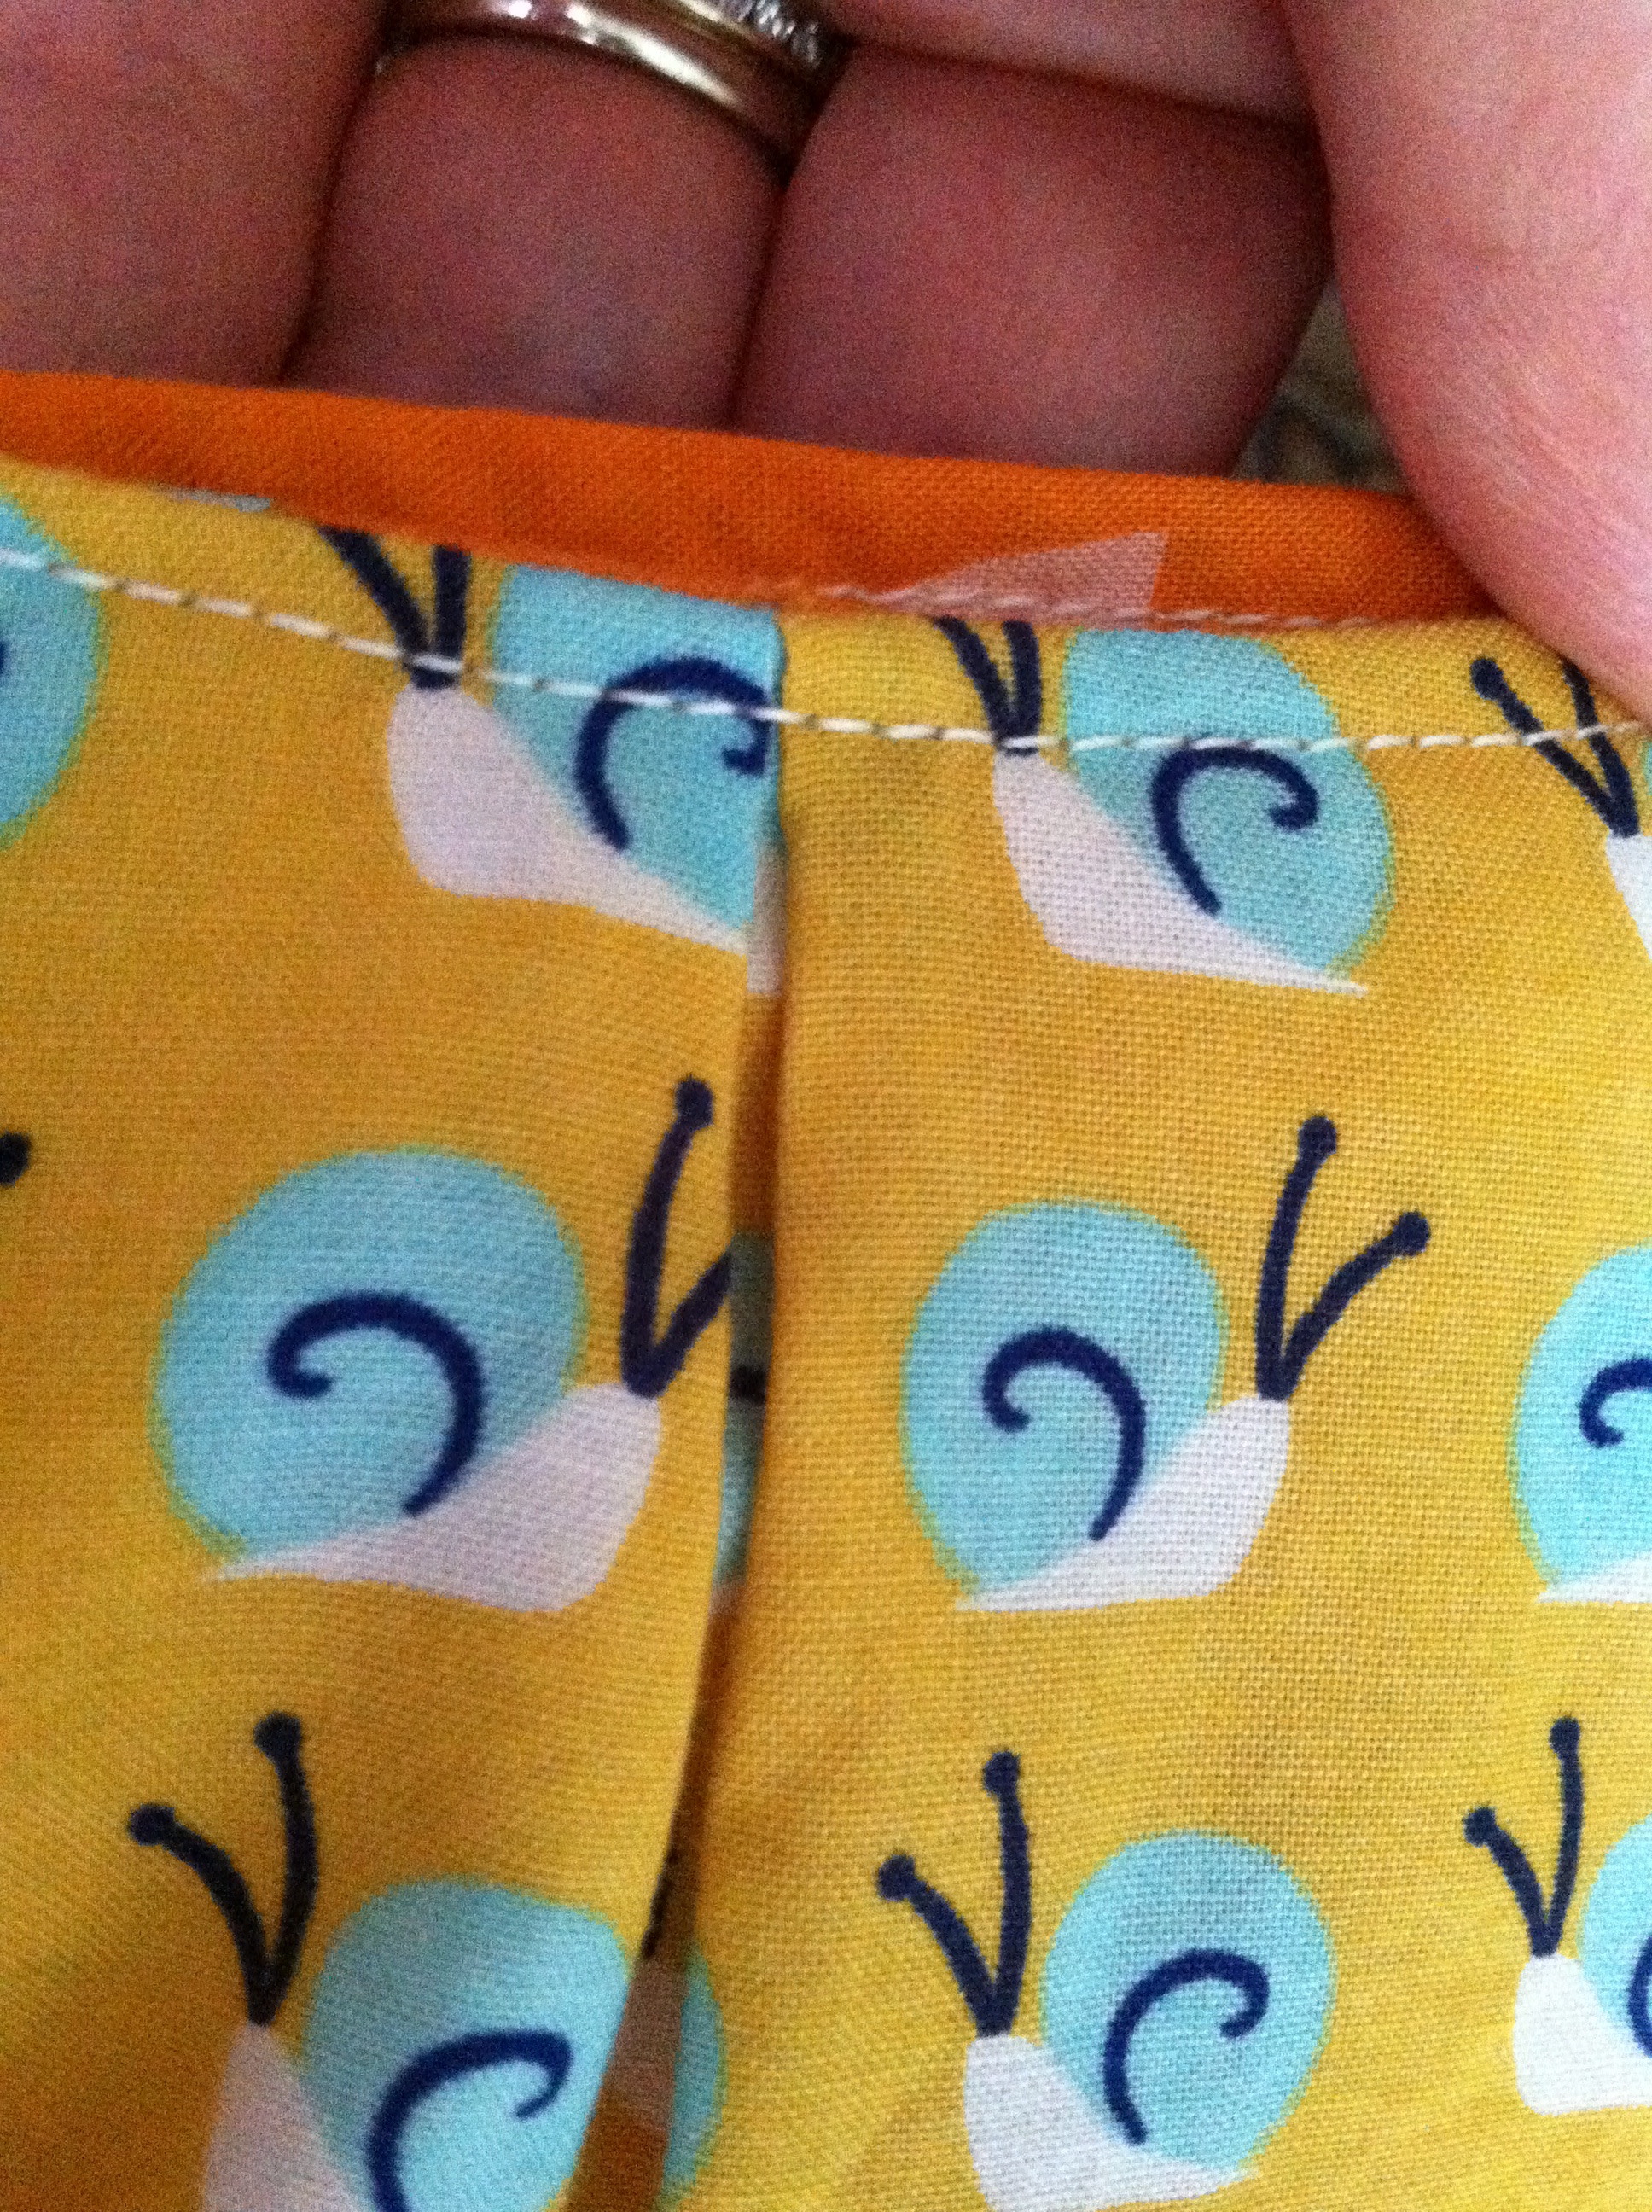
When I cut the bodice out for this project, I put one of my Beatrix blouses on and then figured out where I wanted the bodice to end and the skirt to start which was just under the rib cage. I marked the spot with a pin and then drew a line on the pattern pieces to match that bodice length after adding 1/2 cm for a seam allowance. I folded the pattern piece on that line and cut out the shortened front and back bodice in both the rayon and in the cotton batiste that I planned to use for the bodice lining. I cut out the pieces before Thanksgiving and then they sat on my ironing board until January. But that’s ok. Sometimes you have time and energy to sew and sometimes you don’t. I did a lot more reading than sewing this fall. Reading on Christmas Day below. Such a good book. The ear muffs were my given to one of my daughters. I was just borrowing them. They are actually really warm and cozy though a bit flashier than my usual style.

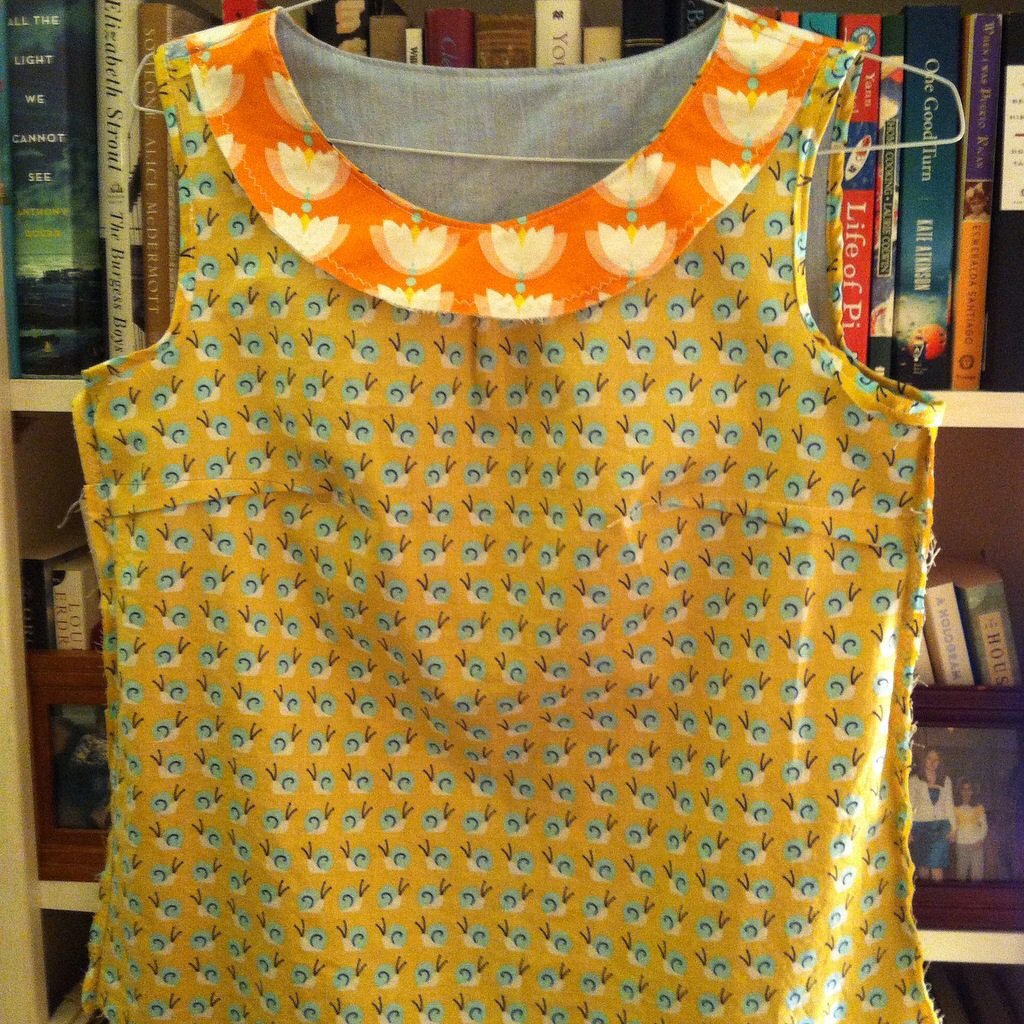
After the holidays I went back to work and did a long drive the weekend after New Year’s Day,  taking my daughter back to school. Finally, the second weekend in January, I had time and energy and finished the dress. img_8464Pictures of sewing the bodice below.

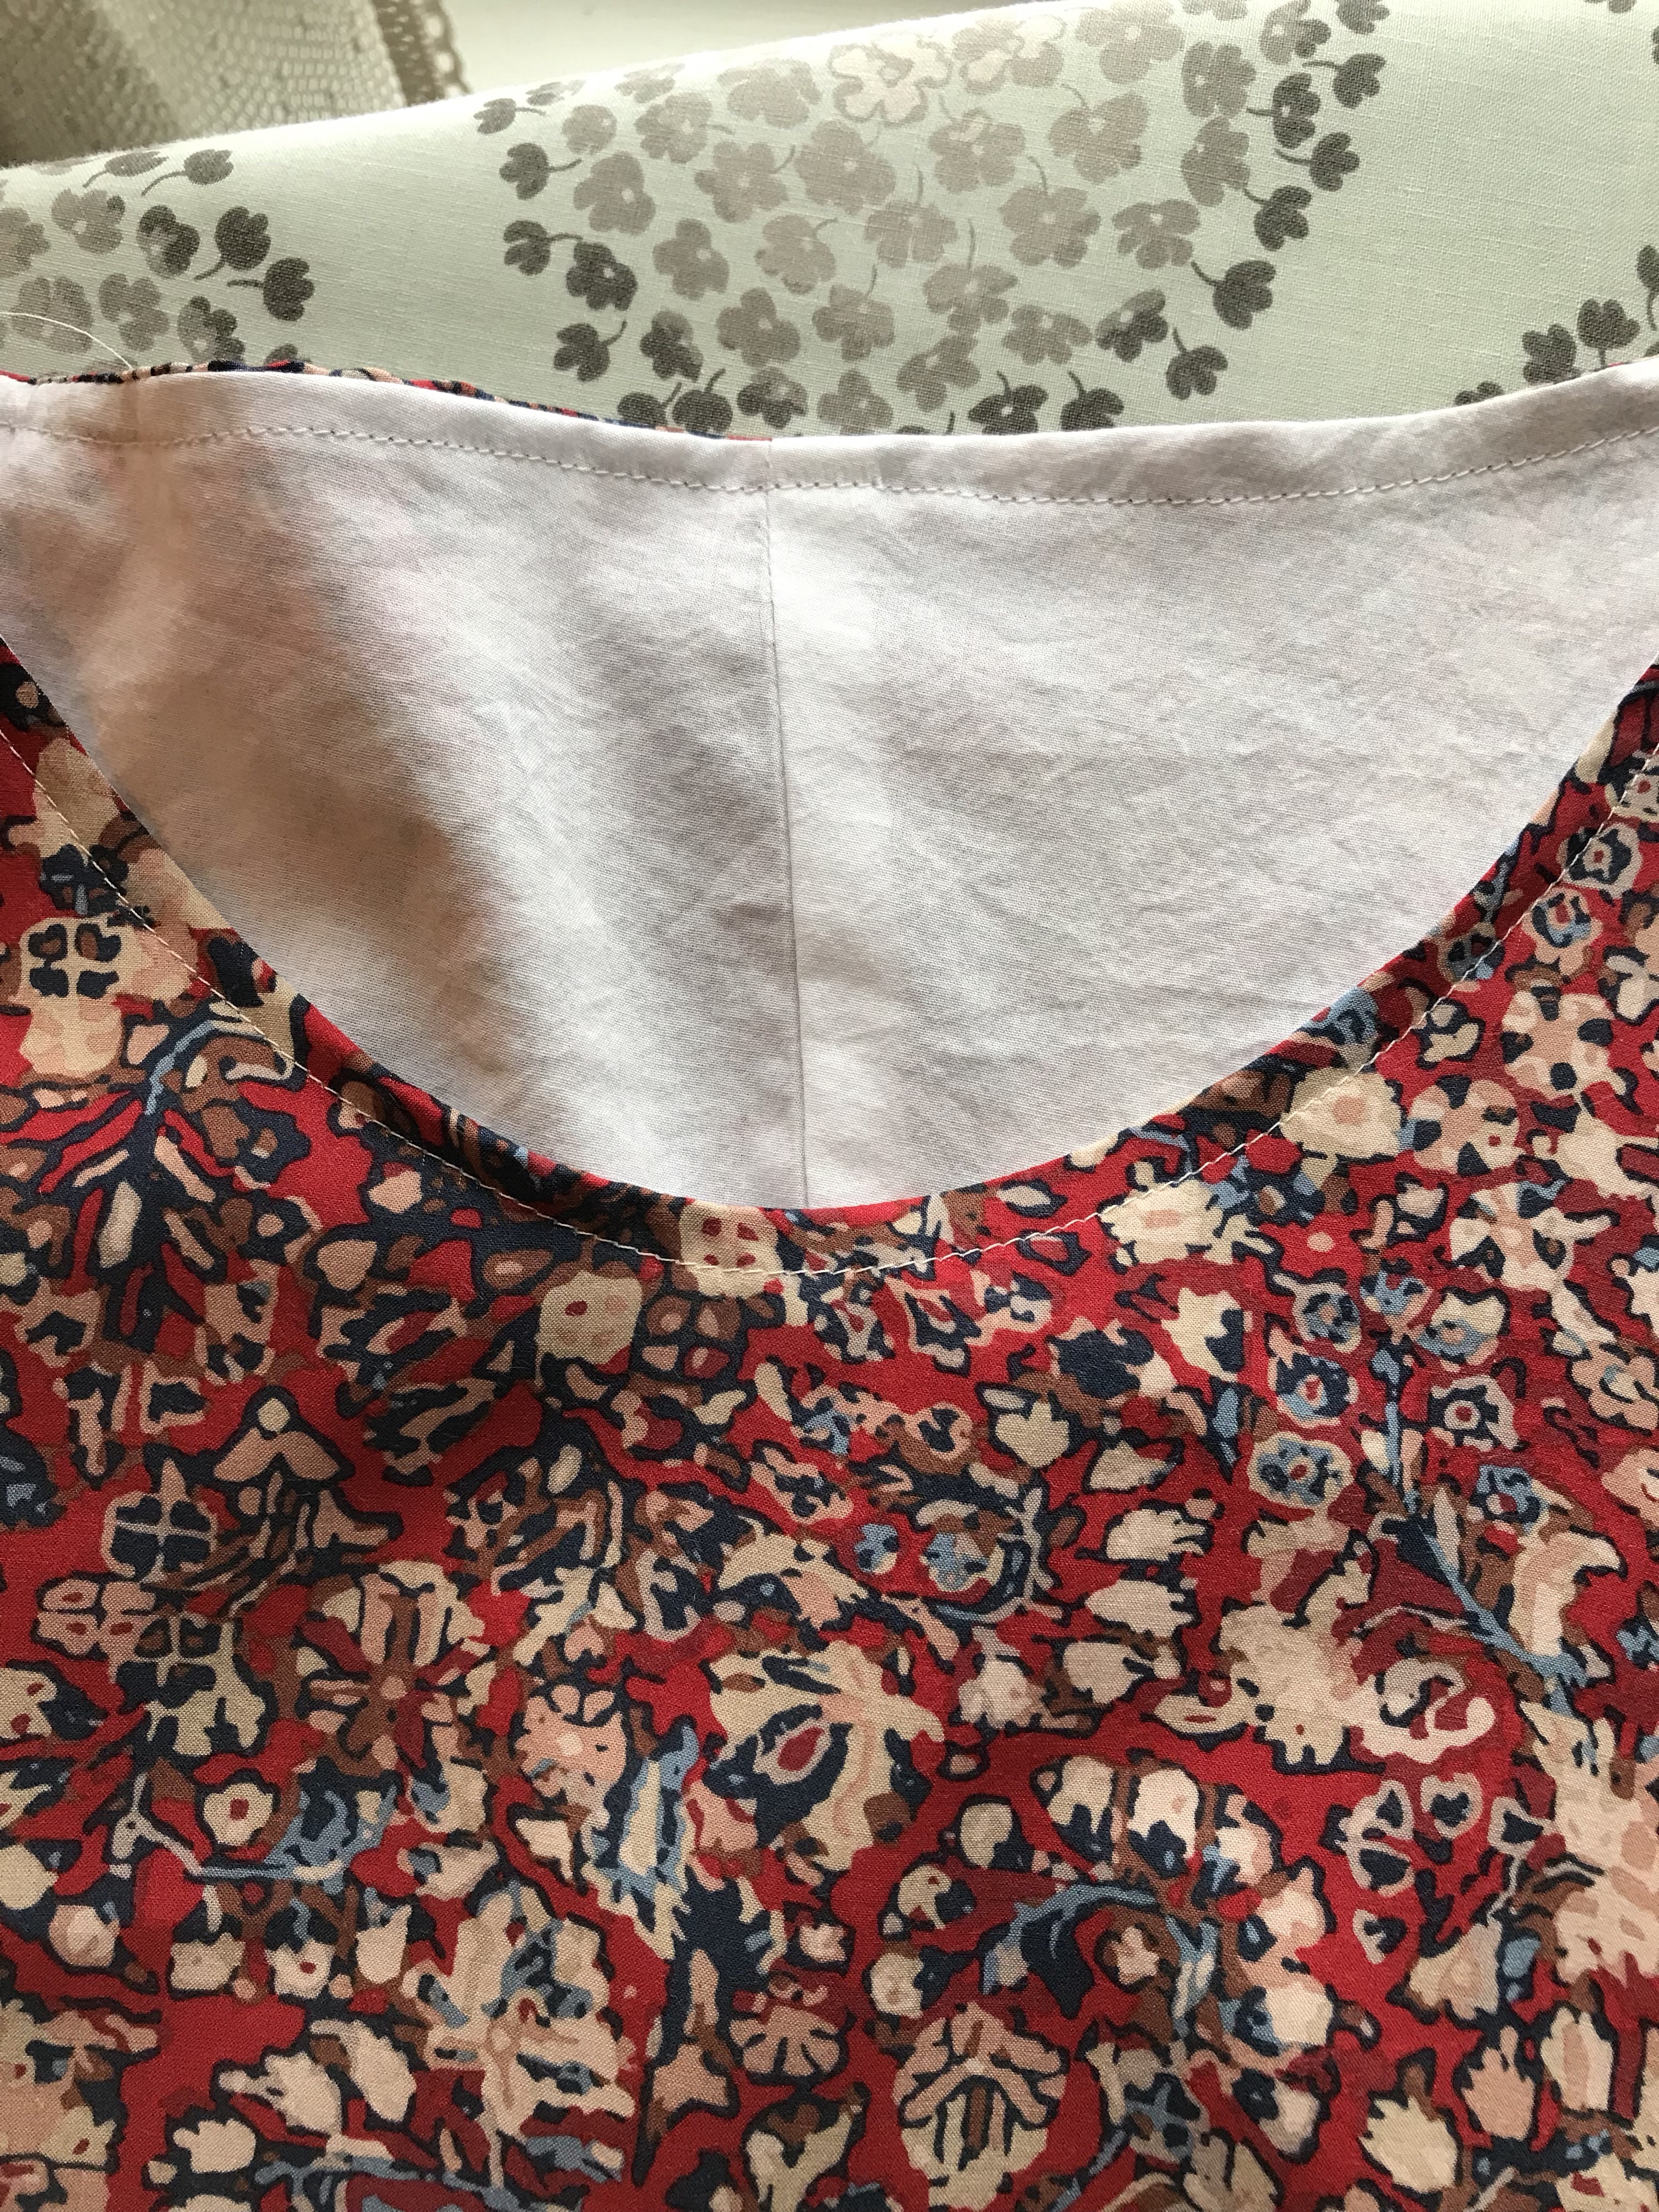
I realized that I cut the back lining piece too wide so I just sewed a center seam to take out the excess. I like to top stitch around the neckline so that everything lies flat.

I sewed the shoulder seams together for both the bodice and lining, sewed the pieces together at the neckline, gathered the sleeves and attached them and then used Rae’s burrito or sausage method to line the bodice. Then I sewed the side seams of the sleeves and the bodice side seams.

I used the skirt from the Isla pattern as a template to cut out the front and back skirt pieces.

I added 2 inches to the width of the back skirt piece because I am bigger in the back than the front and I thought the dress would flow more nicely with a bit more gathered fabric in the back. I did this when I made my  Isla Maxi Dress I was really happy with it. I marked the back skirt piece with two pins and front piece with one pin because they were so close in size that I was afraid that I would mix them up. Then I gathered the front and backs, sewed the two skirt pieces together using french seams, lined up the center front of the bodice with the center of the front skirt and did the same on the back and sewed the bodice to the skirt. I turned the bottom edge of the lining under and hand sewed the lining to the seam that joins the bodice to the skirt in the same manner that Rae shows in her Washi tutorials.

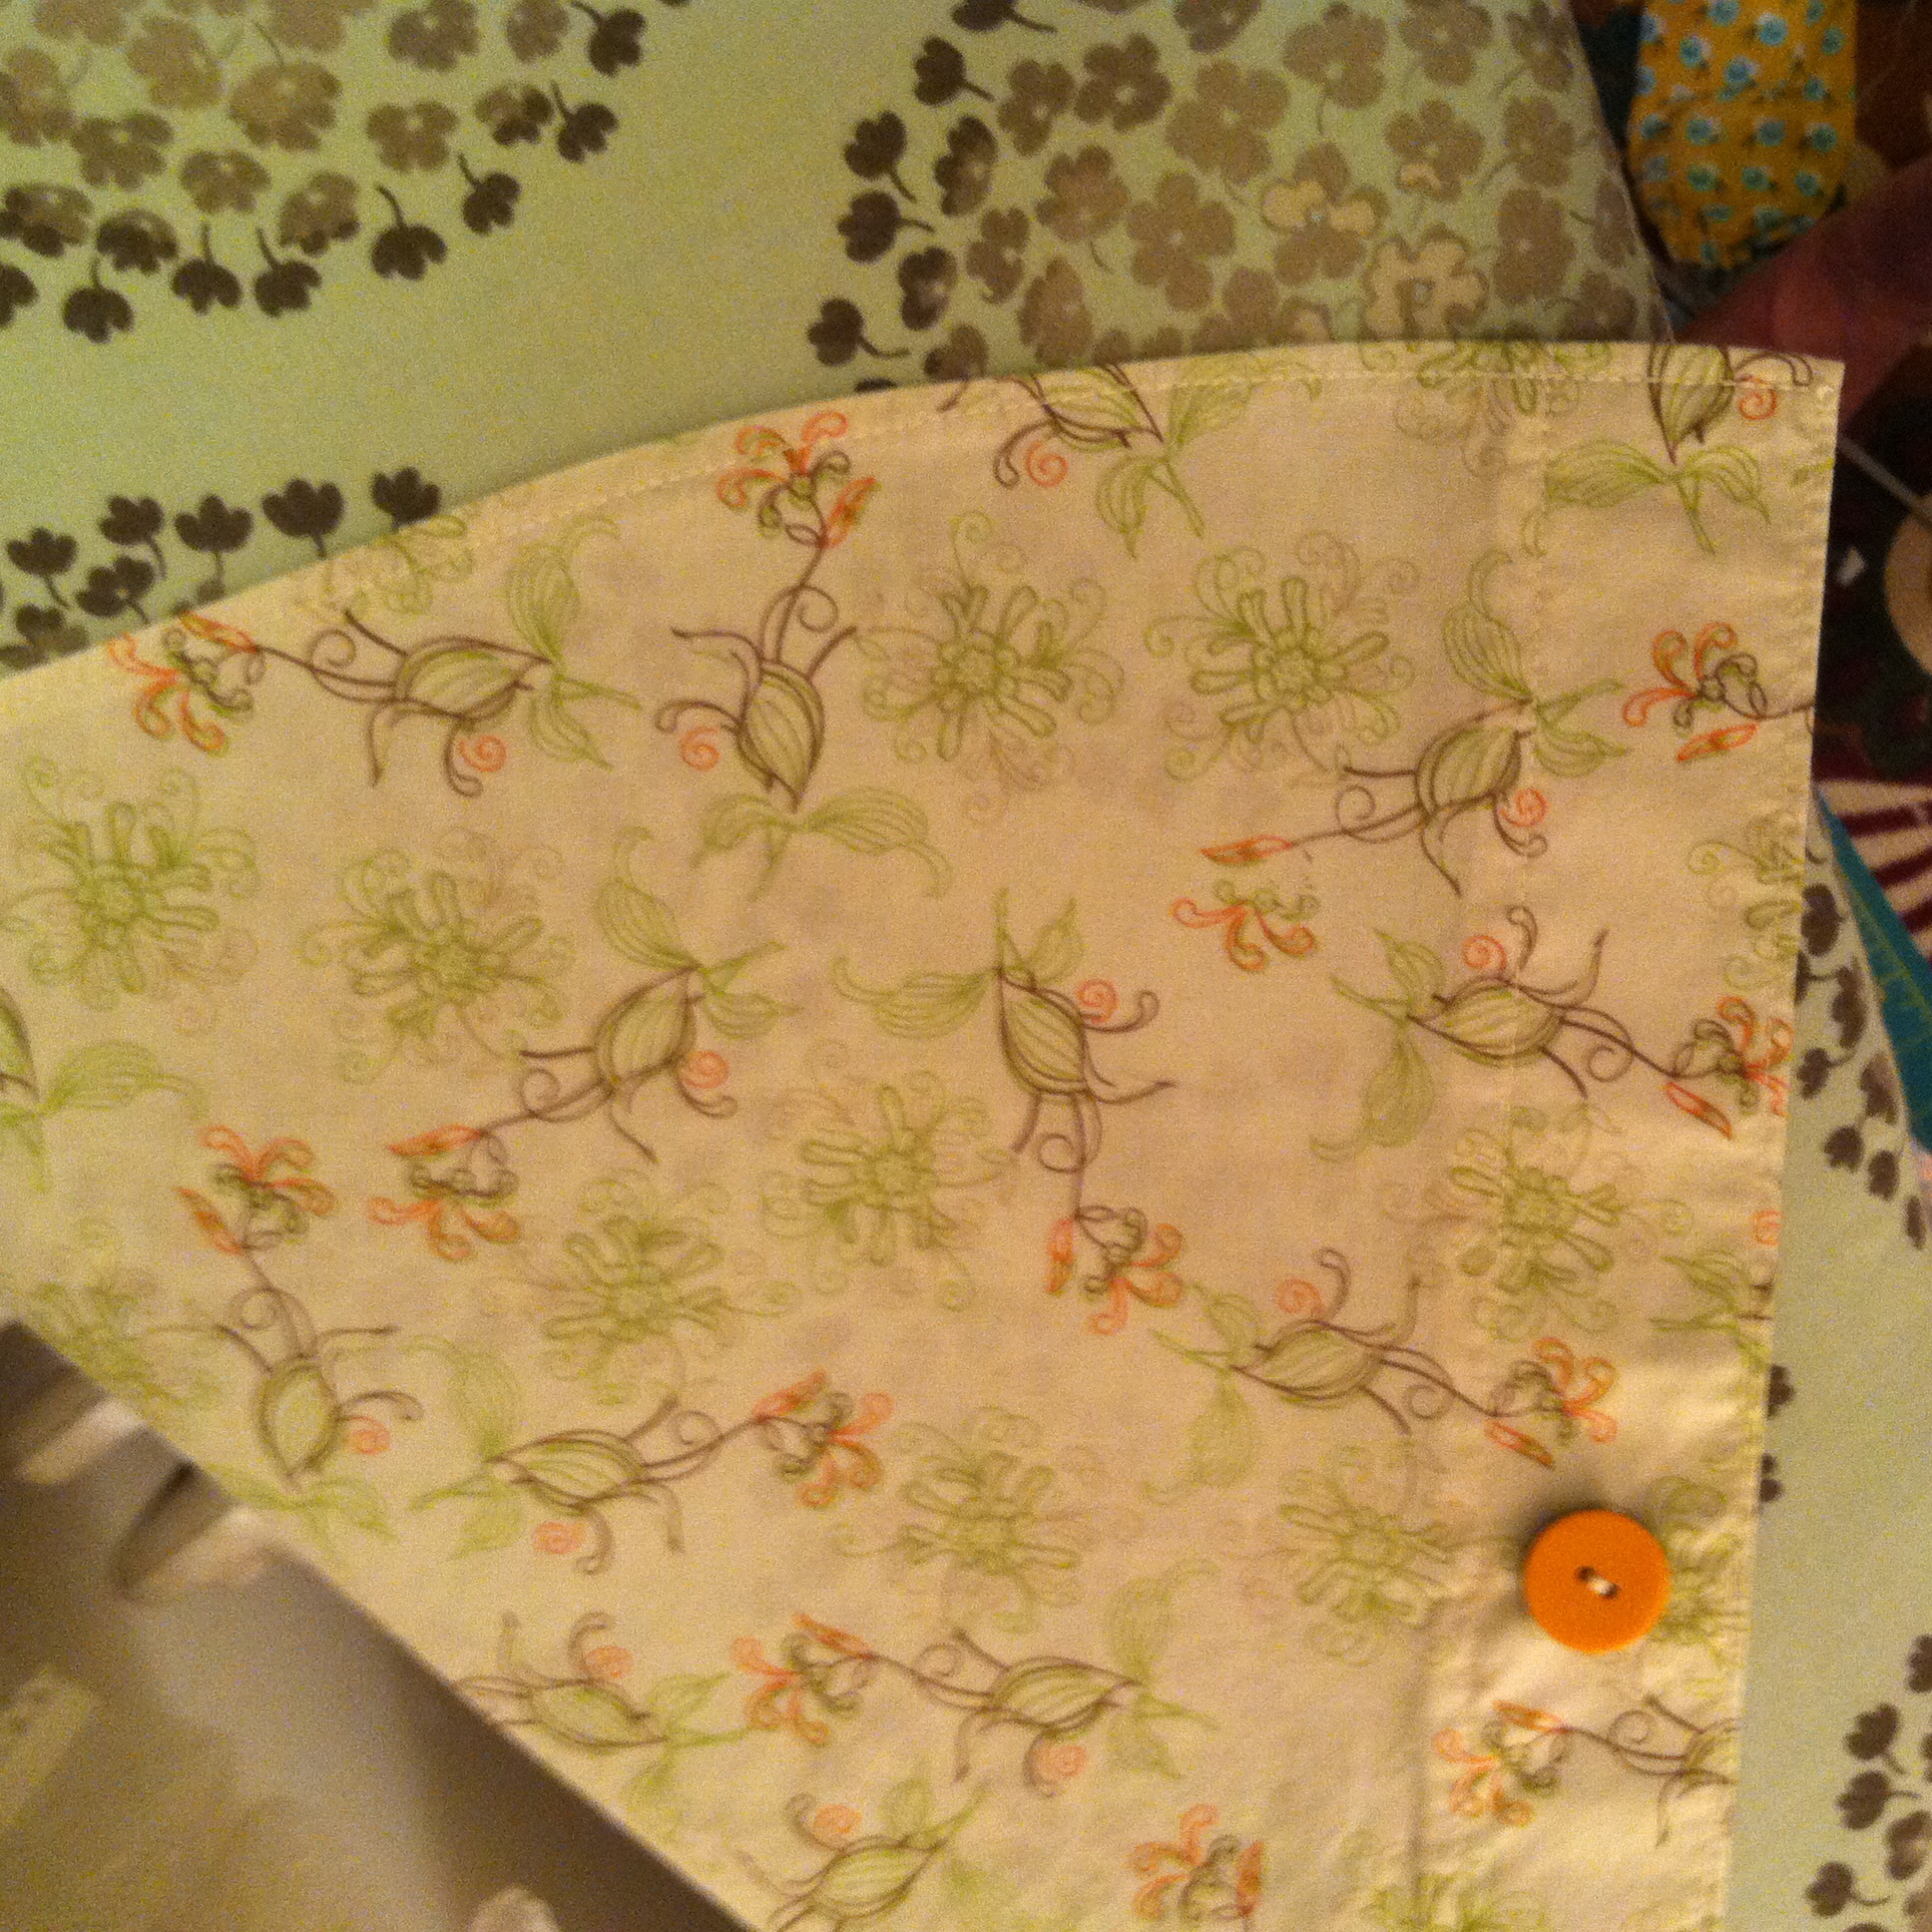
I usually make a hem facing but I thought it might make the hem more stiff since the rayon was so lightweight so I just turned up the hem twice and sewed a line of stitches using a matching thread. It came out fine. I have yet to hand hem a garment. I am sure there will be a time when I feel I should but I have gotten this far machine hemming with good success. And that was it. It was a pretty quick sew. I like that the dress has shape from the darts but is also loose and flowey. I think it can be dressed up and down. I have already worn it to church and I have plans to make it again. I have this rayon which I think would be perfect! This isn’t the first time I lengthened the Beatrix. I have also made two tunic length Beatrix’s that I love. One seen below last summer on the beach. You can read details about those here and here. I highly recommend the Beatrix pattern and Rae’s Beatrix sewalong posts and her videos demonstrating the bodice-lining technique.

More pictures of my new red dress below. You can tell it was windy.

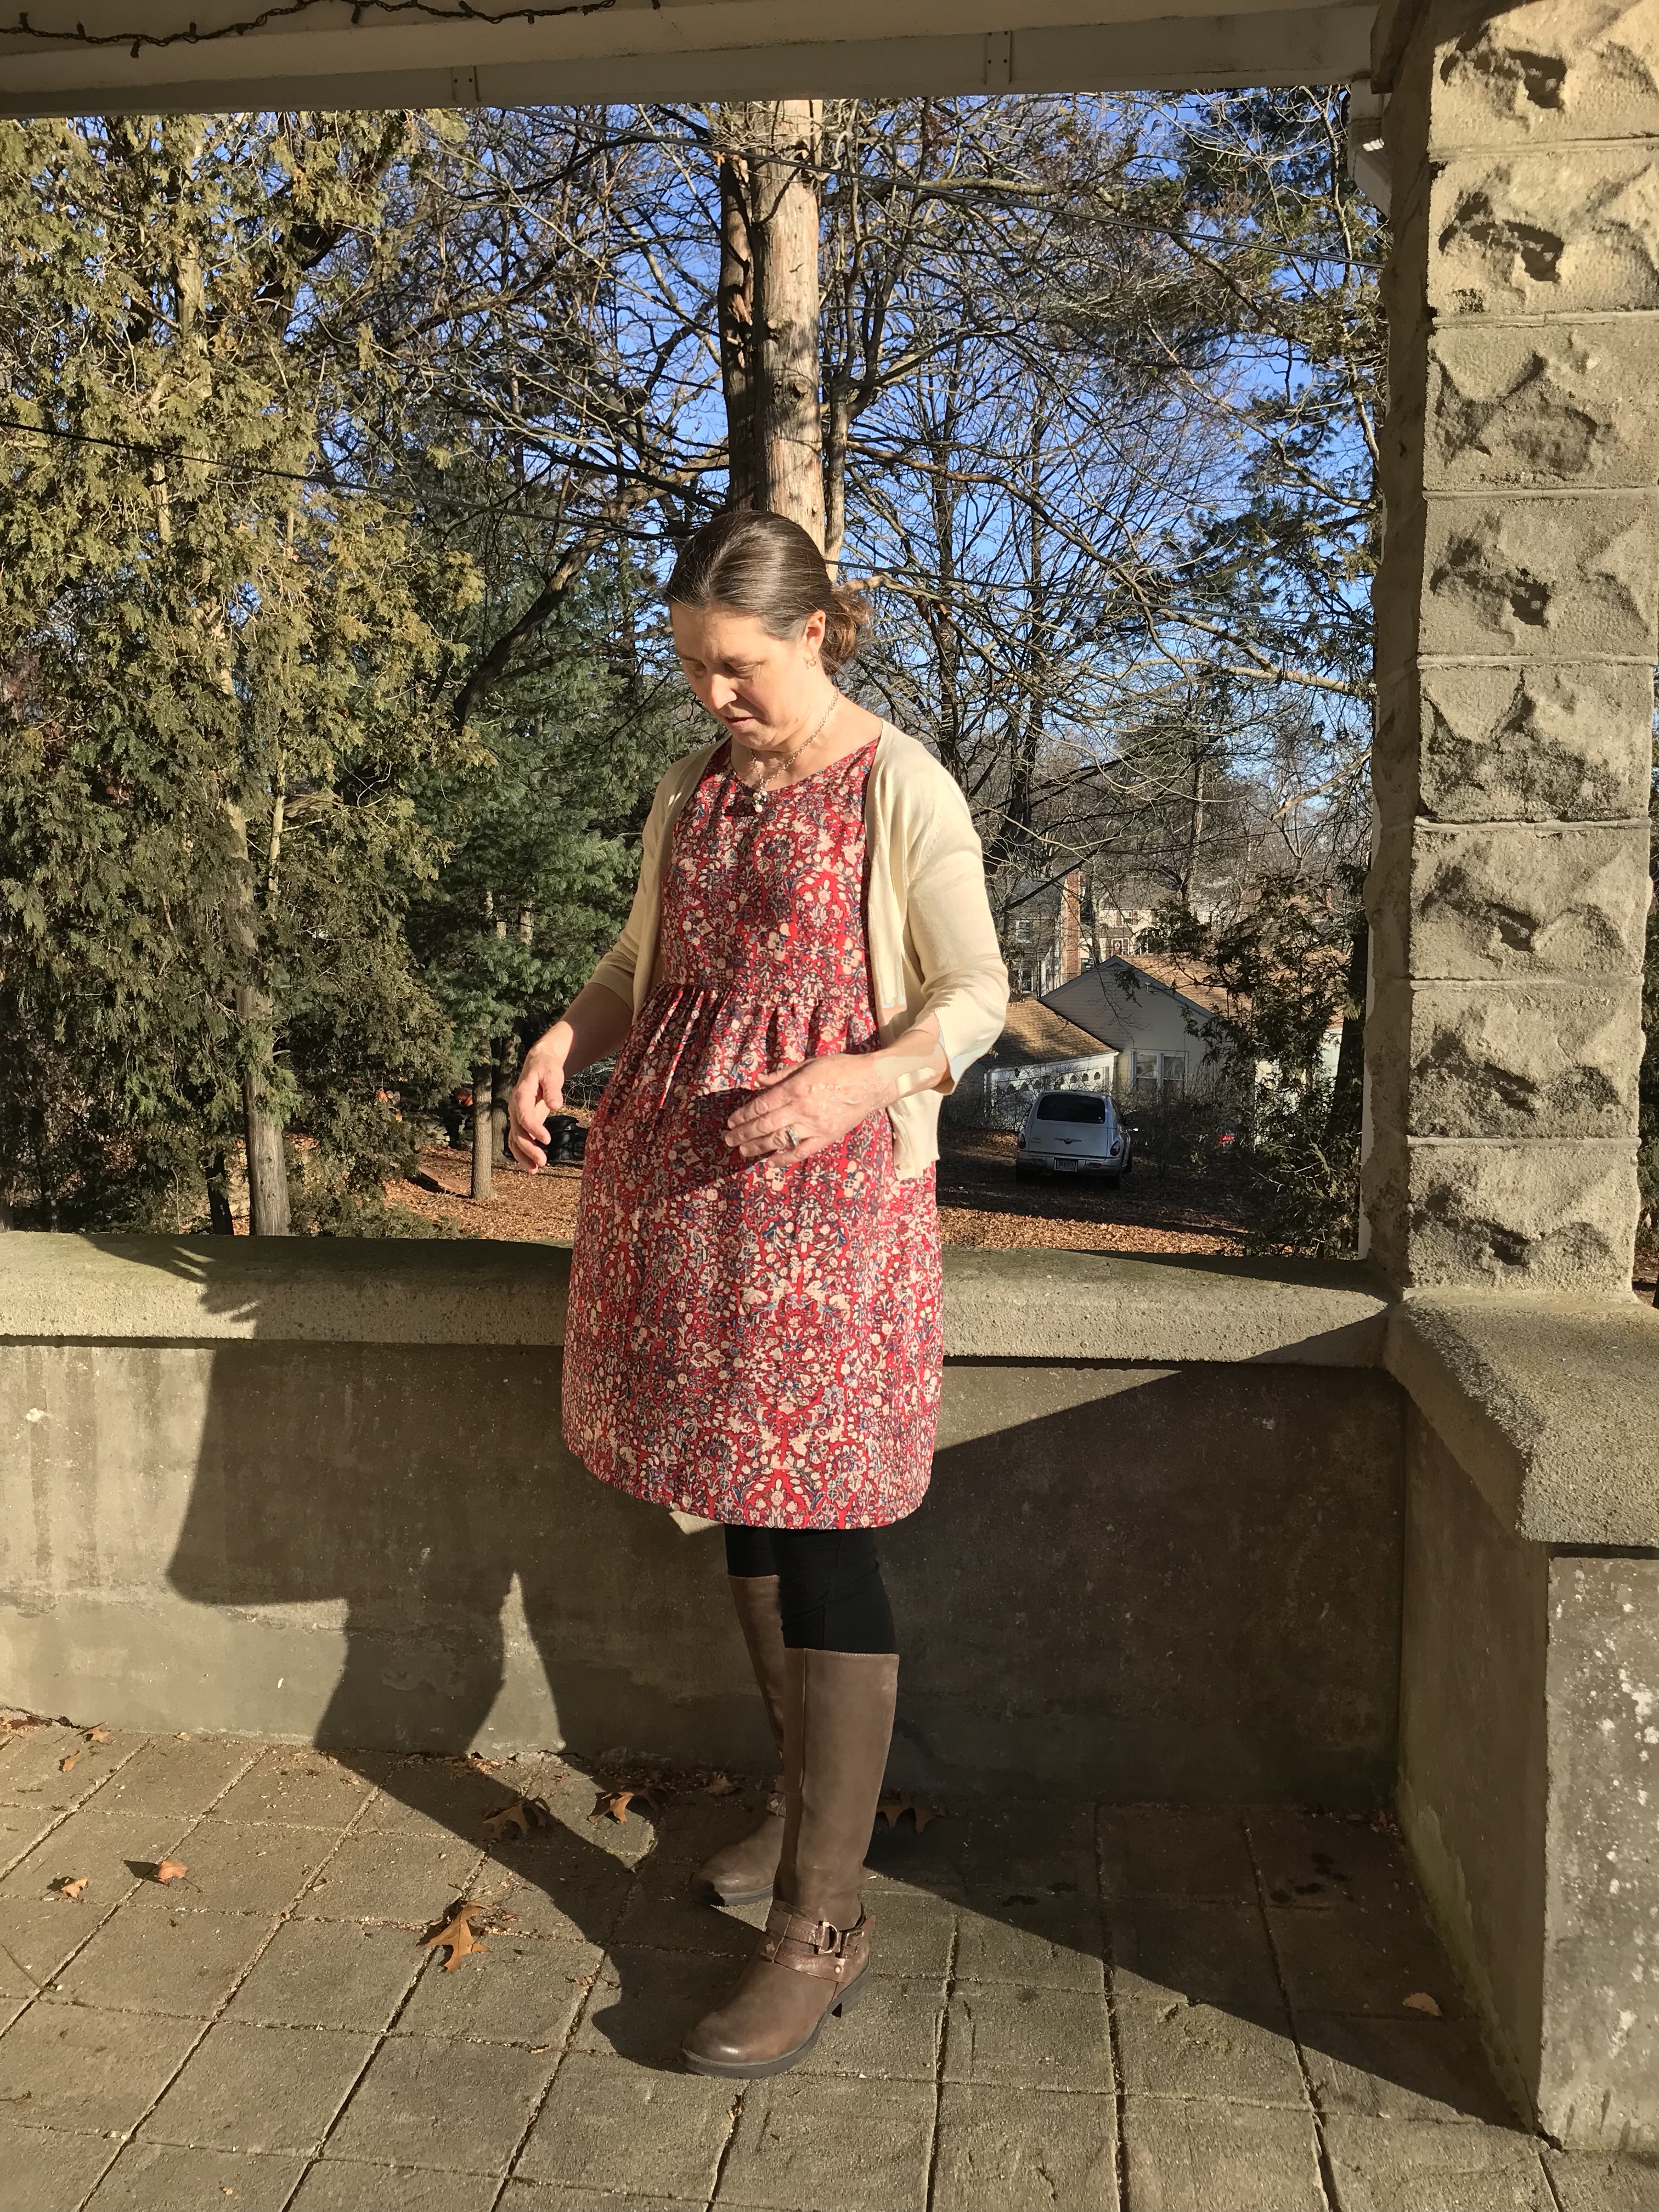
I had the perfect sweater in my closet. Never get rid of a cardigan, that’s my motto. 
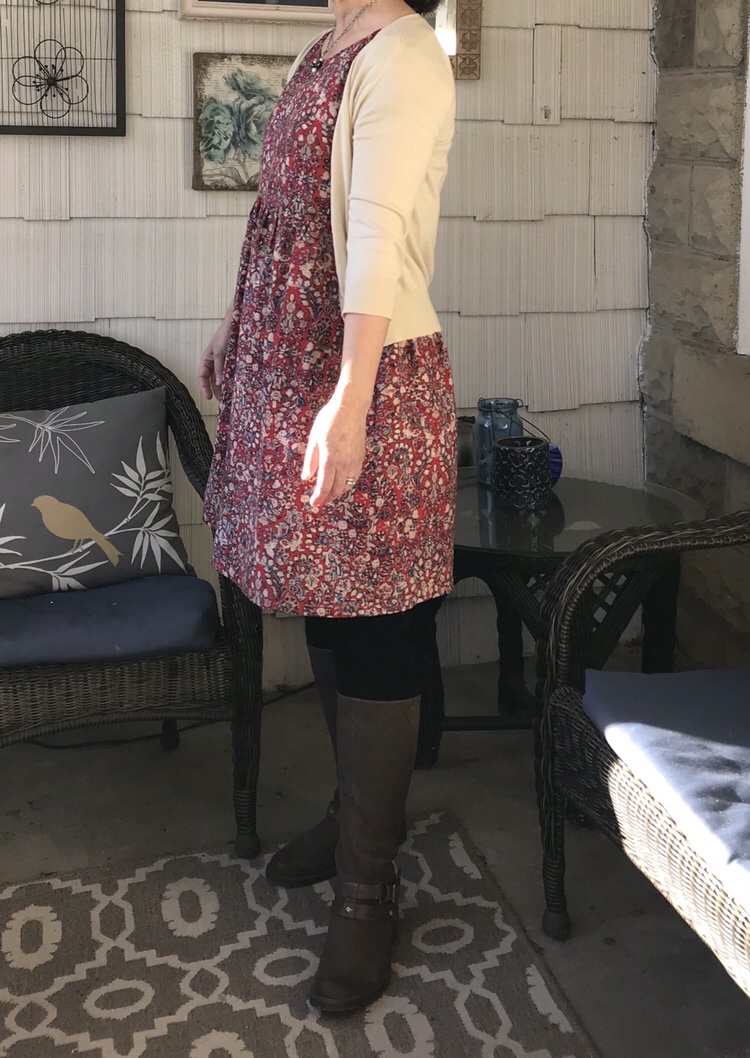
I want to sew the Blackwood Cardigan by Helen’s Closet this year. I think it will be perfect in a sweater knit over this dress worn with jeans.

Perfect with denim.

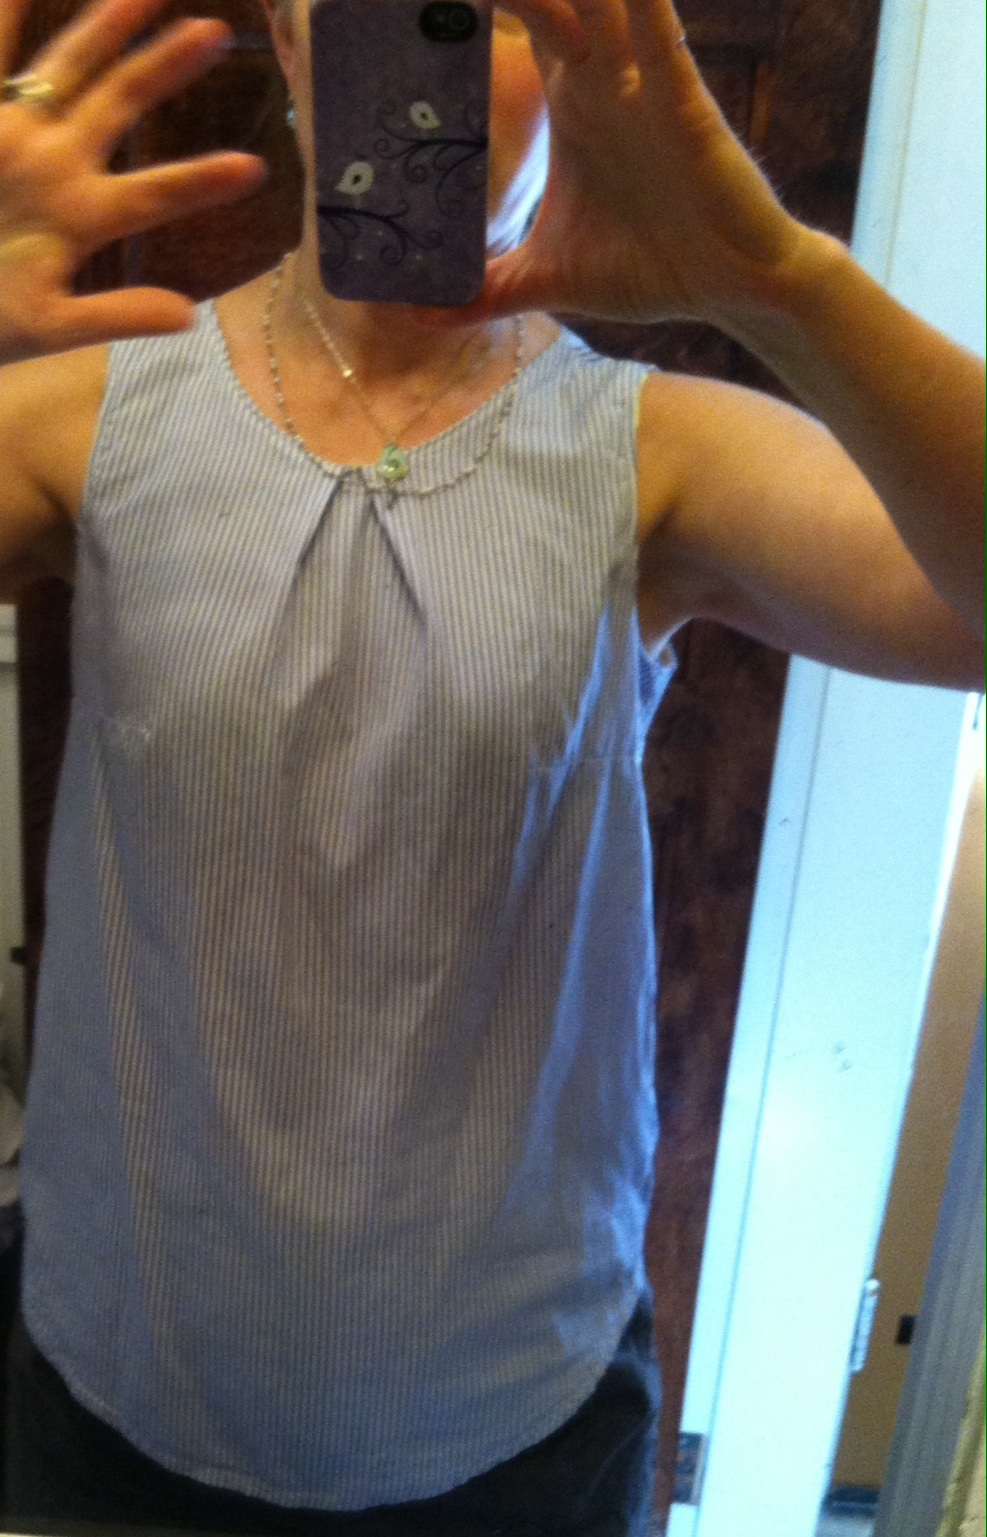
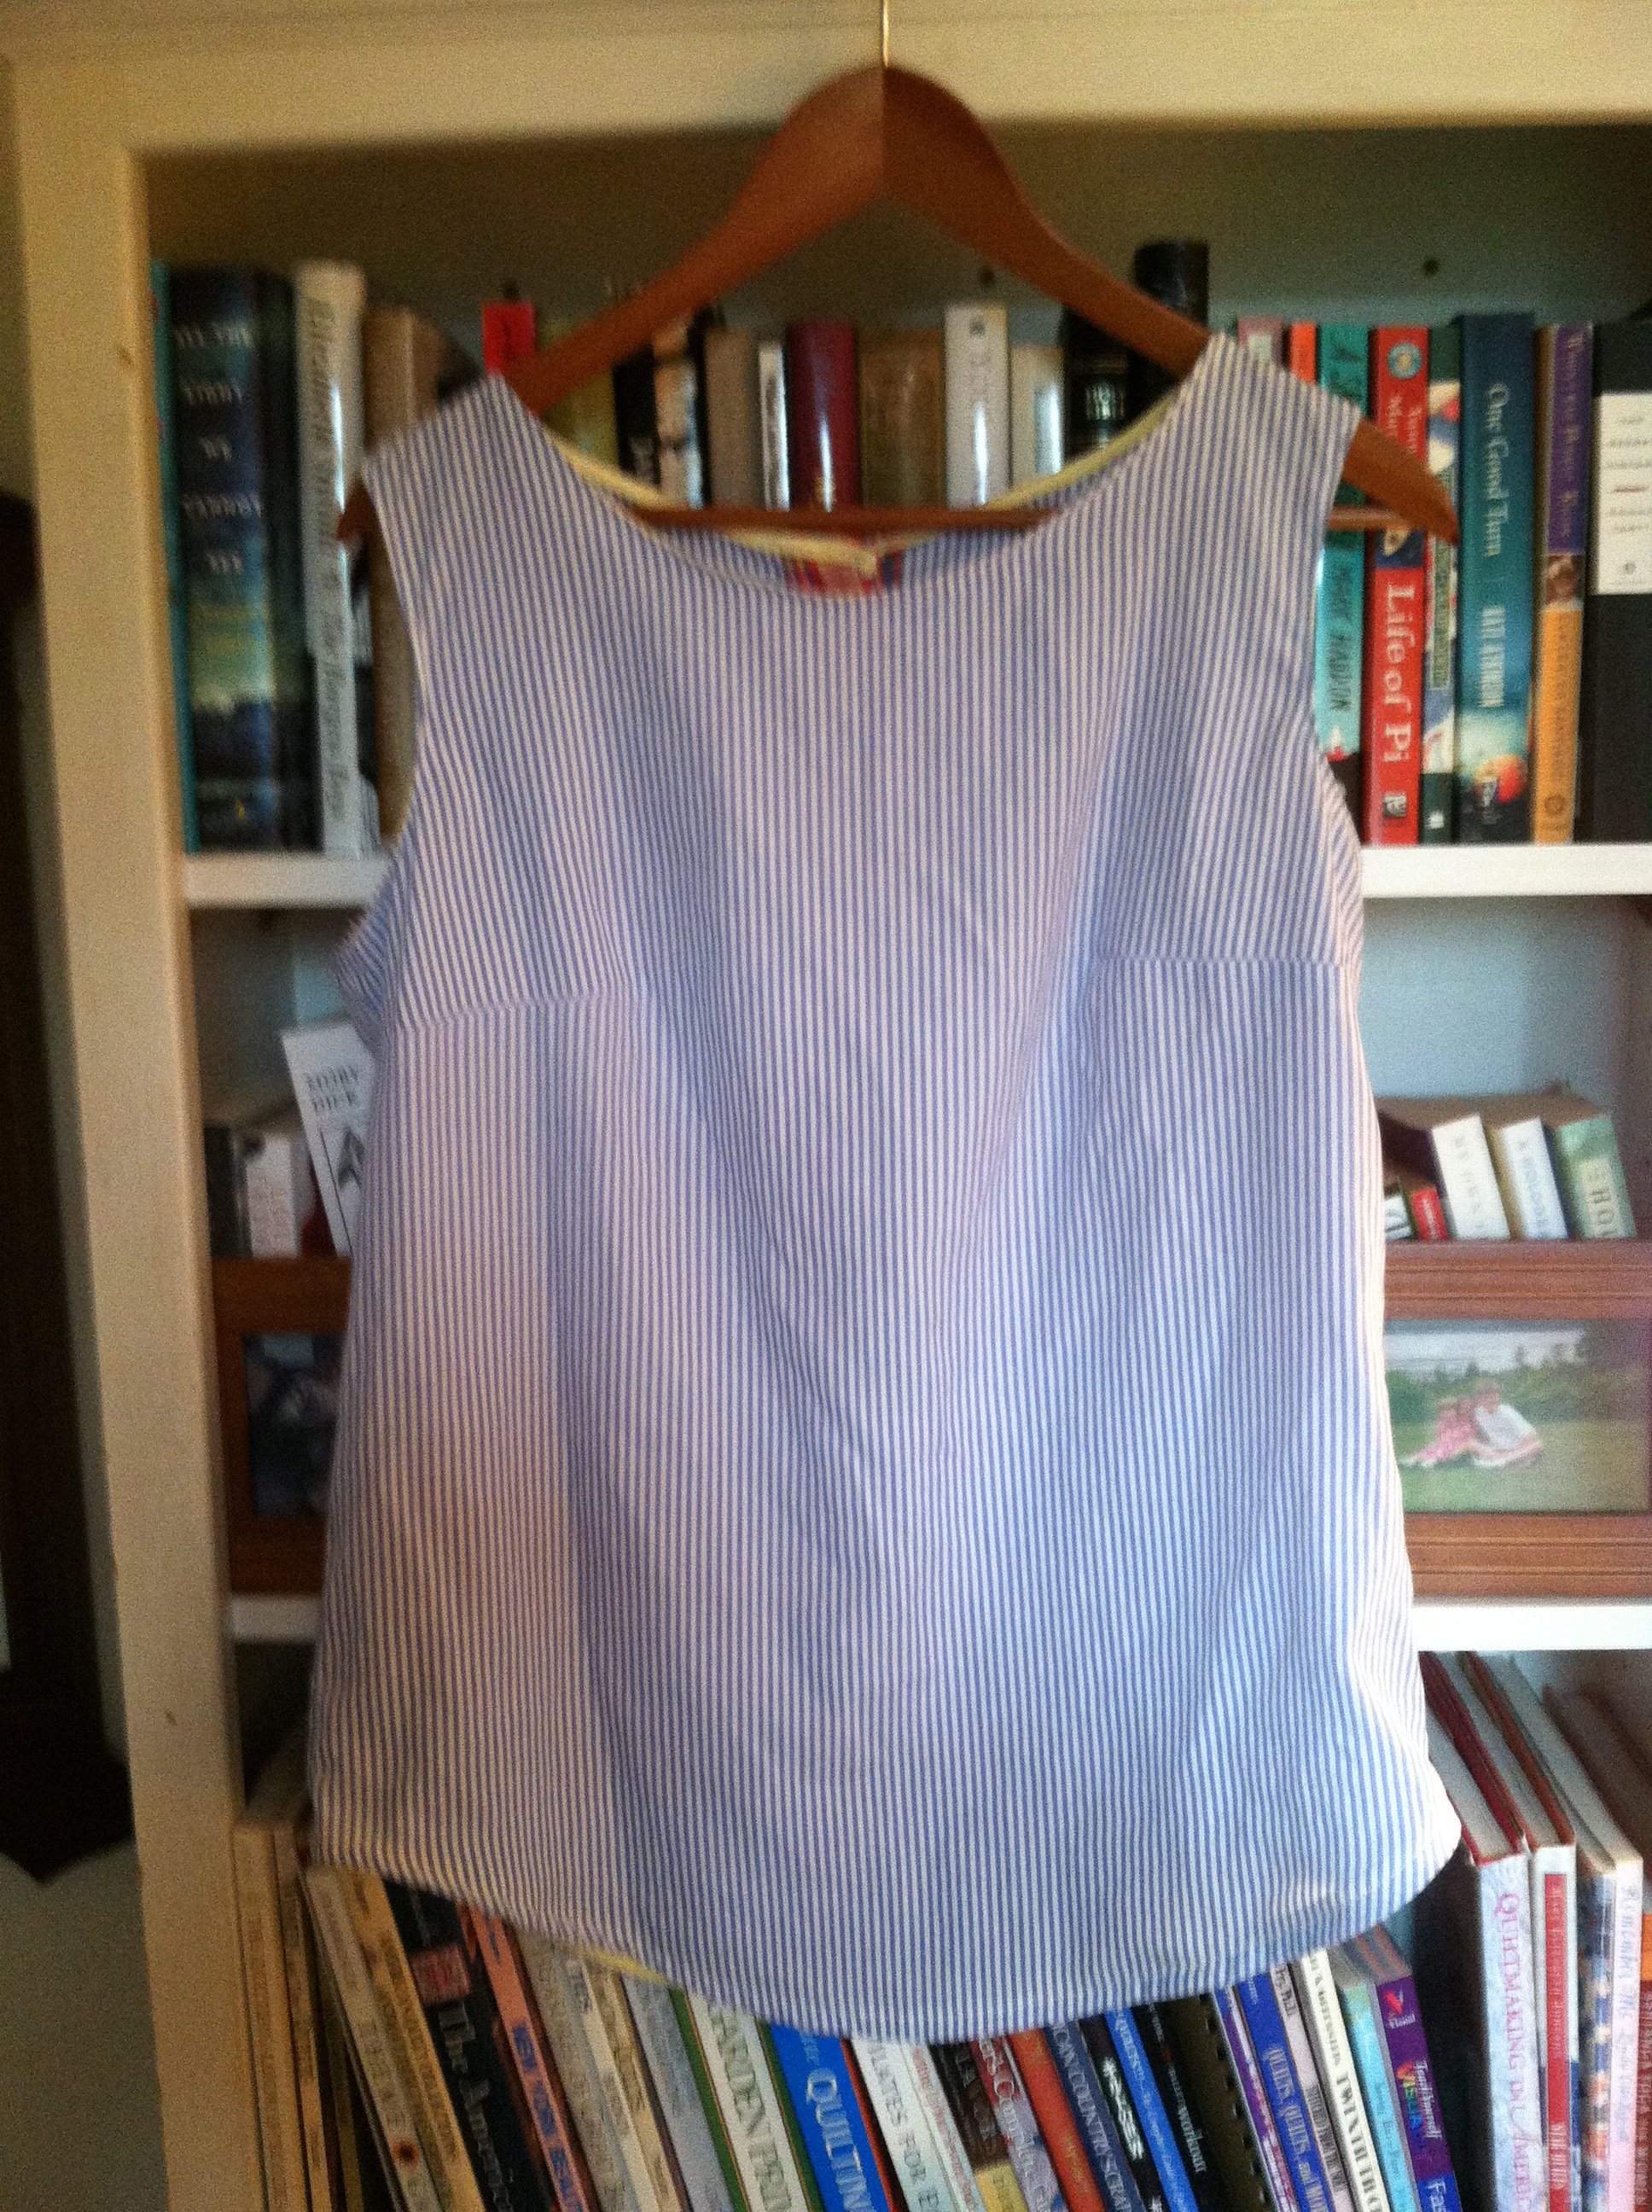
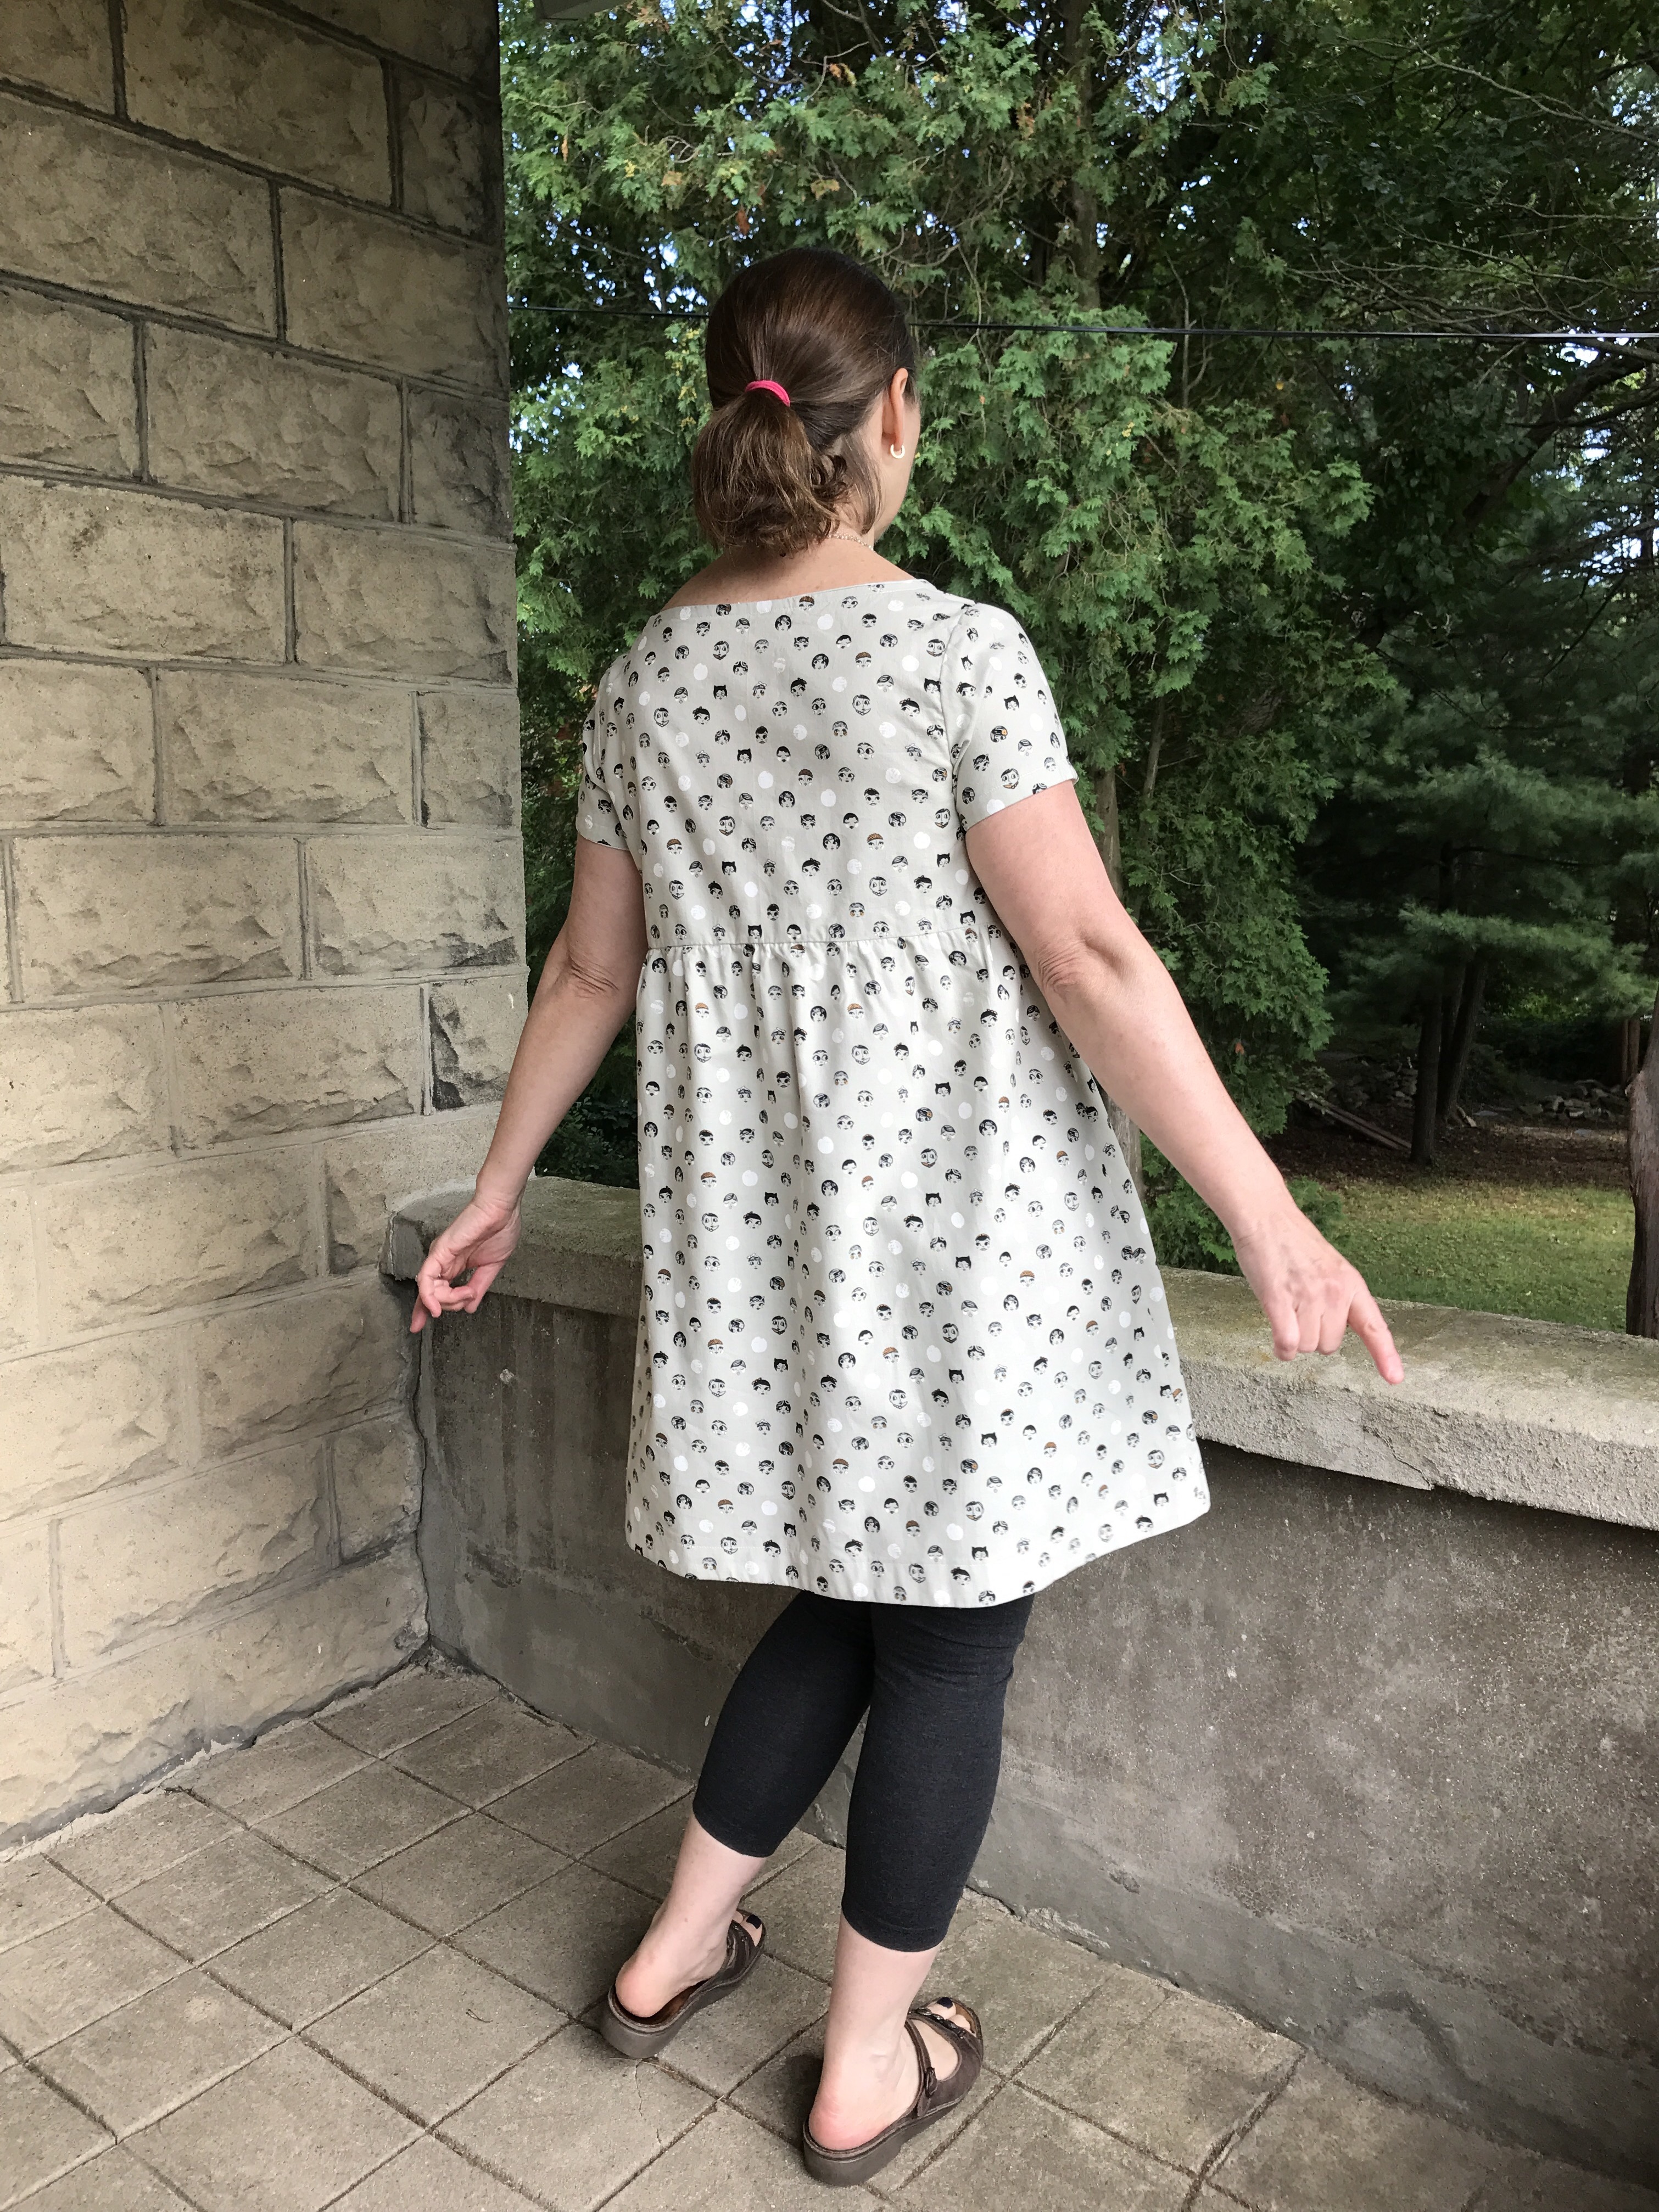
I love the fit through the bodice.

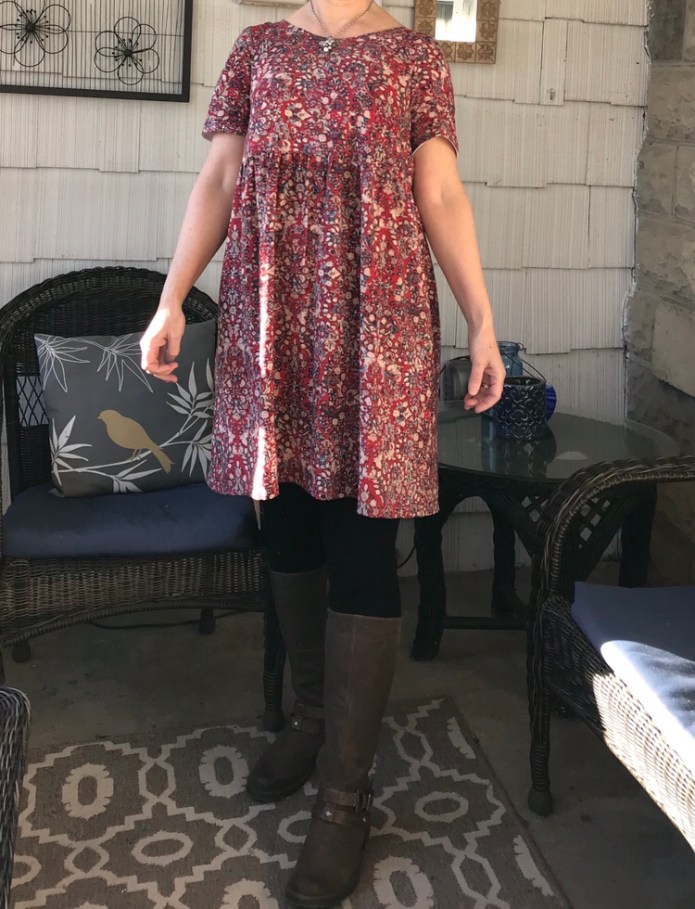
I highly recommend this pattern!

Standard
Uncategorized

Me Made May 2016 Round-Up

Screenshot of my phone on Me Made May day 24. I looked at my instagram account and wondered why I had so many notifications. I scrolled down and this is what I saw. Pretty amazing.

image

Last year I participated in Me Made May but I had just started sewing clothes for myself. I posted maybe 8 or 10 times with many repeats. It was so fun though to see so many different versions of great patterns. I was totally inspired and went on to sew many projects inspired by those posts. This year I was ready. Me Made May is not really different for me than any other month because except for the days I work as a bedside RN when it is all scrubs all day until I come home and fall into the shower, (after 12 + hours, I can’t imagine taking a selfie or changing into anything other than sweats,) I wear me made clothes every day. The posting and selfies though are not my normal routine. But once again inspired by the community, I tried to post most days. Here are some of the posts.

The Washi Dress in many versions including a double gauze version with sleeves on a cold day not pictured in this post:

The Beatrix Blouse as a tunic and two sleeveless versions worn on the only warm days. image

The  Bianca Top and Dress in many versions:image

The Ruby Dress in many versions:

The Pearl Shift in flannel (on cold, rainy May days which were numerous):

imageI made two new Washi dresses for family members. A Paisley Washi for my mom for Mother’s Day and a Polka Dot Washi for my sister for her birthday.

and two new dresses for myself, a Nani Iro Washi:imageand a Polka Dot Shift.

All in all, it was a great month, though cold. Note all the cardigans. Those were not for show folks!

Until next year, #nursebeansews over and out (with Sadie the photobomber!)

image


Standard
Uncategorized

Pink Polka Dot Shift for Spring

imageEarlier this year I wrote a post about modifying New Look 6095 using techniques I learned by doing the Made By Rae  Beatrix blouse Sewalong.imageWhen I saw this great Cotton and Steel polka dot fabric (from the Lucky Strikes collection designed by Kimberly Kight), I knew it would be perfect for this pattern. The fabric is called Dime Store Dot. I bought it at fabric.com where, as seen below, it is apparently No Longer Available, but it is likely to be found elsewhere and those Cotton and Steel gals have several other dotty fabrics which would work just as well.imageIn my previous post, I went though the details of my muslin making process. My first shift was mostly a great success but I wanted to lengthen the sleeves a bit and fix the gaping in front on this version and I accomplished that by doing the same tiny fold I use when I make a Beatrix blouse. It is amazing that this tiny adjustment makes such a difference but it does.image
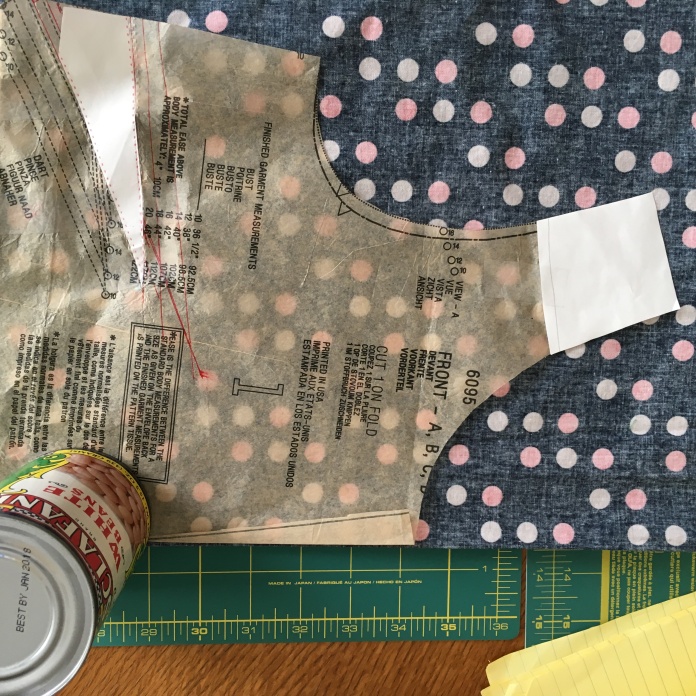
This was a relatively quick sew and it was worn to church today for Me Made May day 22. It was a cold, grey day here and the polka dots were a great contrast. Not much else to say without repeating my previous blog so I will leave you with pictures.  I drafted the facing using the Beatrix directions as my guide:

I was careful to staystitch the neckline and understitch the facing as instructed in the Sewalong.image
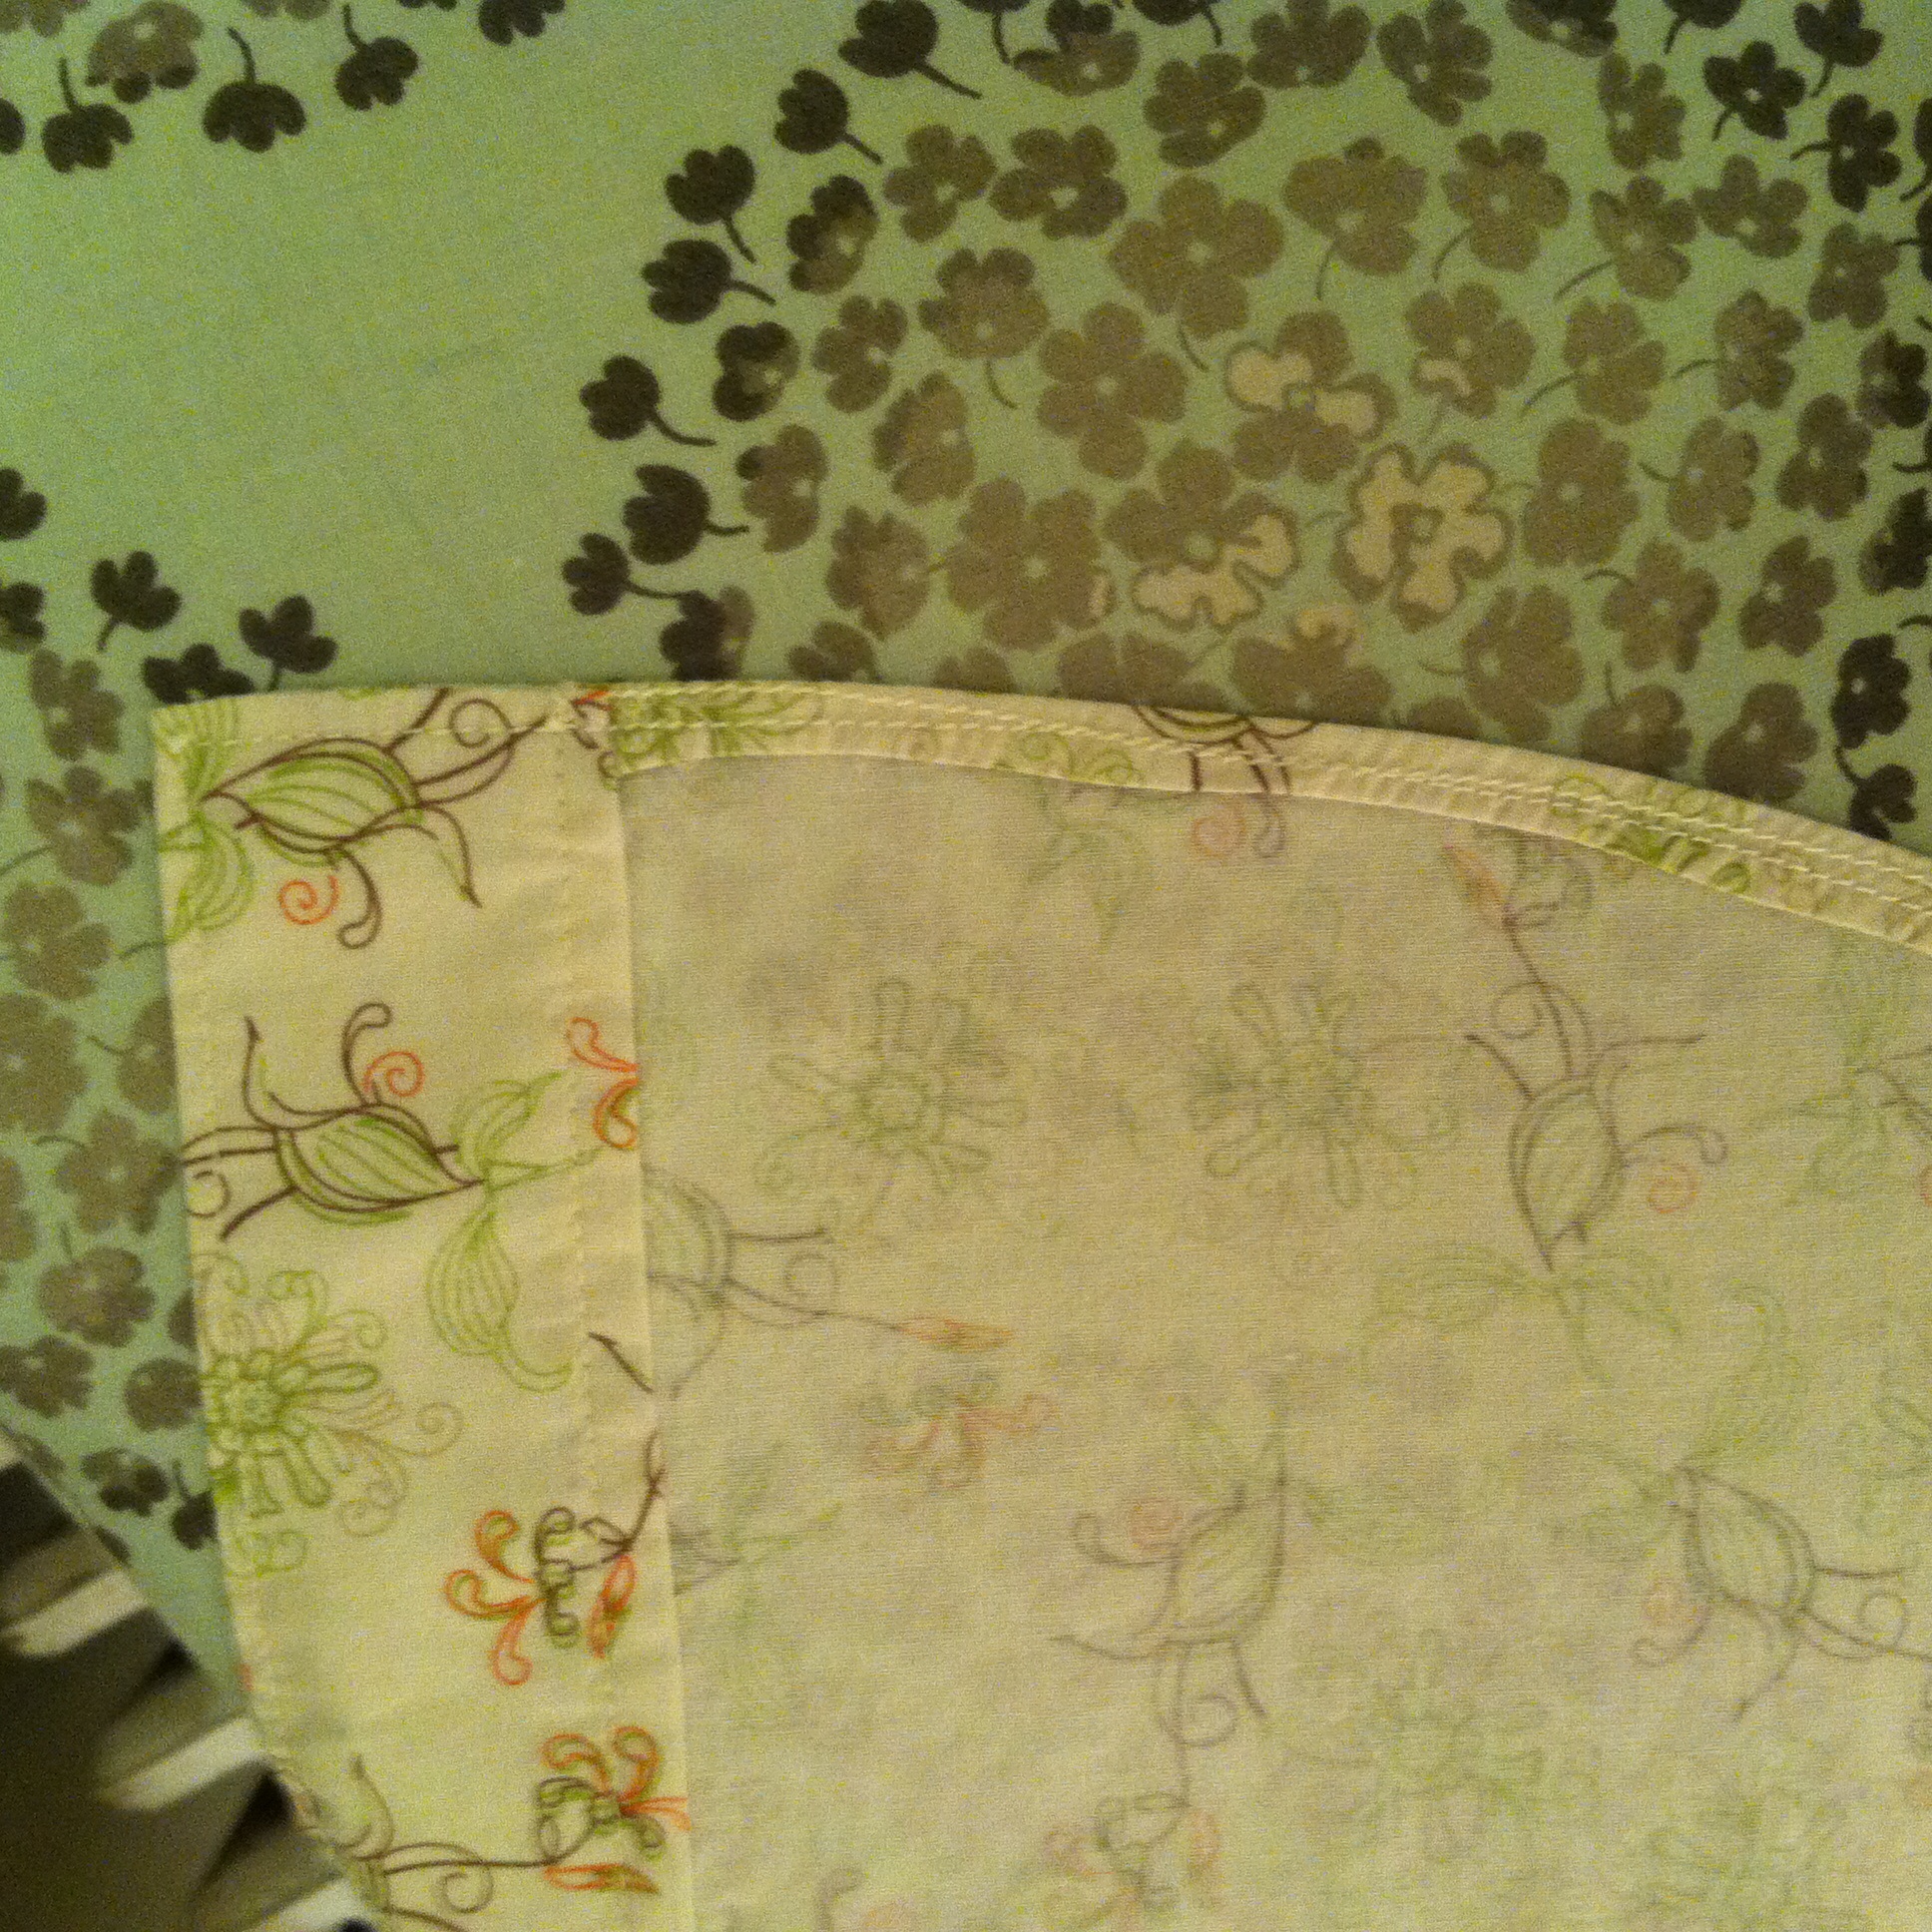
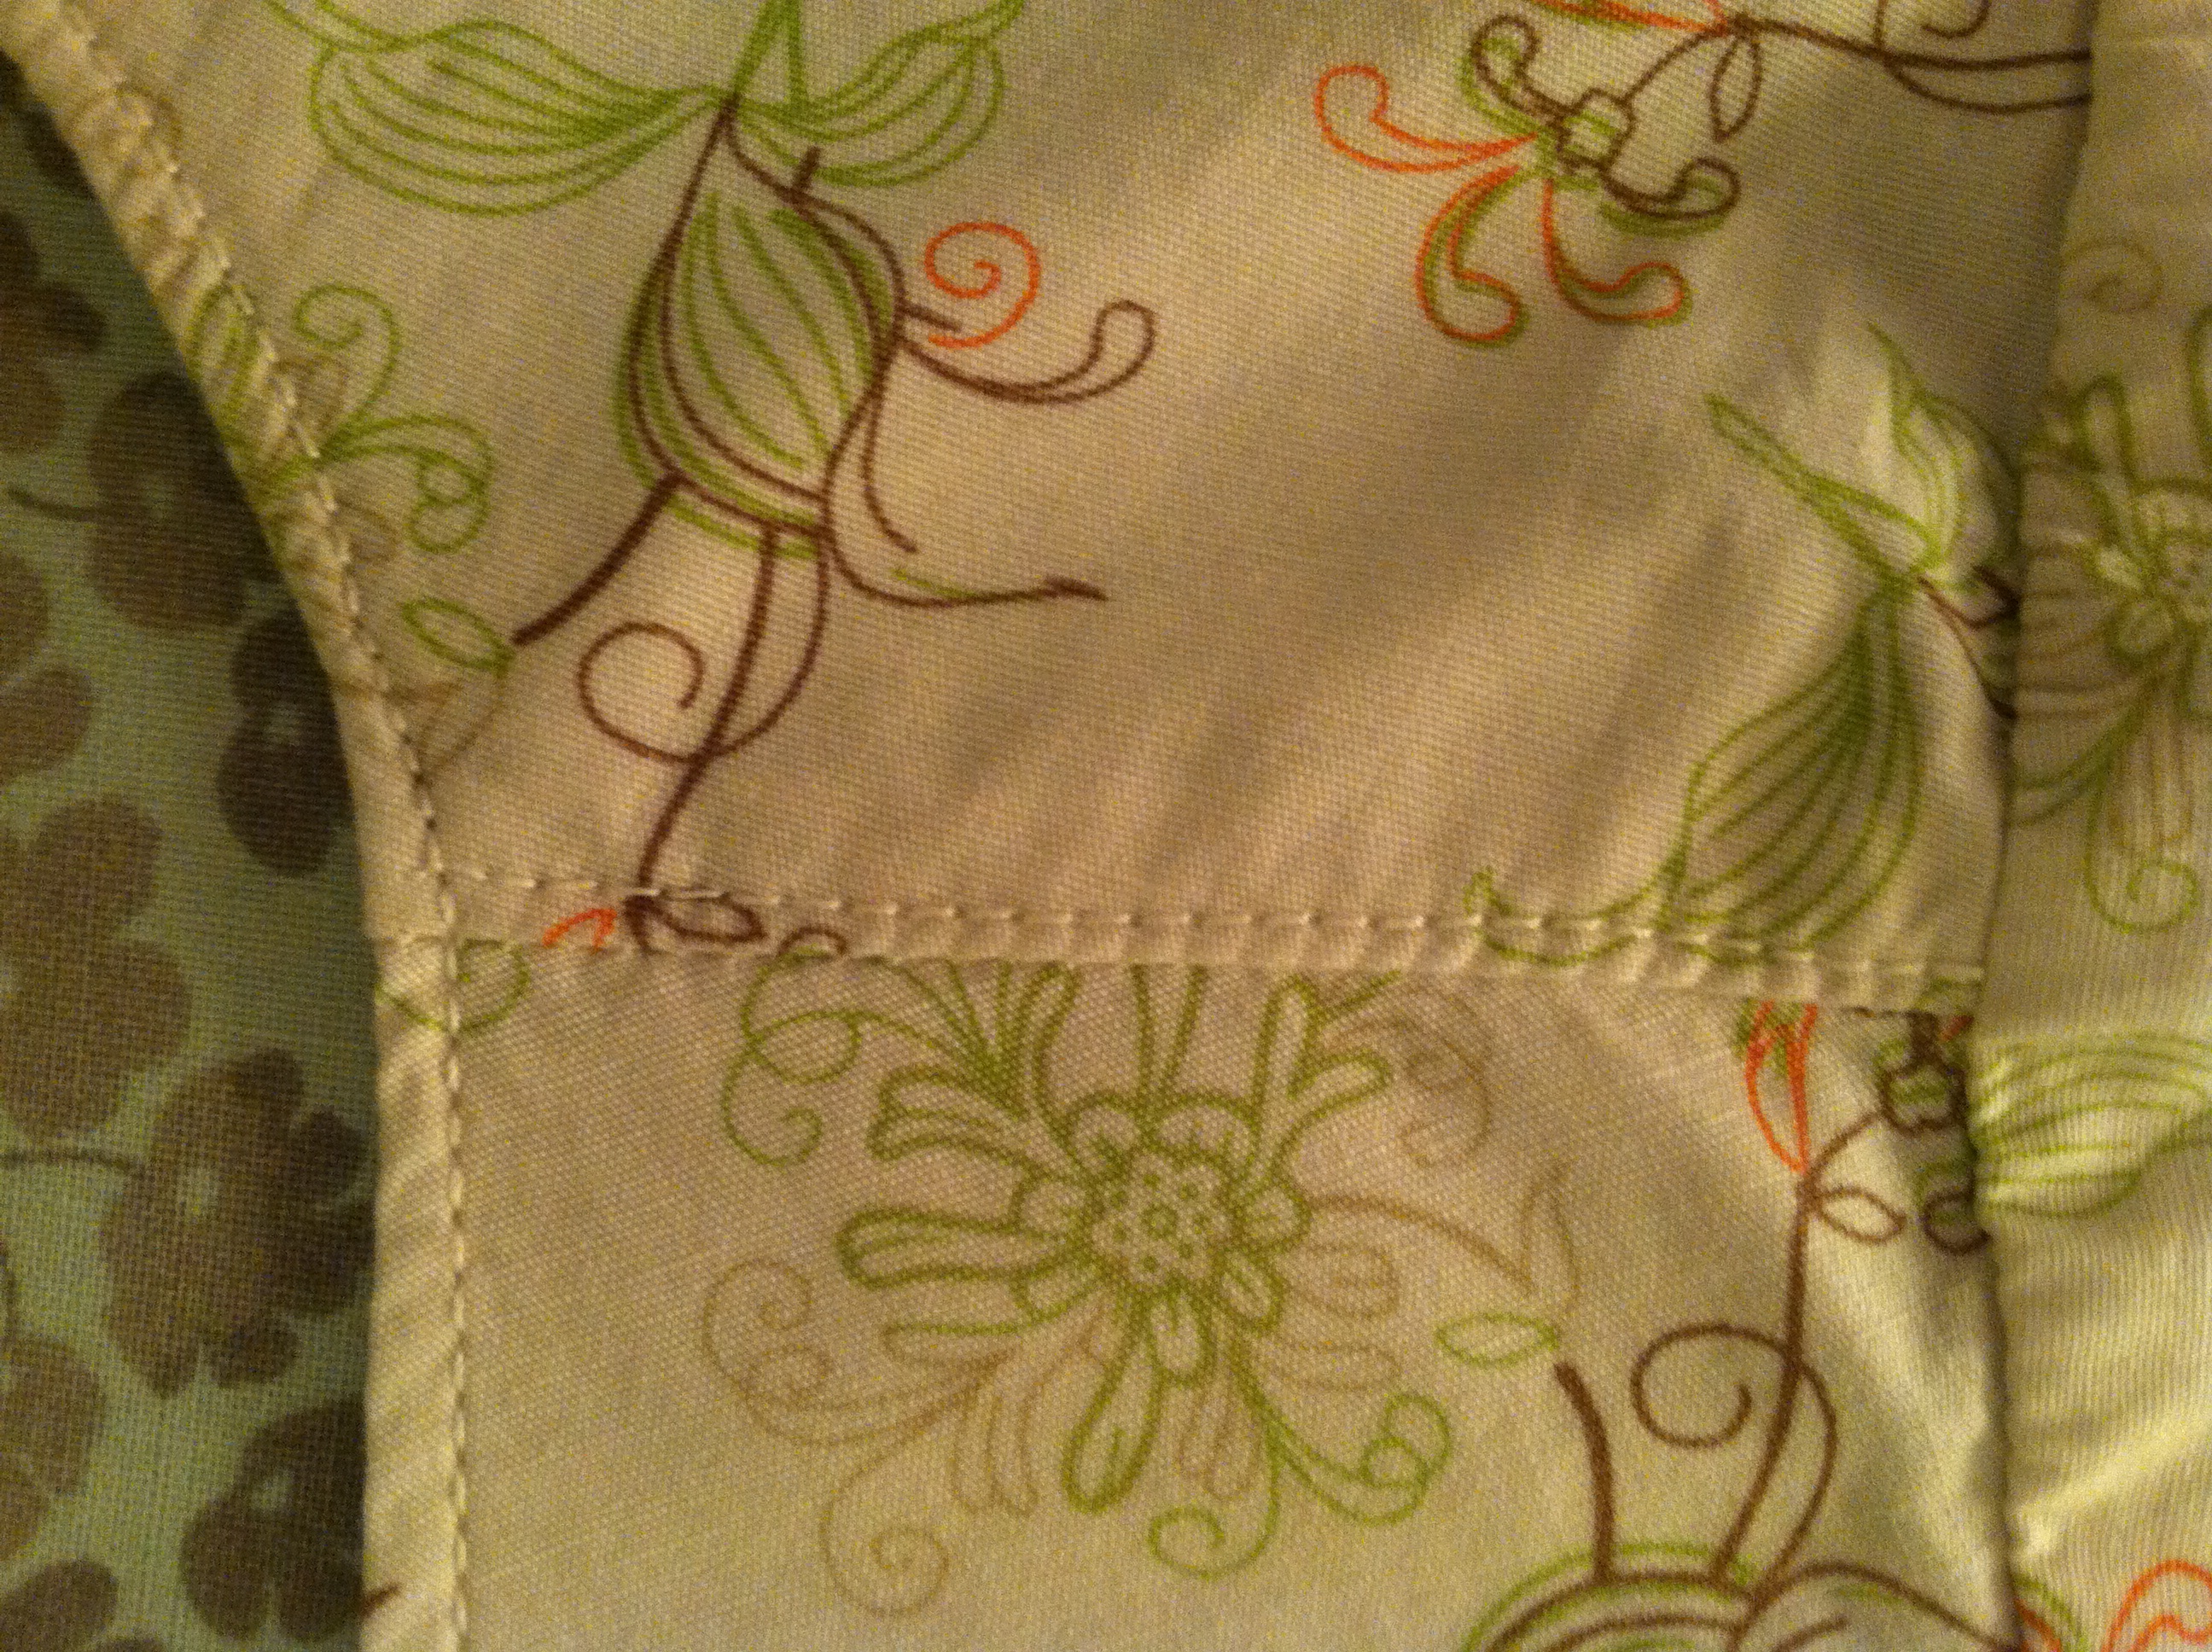
I hemmed my dress using a hem facing as I have done for most of my dresses.image
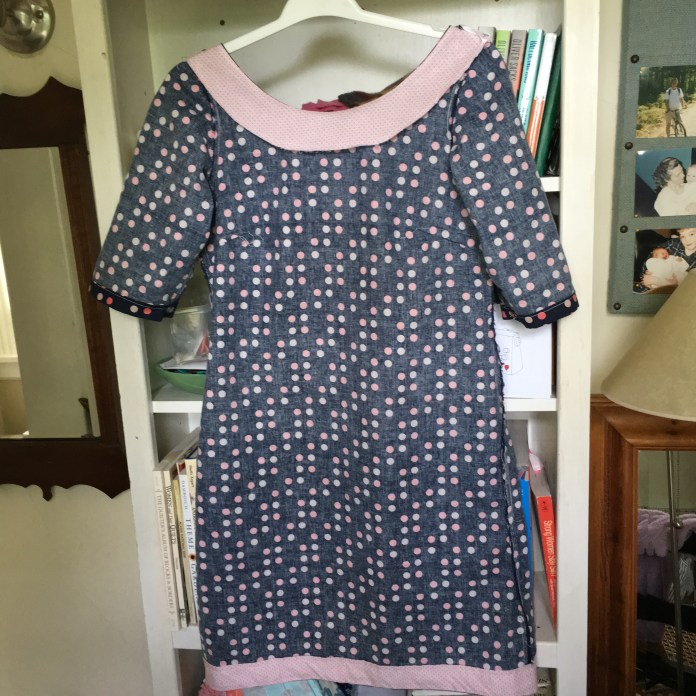
I used one row of hem stitching because the first row of stitches was pretty straight and my motto is “good enough is good enough” which is a good rule to follow in most situations.image
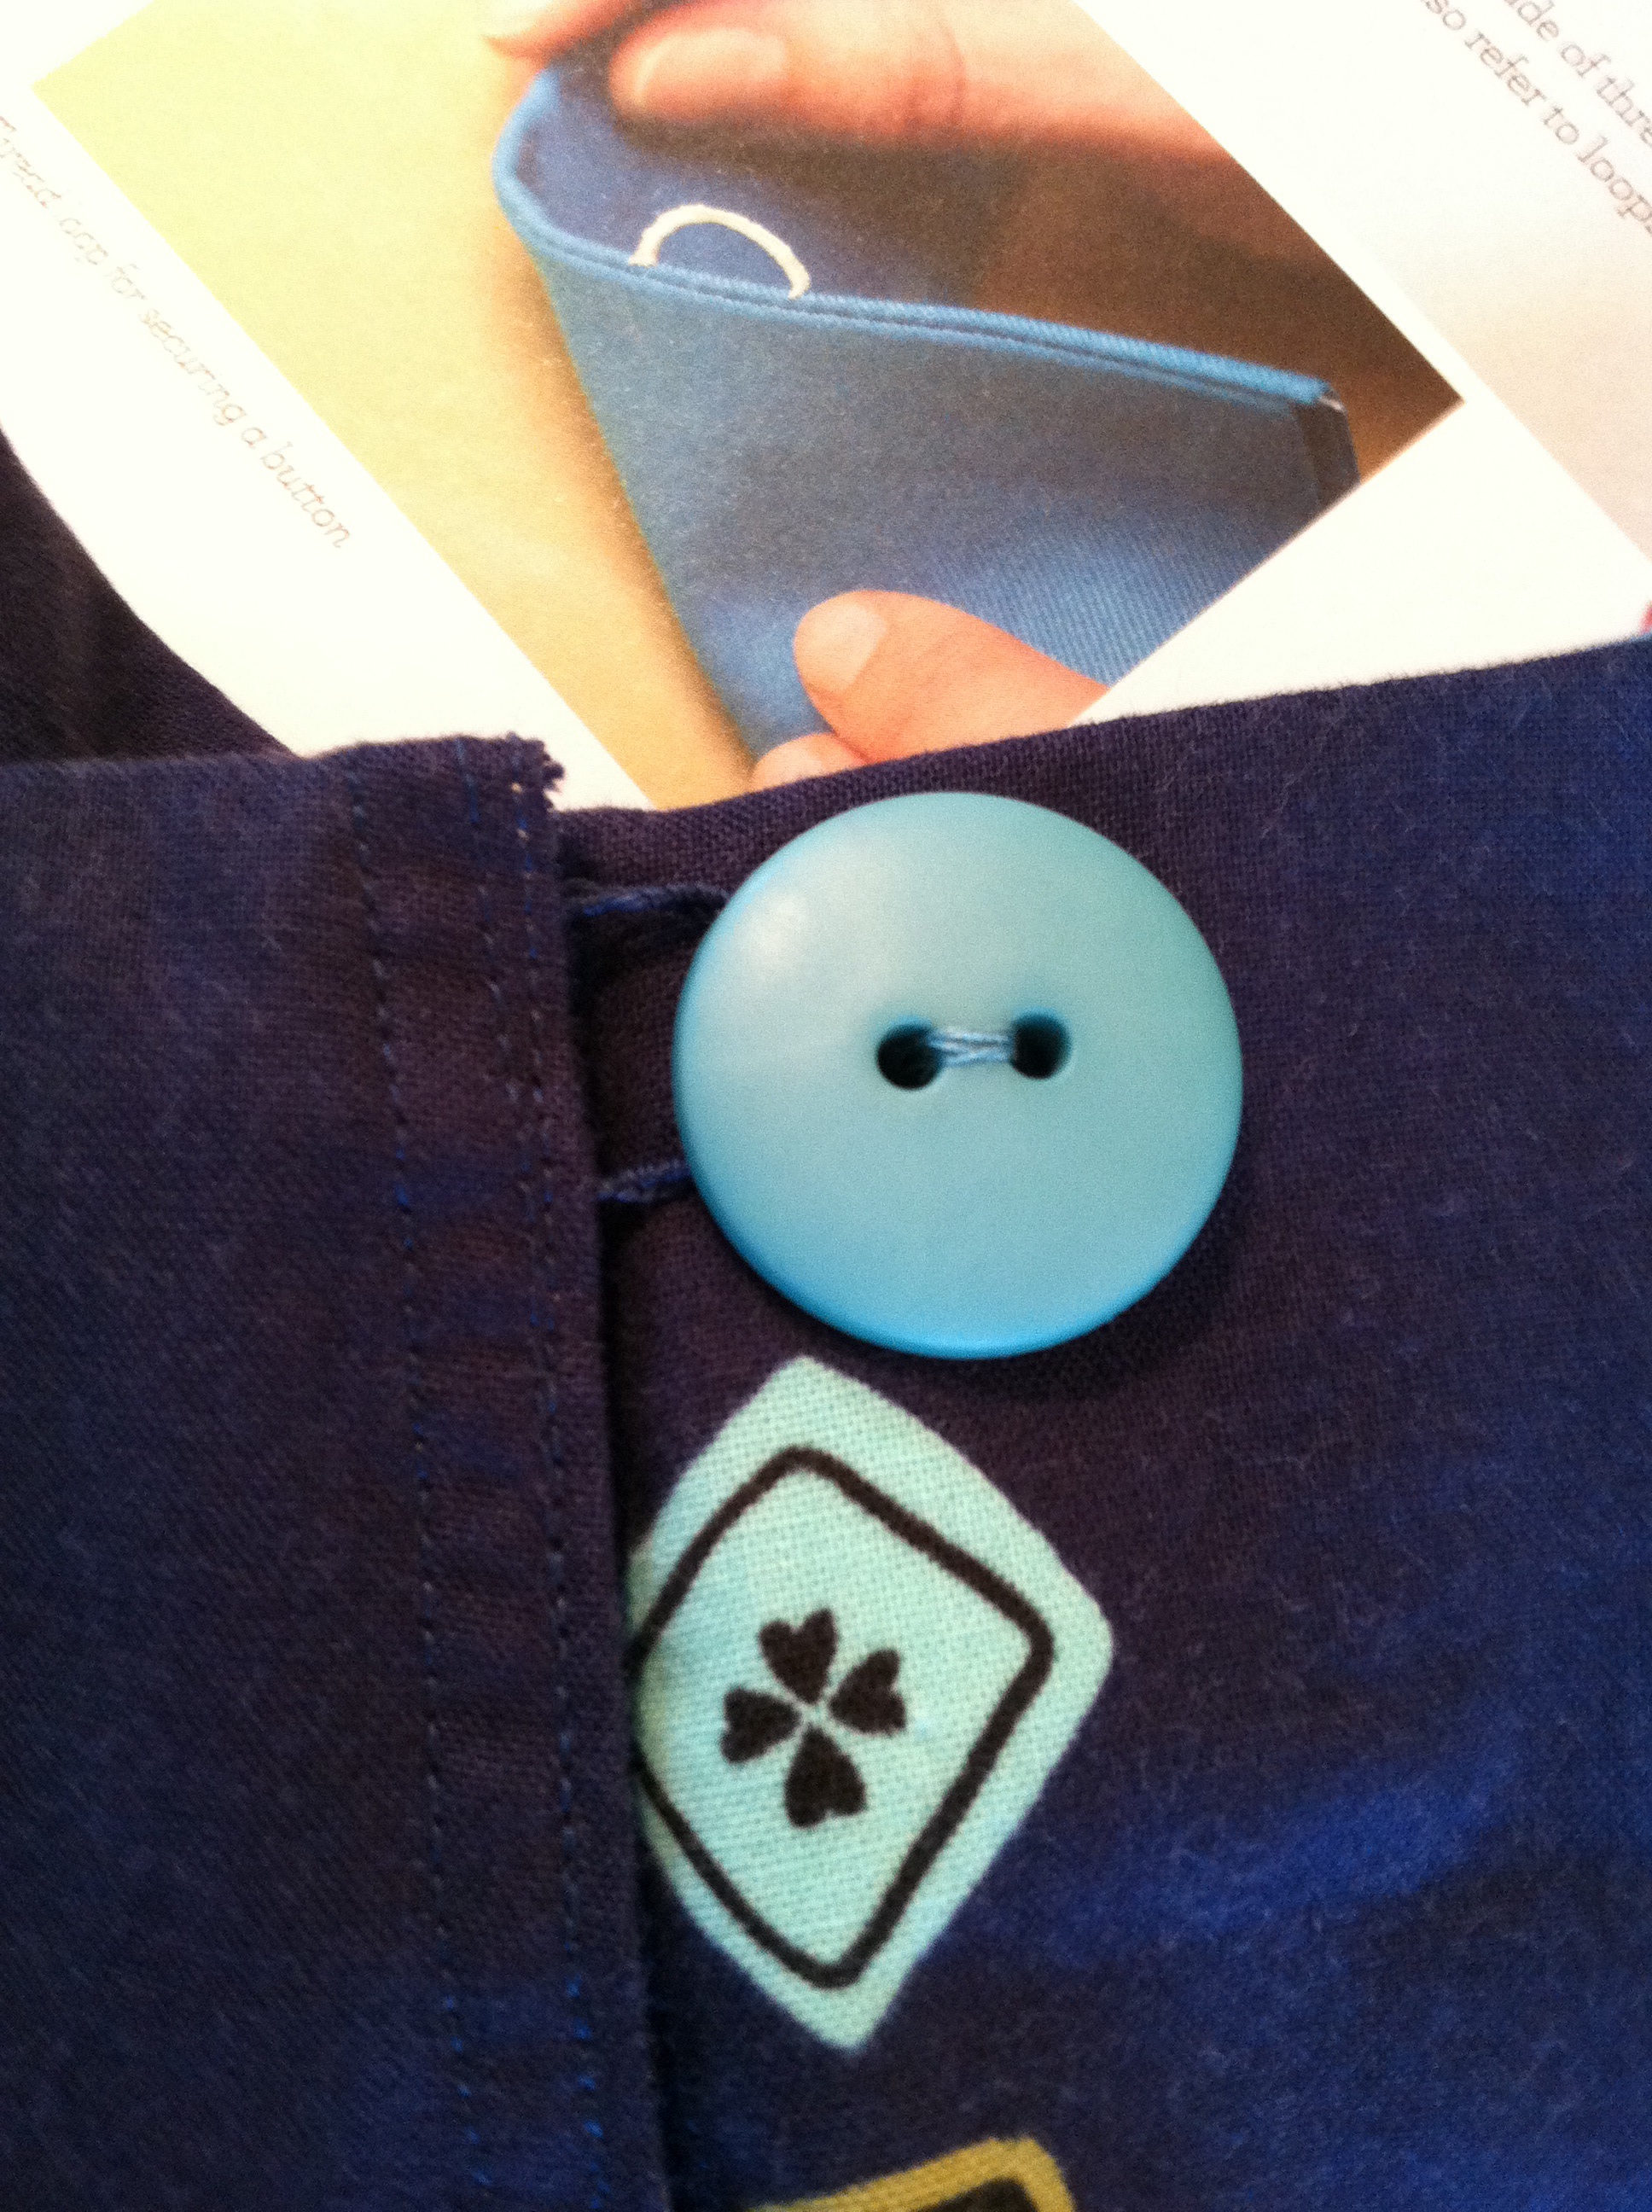
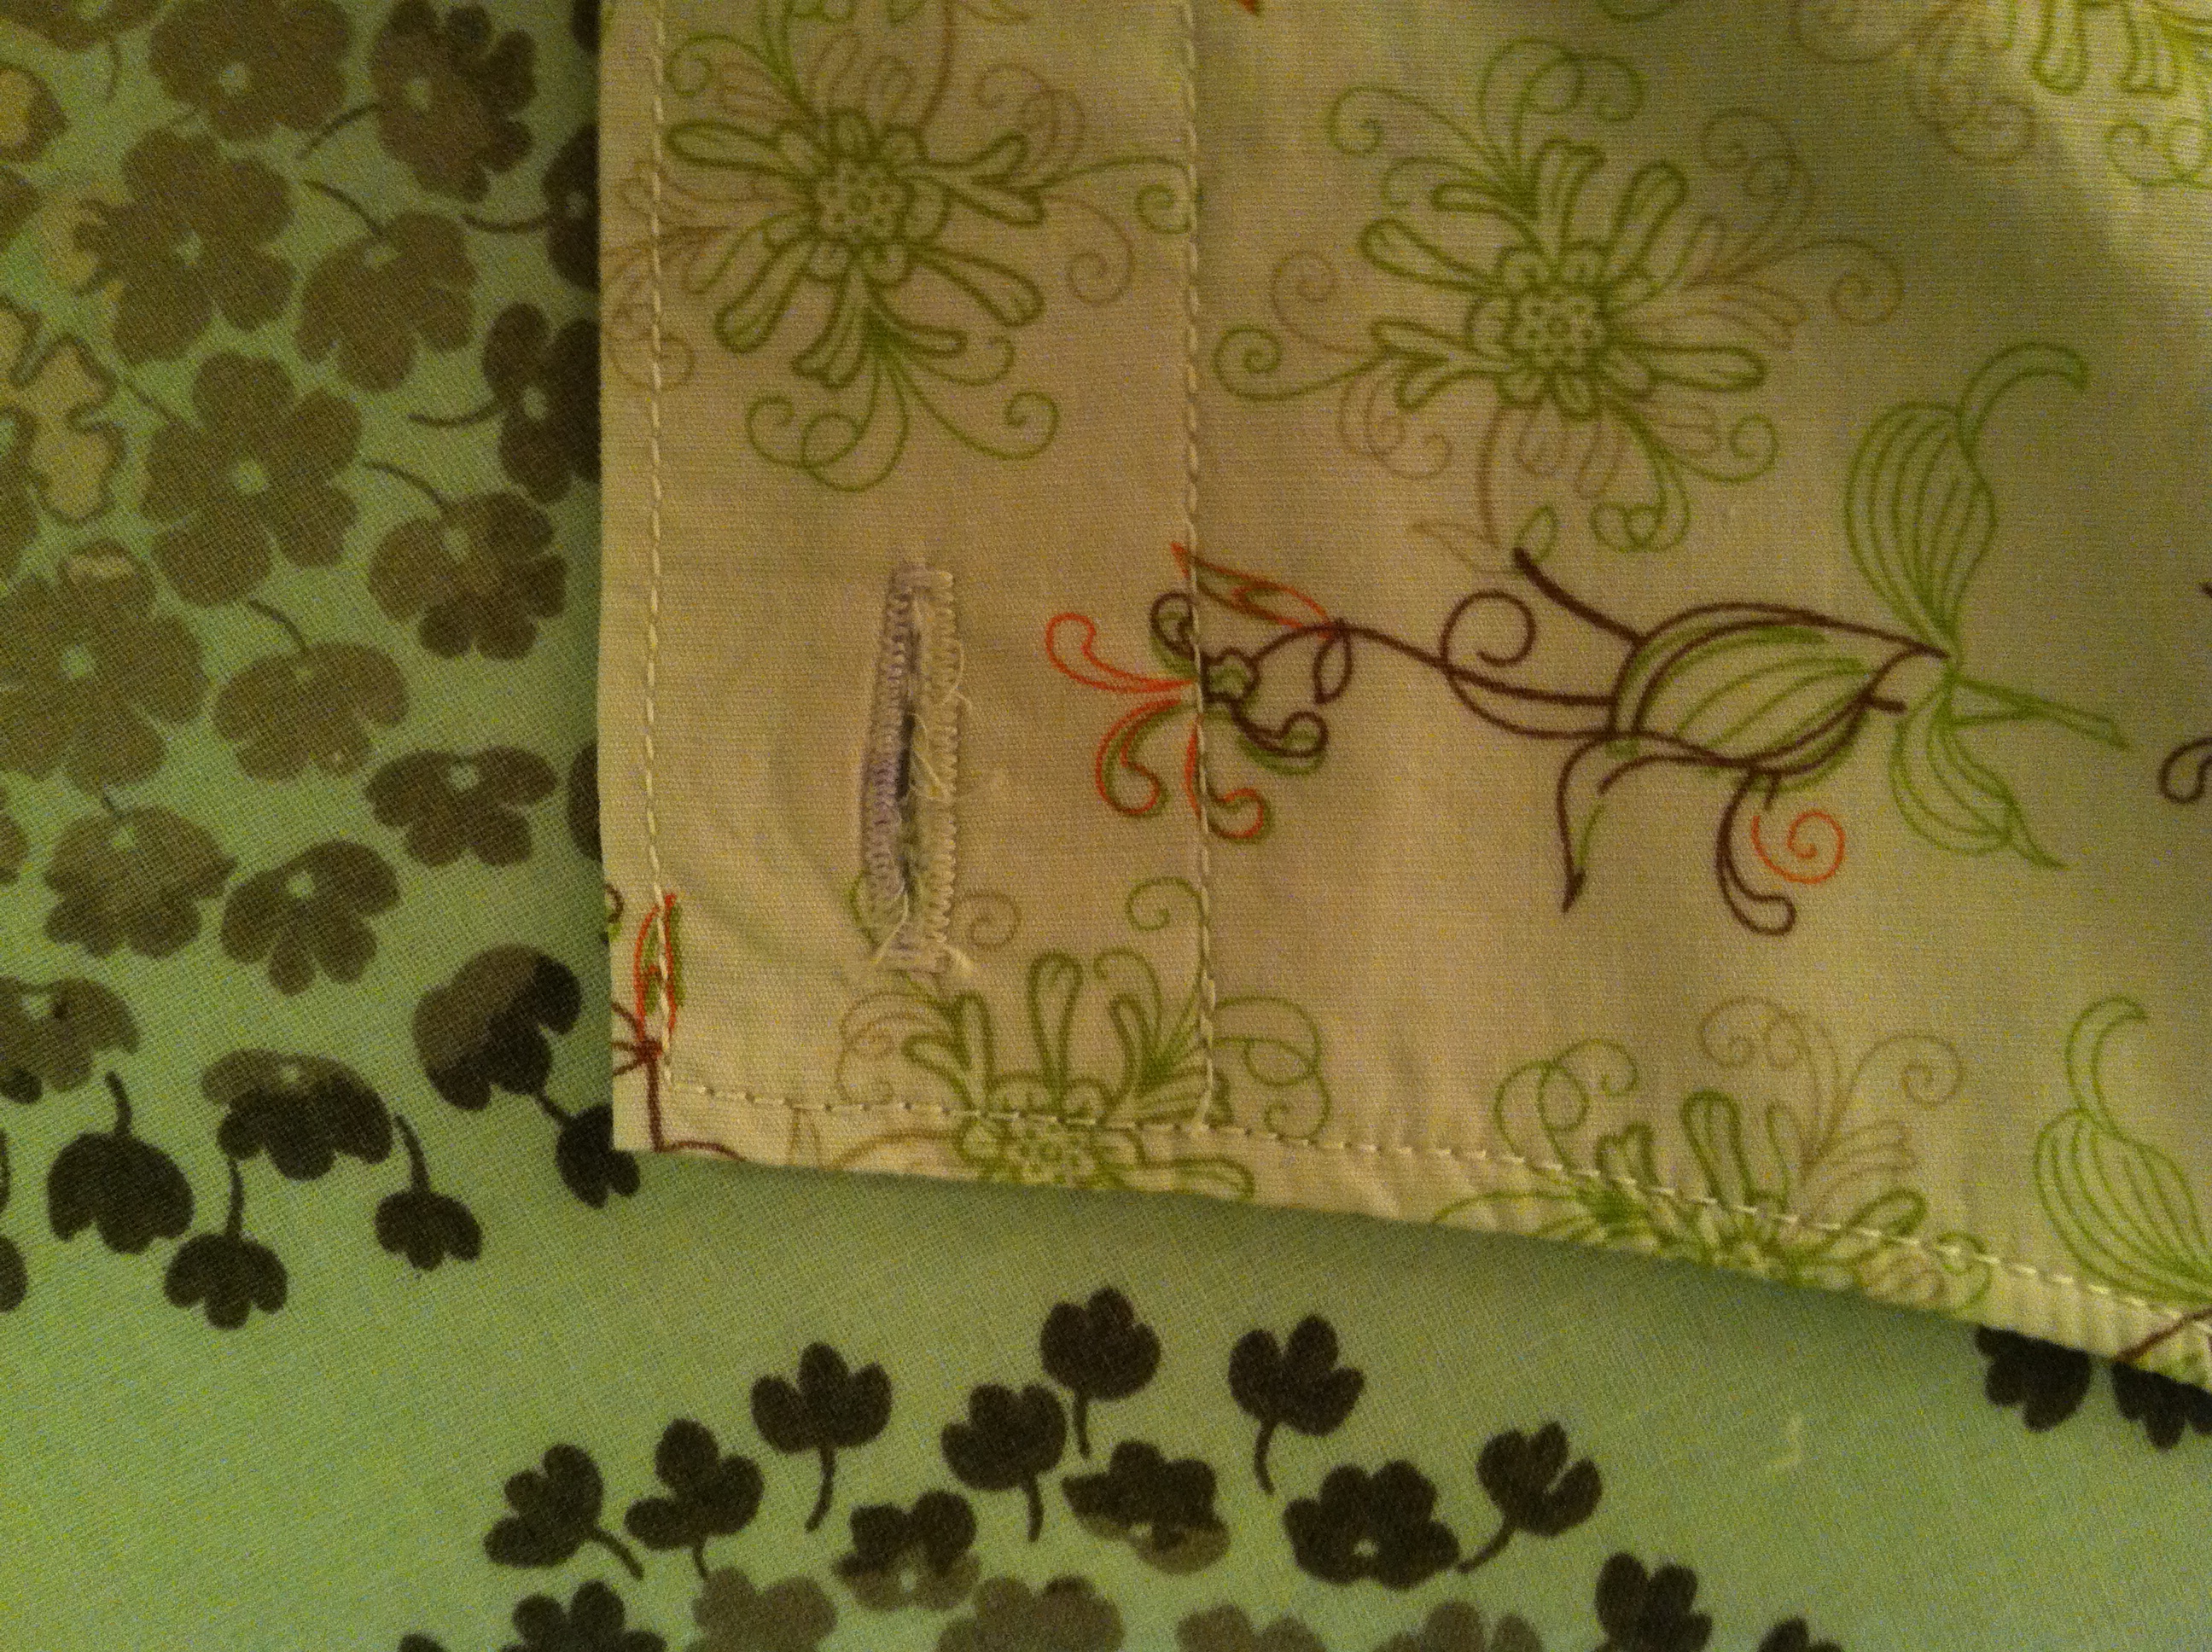
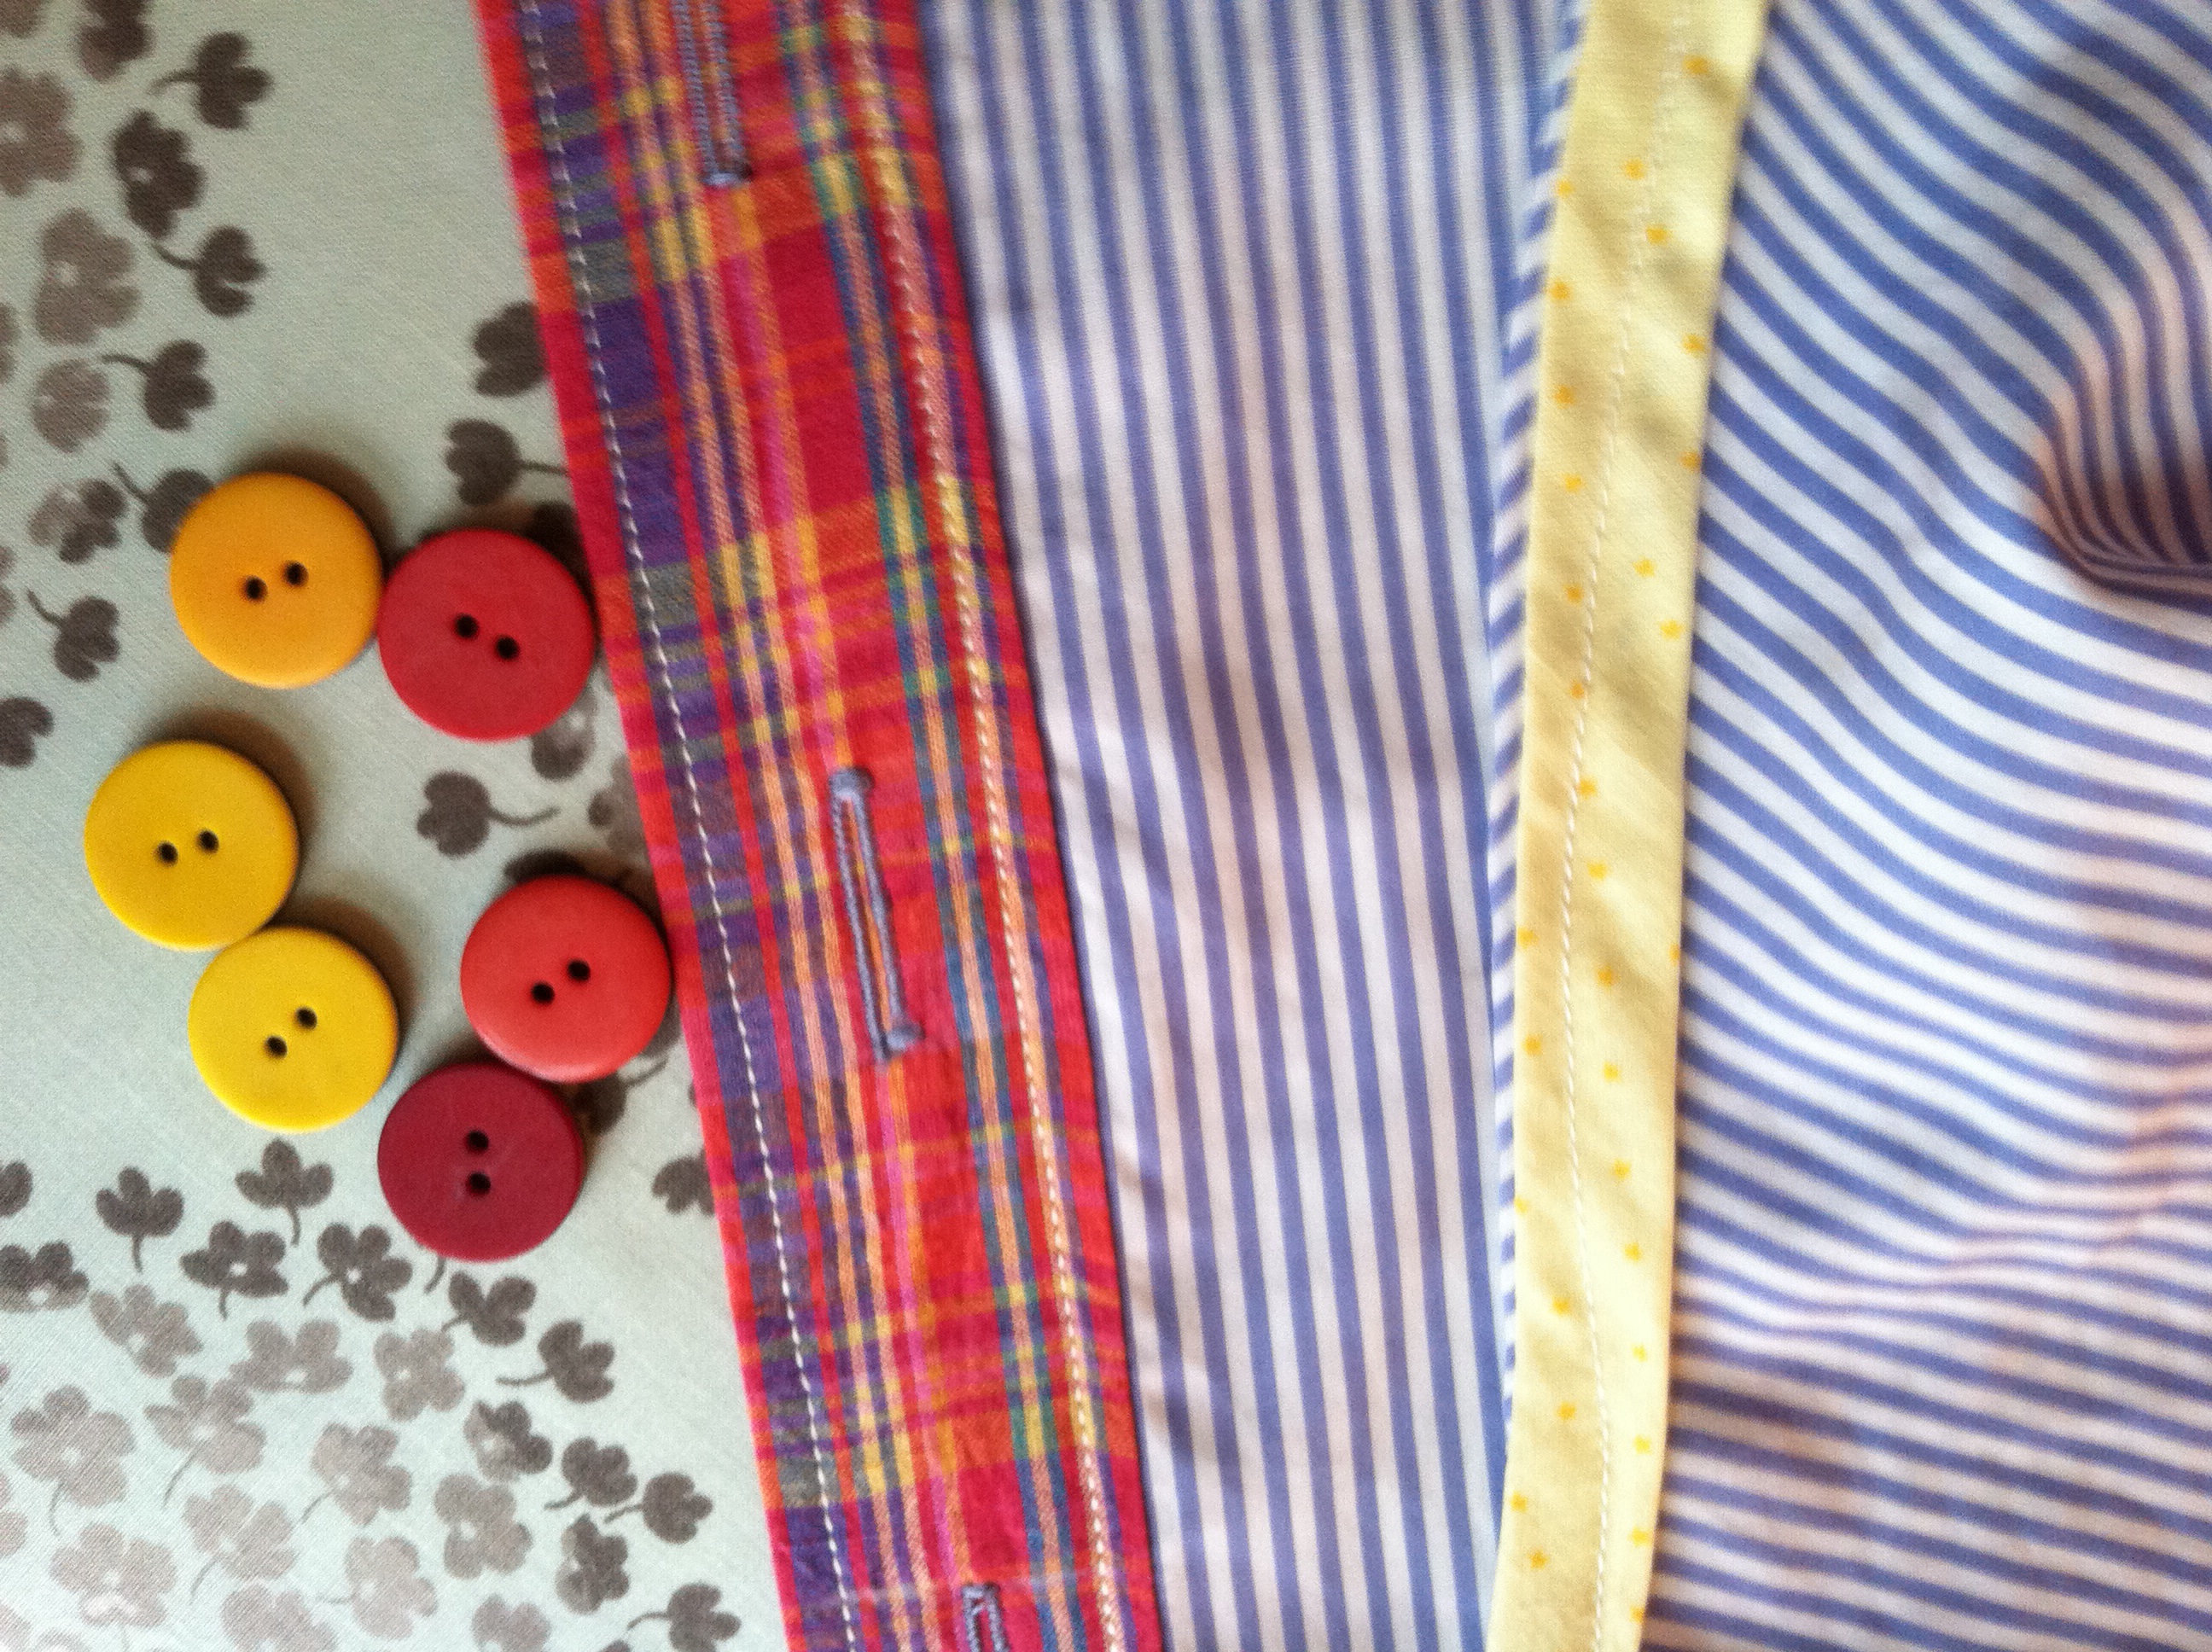
I used a button from my stash of tag sale buttons.imageBack view.imageI created a thread loop using Tasia from Sewaholic‘s wonderful book: The Sewtionary. I love her clear instructions and photos on so many helpful techniques.imageAnd here is the finished product. Many views because my husband was available to take pictures. This was a relatively inexpensive, fun dress to make. It feels like spring which makes me happy, even though our weather has been a bit drab.imageI am pretty happy with the fit. The back gapes a bit so I may move the button or shorten the button loop but it is otherwise quite wearable.image
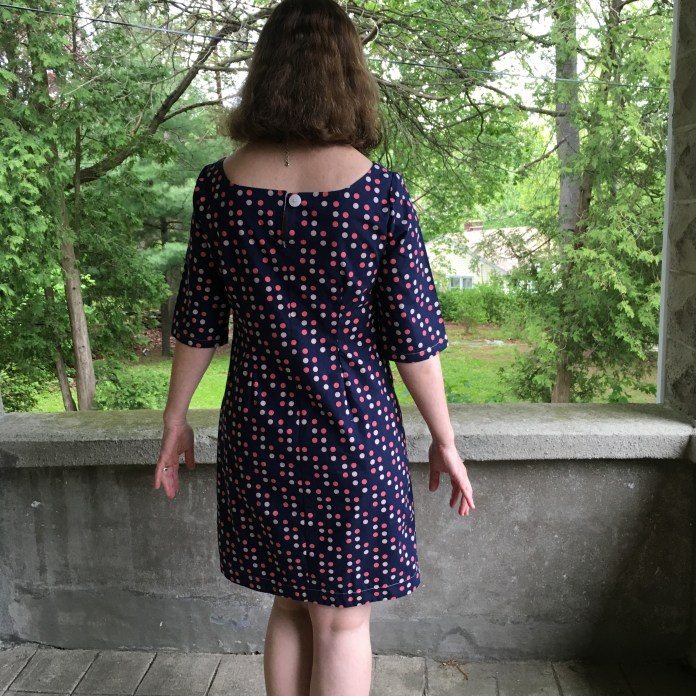
With the obligatory cardigan (still cold in Connecticut).image
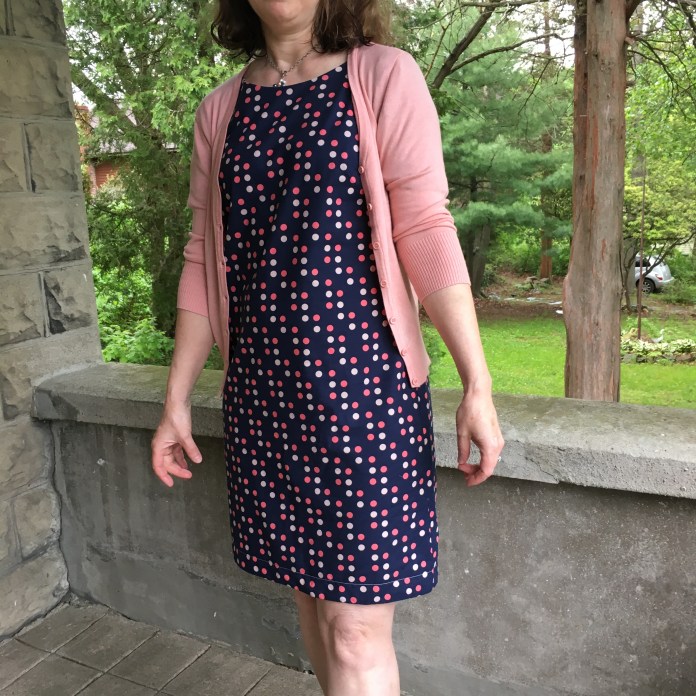
I do not knit so this fall I bought a basic, inexpensive cardigan in multiple colors. I love this muted pink.imageHappy Spring! image


Standard
Made By Rae Patterns, Sewing

Drops and Dots for Spring

image
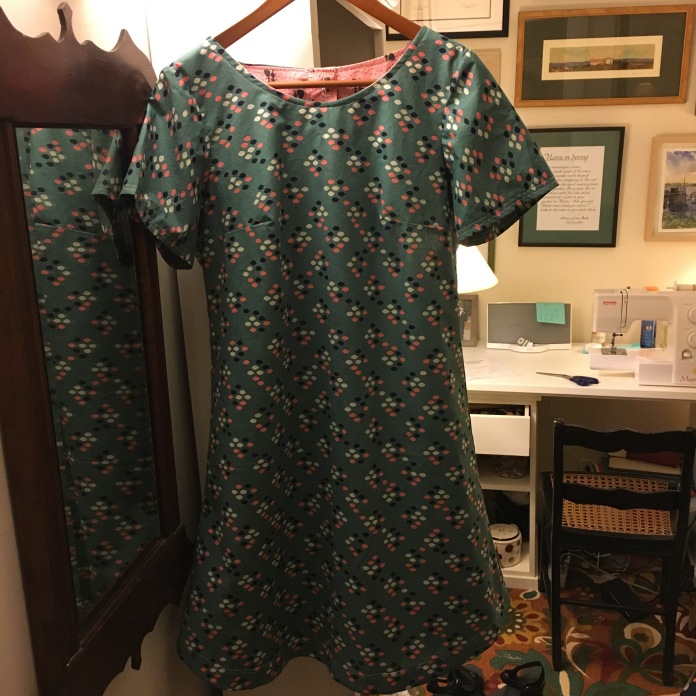
I have had this Cookie Drop Beatrix Tunic in my head since I made my Mochi version several months ago. image 
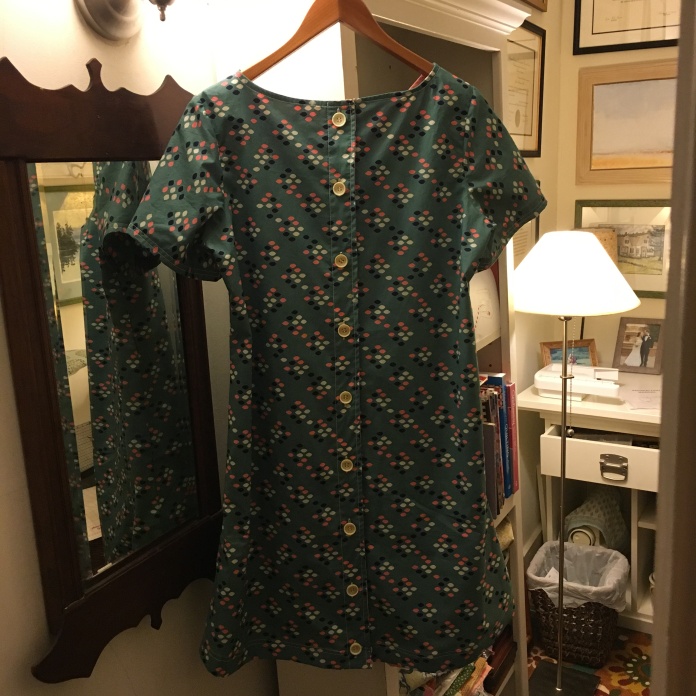
I have always loved this green color. It reminds me of the greens used in so many of the depression era quilts and of my grandparents’ house in Louisville, Kentucky. The mirror below hung in their front  hall for over 60 years.image
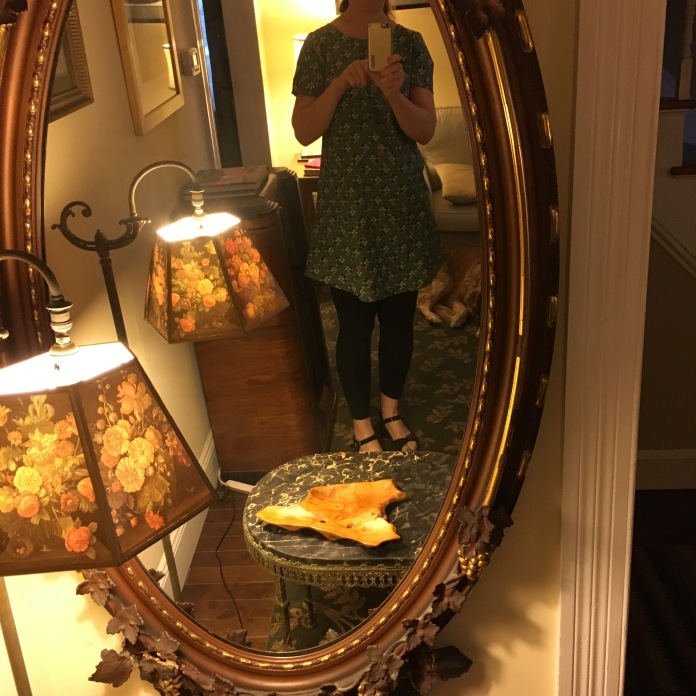
My grandmother loved soft blue greens and those colors predominated in their home. I had the idea for the pop of pink and used this fun fabric for contrasting facings.image
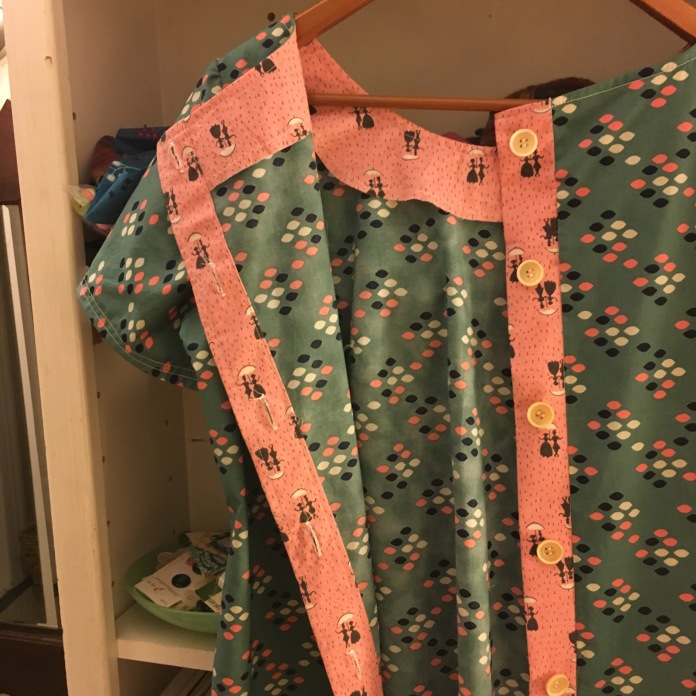
I don’t remember where I got this pink fabric but a friend recognized it. I think she may have given it to me years ago when I had an idea for a quilt with lots of pinks because it was my daughter’s favorite color. That quilt never got made because life got in the way. It may end up being a future project. I still have quilt sized scraps left over.image
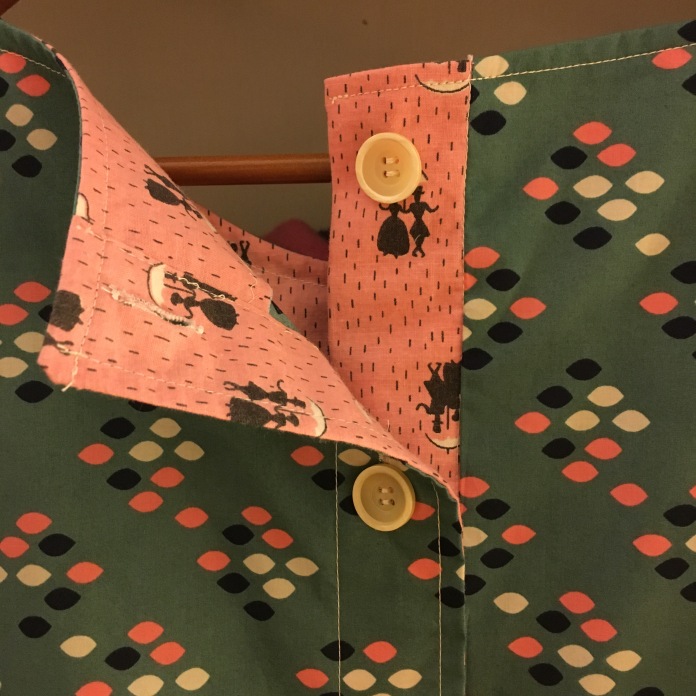
An online friend on instagram commented that the pink fabric reminded her of Mary Poppins. I hadn’t thought of that before but once she said it, I could totally see it. I love Mary Poppins. Who doesn’t? I read all the original books as a child and with my children.image 
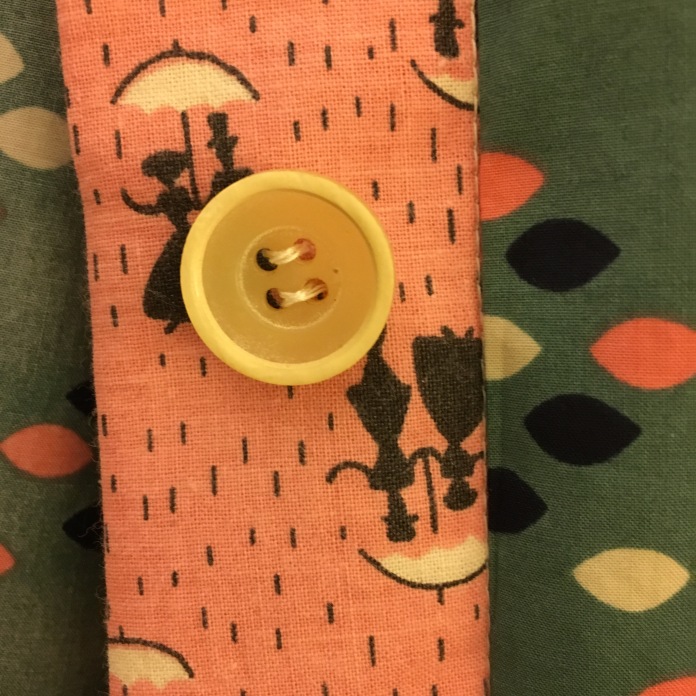
I love the versatility of the Beatrix Pattern by madebyrae. I have made and blogged about several versions. It is relatively straightforward but Rae has a great series of blog posts that walk you through the tricky parts like set-in sleeves.image
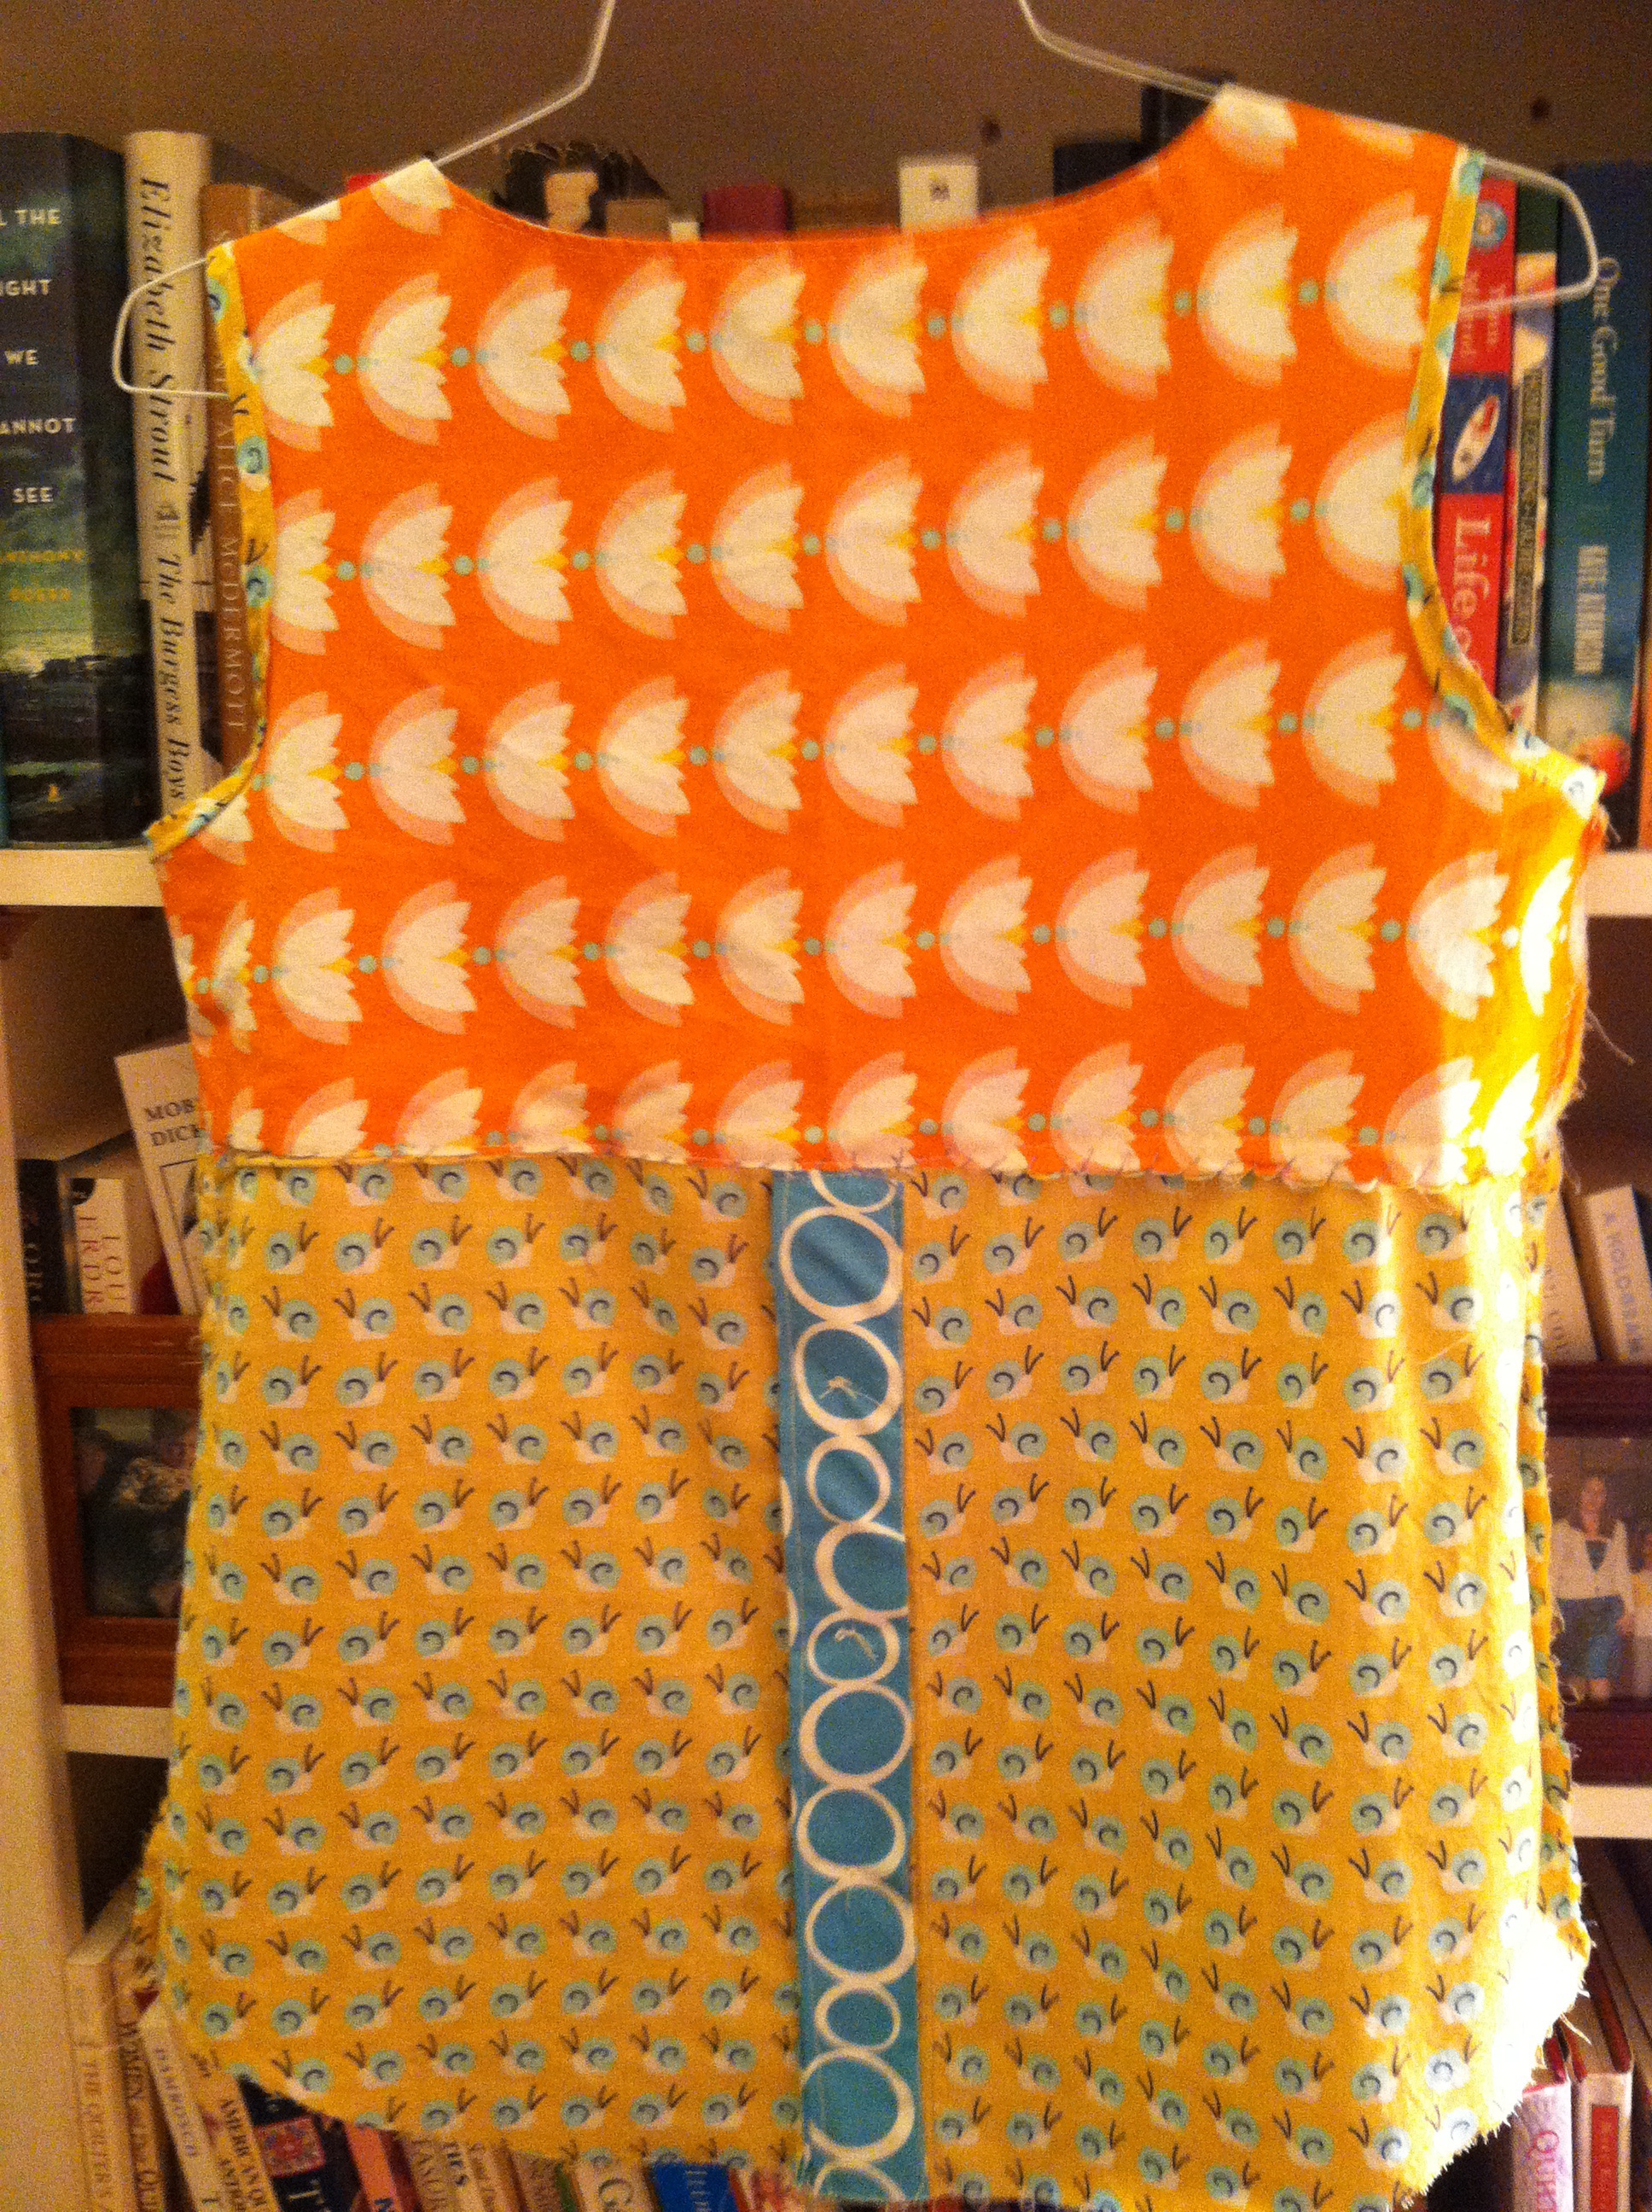
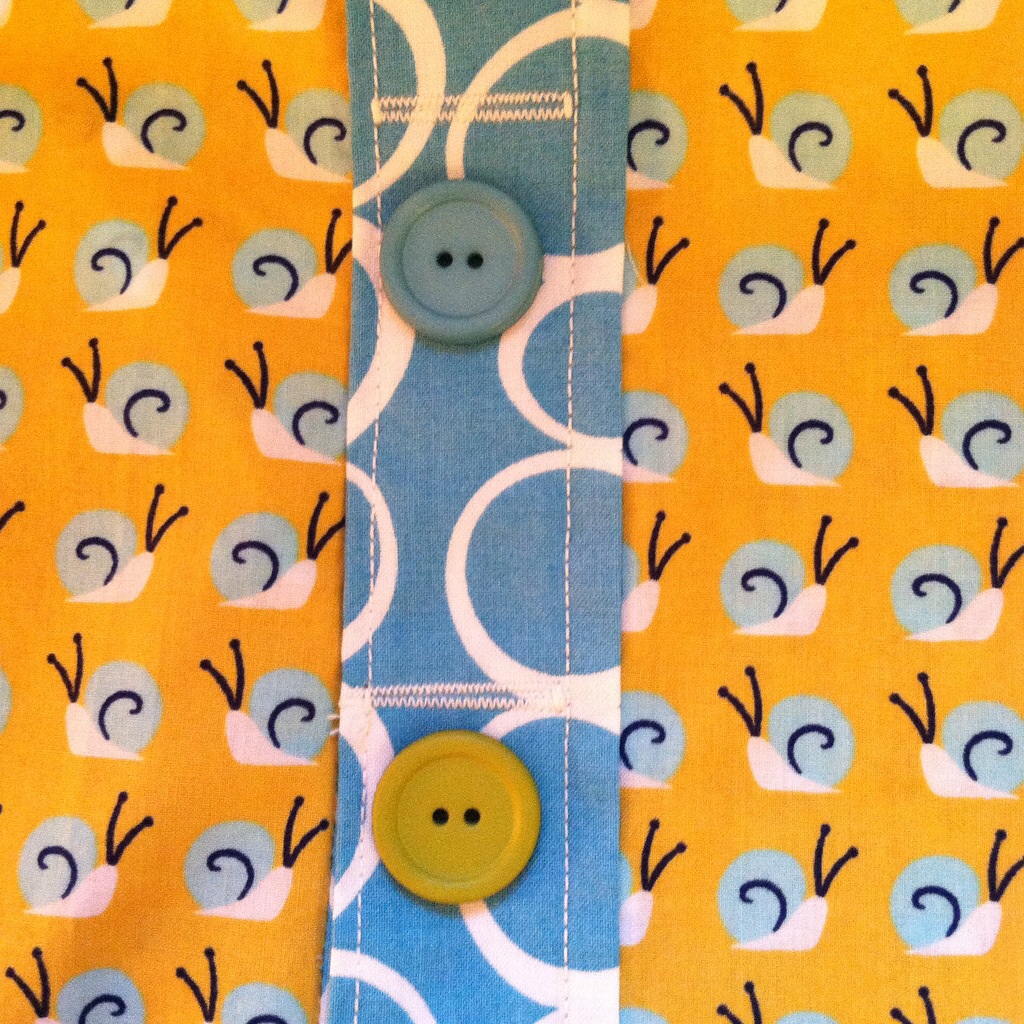
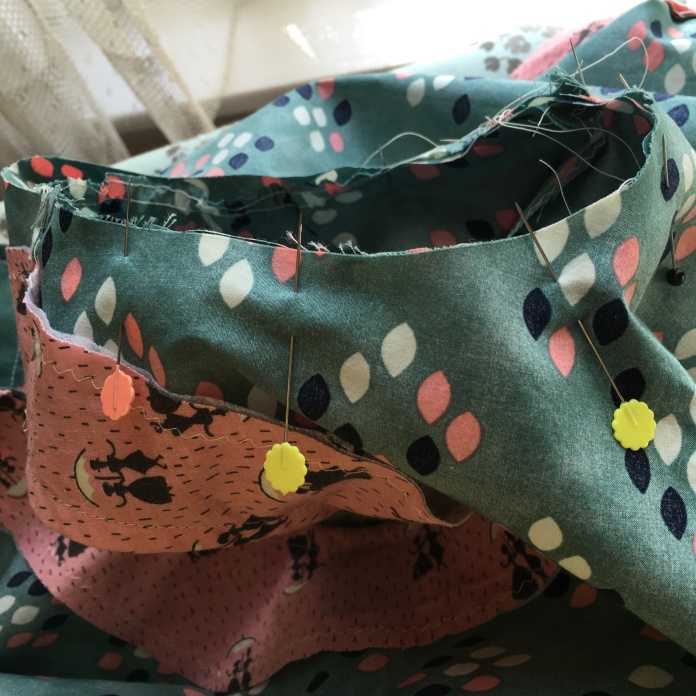
This time, I modified the pattern to use the contrasting fabric just on the inside of the garment. I used Rae’s instructions as if I was going to do a contrasting button placket using the standard measurements on the side with the buttons and then on the side with the button holes, I made the green portion wider and the pink portion narrower adding a seam allowance to each, folding the fabric at the seam where the two fabrics are sewn together, a technique I use for most of my hems. I am really happy with how it turned out. I think the pink on the outside was a little bolder than I wanted to go but I love the way it peeks out. In order to make Mary Poppins and Bert upright, I had to piece the placket facing but I think it came out fine. Waste not want not! The people are sideways on the hem facing which was necessary given the long strip that I needed for the hem facing. imageThis fabric is a cotton lawn so it drapes well but was really easy to work with. Although I originally planned to use these green buttons:image
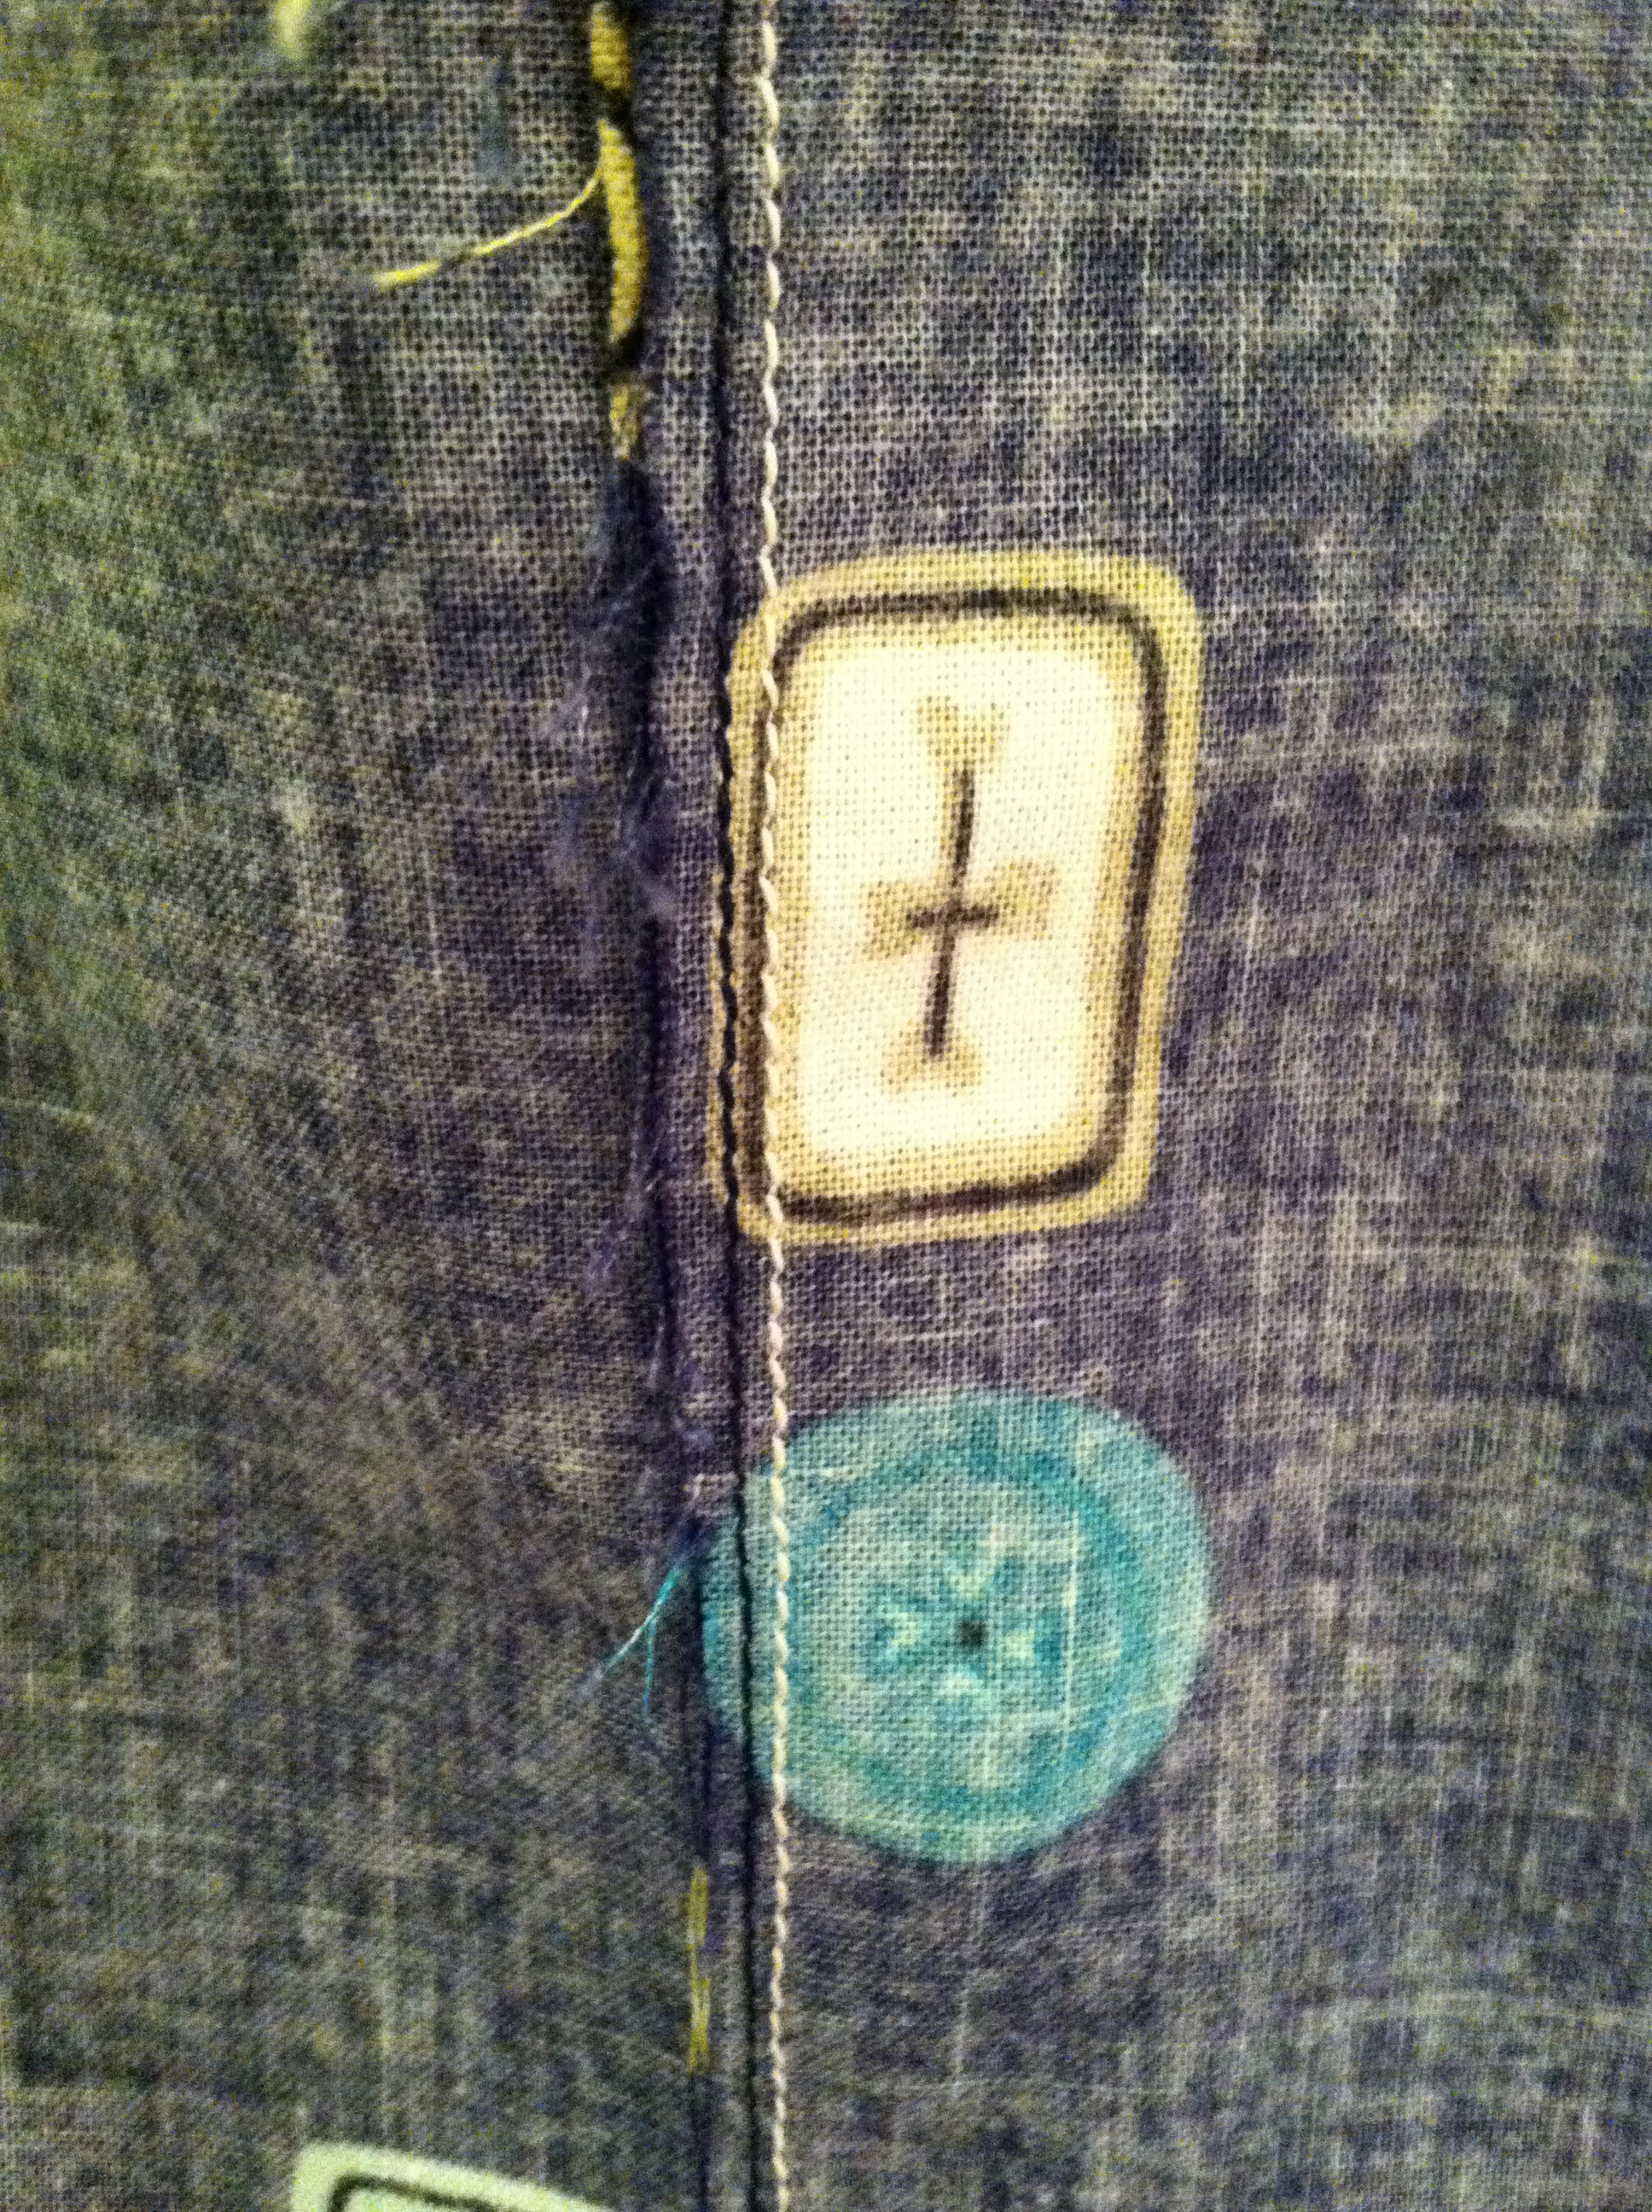
I decided instead to use these slightly worn, older, cream colored buttons that I rescued from a button jar that I picked up at a tag sale when I first moved to Connecticut in 1995 (buttons seen below with all of my long threads after sewing button holes. I left the threads long deliberately in order to pull them through to the underside and knot them. It didn’t take that long and it looks so much neater.) I like the fact that the buttons have variations in their colors and aren’t exactly matching. I used a cream colored thread which is much softer looking than bright white. I like to sew the two rows of stitches on my button plackets because they help me line up my button holes and I like the look of the stitching.imageI used more of the pink fabric for the facing and hemmed the tunic using the facing technique that I explained here.imageIn that same house where I found the button jar, I also found a little package of fabric held together with rubber bands in a pile of old towels in a linen closet. The price was less than $5. That package turned out to be 20 hand pieced quilt blocks. I later used them together with another 25 or so I pieced over the years to make a quilt for a very loved cousin who was going through treatment for cancer. My amazing teacher and professional quilter Judy assembled those blocks and figured out the best way to display them We used a lot of this same green color in that quilt.image On the back, we created a collage of family photos and messages.imageNext up in my quest to finish the works-in-process is a shift dress in cotton and steel polka dots. imageDrops and dots. What could be better?  The cotton and steel cotton lawn fabrics that I used for my Beatrix tunics are still available at fabric.com as of this writing. Happy spring!

image

Standard
Made By Rae Patterns, Sewing

A New Look for Beatrix

imageimage

Last summer, armed with new found knowledge of facings, buttons and sleeves from the MadeByRae Beatrix sewalong, I decided to tackle a basic shift dress pattern that I bought many years ago and never used, New Look 6095.

image

The pattern appeared to be very straightforward with one exception: I took the directions out at some point in the last year and misplaced them. Yikes! So I had pattern pieces but no instructions. This didn’t end up being a big problem although later this year I found the pattern online and bought it again so as to be better equipped before I make it again. The dress is a very simple shape with darts in the front and a neckline that is very similar to the Beatrix style and with two diamond shaped darts in the back to create shape and make the dress somewhat more fitted than the other styles I have made this year. I made version A but I took the sleeves from the pattern and added length to them using the Beatrix sleeve as my template.

image

The front is one piece cut on the fold and the back is two identical sides which I ended up cutting on the fold as one piece by mistake (I tend to do this) and then cut into two separate sides.

image

The advantage is that the pattern matching is awesome when you do it this way although I didn’t plan it. I used this  beautiful Cotton and Steel fabric which I love.

image

I ended up making three muslins to get the fit right. Yes this was time-consuming but since the basic pattern was only three pieces it wasn’t terrible, although I did go through a lot of fabric making the muslins (I am now cutting them up to use as lining in other projects.) What I learned is that you sometimes have to play around with the fit for a while and just because your waist is smaller than the shape of the dress, it isn’t necessarily flattering to taper to the waist too dramatically because then your hips seem larger.Yes this should be intuitive but it was really interesting to make these tiny adjustments and see such a change in the shape which is why I ended up having to do it three times!

Based on the patterns measurements I should have worn a 14 or 16  which is not my normal size. I think I originally cut between the 12 and 14 lines. I ended up scaling back down closer to a 10-12 but I ended up using the dart placement per the larger size pattern placement as the darts placement is different depending on the size. When I sized down, I sewed the darts where the smaller size dictated but then found that the fit wasn’t as flattering so I ended up making a smaller size with the dart placement per the larger size. Now that I have the pattern adjusted the way I like it, what I need to do is to trace it onto tracing paper (on my long to do list) because it is currently a hodge-podge of tissue paper pattern pieces with some added paper with some of the lines re-traced. I plan to make it again at least twice starting with the beautiful fabrics below:

image

Sewing this pattern and playing with the fit taught me that that even small adjustments can result in a big change in the shape and drape of a garment. By experimenting, I got a nice fit for everything except the neckline which I should have adjusted as it does gape a bit in the end. I will fix it next time!

image

I drafted a facing for the neckline and sewed across the shoulder seam to tack it in place as Rae teaches in the Beatrix sewalong.

image

I used a Moda turquoise fabric for the neck facing and to face the hems.

image

My hem facing ended up smaller than planned because I used too narrow a facing strip. I used this Moda fabric all summer to face and line several projects and I was almost out when I got to this dress.

image

One could use a zipper but I decided to try a button loop because I had a large turquoise button that I thought would work well. I followed the directions for the hand sewn button loop in the Sewaholic book: Sewtionary which is a great resource. I  am really happy with how it came out in the end. I drafted a little facing for the button opening. I just sort of made it up and it works.

imageimage

I an happy with everything except the neck gaping but I know how to fix that using the hollow chest adjustment technique that I used making the Beatrix. I will be making this again soon and this time will have the instructions. Woohoo! I am interested to see if it makes  a big difference. Changes I will make to the next version: wider hem facing, hollow chest adjustment and slightly longer sleeves. Otherwise I am really happy with this. It works well with sandals in the summer and with boots and tights in the winter with an olive green cardigan.

image

Standard
Made By Rae Patterns, Sewing

Mudan Moss Beatrix Blouse

A mudan is a type of woody peony native to China. For my sleeved version of the Beatrix blouse, I chose an Art Gallery fabric called Shanghai Edition Mudan Romance Moss. The fabric appealed to me because the lacy design evokes the ferns that my husband loves to plant.

moss fabric

I also gained a whole new respect for mosses after reading The Signature of All Things which is a great book. If you haven’t read it yet, you should! This has been a summer of ferns and mosses.

image

Moss on a rock in Acadia earlier this summer

We have an area along the side of our house that was torn up when the prior owners set about to widen the driveway. They hadn’t planned to sell and ended up leaving the driveway as well as several other home improvement projects unfinished. In an effort to stem erosion and be budget-minded, my husband has been planting ferns and mosses that he has collected. He buys all our produce at a local farm and they generously allow him to bring specimens back from their wooded area and transplant them alongside our house. My husband has really enjoyed this project-I think he even surprised himself- and it has become somewhat of an obsession so when I saw this fabric on sale it appealed to me and I thought it would be perfect for a Beatrix blouse.

A woodland garden. All we need are fairy houses

A woodland suburban garden. All we need are fairy houses

I waited to make my real version of the Beatrix until Rae did the Beatrix sewalong and I am so glad I did because her tips were excellent and her directions very clear. I ended up following along a few days late because weekends are when I work long shifts as an RN and no sewing happens but I was able to catch up and do a couple of the steps each night.

image

Stylish fabric weights

This time I read Rae’s very clear guide of how to choose your size. Funnily, I ended up with the same size I always cut, a Medium with an added inch since I am tall.

image

I added an inch to the sleeves and to the front and back and button placket

I experimented with a wider tuck of a tiny bit of fabric along the neckline. Next time around I will use the hollow chest adjustment that Rae recommends in the sewalong.

image

front of finished beatrix blouse with tucks at neckline

I had fun picking out buttons.

I used orange buttons from my button jar.

image

I used 7 buttons due to the added length. I only had 6 orange.

The top button is slightly more red.

image

I followed Rae’s very clear instructions for the curved hem.

image

image

curved hem enclosed in button placket

I love the way the design of the blouse has the button placket enclosing the hem and the neck facing for a clean finish.

image

facing is enclosed in button placket

image

Rae suggests securing the facing by sewing in the ditch of the shoulder seam. I have more luck sewing just to one side so I did that here. I also top stitched around the neckline

image

There will definitely be more Beatrix’s in my future! Great pattern and great tips on Rae’s blog.

image

peony from our garden this spring. So beautiful!

image

image

image

image

Fairy houses from the healing garden at the hospital. They were made by patients and their families. Magical!

Standard
Made By Rae Patterns, Sewing

Lotus pond Beatrix blouse

#thisisthebeforepicture

#thisisthebeforepicture

image

small tuck basted into neckline-measures half an inch

My first real experience sewing was as a quilter and I think that the quilter in me informs my garment sewing. I love finding a way to use a scrap of pretty fabric or combine quirky patterns to make a straightforward pattern more interesting. I am happy to piece together scraps to make new fabric to then cut out the shape with the extra seam adding to the design. I am happy when faced with a challenge of not having enough fabric for a particular design and having to innovate-usually!

pieced button placket due to tiny size of scrap

pieced button placket due to tiny size of scrap

I decided to make a second sleeveless Beatrix in order to try the fit of the Beatrix using real, i.e. non-previous shirt, material to test the fit before cutting into the garment fabric that I bought for my #beatrixalong blouse with sleeves. After making the first blouse, I noticed that the neck gaped a bit. I played around with pinching a bit of the front bodice fabric in front of a mirror in order to figure out how much to adjust the pattern and I noticed that the drape of the fabric changed for the better with that minor tweak. I tried sewing a tiny pleat into the neckline-which was already finished but I just hand-sewed a few basting stitches-and I really liked the way the front of the blouse looked with the tuck so I wanted to try it out again in a planned way. I also wanted to try sewing the neckline facings instead of using bias binding. So I found some leftover lotus pond fabric and I planned a second blouse incorporating some of these changes.

tuck top stitched in place

tuck top-stitched in place

inside view of tuck-measures 0.5 inch across

inside view of tuck-measures 0.5 inch across

I realized after sewing the first blouse that I had no problem putting it on with the buttons buttoned so I thought it would be fun to try it with a one-piece back bodice-partly because I only had three matching buttons of the type I wanted to use and partly because I didn’t have enough of the main fabric to cut out the front and back pieces of the shirt in one piece and I didn’t think that the snail fabric would be as forgiving as the tiny stripes in terms of hiding my extra seams from piecing.

imageimage

I cut the front of the blouse out of the main fabric and used a scrap of light blue chambray that had previously found its way into two ruby dresses for the back one-piece bodice.  I measured the finished back width of my previous shirt and added seam allowances. Since the chambray was potentially more stretchy than the quilting cotton, I had the idea to line the back one-piece bodice with a scrap of orange water lily fabric also from Rae’s Lotus Pond collection. I didn’t have a big enough piece to cut on the grainline so I shifted it 90 degrees and the flowers flow sideways which worked fine. I cut the front facing from the same orange fabric. For the button placket, I used some turquoise bubble fabric left over another project. I finished the arm holes with bias tape.

imageimage

In the spirit of not spending money and using what you have, I found three buttons-one turquoise and two green-in a button jar I was given by my daughter. While the green doesn’t exactly match, it makes the top a little more quirky which I like.

image

The top is all done except for the hem and I am very happy with the fit and how it turned out. There are two things I would change next time though. One is that I would make the back one piece bodice a little shorter and the button placket a bit longer. The second is that I would loosen the front tuck a bit. I noticed as I wore the first Beatrix that the basting stitches I put in to test the size of the tuck had loosened and I was happier with the looser tuck and the way the fabric draped when the tuck loosened so I plan to try it out on my next project which is my #beatrixalong blouse-to be made all from the same fabric and with three quarter length sleeves. I also may adjust the back, armholes and sides a bit to make them more snug the next time I make a sleeveless version. I did that without planning to when I made the first blouse from my husband’s shirt because I had to scrimp on fabric since I didn’t really have enough but oddly, the fit turned out better.

I am also planning to try the reverse-a beatrix with a button placket on top and a flowy one piece bottom piece. I think that’s a natural and a good idea for when you only have two matching buttons! There are also going to be many more upcycled shirts using those great former banker shirts in my husband’s closet. #wastenotwantnot!

loosened tuck = flattering drape

loosened tuck = flattering drape

I find that I sew the way I cook. I read the instructions but I make little changes along the way, sometimes without realizing what I did. Hopefully blogging will make it easier to re-create my happy mistakes!

Standard
Made By Rae Patterns, Sewing

Beatrix Blouse part 1

imageimageimage

Once upon a time, I was a young mother in a great neighborhood in Brooklyn with a fabulous sewing store. I took classes and learned to quilt and sew simple children’s garments and I was a member of a great group of women who were my Tuesday night quilting group. It was a huge part of my life for many years. Then things got busy and complicated and I had many years during which sewing was the thing I hoped to do again some day although part of me worried that day would never come.

Well, amazingly, that day came this winter when a massive snow storm hit my town and I couldn’t go to work. I had been reading sewing blogs and planning all the things I might sew when I finally had the time,  I had recently moved and had claimed a small room on the second floor that used to house linens and made it into my sewing room and that day I made a dress pretty much start to finish. The dress was a Washi by Made-by-Rae which anyone who reads sewing blogs has probably made multiple times. I call it the gateway pattern. Since that day in February, I have made 10 dresses, 2 skirts and four tops, most of them with patterns that Rae designed and they are wonderful. I have a mostly me-made summer wardrobe that I enjoy wearing thanks to Rae. I have thought about blogging since I started sewing again in order to share the pearls I have learned along my journey. When Rae announced that she was coming out with a new pattern, I decided to take the plunge. And so here is post #1 on my first attempt at the Beatrix Blouse.

My approach with the Made-By-Rai patterns I have made so far-the Washi, the Ruby and the Bianca-has been to make a medium and lengthen by 2 to 3 inches because I am tall-5’9″- and I wear most of these dresses to work and I don’t want the skirts to be too short. I always make a muslin and I try to be budget-minded and not spend money on the muslin.

image

My husband gave me several gently worn striped men’s dress shirts and I thought I would try to use one of those to make a sleeveless Beatrix to check the fit and have a wearable muslin. I cut the shirt apart doing my best to preserve the biggest pieces of fabric. I was easily able to cut the front bodice out using the back of the shirt. I ended up making the button placket view of the shirt-view B-because I didn’t have enough fabric to cut the 2 view A back pieces and I ended up having to do some creating piecing to get enough fabric to make the shirt. It ended up being a bit of a project-not at all the simple muslin that Rae recommends! But it was a fun challenge. Probably the quilter in me. I used a madras plaid fabric scrap for the button plackets and had fun sorting through my button jar to find enough buttons. They are mismatched but I think that adds to the fun.

image

I used self-made bias binding on the neck, armholes and the hem. I did it quite quickly since this is going to be a wear around the house top. My original plan to lengthen the pattern fell through when I mistakenly sewed the bias binding on the wrong side of the hem-too tired much? Since this was  a muslin I just took my rotary cutter and cut it off along the seam line and made new binding tape. Luckily the length ended up being fine so good to know.

The great thing about the first go at a pattern is that you flush out many of the mistakes and tricky parts so that you will be better prepared the next time. The pattern is pretty straightforward and the fit seems good, even without lengthening it. My version is shorter on the sides because I had to work within the existing lines of the shirt. I actually enjoyed the challenge of making the pattern work with the odd shapes pieces of the shirt. I pieced the back and created a short of belt effect by turning the fabric 90 degrees. I also pieced one of the lower back pieces of the bodice because I had run out of bigger pieces.

I also noticed that on me, the front neckline seems to gape a bit so I may adjust the front bodice to be slightly more narrow-perhaps half an inch-on my next version to see if that helps. I might also lower the neckline slightly. Otherwise I am very happy with it and looking forward to the Beatrix Sewalong that starts this weekend. I have found Rae’s tutorials to be really helpful and refer back to them often. She does a great job of breaking the steps down and I have had really good success with making garments I enjoy wearing.

Best thing about the Beatrix? #buttons 🙂

image

Standard