A few pictures of the insides of my Washi dresses. I have started lengthening the front bodice lining a bit so I can turn more under to get a cleaner finish. I generally finish the hems with a 3 inch facing that I turn up and finish with two rows of stitching but when I sewed my most recent Washi, I stitched one row and caught the edge of the facing perfectly-a first! and decided not to chance a second row of stitches as they might not have been even and I was happy with how it looked. I generally use scraps for facings. I enjoy the challenge of finding something that works. It is the quilter in me. This Pat Bravo fabric was somewhat sheer so I lined it with white quilting cotton. I like the structure the lining gives to the bodice and the hem.


This Cotton and Steel Washi was lined with wonderful mustard mustang fabric. Love this fabric. I should have probably bought a bolt! I used it to make a Beatrix blouse that I wear all the time.


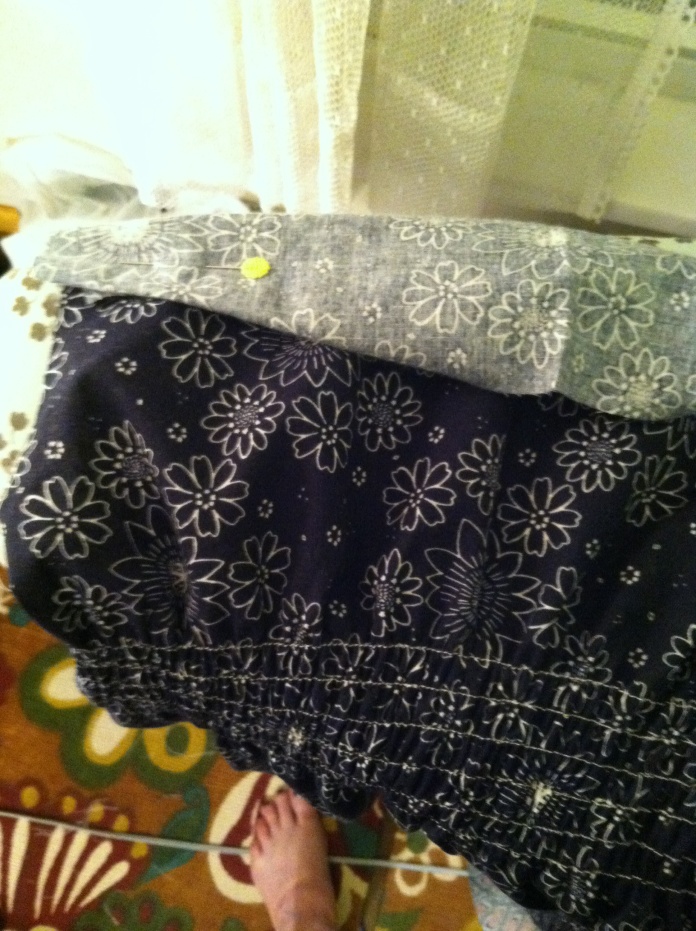
Most recent April Rhodes Washi with lining and sleeves. I used Rae’s sausage method successfully although there was a lot of fabric in the sausage! I pinned the bulk of it away from the seam line so I wouldn’t catch it when I sewed.


Speaking of pinning. A word to the wise. When sewing the shirring, pin the top of the bodice together. I have caught the top of the bodice in the shirring more times than I care to admit. I just get carried away and don’t notice! This helps. Another tip: make sure you have enough elastic thread in the bobbin before you sew each line of shirring. You don’t want to run out in the middle of a seam because you will have to pick the whole line of stitching out. Happy sewing!