
This is the before picture. When I made my first Washi Dress last winter, I didn’t have enough fabric and ended up adding a strip of a different fabric as a border. I was really happy with the result. I was new to this sewing business and if you look closely you can see that I didn’t match up the seams on the main part of the dress and the border but to be honest, it doesn’t even matter. It is cute. I wear it all the time and I get lots of compliments. It is a tribute to Rae that even my first attempts at her patterns have turned out to be wearable and cute.
 I wanted to make the pattern again and decided to use some black quilting cotton from my stash to make a black Washi. I realized that I had enough black cotton to make almost two dresses but not quite so I decided to use a second fabric to make a contrasting band at the bottom of each skirt. I ended up making two versions: one for my daughter with polka dots and for myself, I used fabric leftover from my younger daughter’s grade school Invention Convention project, which was a “puppymobile”. Details of the two dresses can be seen here in my original post.
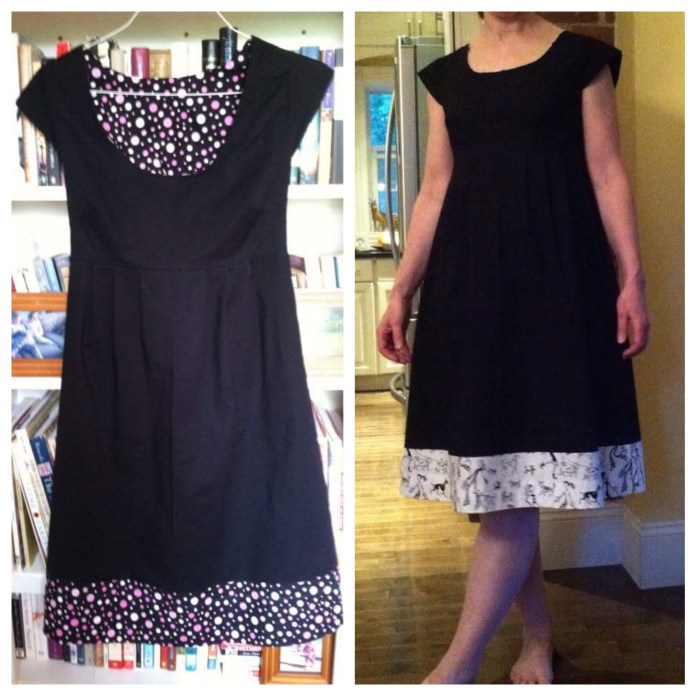 I was really happy with the effect this little change made to a basic black dress and I was happy to be able to make two dresses using fabric I already had. My sister saw the polka dot version I made for Sarah and said she really liked it. I happened to have the polka dot fabric in a different colorway so I offered to make her one.
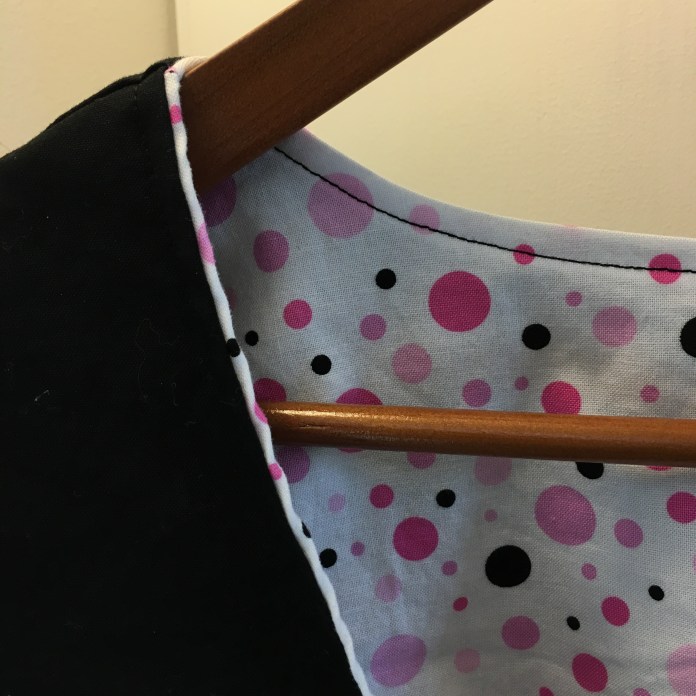 When I made my own black washi with the puppy fabric lining, I must have cut the lining a bit bigger than the bodice pieces for the dress dress and when I went to topstitch the neckline, it shifted a bit.
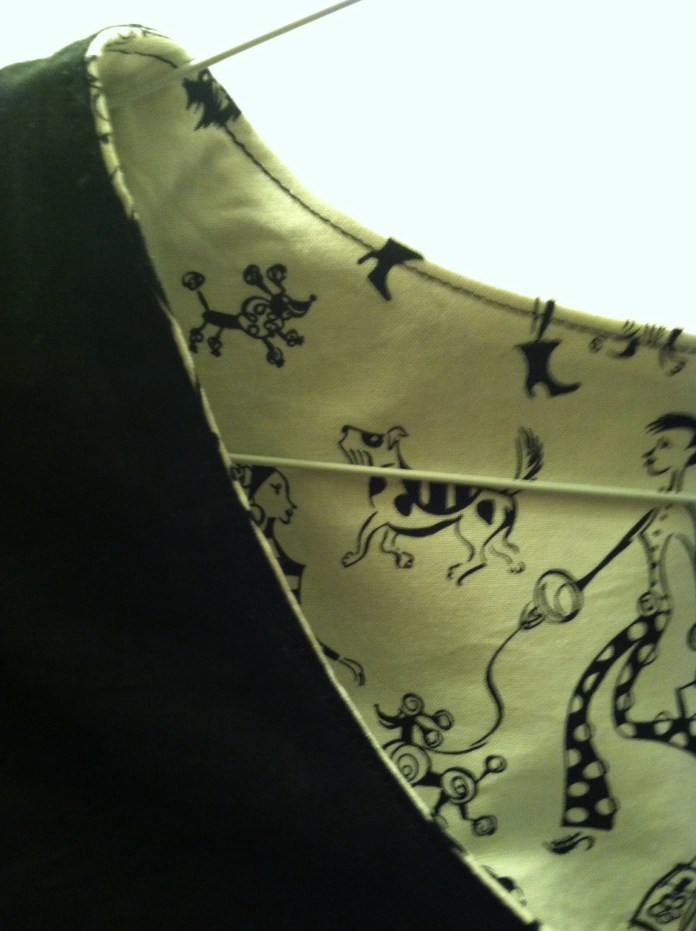 I ended up doing it on purpose to create the effect of piping without actually having to make piping. I did that for Madeleine’s dress as well. It is such an easy thing to do and I love the effect.
 Once again, I used the wonderfully clear Made By Rae videos to walk me through the sausage technique to get a clean finish for the lined bodice-finished dress inside out above. Sausage in process below.
 I used the cutting lines for the Washi tunic and added several inches to create my seam line for the main part of the dress. I sewed all the side seams and added the contrasting border at the end lining up the seam in the border with the side seams of the dress.
 After sewing on the border, I ironed the seam and then topstitched for a more finished look and for durability, something that is important to me as I machine wash everything. Dry cleaning costs are just not in my budget.
 I am really happy with the way it turned out. The polka dots add just enough cute to be fun.
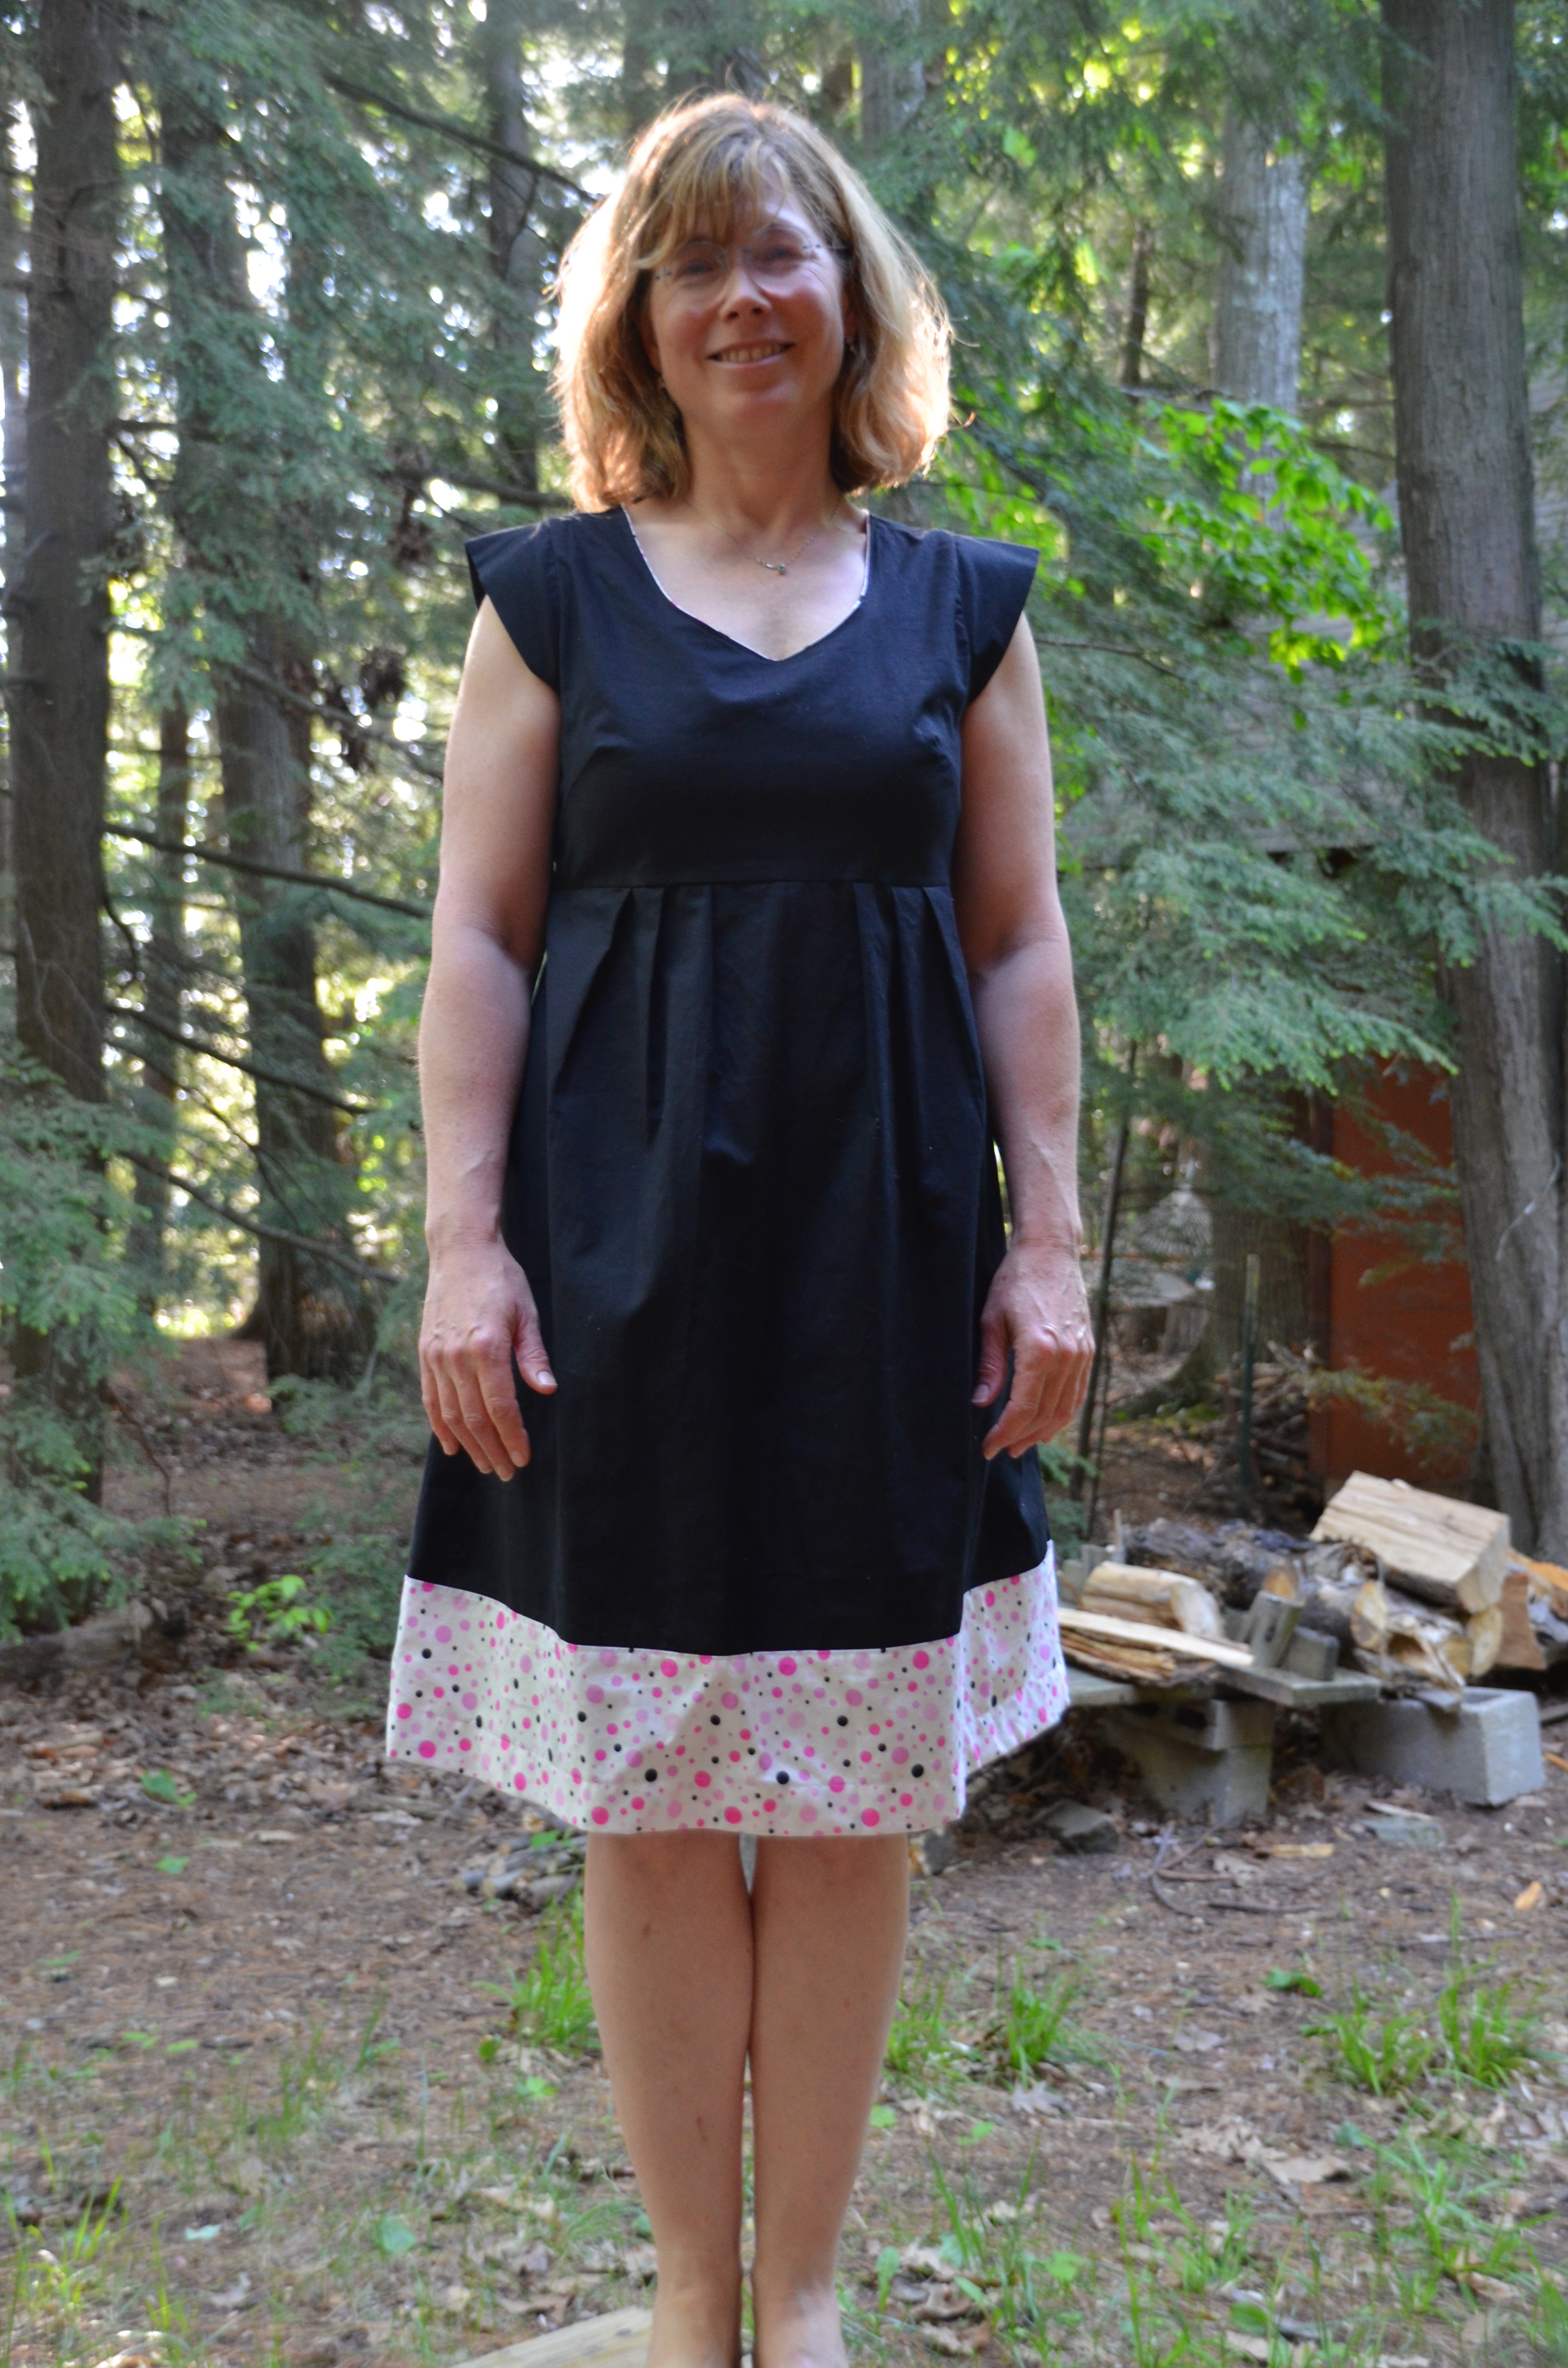
 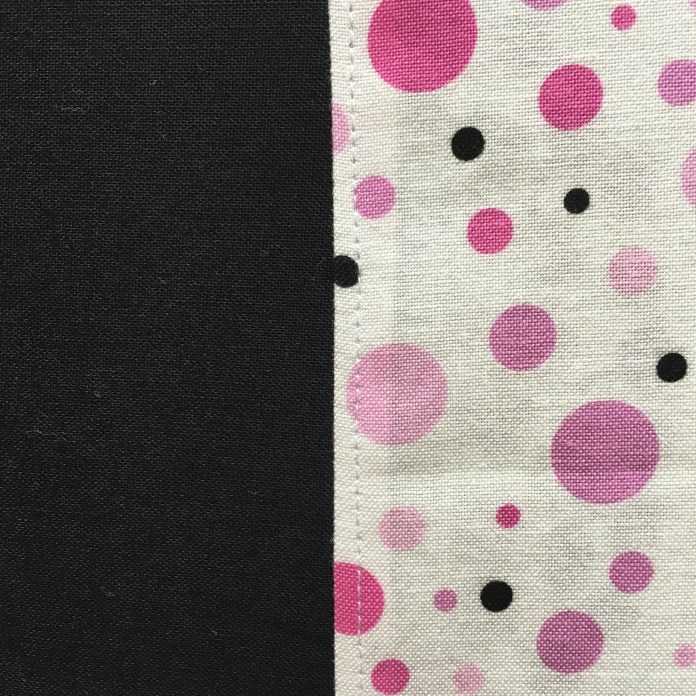 And here is the finished dress which was mailed out to Michigan for the birthday girl.
 The puppy version (slightly rumped) below. I wear it often.

Pingback: Me Made May 2016 Round-Up | nursebeansews
Pingback: Gemma Tanks using Upcycled Plaid Shirts | nursebeansews
Pingback: Nursebeansews: Sewing a Handmade Wardrobe | nursebeansews
Pingback: Nursebeansews a lot: 2016 year-end wrap up | nursebeansews
Pingback: Snowversary 2017 | nursebeansews