
It is almost Easter and in that spirit I did a bit of sewing last week.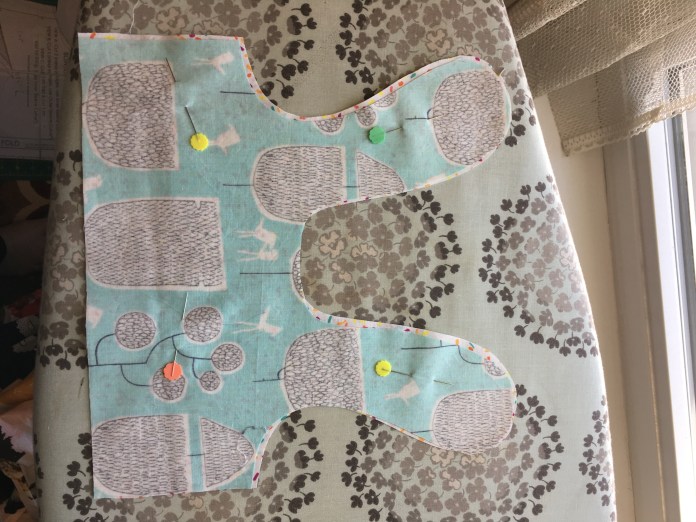 I made a teeny tiny dress.
 A friend at work had a baby last week, a little girl. This gave me a great excuse to sew something tiny and cute. The pattern is a free pattern literally called the Itty Bitty Baby Dress from Rae Hoekstra available for download from her site. It is really small and I even sized it up a bit. It is designed to fit a 3 month old as sewn. My children are all grown. One forgets how small new babies are!
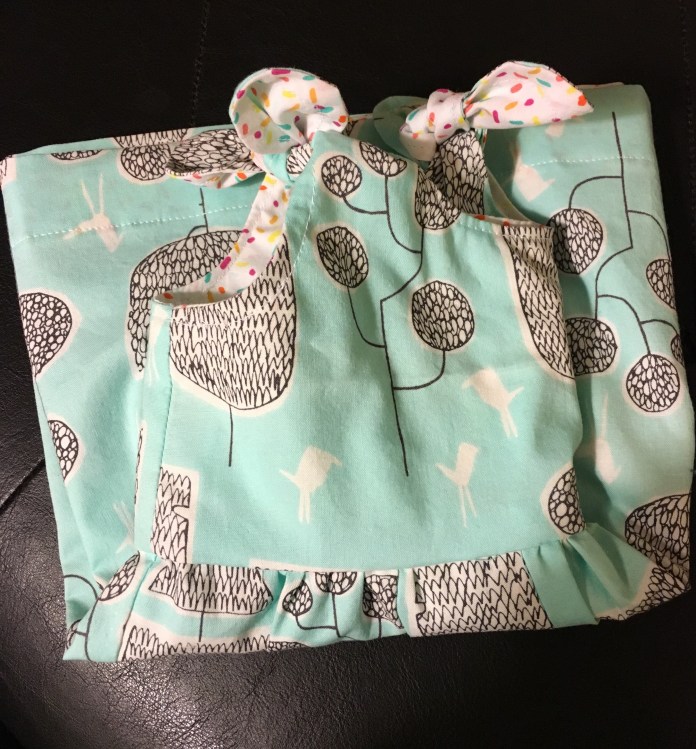 I love the little birds. This fabric is cute but not cutesy which I love. My sewing wasn’t perfect but it really didn’t matter in the end.
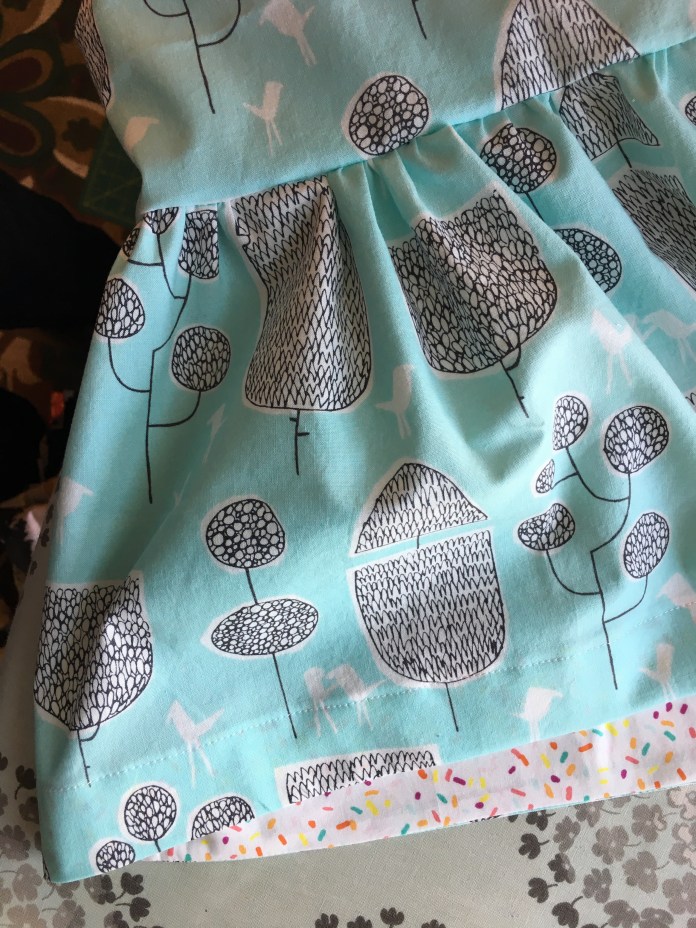 I made this little dress from fabric left over from a Ruby dress that I made and love. The fabric is Tokyo Trees from Cloud 9 fabrics. I bought it online at HoneyBeGood which has a great selection of organic fabrics.
 The lining fabric was a fat quarter I had purchased from The Cloth Pocket. It is still available at various stores. The fabric is from a collection called Boardwalk Delight by Art Gallery Fabrics. I couldn’t resist the sprinkles. (below before I hand sewed the bodice lining) I love the rabbit ear shape the ties make. The curves are very small by the way which is a bit of a challenge-sew slowly 🙂
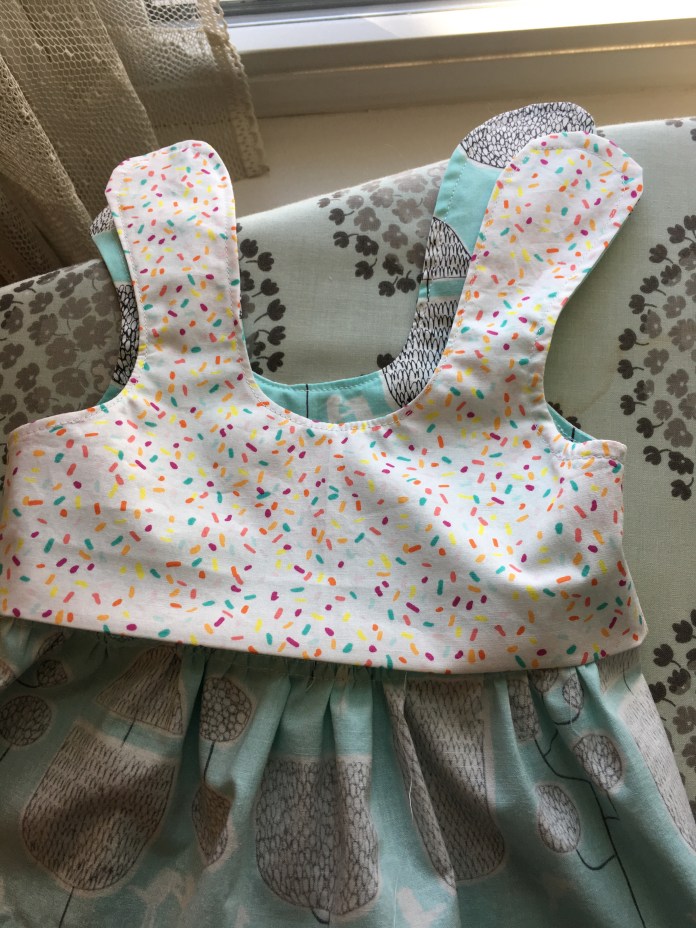 In preparation for grandparenting which I hope to not be too far off-maybe 2 or 3 years?- I had already purchased the Geranium and Flashback Tee patterns when Rae had a pattern sale earlier this year. I love the many variations of those patterns (especially this one which reminds me of outfits my girls wore when they were little) and look forward to sewing them in the future. But this little pattern has no buttons or zippers so I thought I would try it as I was sewing last minute the day before the shower-as I do. It didn’t disappoint. I simplified it a bit, eliminating the piping in the interest of time and I created a hem facing the same way I always do, only smaller.
 It is pretty foolproof and quick.
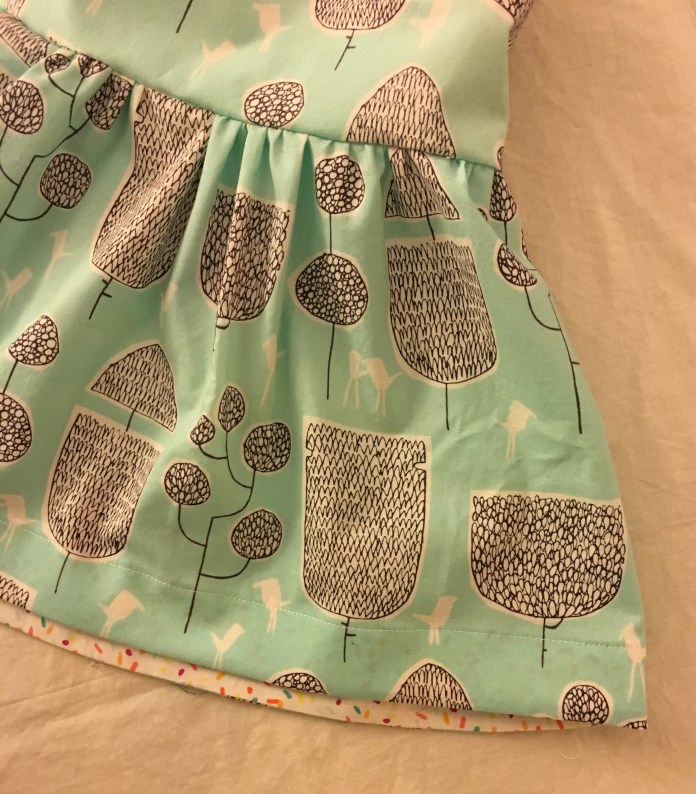 One challenge was not having a small enough hanger to properly show off the finished product. I tried to improvise. I am not sure I am doing it justice in this photo.
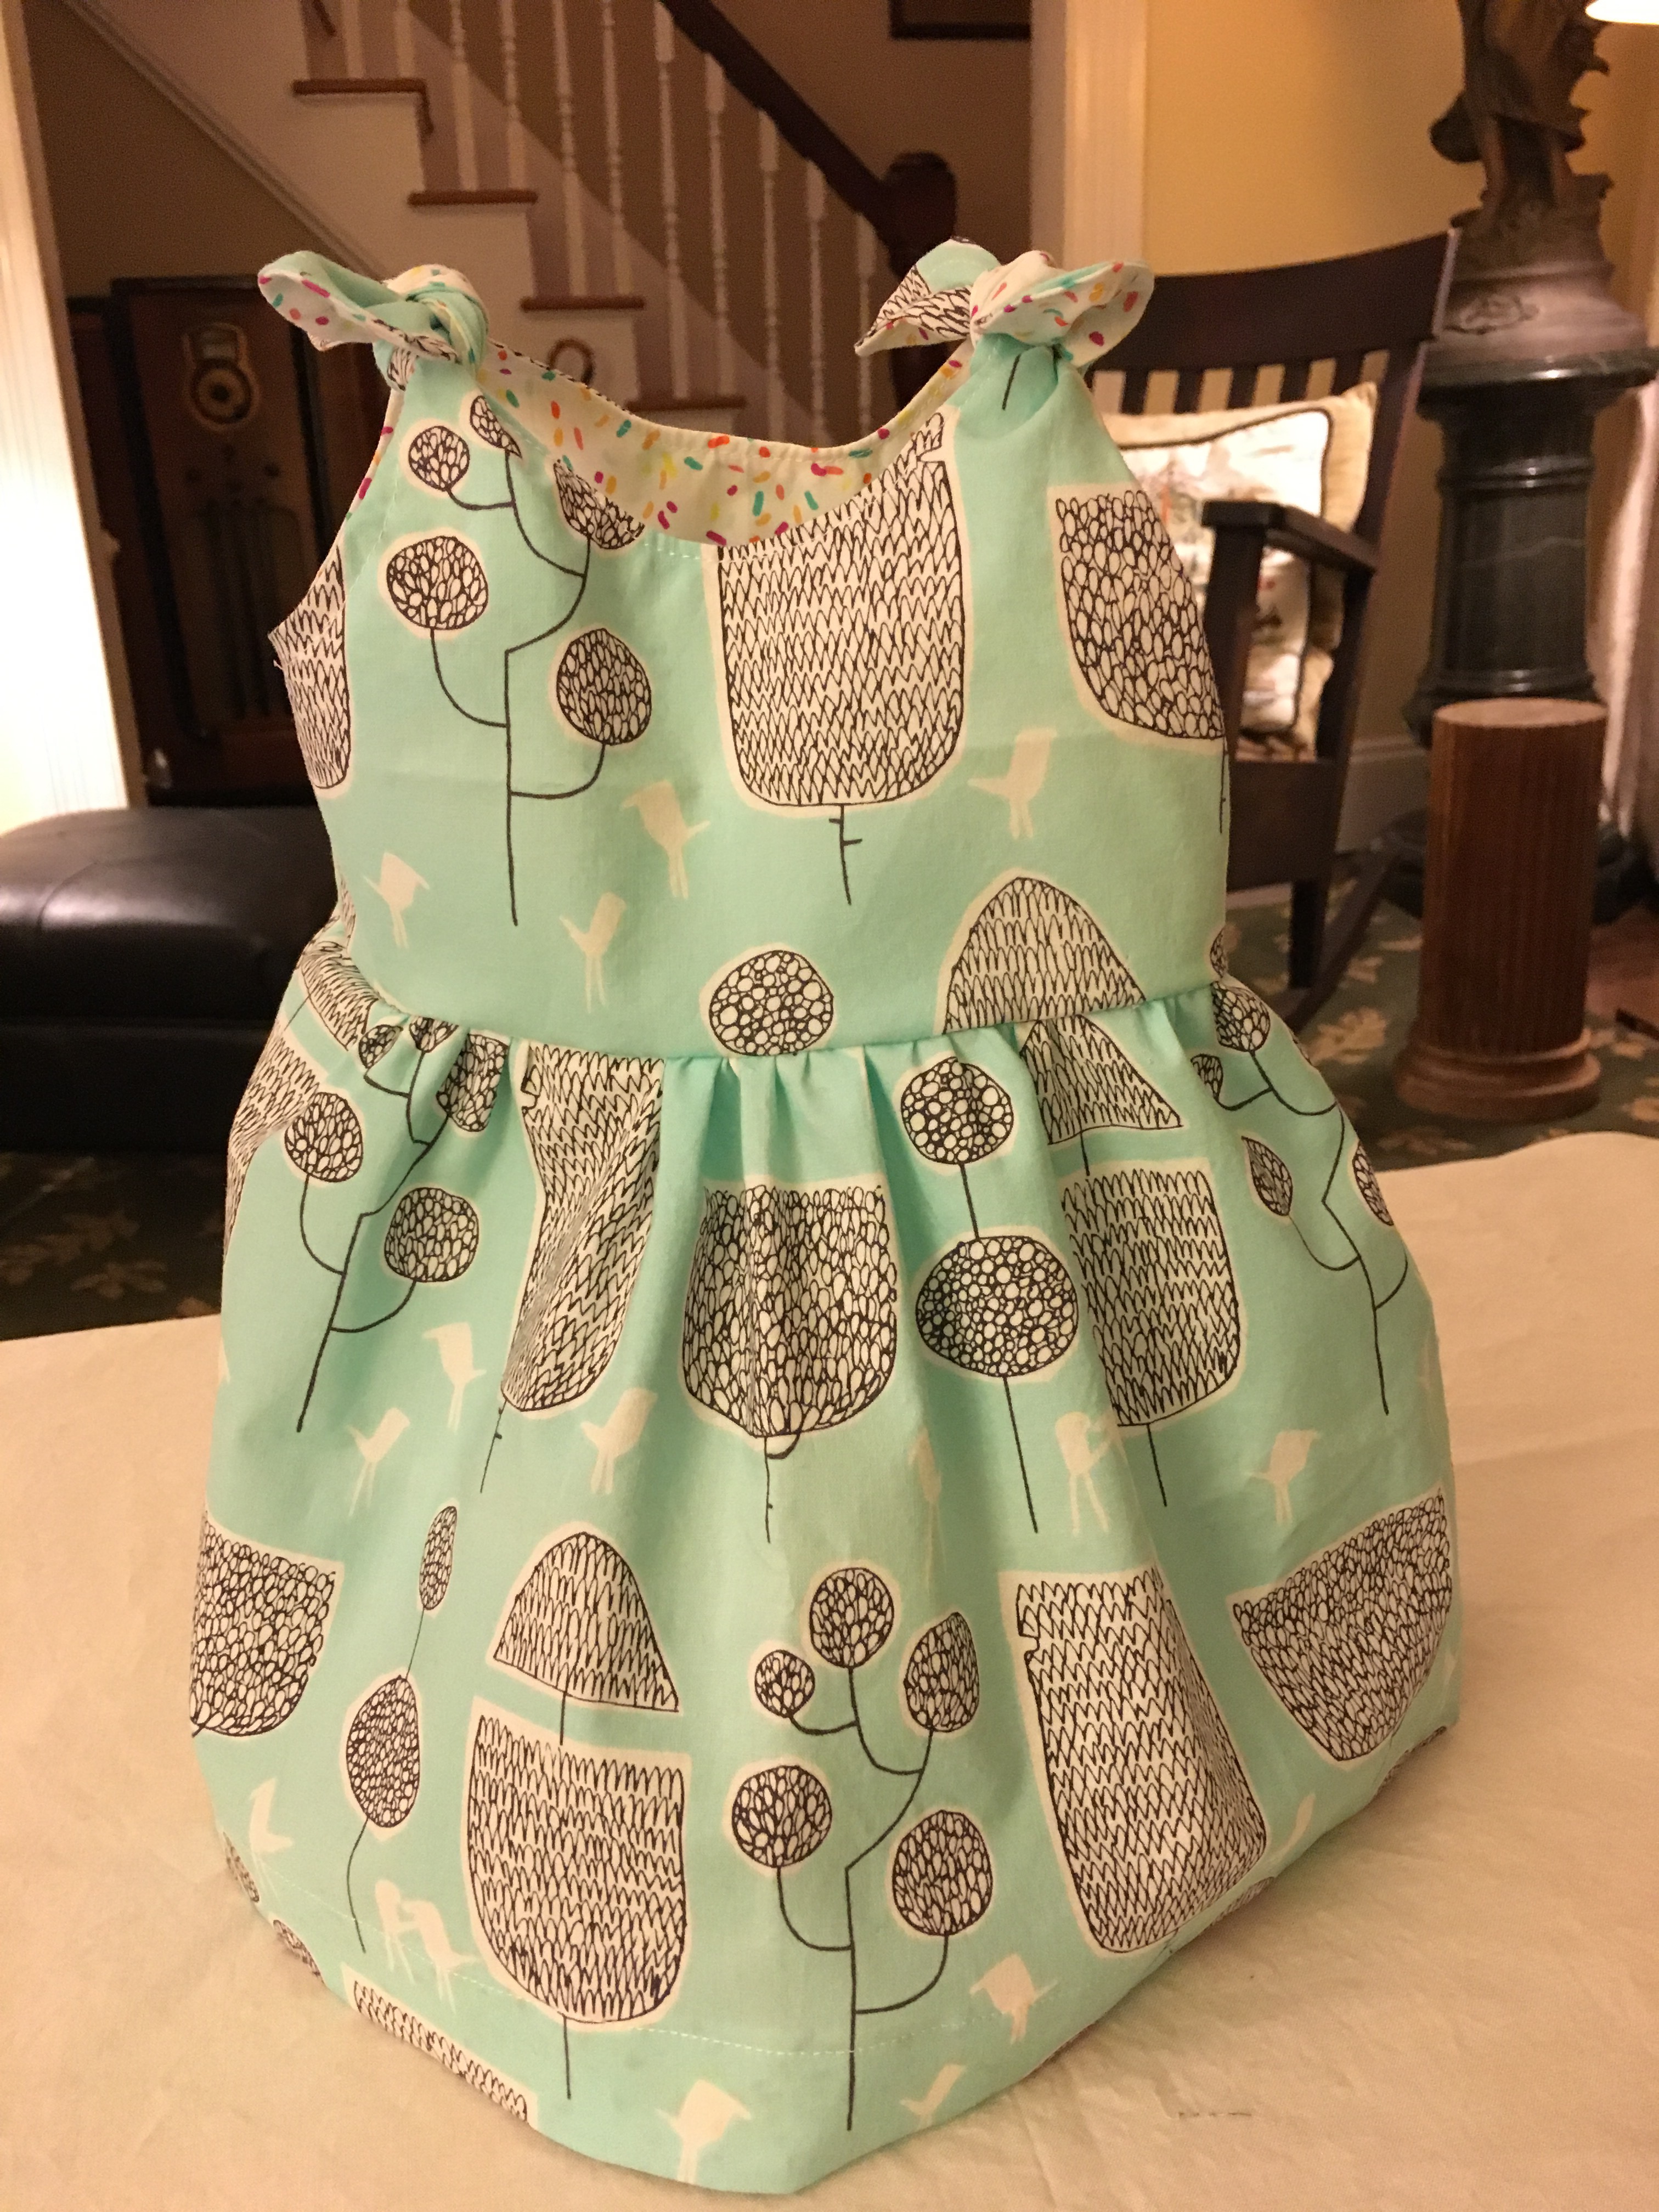 I sewed everything by machine except for the last seam where I hand sewed the bodice lining. You could probably do that by machine as well but I don’t trust myself with the tiny gathers. It doesn’t take long.
 I enjoy hand sewing and it is quicker to hand sew once than to machine sew and have to redo it.Some more construction pictures below. Hem facing.
 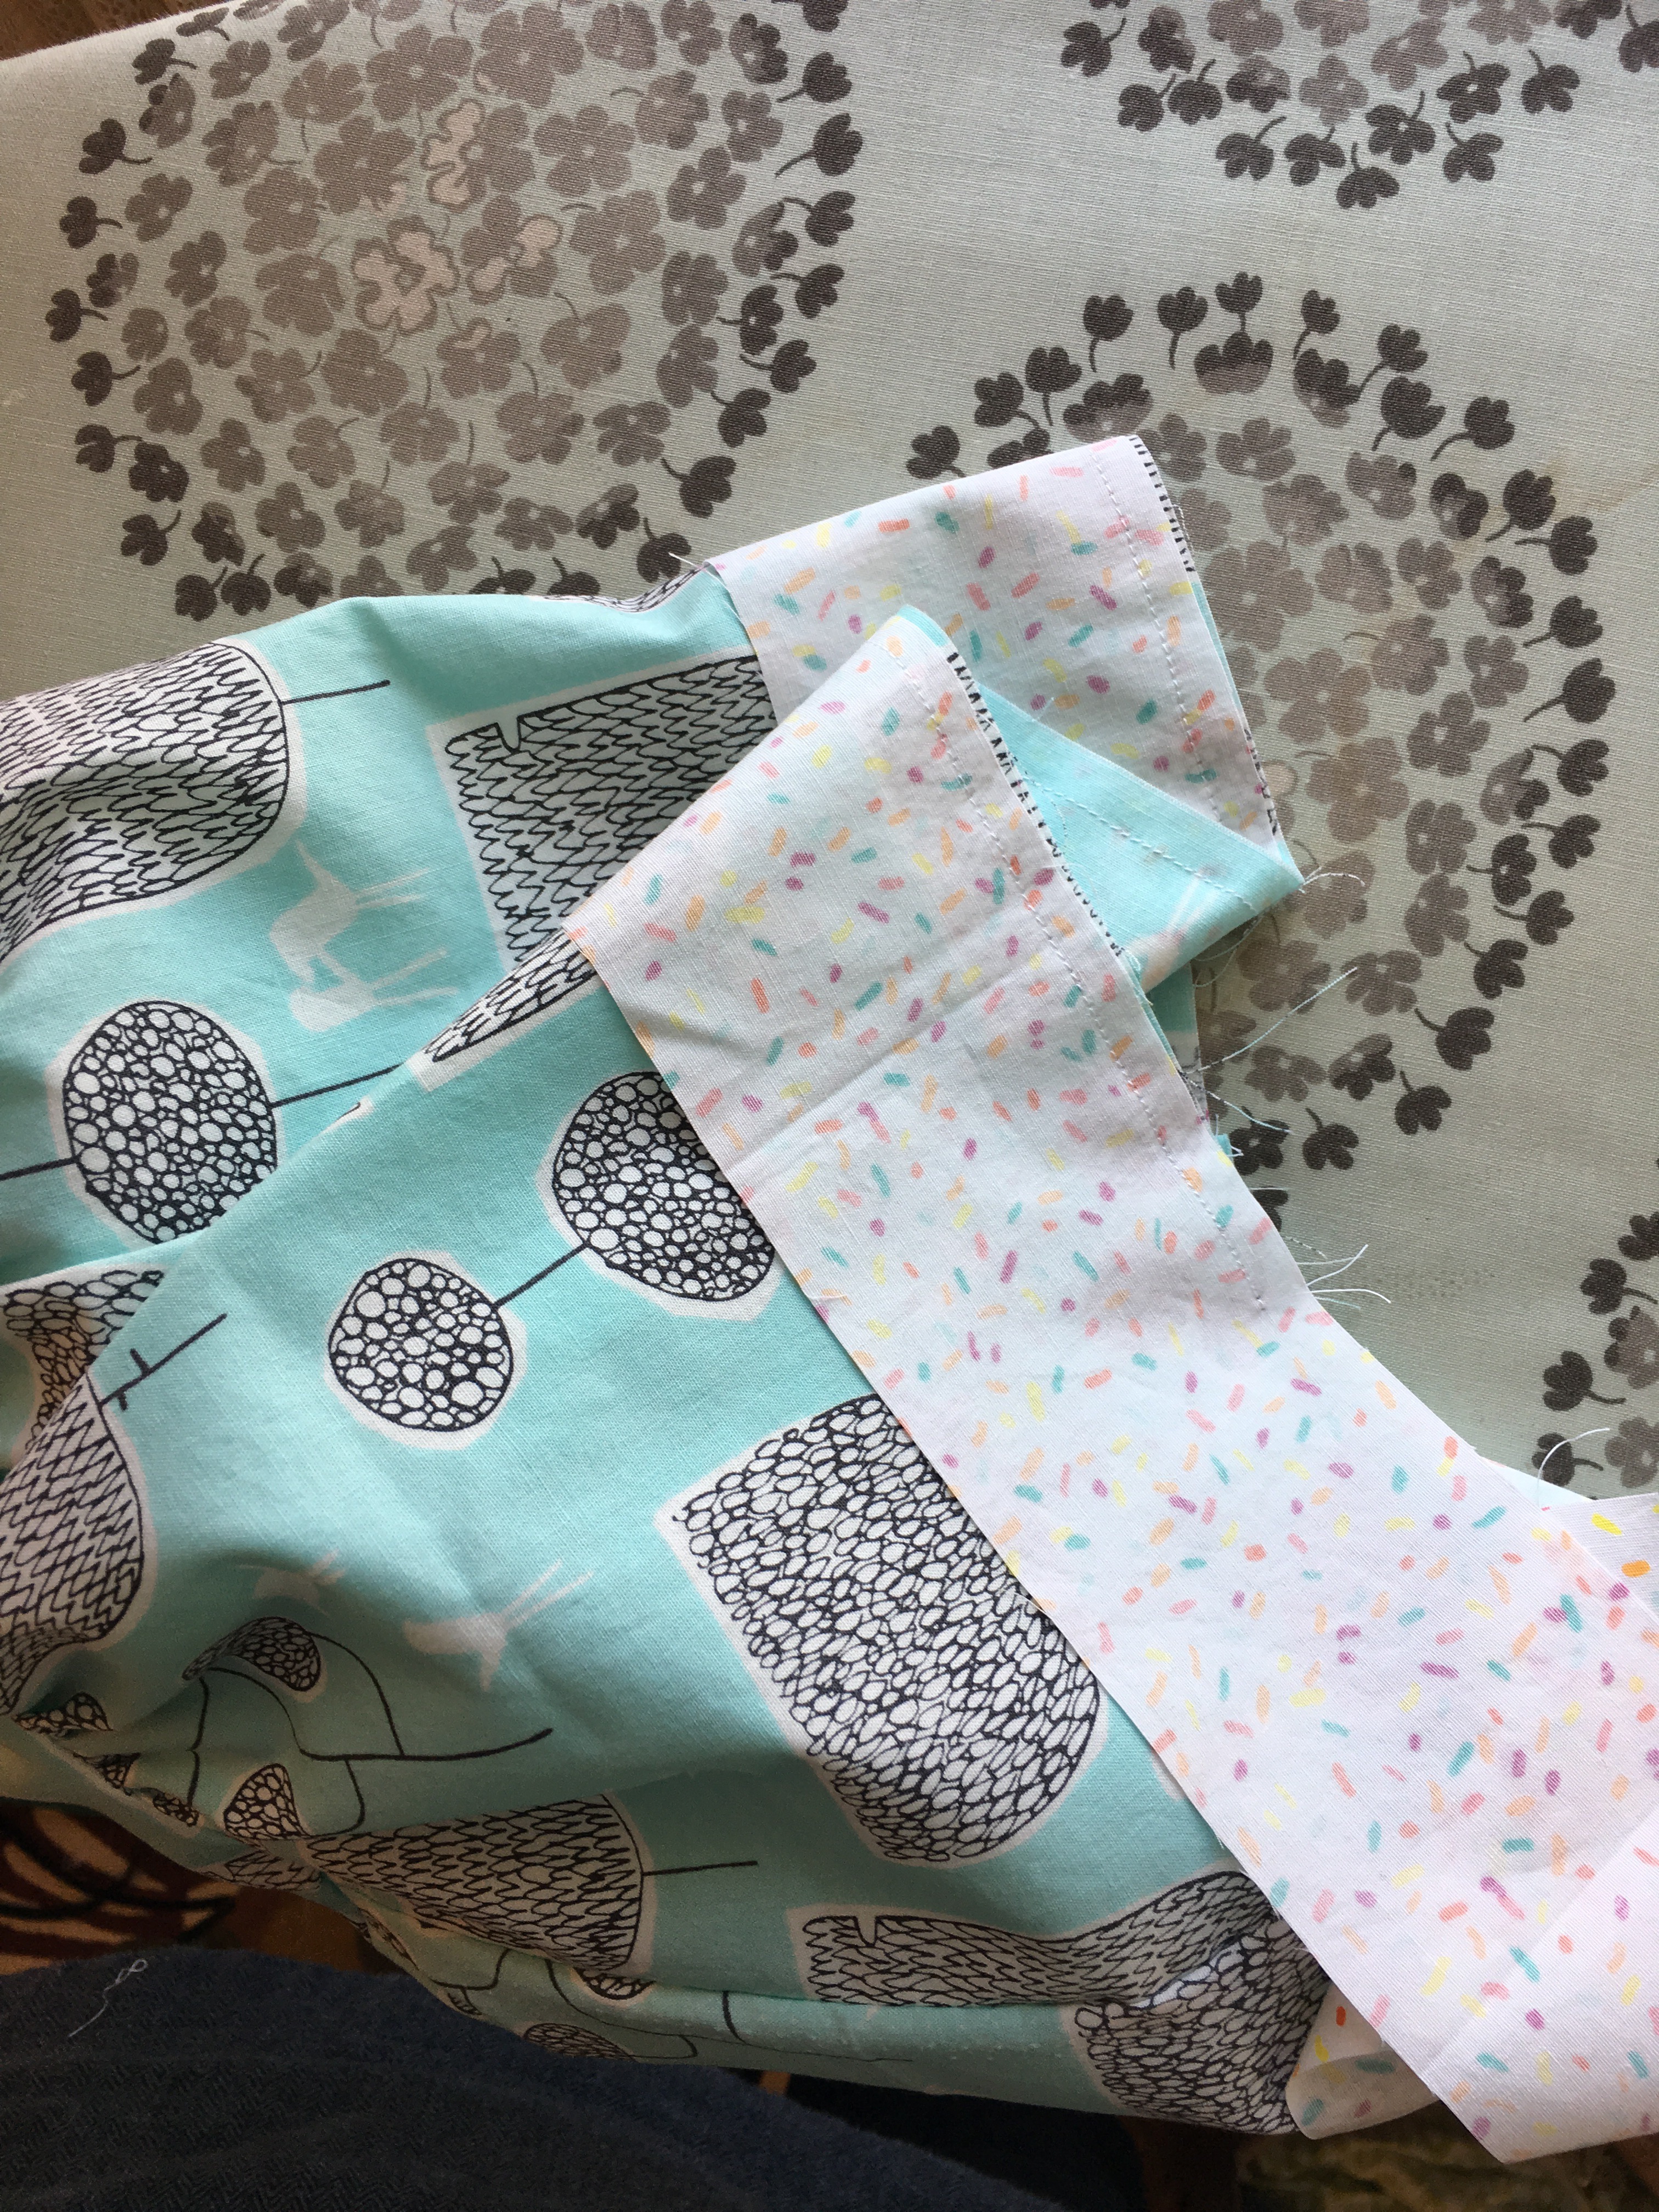 Attaching bodice.
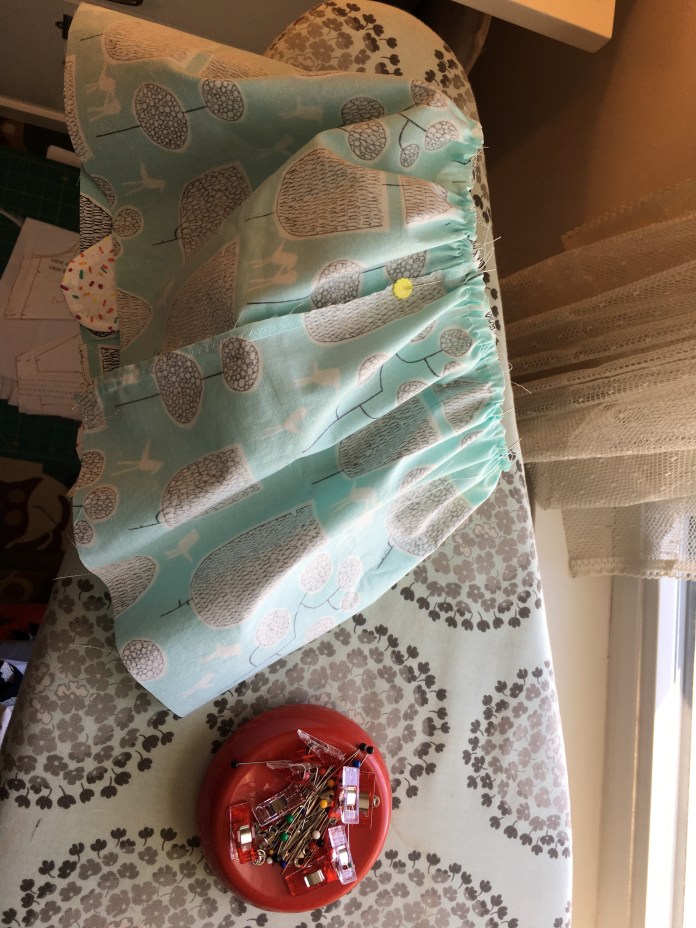 Such quick little seams to sew.
 One lesson learned, it you want to topstitch around the neck and armholes, wait until after you attach the front and back bodice pieces together. Ask me how I know that?
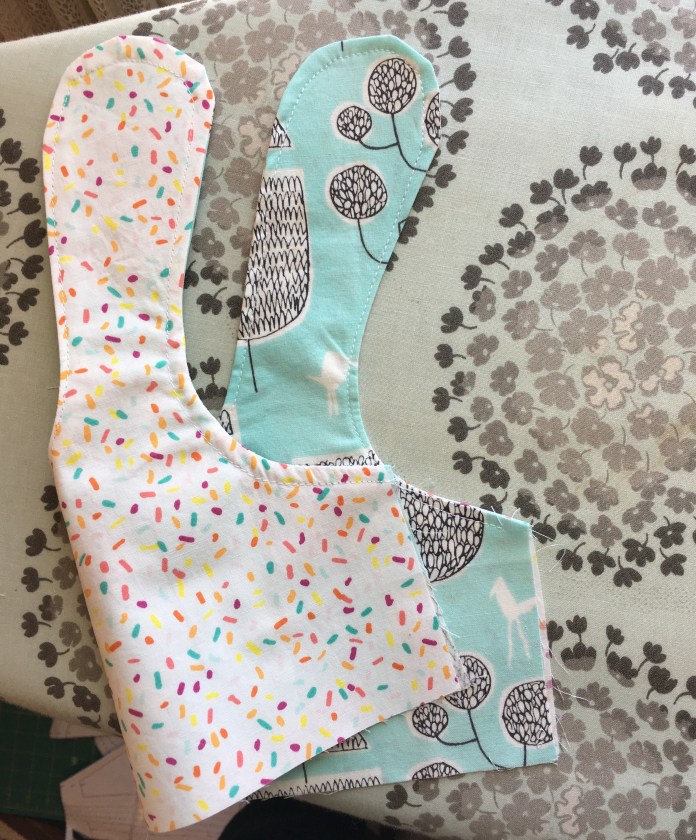 I got a little ahead of myself. But it all worked out in the end.
Tag Archives: Art Gallery Fabrics

Bias Binding my Gemma Tanks: the Good, the Bad and the Ugly-Part 1 of many
The first Gemma Tank I made was this one. Pictures of it as worn by me here.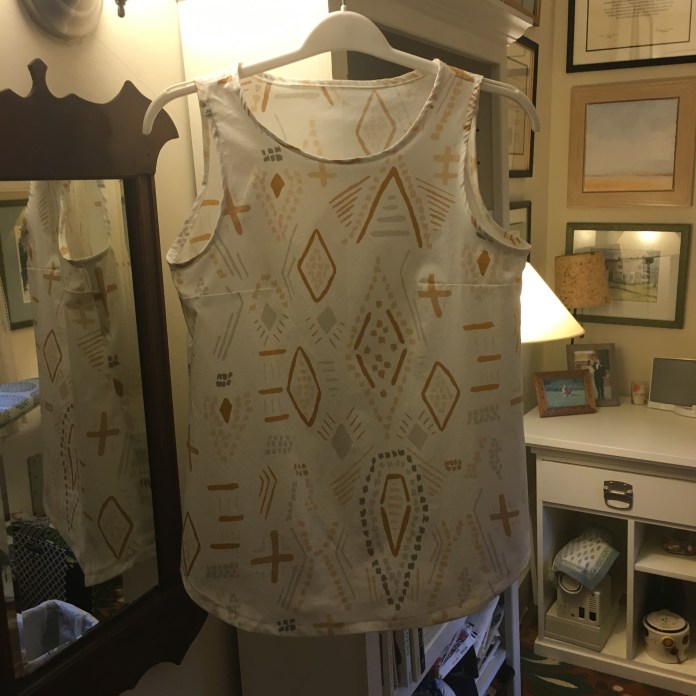 I cut a Medium with the higher neck option, although I shaved a small bit off the front of the neck. You can see approximately how much I took off below although the picture below is a different Gemma (made the same way). I just slid the pattern down and cut a bit lower using the same curve so that the edge would be below the collarbones.
 I also lengthened it by approximately two inches.
 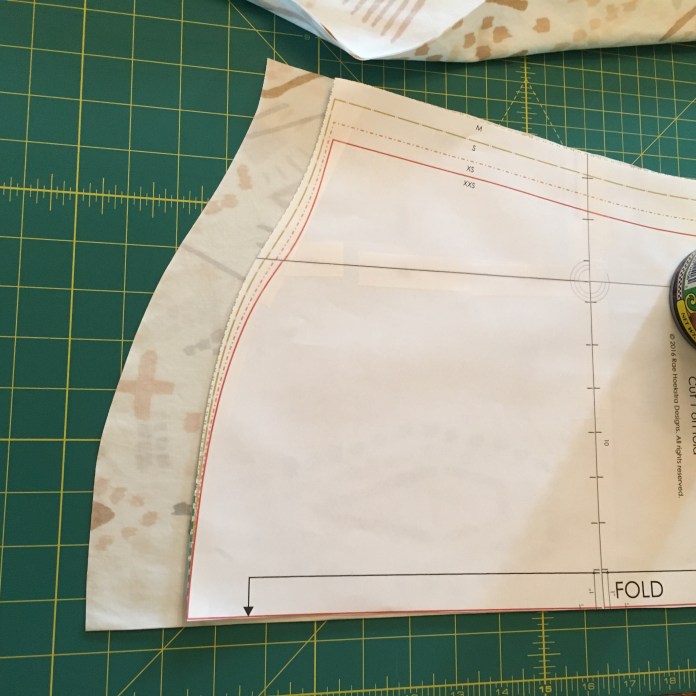 I mostly followed the directions for the bias binding using the traditional method with two changes: I cut my bias strips 1.5 inches instead of 1.25 since I sometimes find I don’t catch the whole edge with the narrower strip and I sewed from the front side on the edge of the binding rather than in the ditch. I find I can line things up better that way and I like the look of the stitching. You can see the position of the needle below. When I initially sew the binding to the edge, I use my presser foot as a visual seam guide and it is about 3/8 inch so my whole binding ends up being a bit wider.
 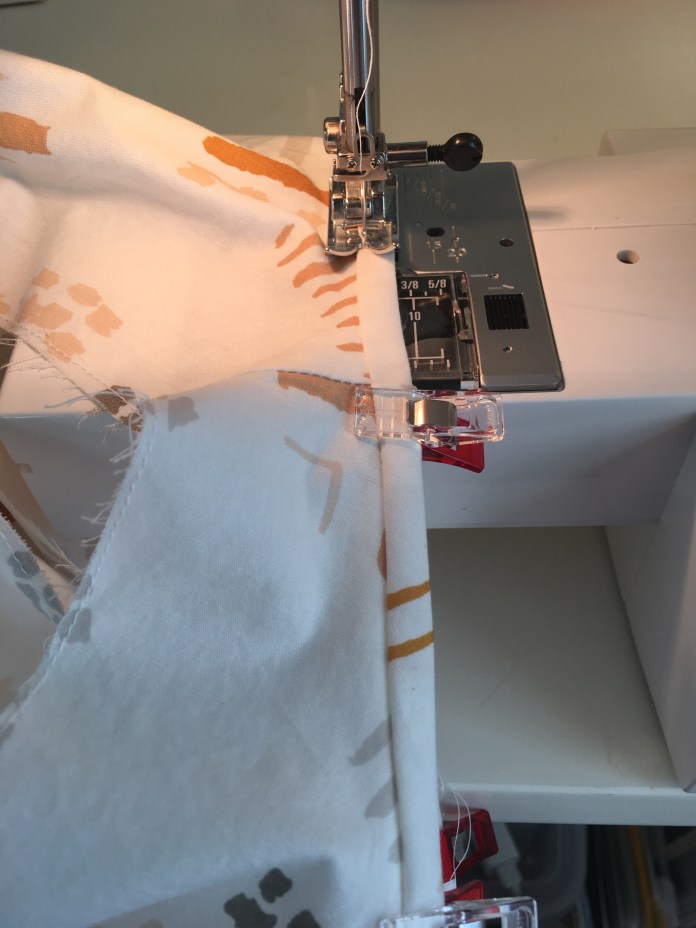 I used this beautiful cream colored Art Gallery quilting cotton by April Rhodes. I love this line and had previously made a Washi Dress with the same fabric in the green colorway, seen below.
 I was so happy with the feel of the fabric-it is soft and works beautifully for sewing garments. It is more like a lawn than quilting cotton. In fact, I bought another 3 yards of the green as a back up plan. I have done that only a few times but I was so happy with my Washi that I wanted to have extra to be able to make it again when I wear it out which I will since I wear it all the time. I often make little changes as I sew and then forget what I changed (I do the same thing when I cook) so I have learned to take pictures. I actually had to look at my picture below to remember that my bias strips were 1.5 inches.
 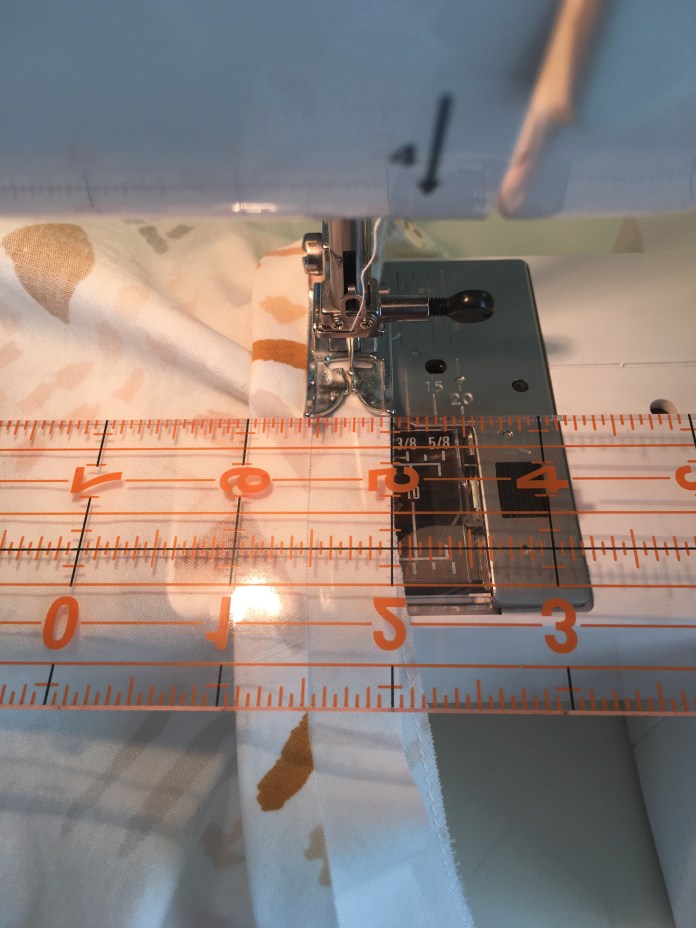 I don’t pin before I sew, I just hold the edges together and it generally works pretty well. Then I iron the stitching line and press the edge to the other side and use wonder clips to hold the bias binding in place before I sew the second seam which, as seen below in the finished version, is just to the inside of the ditch. It actually looks like it was sewn on the inside and flipped to the front using the topstitch method, the way Rae shows you here in this great tutorial. Fellow blogger Teri used this method beautifully when she made this great checked Gemma. I am not sure if I would find the topstitch method easier than what I currently do because I have never tried it but I am really happy with this sort of fake topstitch method I developed by mistake. I actually started doing it this way because I couldn’t sew as straight a seam in the ditch as I liked and had better results sewing just over a bit on the side of the seam. I am really happy with how it turns out when everything cooperates. The picture below was taken after several washings and I am still very happy with how this shirt turned out.
 I like using the wonder clips because I turn the blouse inside out and iron the binding to the wrong side and whereas I used to pin it in place on the wrong side and then flip it and have to move all the pins to the outside before sewing, the side doesn’t matter with the wonder clips and it saves a step. This is what the outside looks like before sewing the second seam.
 I also sewed a facing onto the hem of this Gemma using more of the binding tape. For some reason, I get a much neater hem doing this than just turning up the fabric. Although it might seem like more work, the seam line gives a visual place to turn up the edge, I iron like crazy and everything just turns out neater. I also like a slightly wider hem than the pattern calls for because I find it lies flatter and doesn’t curl up.
 I do a lot of ironing when I make the hems this way. I have described this in several previous blogs. I often use contrasting fabric for fun. You can see other examples here, here, here and here. Pictures of the hem facing process below.
 As those of you who follow me on instagram know, I have been in the midst of sewing quite a few Gemmas. One might even call it Gemma madness. I have another binding method that I like even better that I will post about soon (also non-traditional.) Stay tuned!
Gemma Tank Five Ways
Version #1 of the Gemma Tank Pattern by Made By Rae. Size medium. Higher neckline version which I cut a bit lower. No other adjustments except adding 2 inches to the length. Fabric is from the Bound Collection by April Rhodes. Front view: Back view:
 Version number 2: Size medium. Same adjustments as version #1 but decided after cutting out the pattern to use contrasting fabric left over from my Luna Pants for bias binding. I deliberately sewed it in a way that lets it be seen (fake piping method which I describe in my Washi Madness and Washi Details posts). Because I didn’t add a seam allowance, the shoulders are a little narrow. But I love this tank because I love the fabric from the Lucky Strikes collection from Cotton and Steel. This tank falls into the very rare category of garments I love so much that I went out and bought the fabric again as a back up to make a second version if anything happens to the first. This is one of four garments that fit that category and yes, I bought another 2 yards of the fabric the other day (thank you Alewives Fabric where it is still available.) Front view:
 Back view:
 Side view:
 Version number 3. I made a muslin in size Small for my stepdaughters to try since they have a birthday coming up and there is some Octopus fabric just crying out to be a tank top. I tried it on and I liked the closer fit for the lower scooped neck so I made this version with Wood Block fabric from the Mesa collection of Cotton and Steel. Still available in green at Fabric.com and in both colorways at Hawthorne Threads. I am seriously contemplating buying the blue version because I love how well this fabric suits the pattern. I love how the fit feels on but I think I need to try another version cutting between the Small and Medium lines. The Medium is a little more blousy than I like. I didn’t realize it until I wore it all day. And the Small gets a little tight in the upper bust and I think the smaller size is a little less flattering to the bust. The drape of the medium is prettier than the tighter fit for those of us who are small busted but I like them both. It is sort of like having two patterns making the two versions (high neck vs scoop neck) in different sizes. I lengthened this one by 1 inch and used facing for the hem. Front view.
 I used chambray left over from several previous projects that I purchased over 20 years ago in Brooklyn for the bias binding which I used on the neck, armholes and as a facing for the hem.
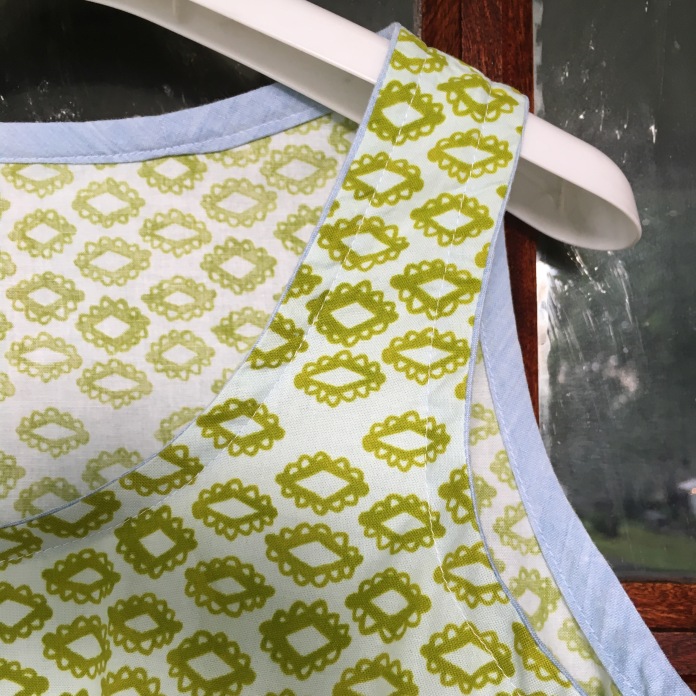 I swear that this fabric regenerates itself while I sleep. There is always a bit more for one more project. One of my children’s favorite childhood books was this one which this reminds me of. A wonderful book which we discovered through Chinaberry Books which is an amazing parenting resource for all you parents out there.
  Gemma hanging on front door. #goodlight
 Gemma hanging in a window.
 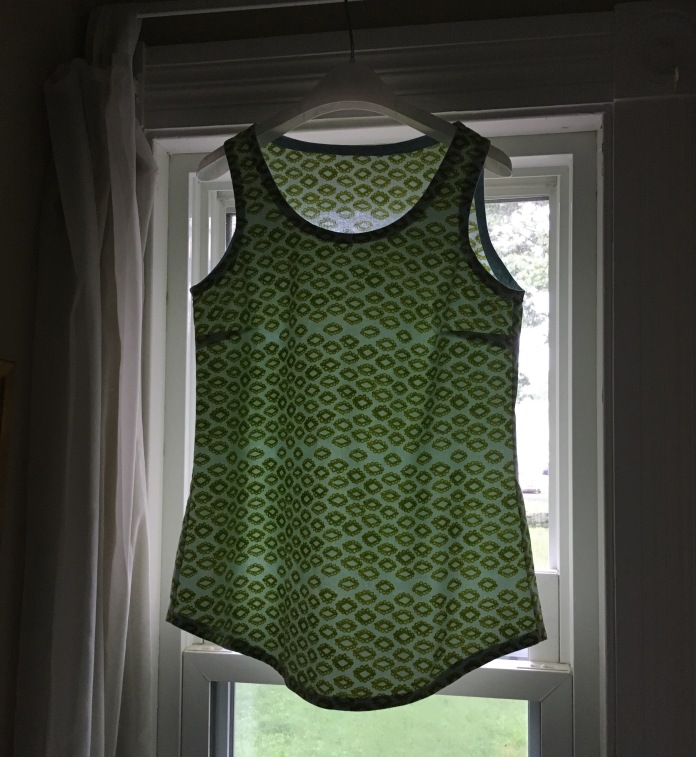 More pictures of my woodblock Gemma below. It might be my favorite. It is hard to choose.
  The Gemma tank is perfect with a cardigan:
 Side view:
 with Sadie the wonder dog who is not enjoying the Dog Days of Summer
  action shot with dog below, (note to self: add bra-strap holders) but the fit is really good as you can see.
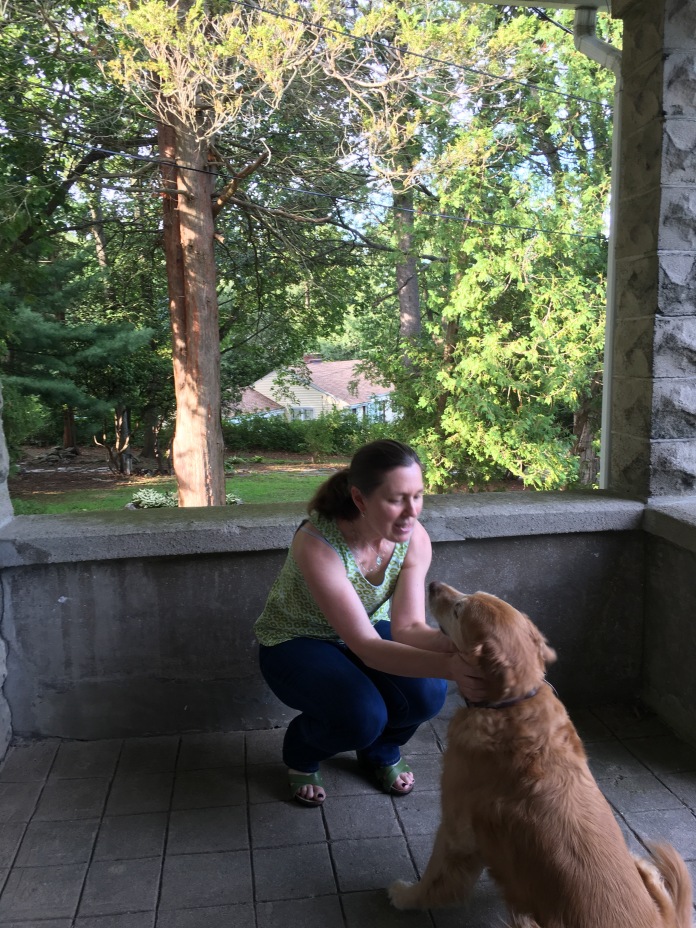 All of these tops have already been washed and worn. Even though the Dog Days of Summer are supposed to have been over August 11th-at least according to the internet- they are in full force in Connecticut. It has been unbearable. These tanks are perfect for these hot days. Sadie the wonder dog is not feeling so wonderful d/t the heat. #summerinconnecticut
 I have two more Gemmas in the works. This teal version in Cotton and Steel lawn from the Cookie Book collection just needs binding. I haven’t yet decided whether to bind it with matching binding on the outside like my April Rhodes Gemma or with contrasting pink binding on the inside like my other two Gemmas. I may split the difference and use the pink for a hem facing and do the bindings in the traditional way called for by the pattern a la version 1. Still deciding and still #toohottosew in CT so it will have to wait.
 You may not be able to see it in the photo but I stay-stitched all my seams. Rae taught me well!
 This final version is Art Gallery voile purchased on sale from the always awesome The Cloth Pocket, my neighborhood store in Austin, Texas. I love buying fabric there online and in person. I feel as though I have a whole group of sewing friends cheering me on, which I do. I lined it with organic cotton batiste from Fabric.com which I have used successfully for several projects. It just needs hemming. This was sort of an action shot. I was turning from back to front. But it gives you a good idea of the fit. I did add a bit of a seam allowance to the armholes but used more than I added. I lined it using the good old MBR sausage method which I have posted about many times. I will do a more detailed how-to blog soon.
 Back:
Back: So clearly I am enjoying this pattern. It is quick and easy sew and it allows you to get a little crazy with fabric because while you might not make a whole dress of a funky fabric, a tank top is a small enough commitment (and everything goes with jeans) so I am now looking at my stash in a new way and seeing so many possibilities. I will post again later this week with details and how-too info. Next up will be to try a Small-Medium version to see if that is the perfect Goldilocks fit solution and to get going on many tanks in size Small for the birthday girls. Action shot below. #jumpingforjoy because the heat is lifting:)
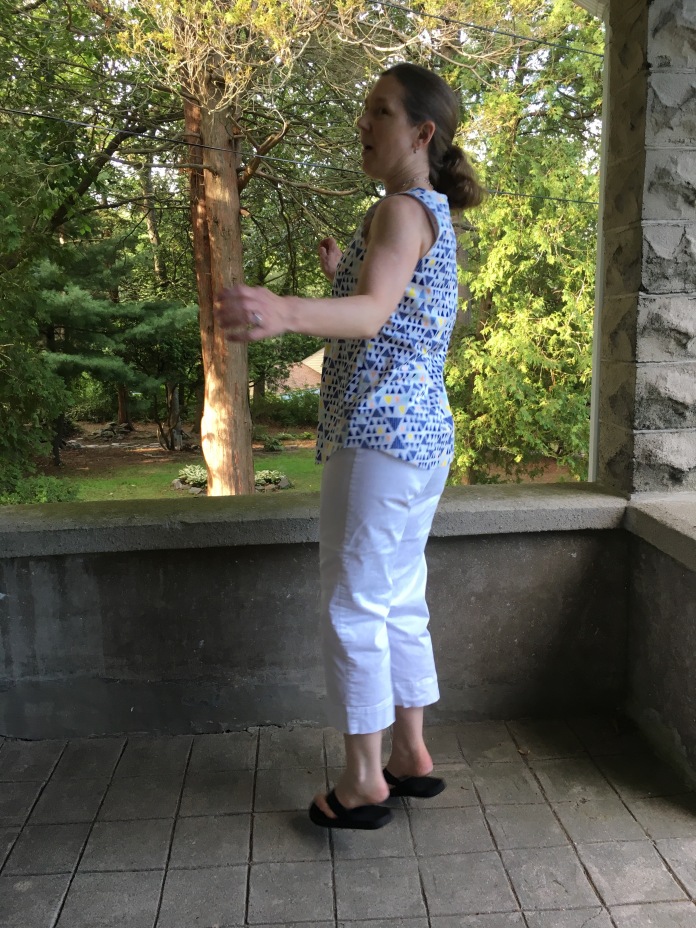
Please note that that my blog is not monetized and has no sponsors. I provide links to share online resources that I enjoy using. I do not derive any financial benefit if you click on links in my blog.
