Last winter my husband and I spent a bit of time in our local Goodwill Thrift stores buying old sweaters for an afghan project for my stepdaughters which you can see in this post and I came across a plaid men’s oxford shirt in great shape. I liked the colors and thought it would be good for binding or facings and then it sat on my shelf until about a month ago when I discovered the Gemma Tank pattern by Made By Rae and embarked on a month-long tank-making frenzy that continues to this day. When I saw this linen version by Rae’s cousin Jess, I thought I would use some leftover woven cotton that has a linen-y look to it (previously purchased at Joanne’s for a Bianca dress that I wear all the time) and use the plaid for the bias binding. But then I realized that I probably had enough of the plaid to make it into its own Gemma, so that is what I did (before binding below). Simultaneously, almost, I cut out the blue woven material to make that version of the Gemma. Although I had planned to use the plaid shirt above to bind the blue Gemma below and some of the blue scraps to bind the plaid, I ended up with another plaid shirt in the mix.
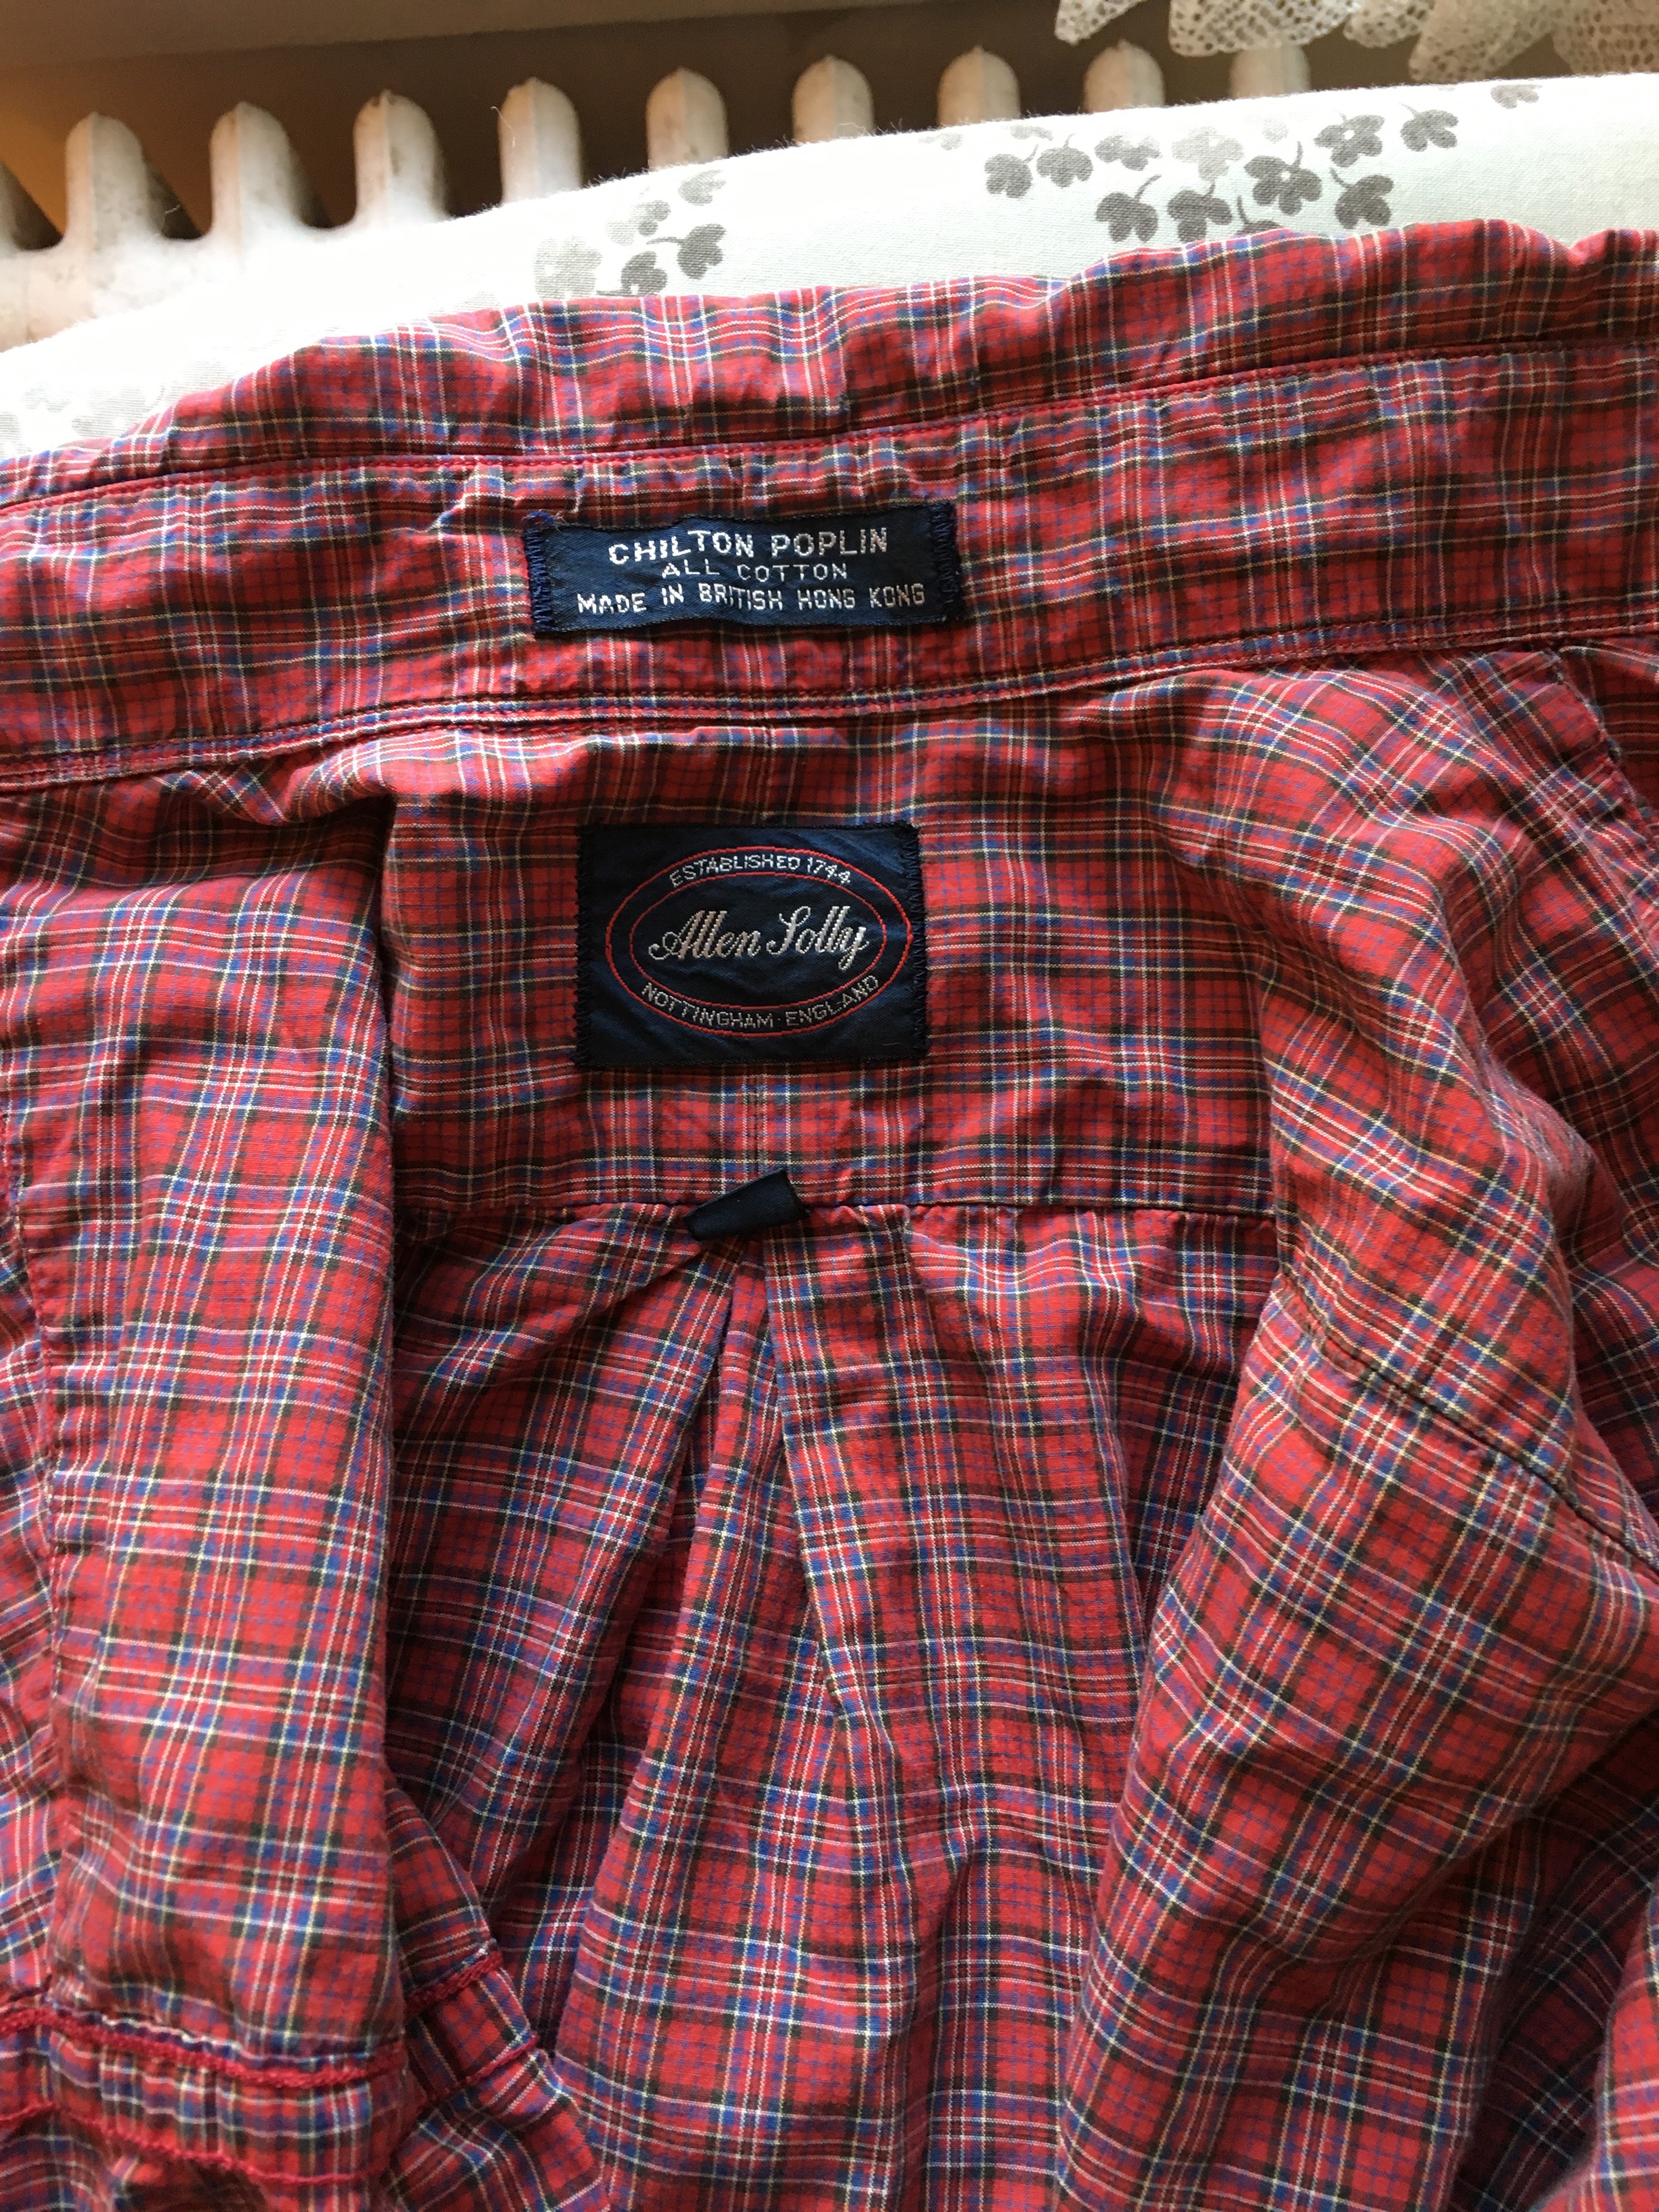
My husband saw how much fun I was having repurposing the Goodwill plaid shirt and gave me one of his from his closet that didn’t fit him. And I liked how it went with the blue as you can see below. I ended up using a lighter blue chambray to bind shirt number one (are you confused yet?) only because I had it leftover from binding my Wood Cut Gemma seen in this post and the extra was on my sewing table and I happened to notice how nicely it went with the plaid-serendipity. My husband’s shirt below (this is the before picture.) Who knew he had such a treasure hidden among the white and blue oxford shirts? Great quality and a perfect match.
 I had both these tanks sewn up and had started the binding several weeks ago but then I set them aside to make some birthday tanks for my stepdaughters (twins) which I will blog about some day. (so cute-both the girls and the shirts)
So in the process of making these shirts, and although I still have quite a few that still need binding, I have had some successes and some not-so-successful results. I previously blogged about my version of the traditional binding that ends up looking like a topstitched binding. But the binding I like best is the version I used for these plaid/chambray Gemmas and for my Wood Cut Gemma and the girls’ Octopus Gemmas seen below.
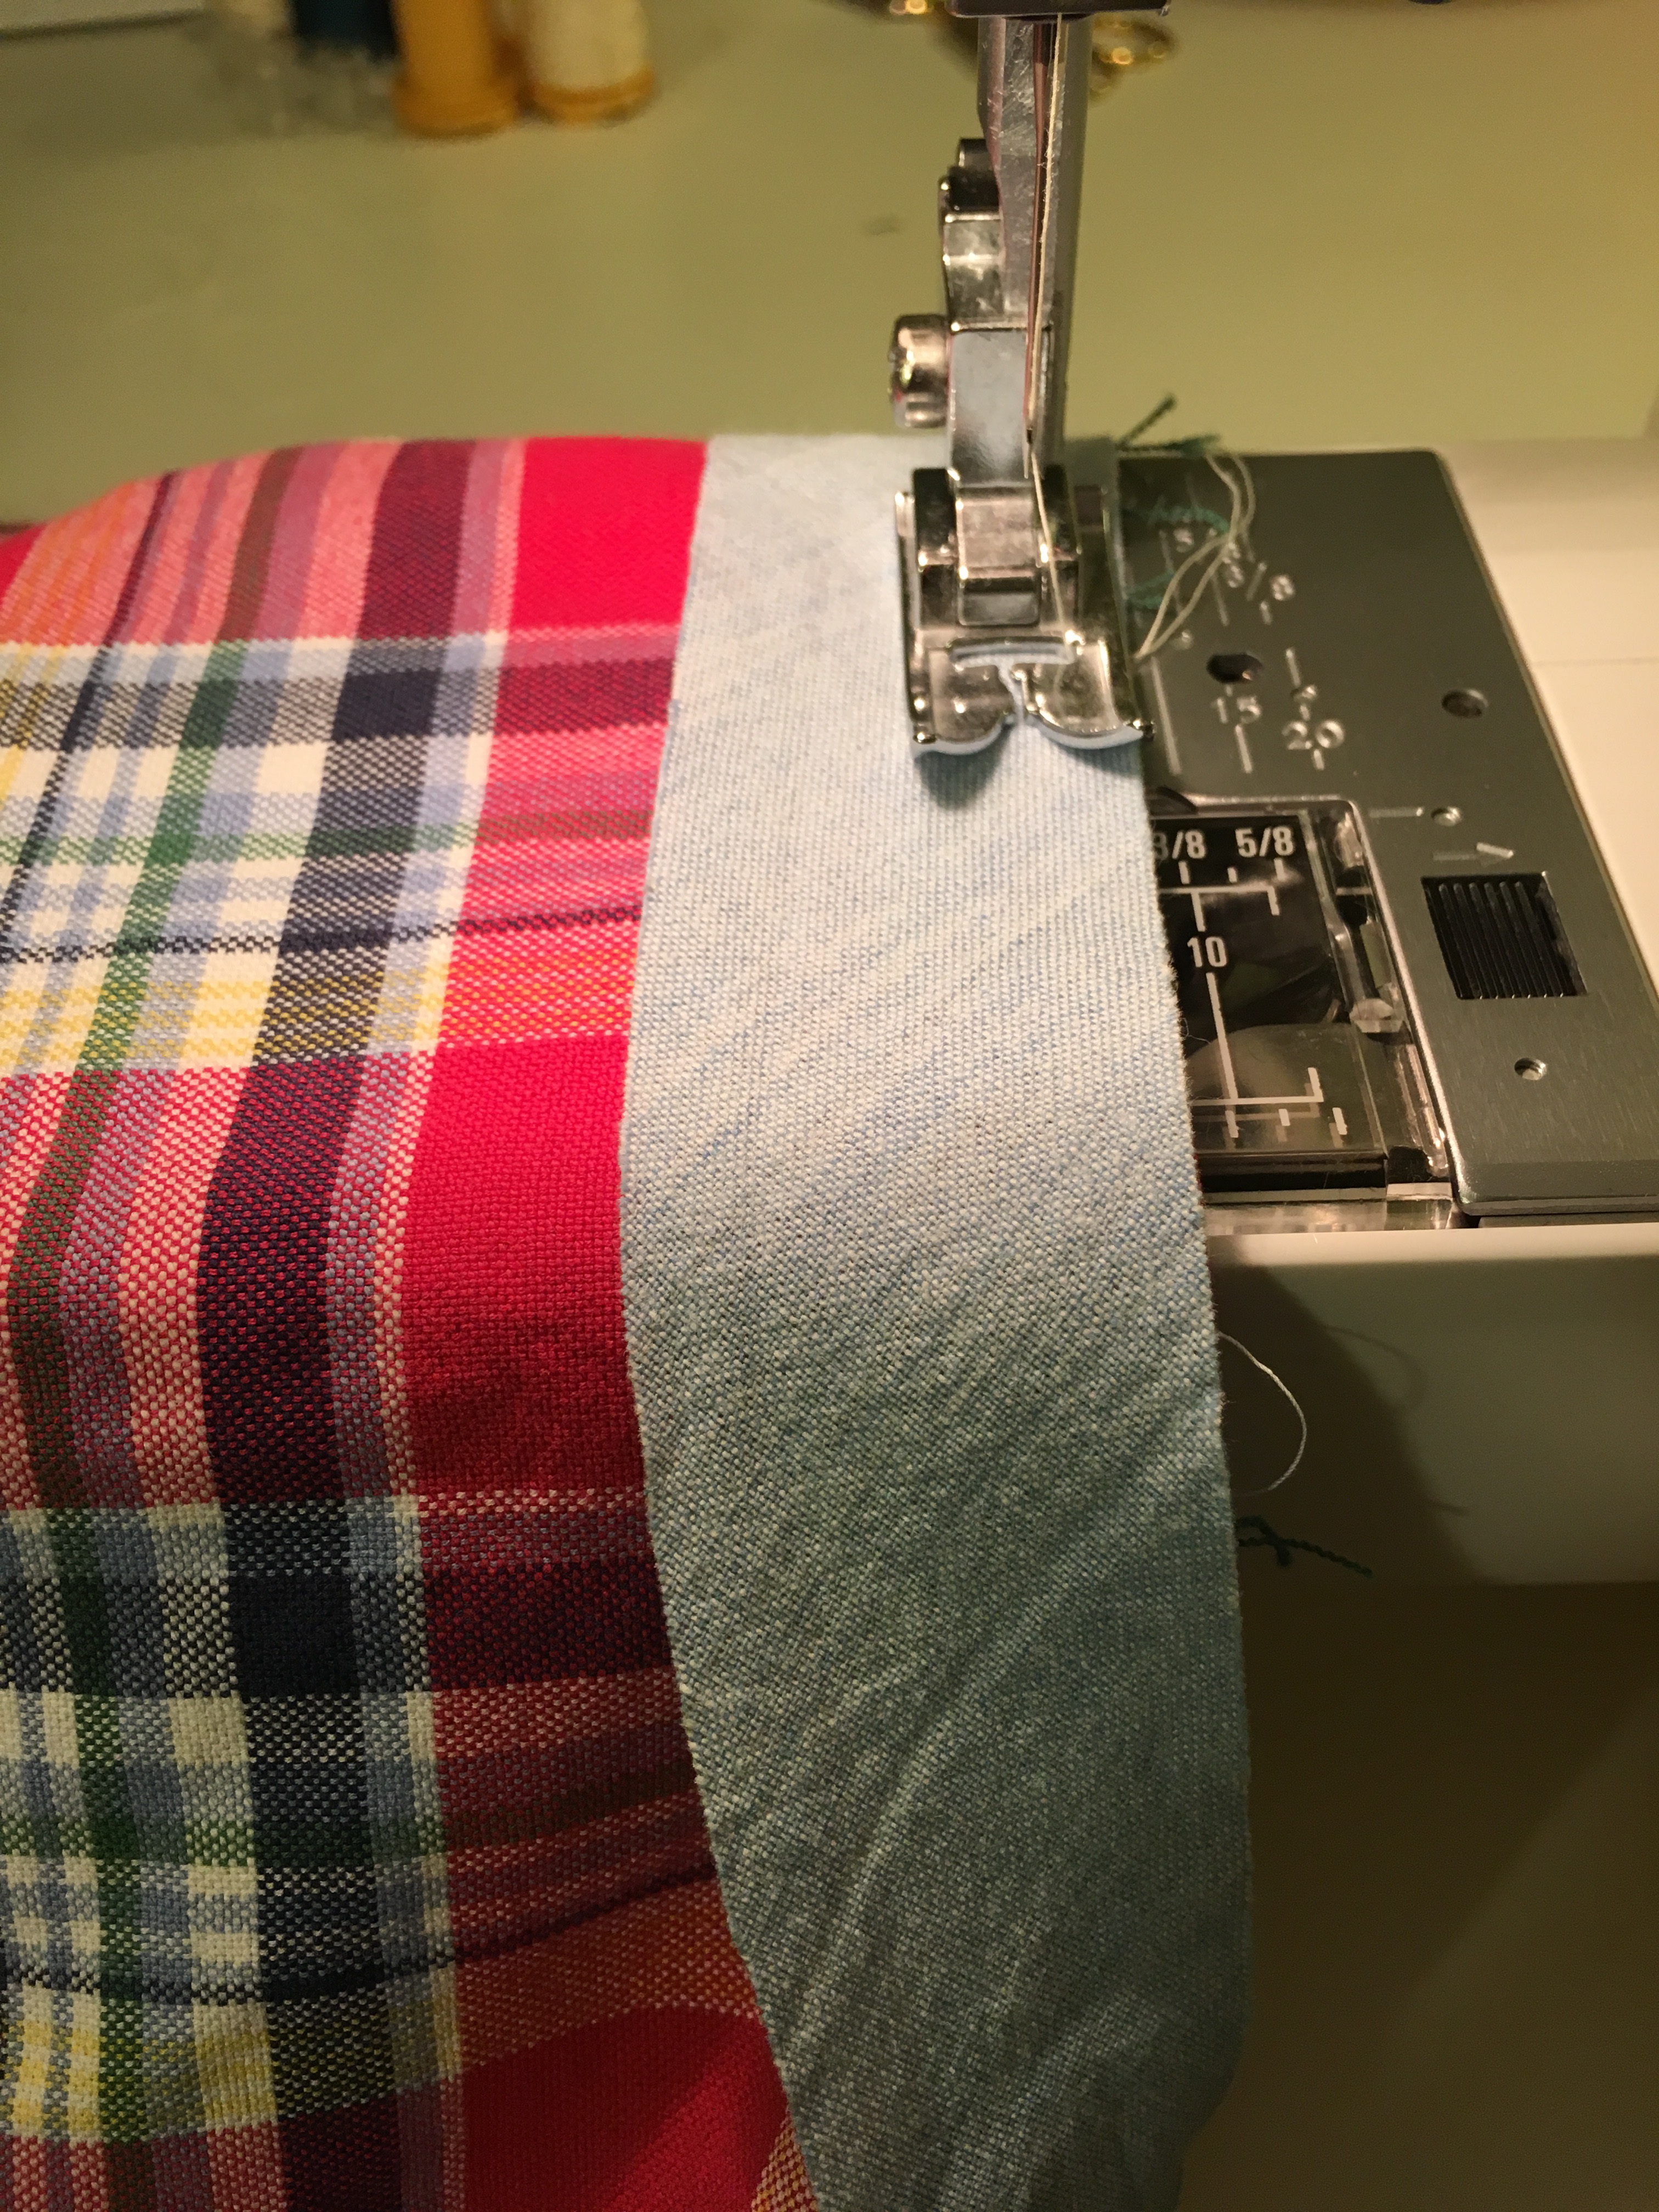
It resembles the french binding technique that Rae explains (all three of her binding tutorials are terrific) but since I just made it up as I went along, I found that I am doing something different than she teaches (I made these Gemmas before the binding tutorials were available) so I am sharing my approach in case it is helpful to others. First, I usually cut my binding strips 1.5 inches wide, although I believe the light blue chambray below is 1.25. I sew it with right sides together (a mistake I have made repeatedly as I make the Gemmas is to sew the binding to the inside instead of the outside). I don’t pin. I use the presser foot as a guide and I end up with a seam allowance that is between 1/4 and 3/8 of an inch.  I initially tried the method of overlapping the ends that Rae describes in her pattern but I was not happy with the results so I leave a tail when I start sewing so I can stop a couple inches before the end and sew the ends together. Rae shows how to do this in her french binding tutorial. By the way, when I make binding tape, I just join the pieces using straight edges, I don’t cut the 45 degree angles that the tutorials recommend. I don’t find that there is enough bulk to bother me and it is quicker. Sacrilege I know.
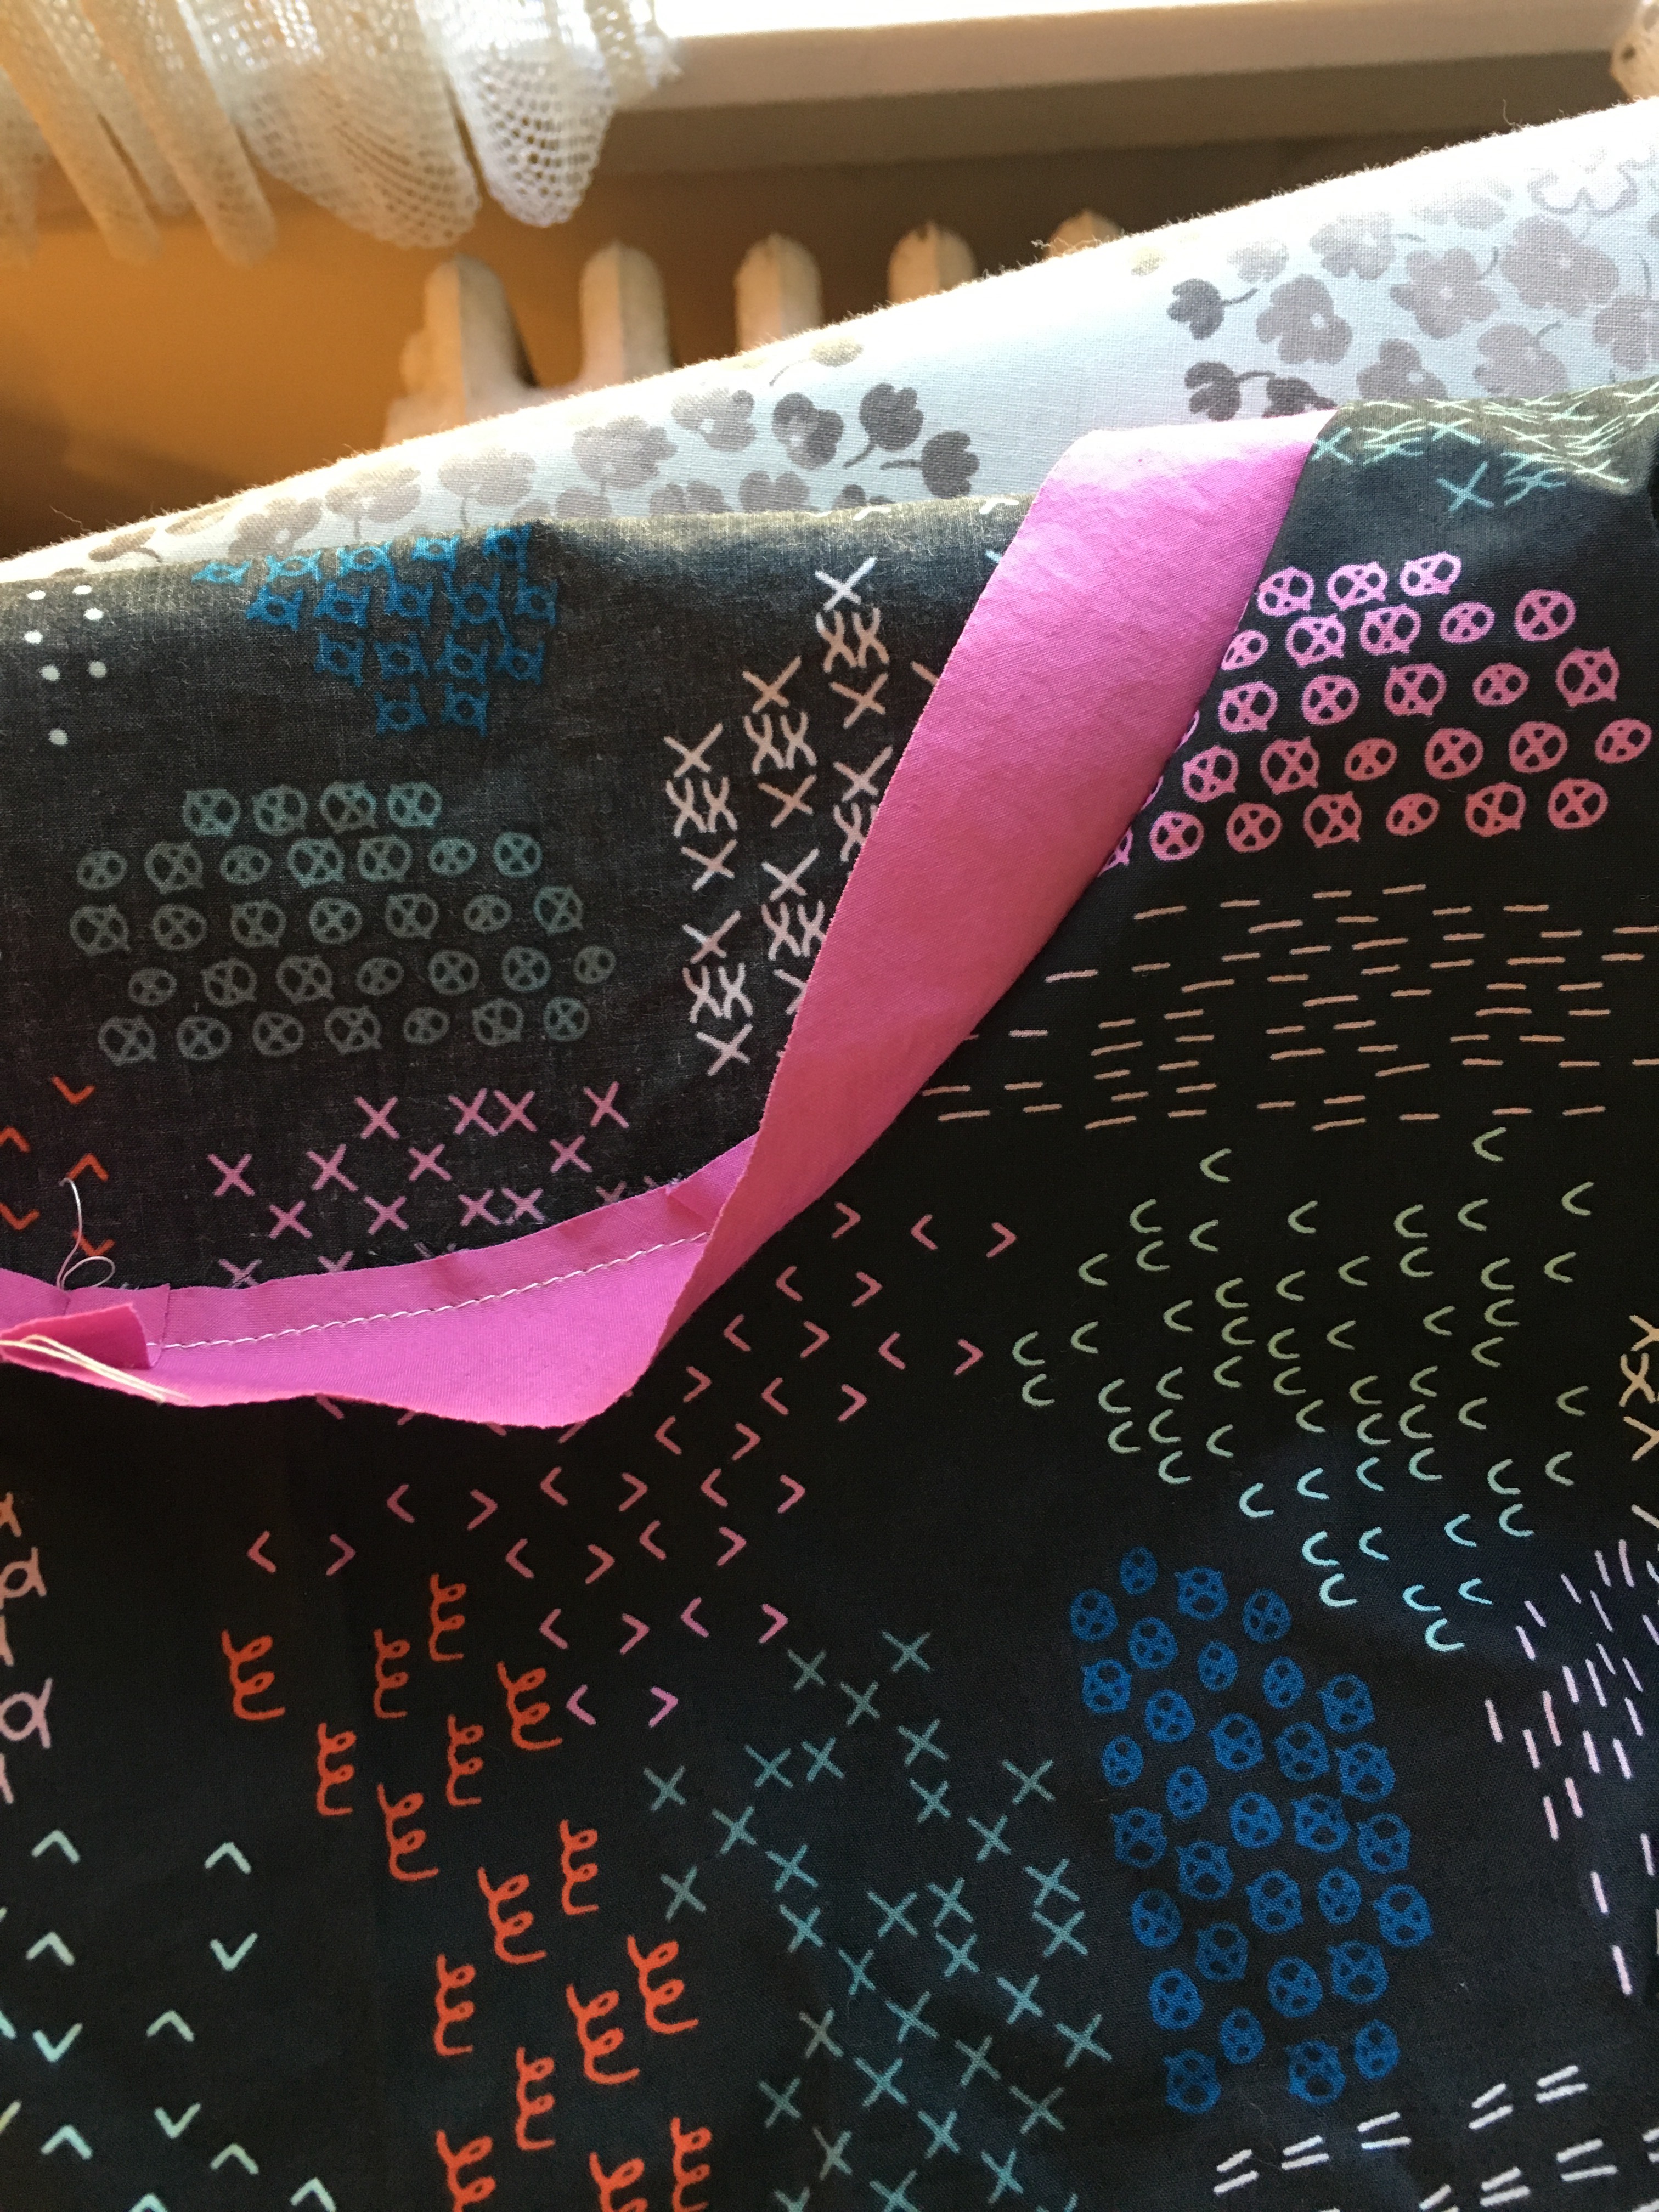
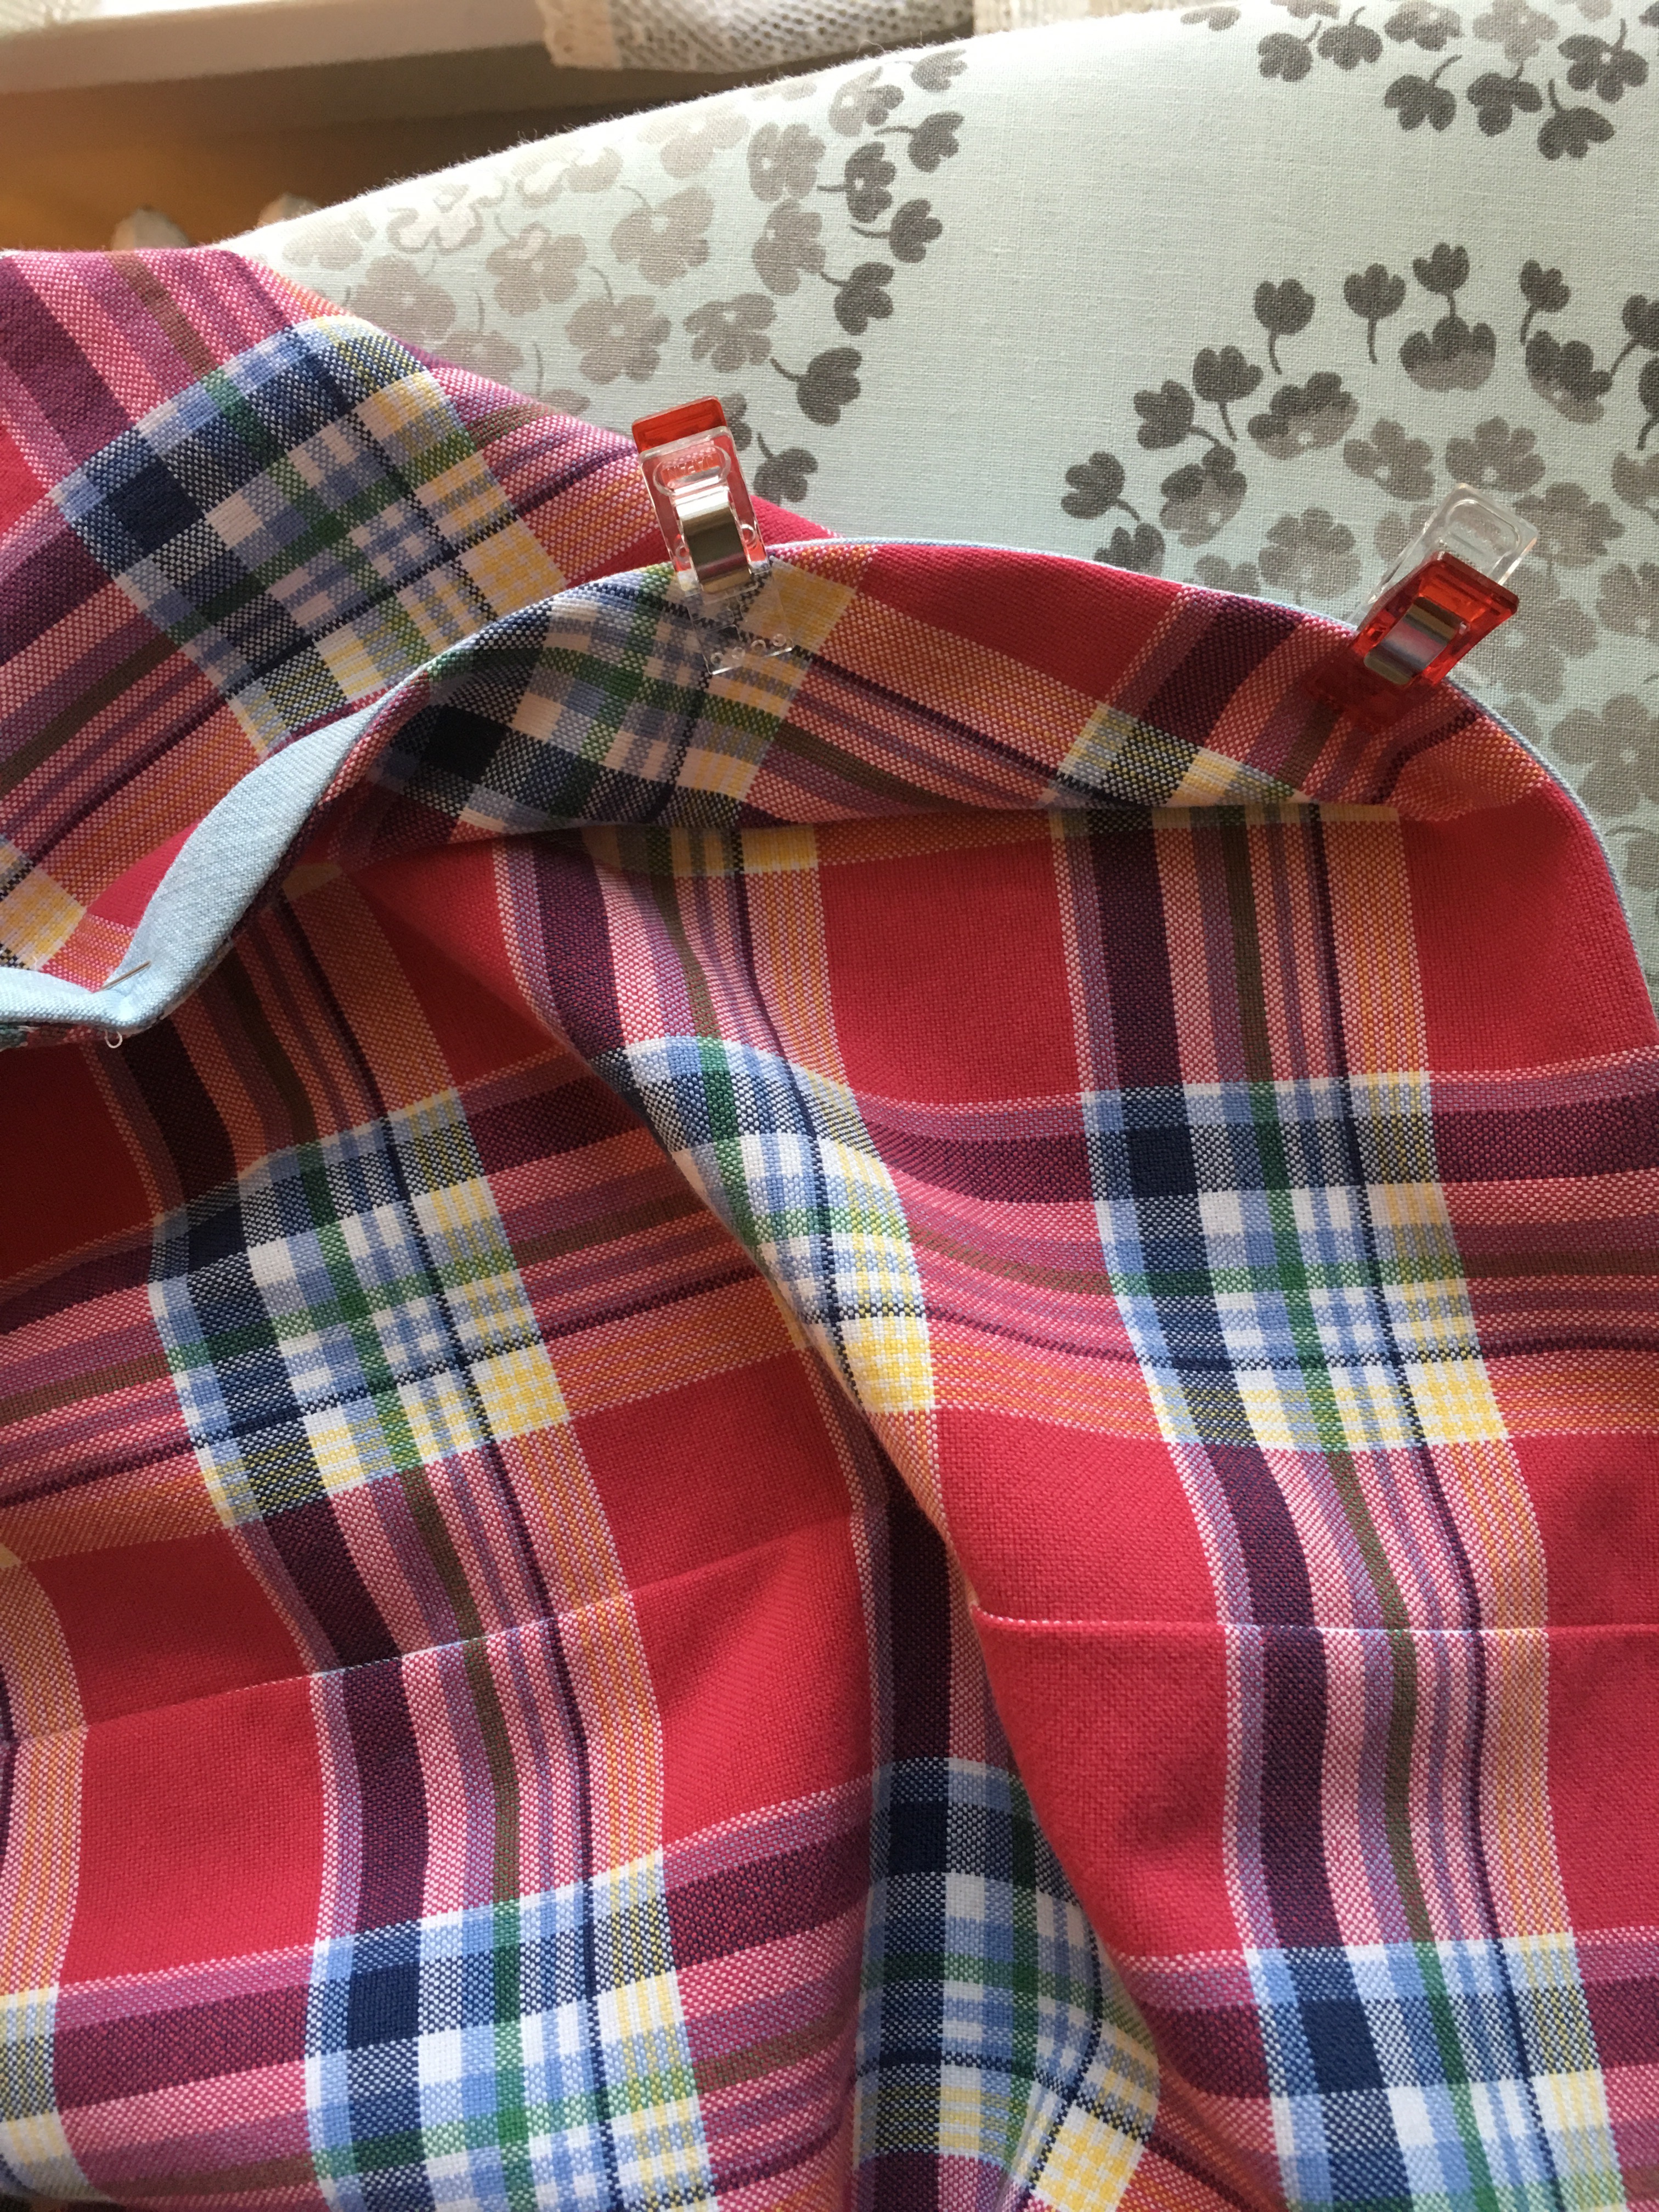
 As you can see above, I don’t iron the fold into the binding tape prior to sewing it to the garment, which is different than the tutorials. After sewing the seam, I gently press the seam and then press from the wrong side of the garment and fold the binding tape inward so the edge meets the stitching line. I will show more pictures of this below. Then I iron and then I fold again using the seam where the shirt edge meets the binding and so I have a sort of tri-fold sandwich. Then I use wonder clips to hold it in place. I try to make the width of the folded fabric even.
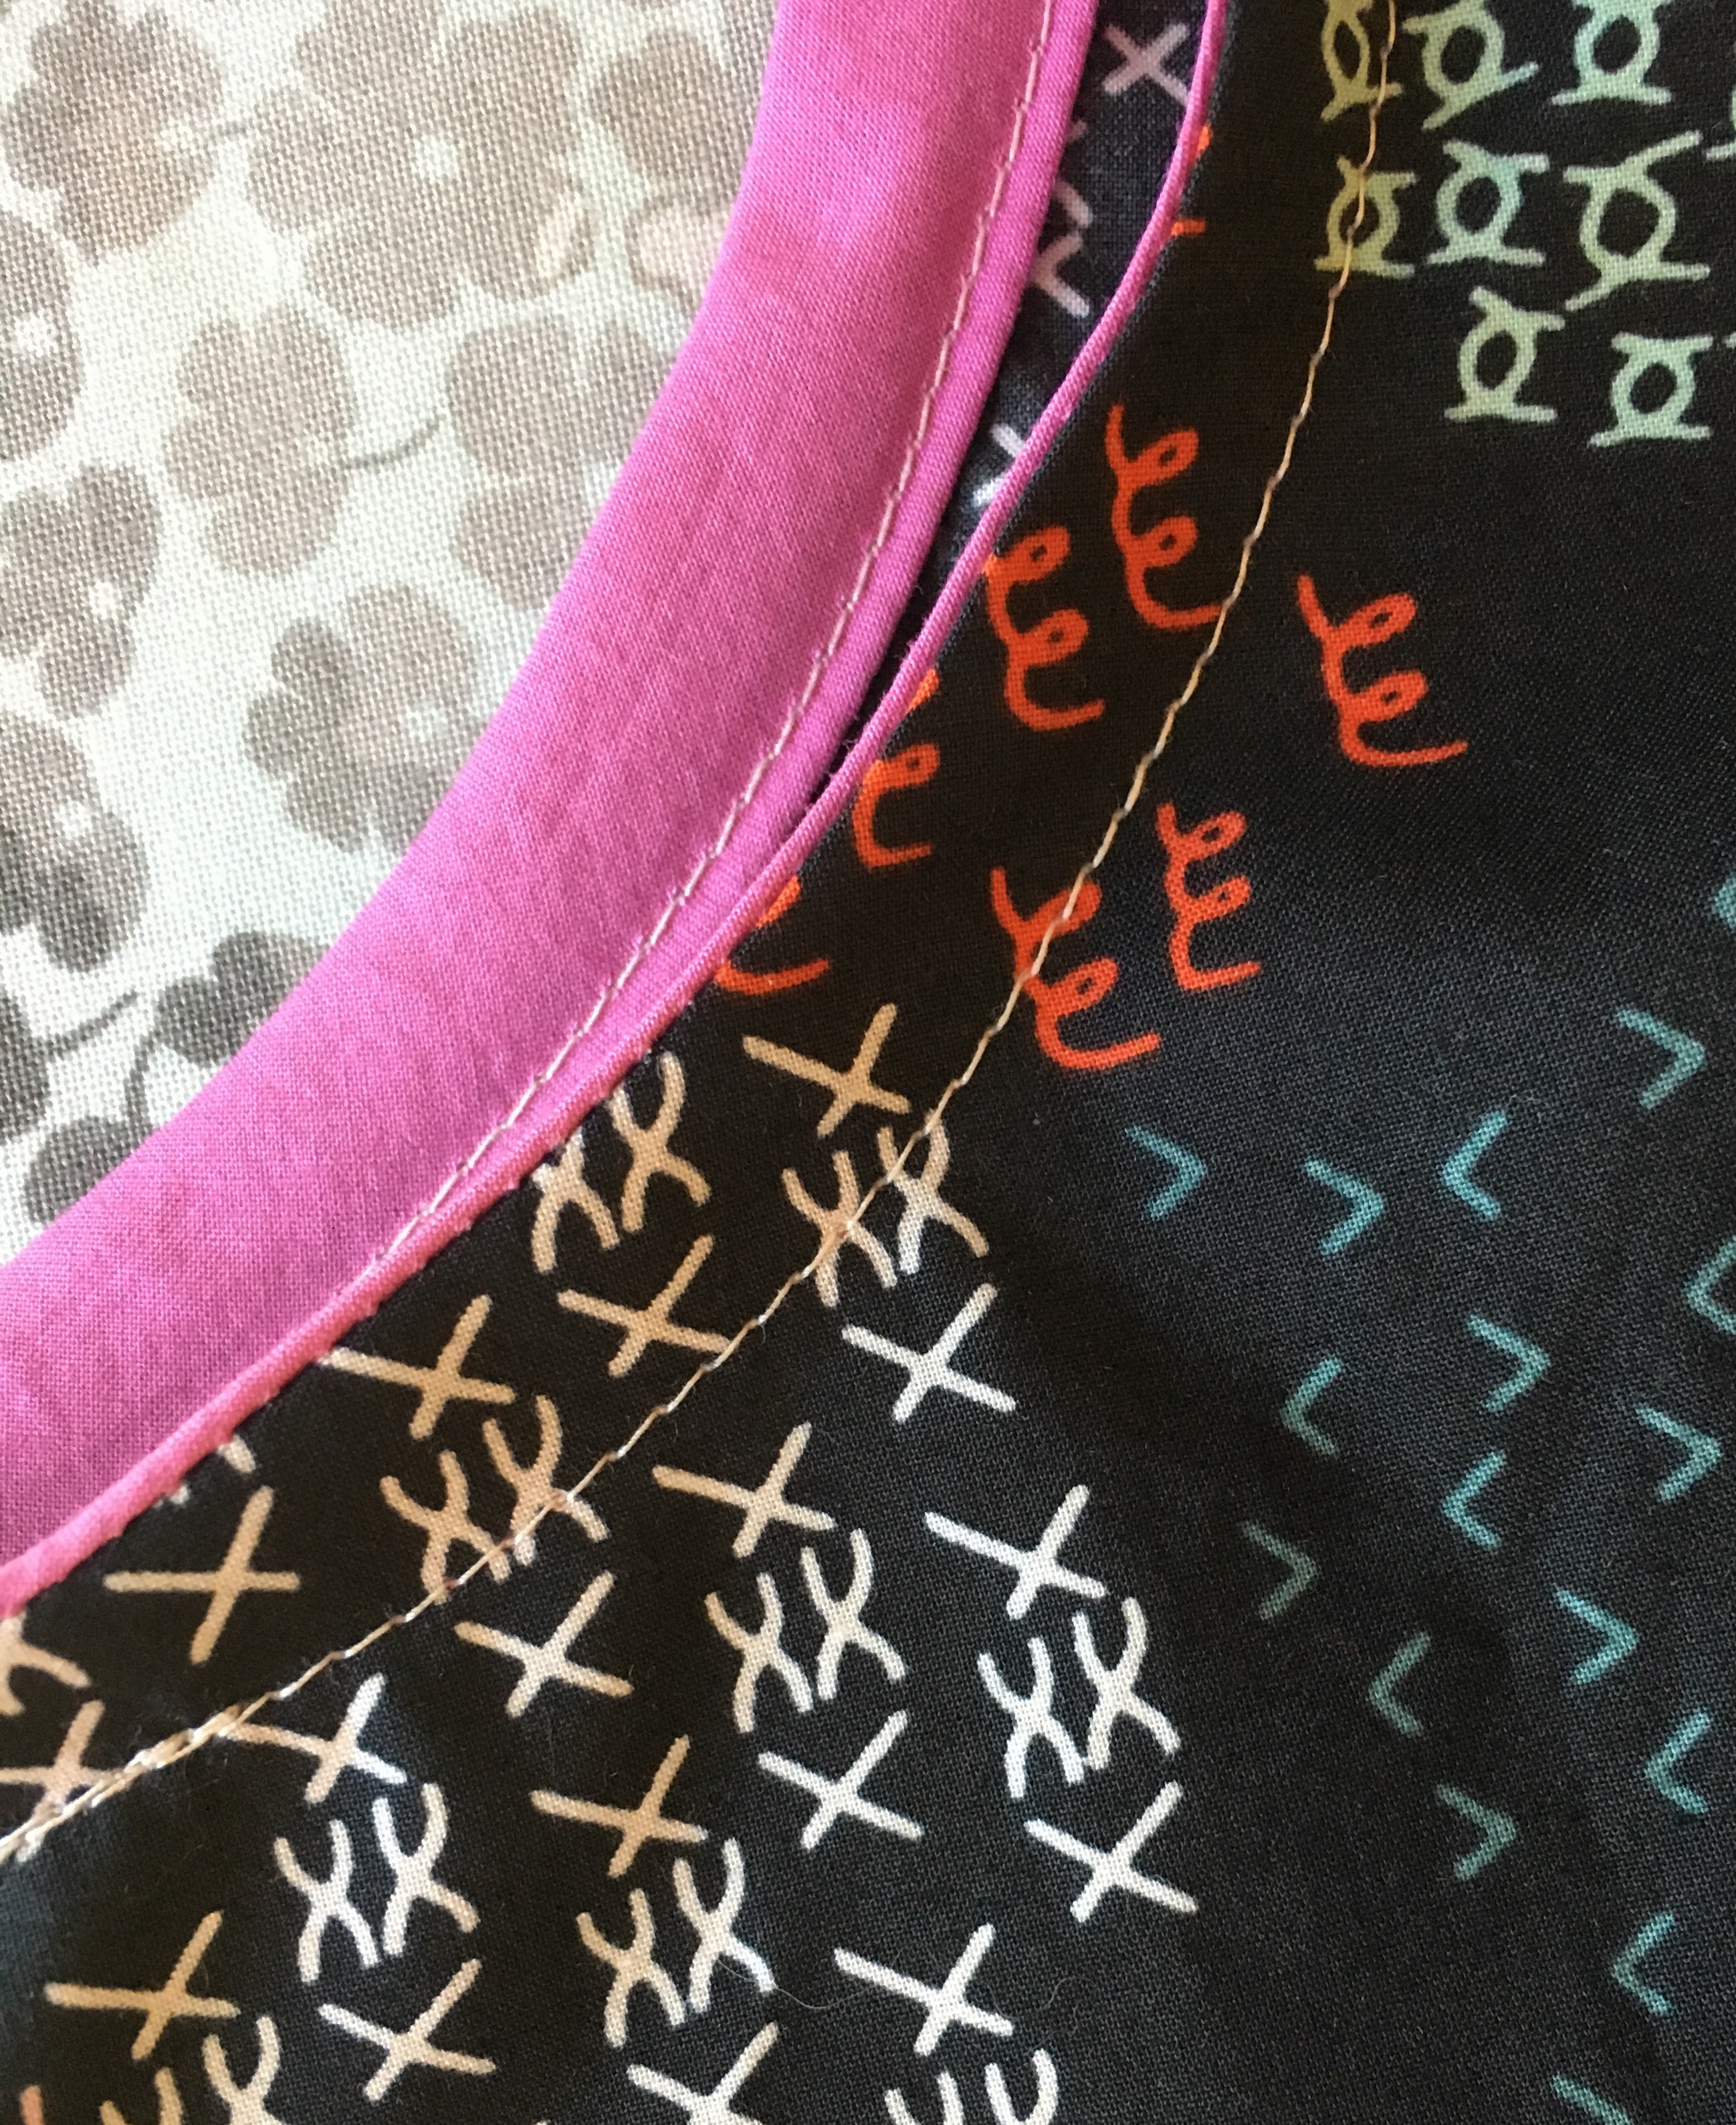
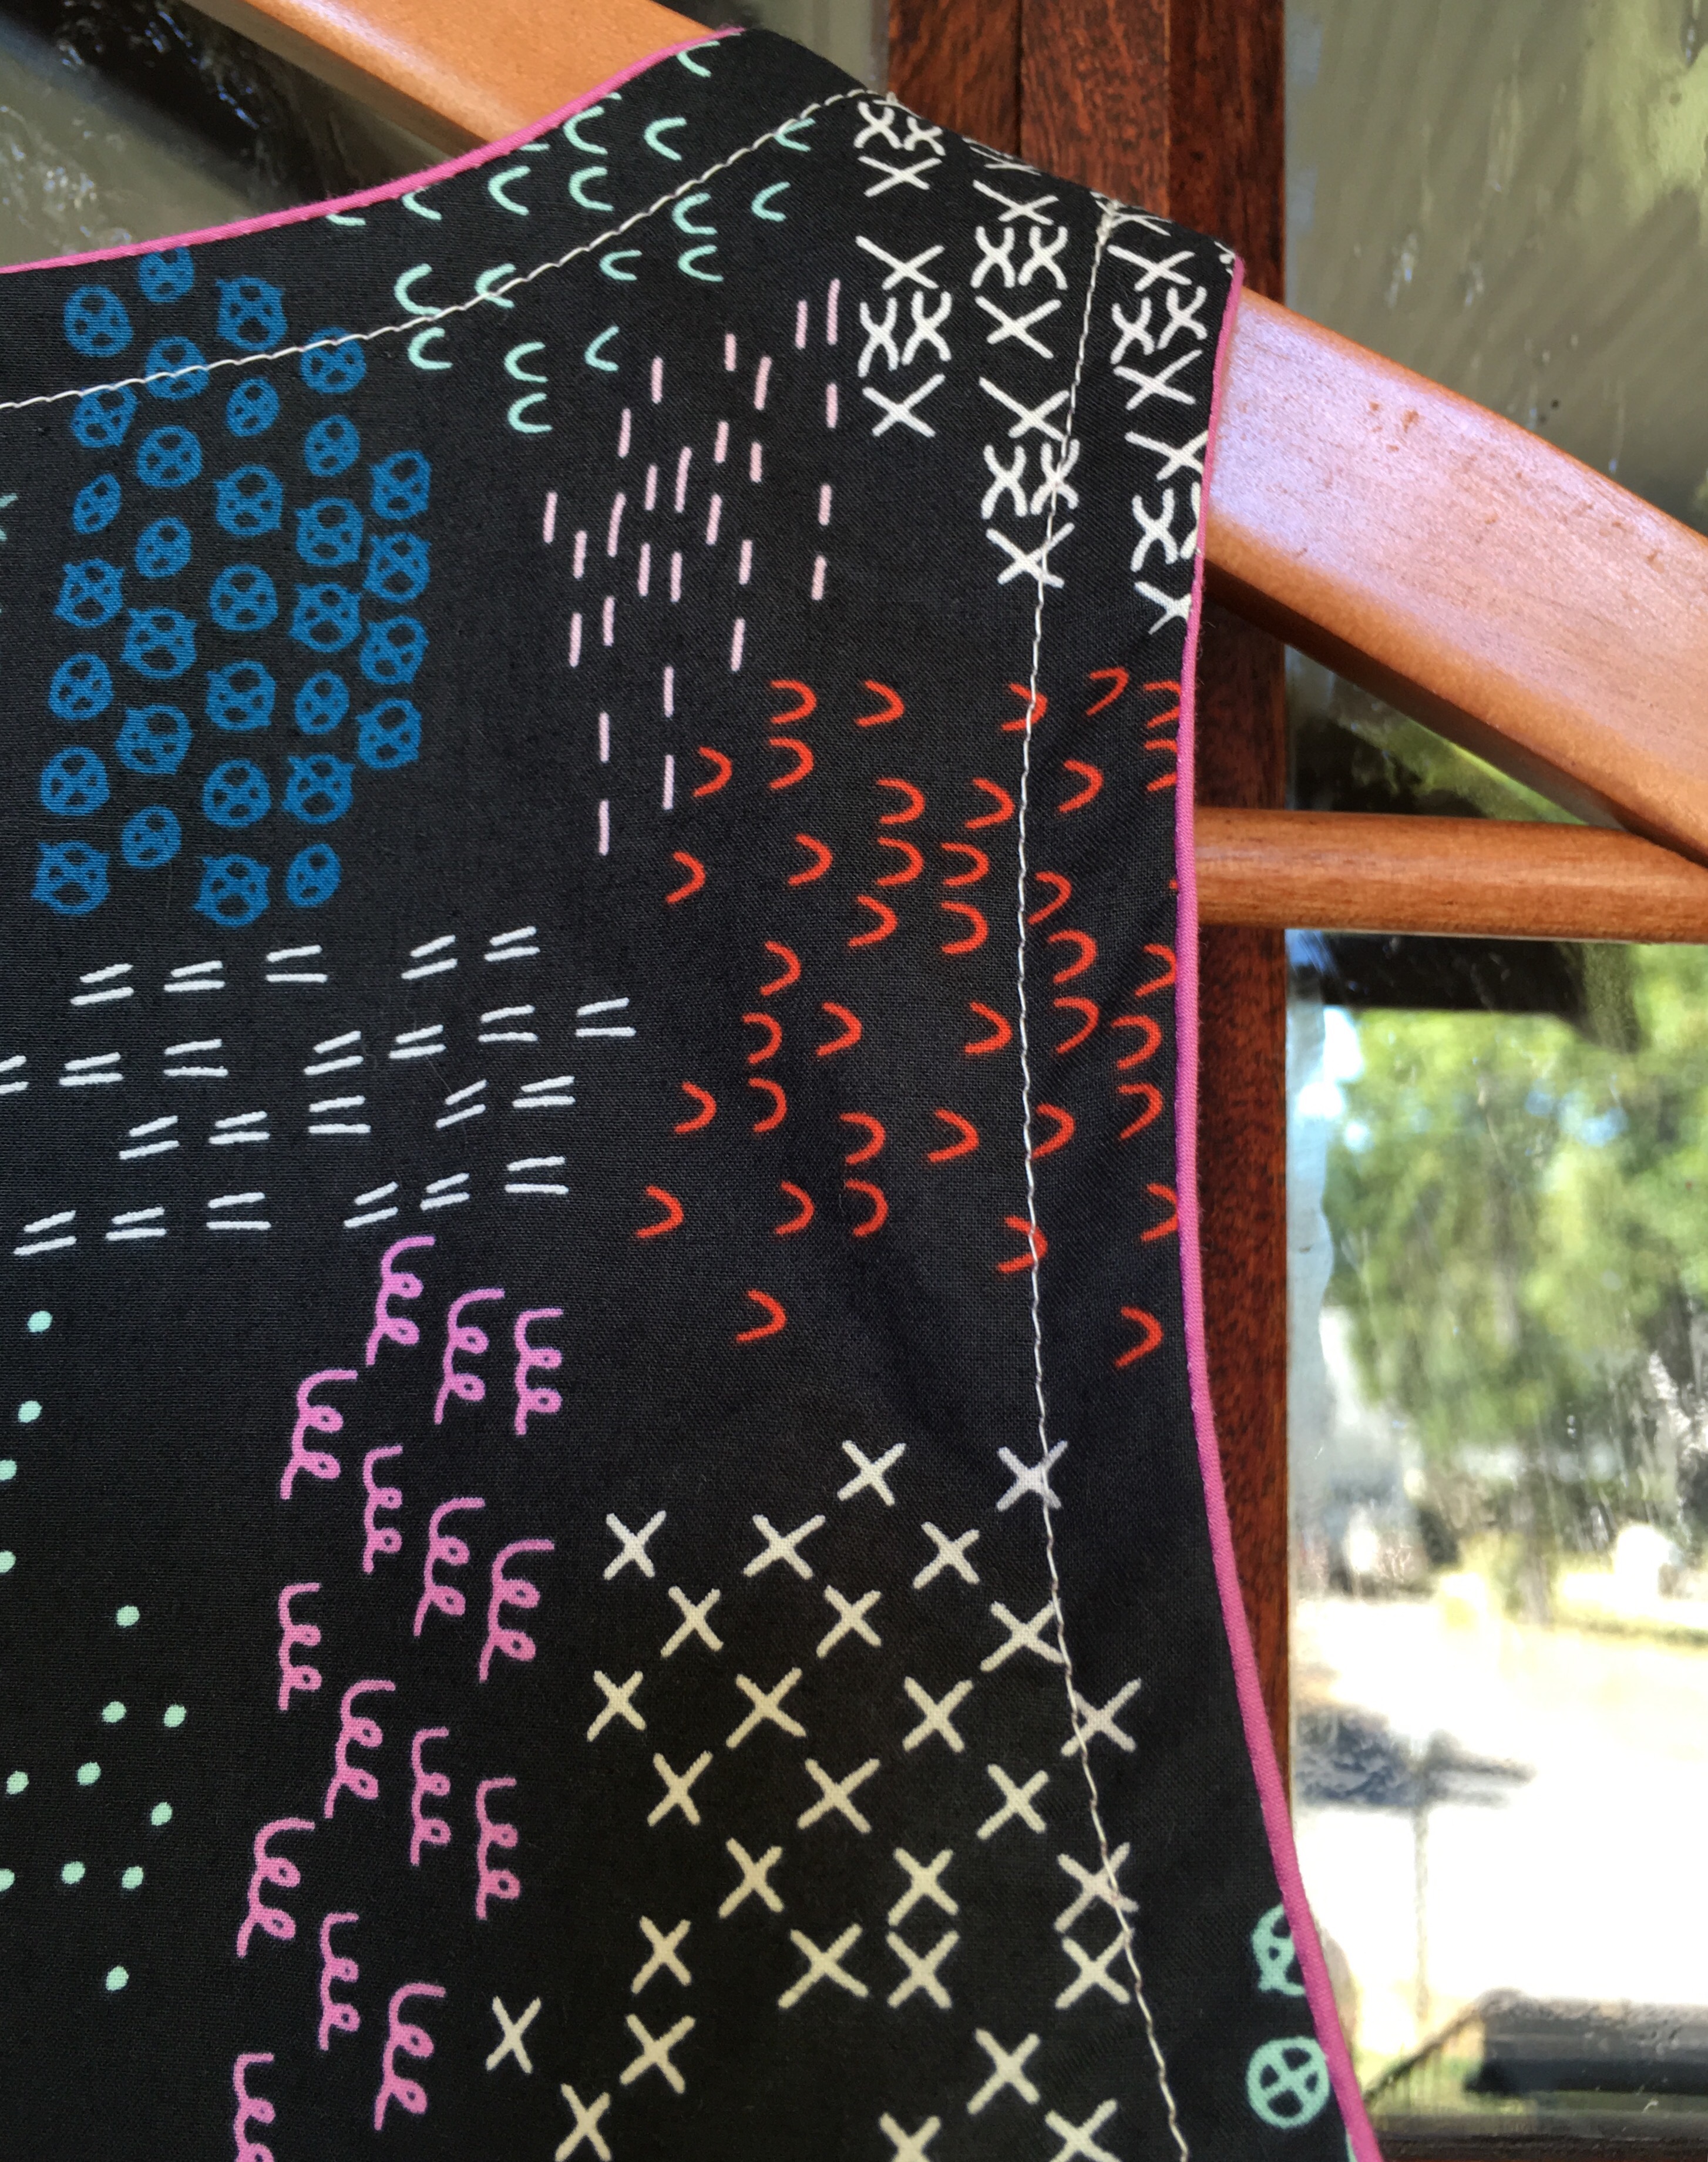
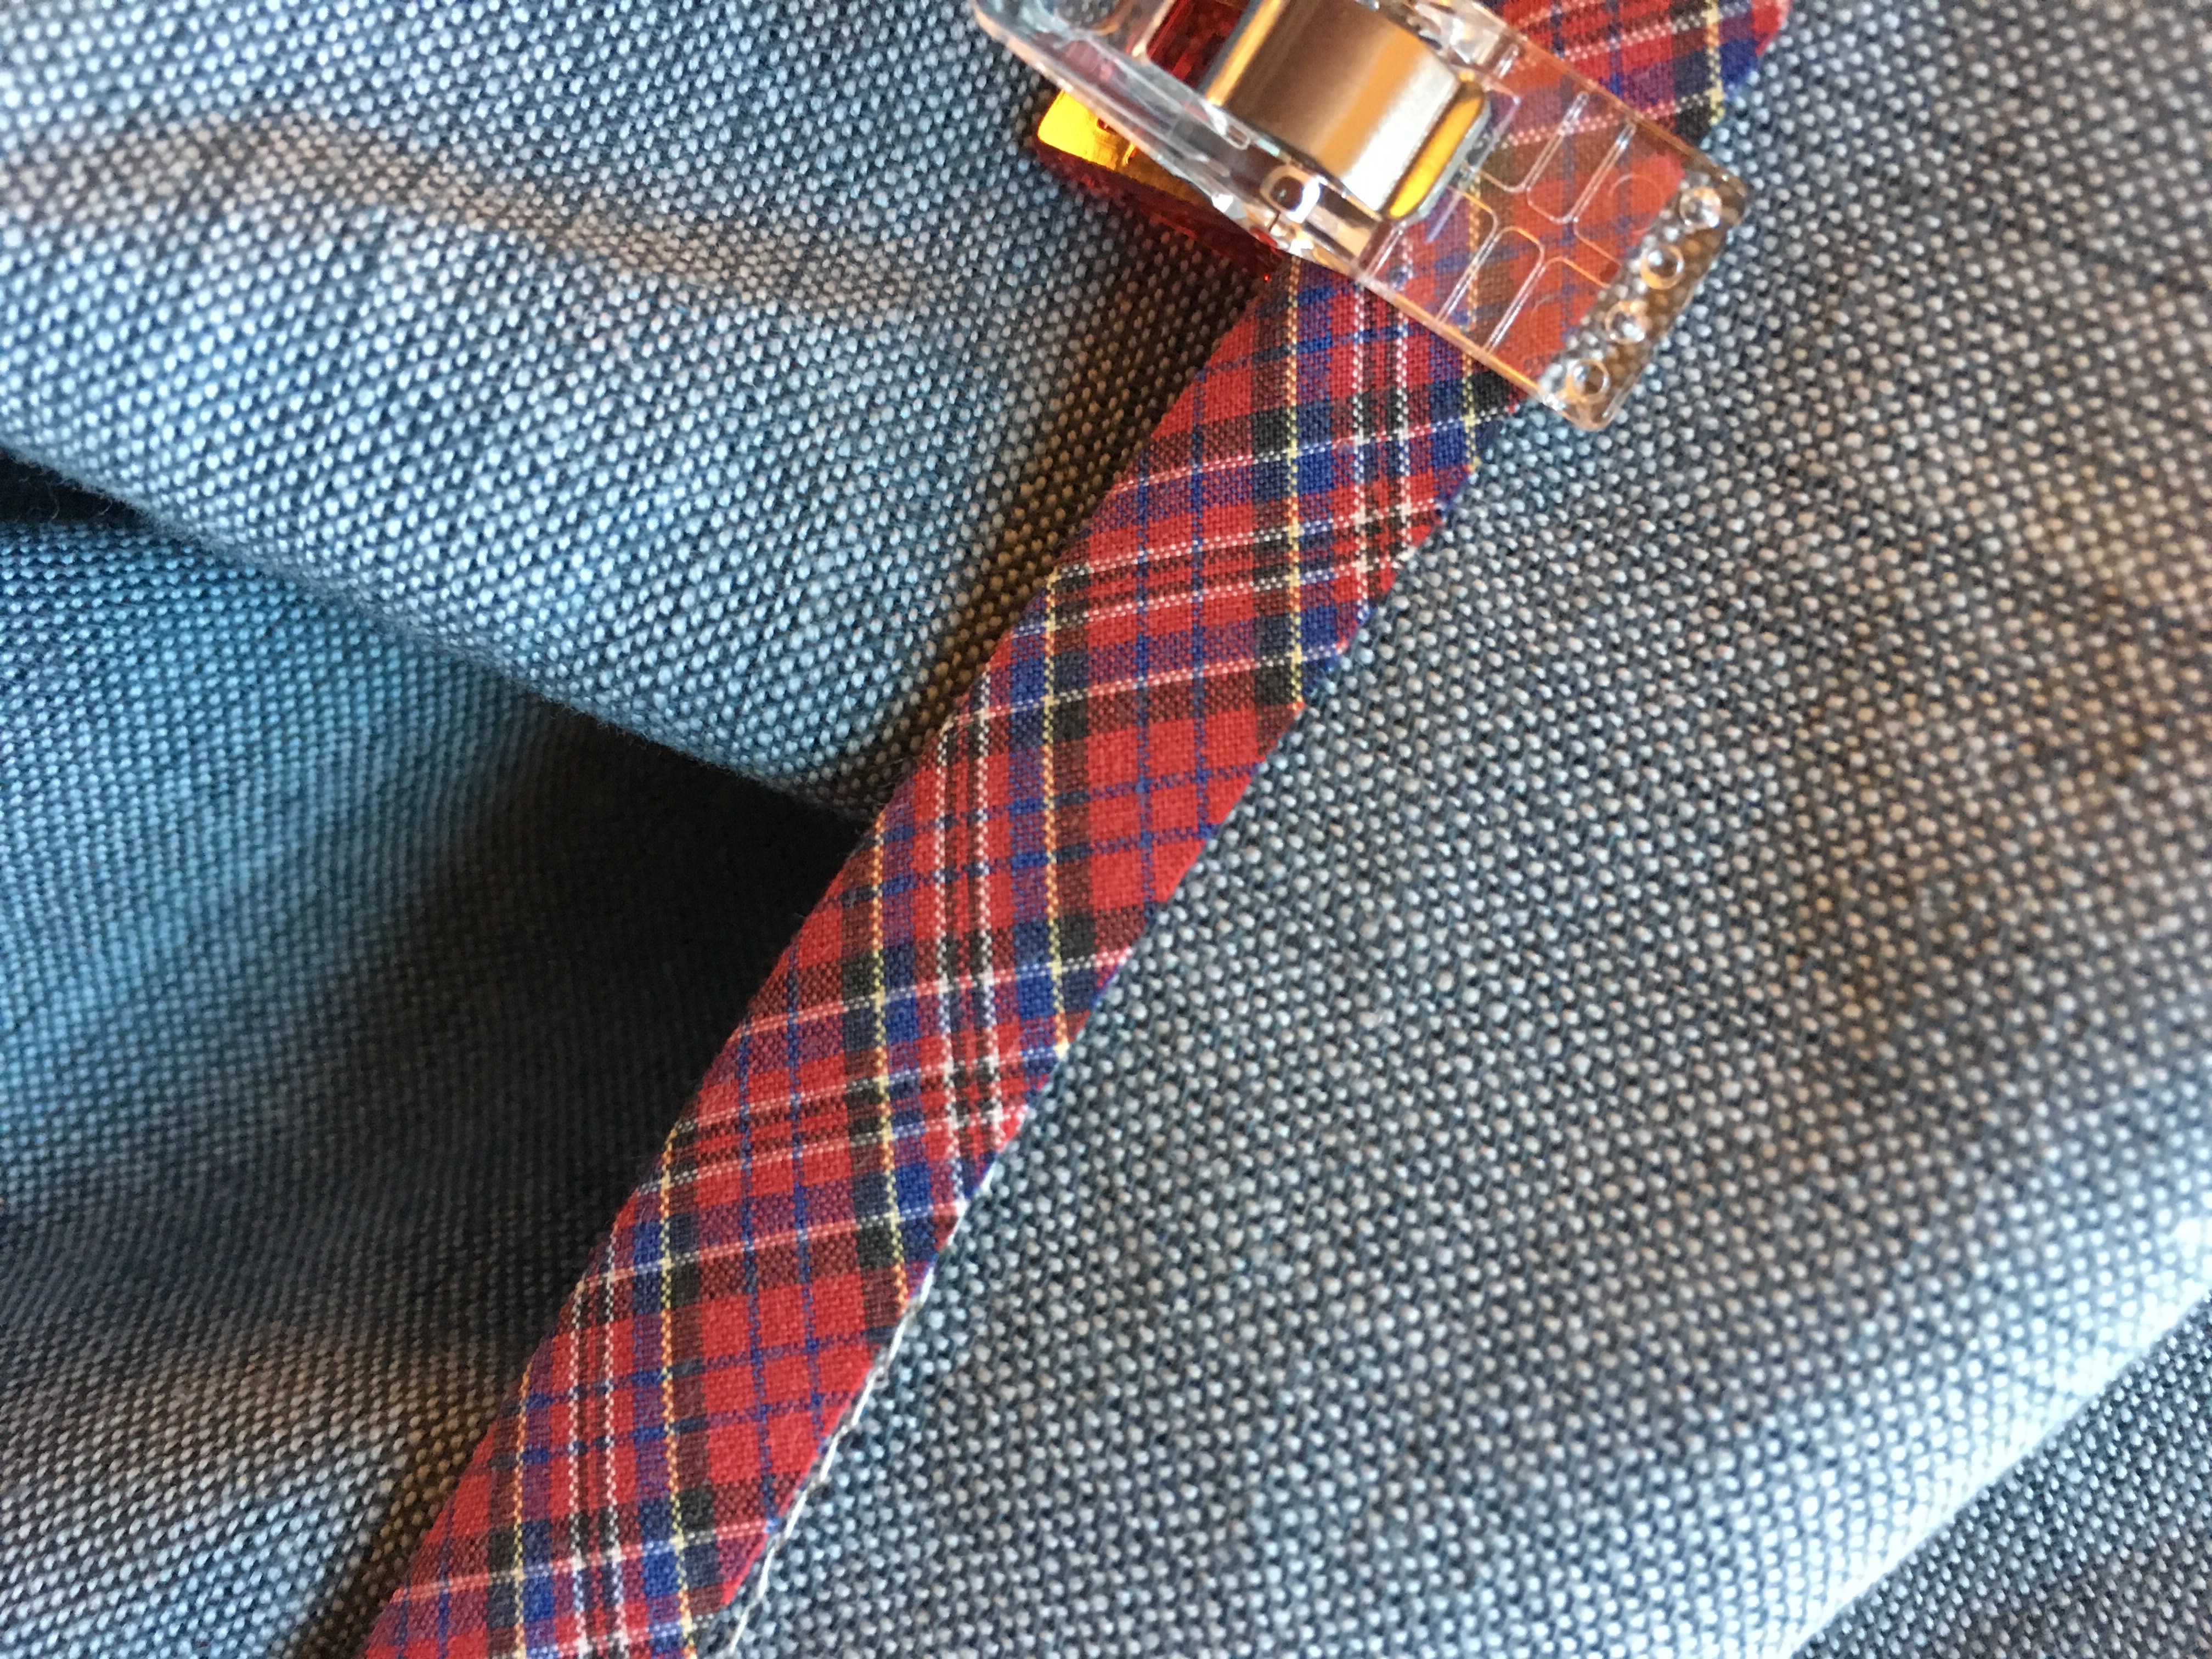
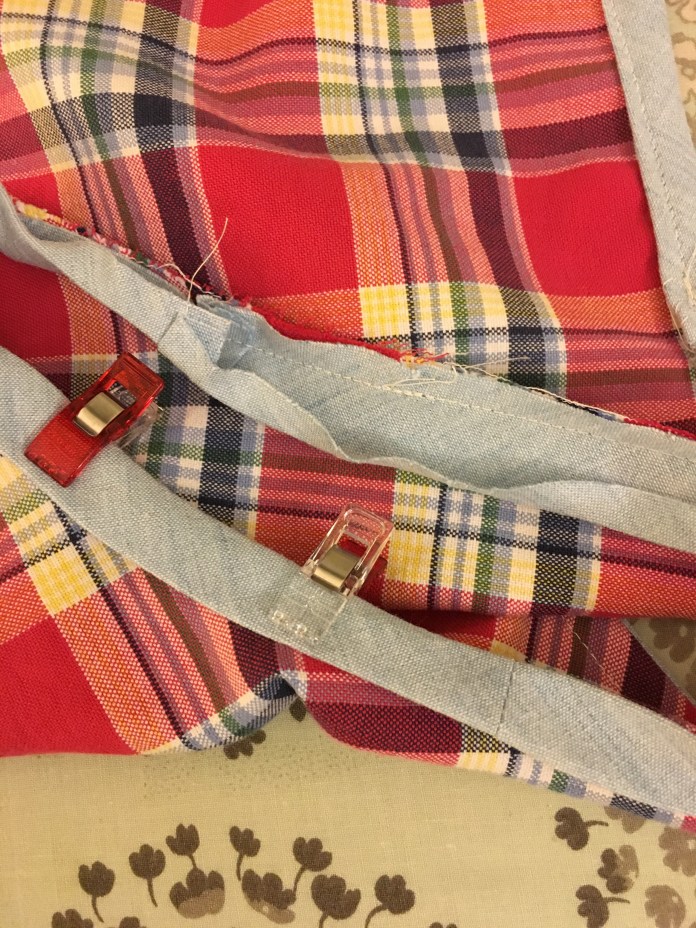 Then I flip the garment right side out and check to make sure that the fold is even and sometimes I iron a bit but I don’t go crazy ironing if it is a neckline or arm hole so as not to stretch the curve out. Then I sew from the right side, which is the opposite of the french technique Rae explains where she sews from the inside. I do this because I like the look of the stitches and I want them to be as pretty as possible and I find that my stitches are not as pretty on the underside. I also do it because I usually like to shift the fabric fold just enough to create a bit of a an edge that ends up looking like piping. I learned to do this by mistake when I made a black lined washi dress for myself. I then did it on purpose when I made a similar dress for my sister. It is an easy thing to do and I am really happy with the little extra zing it gives the garment. This is what it looks like below. I basically hold the fabric fold and feed it into the machine so I have a sense of where the thickness is to be able to catch the whole fold and have a relatively even width between the stitching line and the edge of the garment. I don’t always have exactly the same amount of contrasting material-fake piping showing but I think it ends up looking fine.
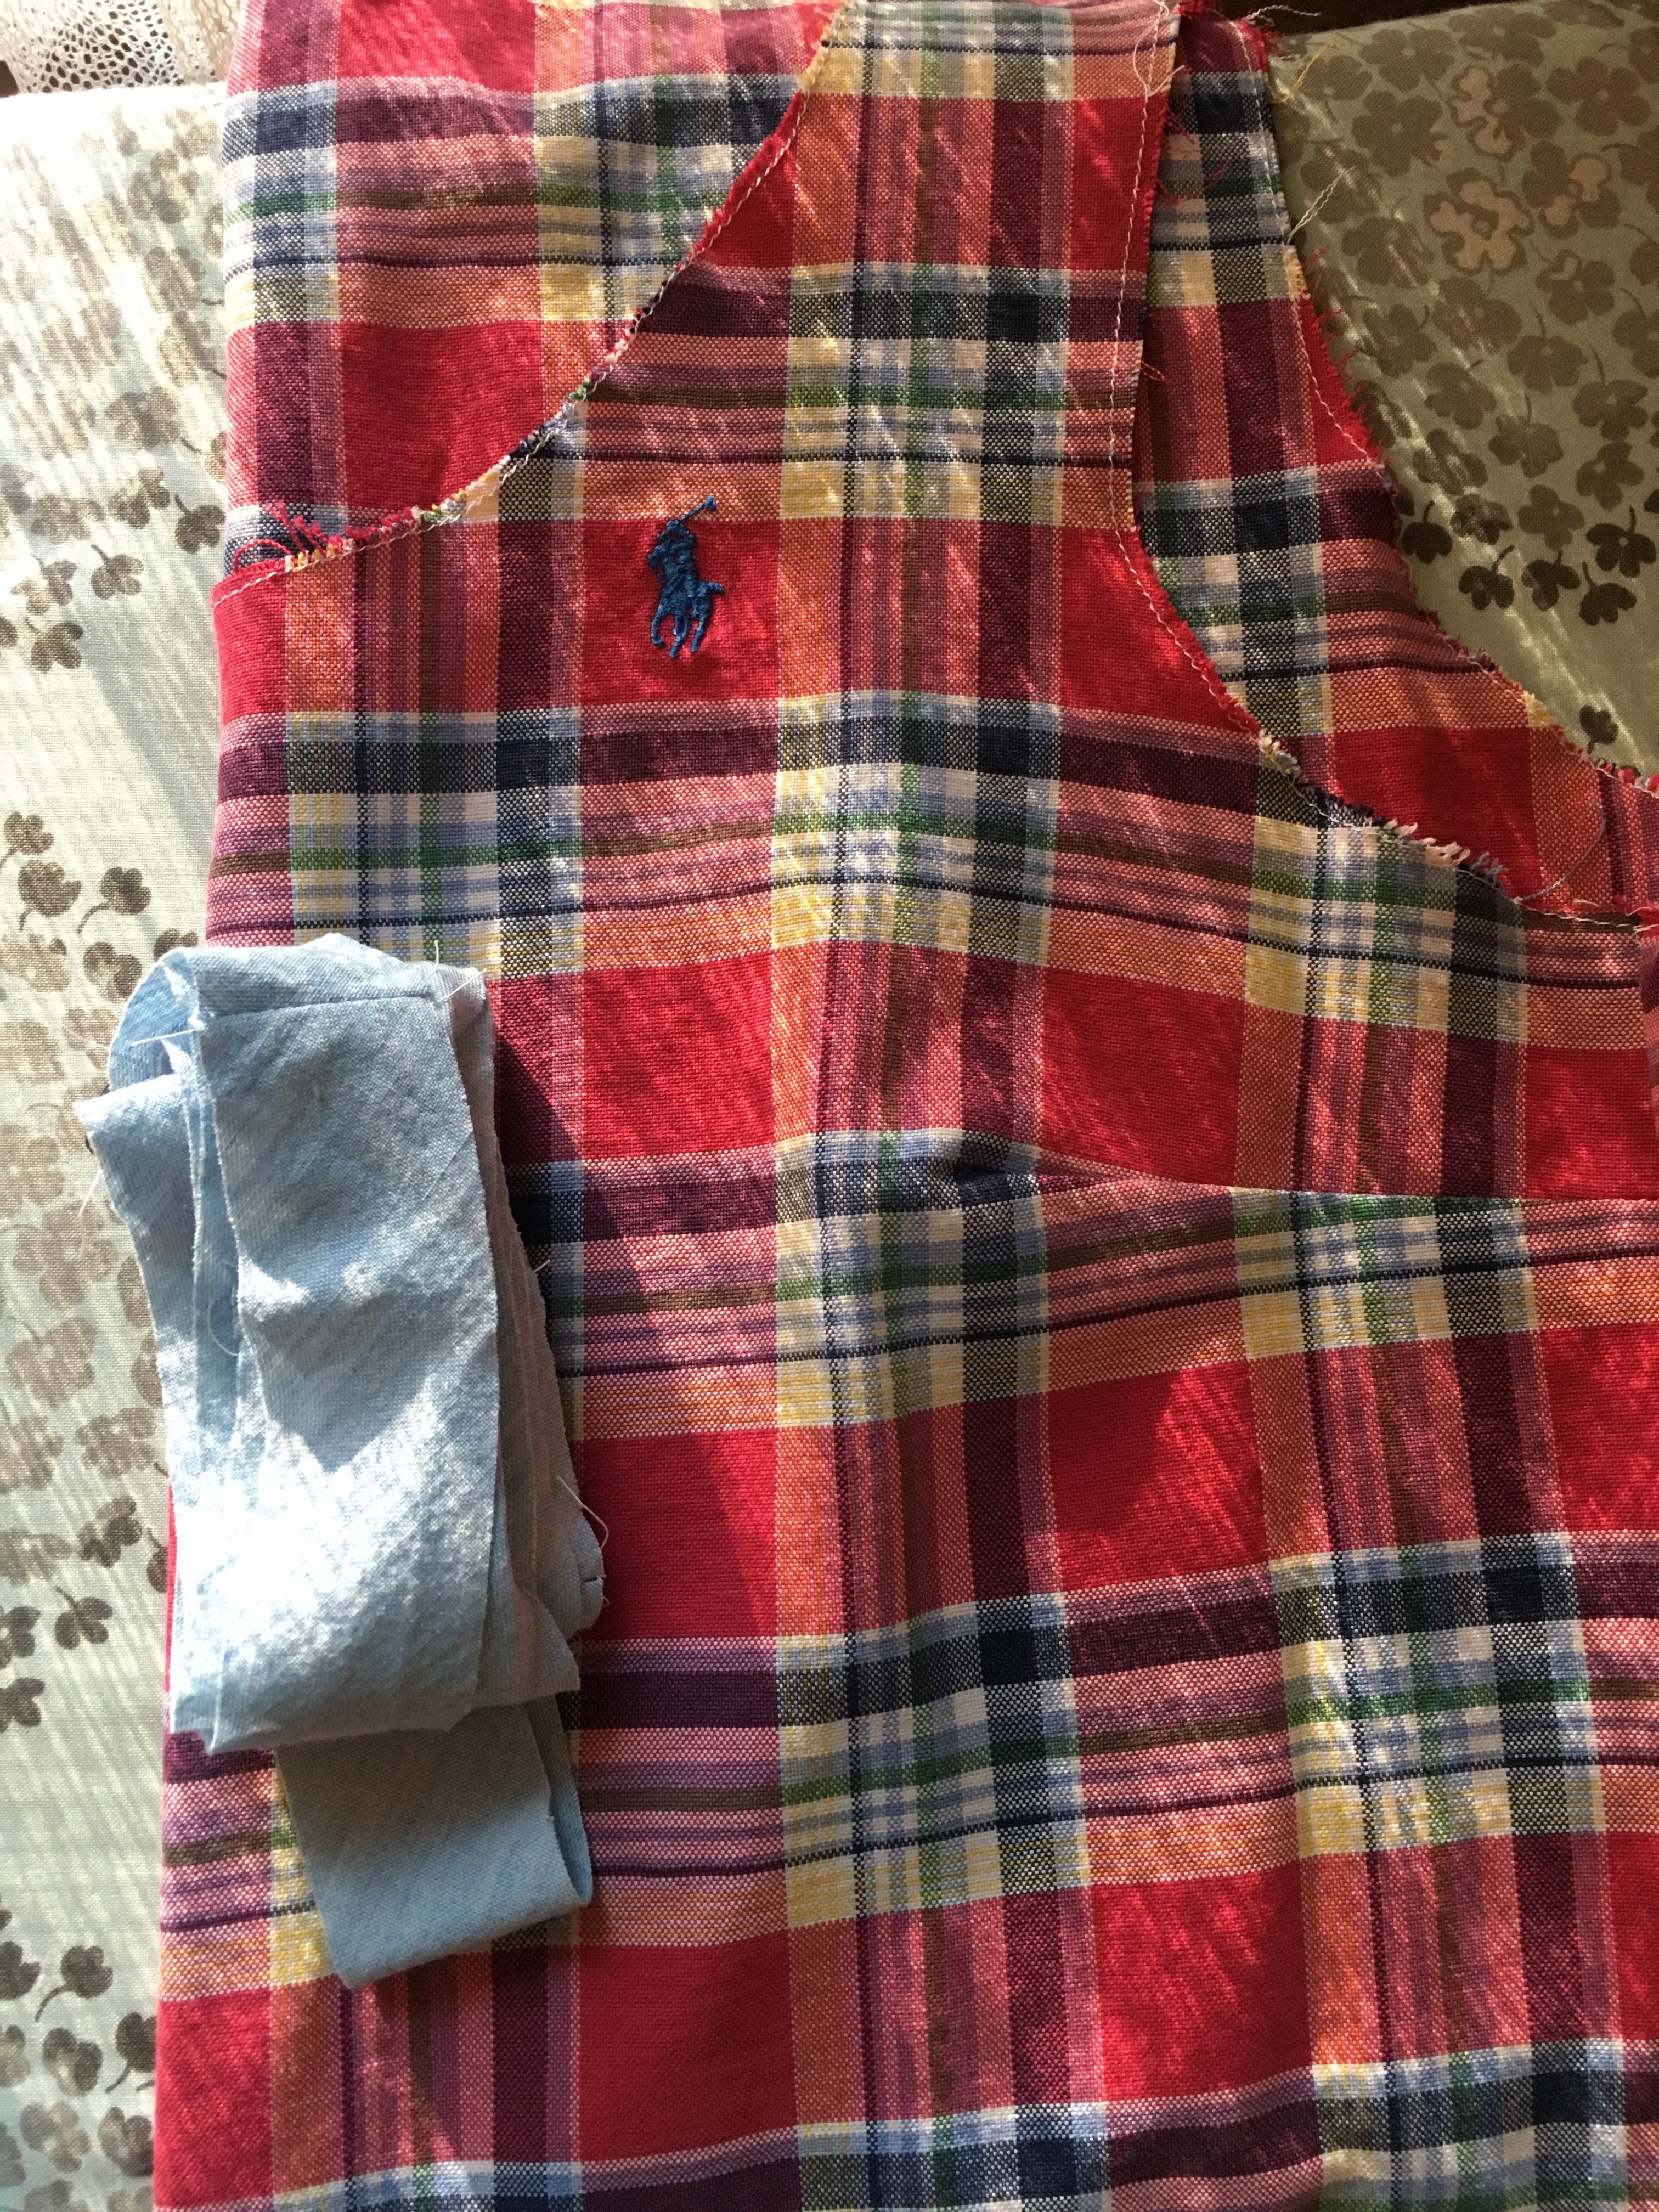
 In terms of my approach to upcycling, I did the opposite from my approach to my upcycled Beatrix shirt where I used the back for the front and the front for the back. In this case, I pieced the front from the two sides of the front of the oxford shirt and cut the Gemma back from the shirt back. I had to do this because of the size of the back pattern piece and the logo which was on the front of the shirt, seen below.
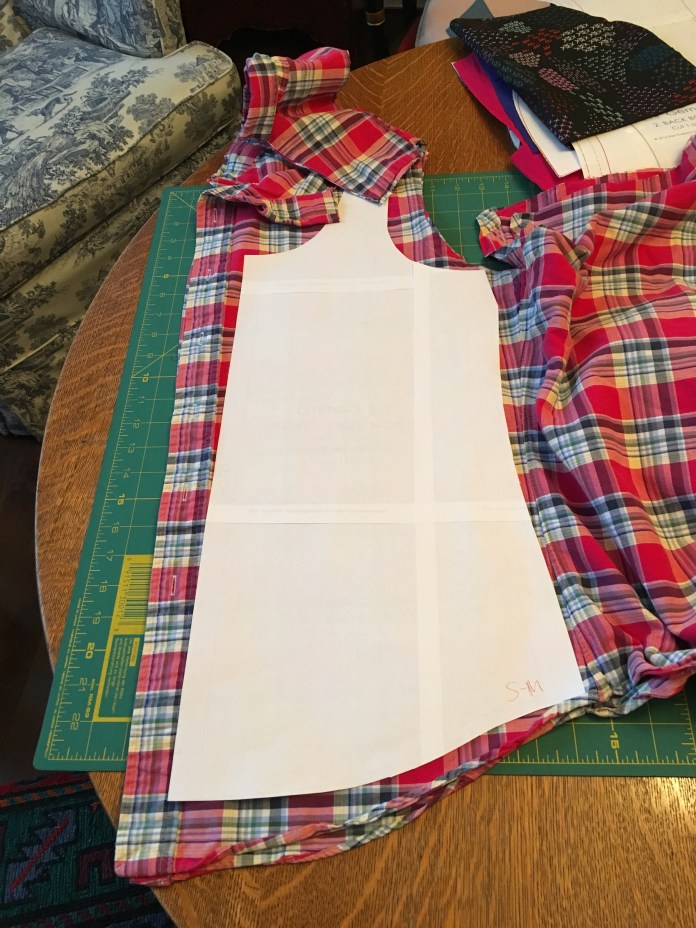 Luckily there was no pocket to contend with but there was the polo player who ended up in just about the right spot. I really like the contrasting blue edge around the neck and arms.
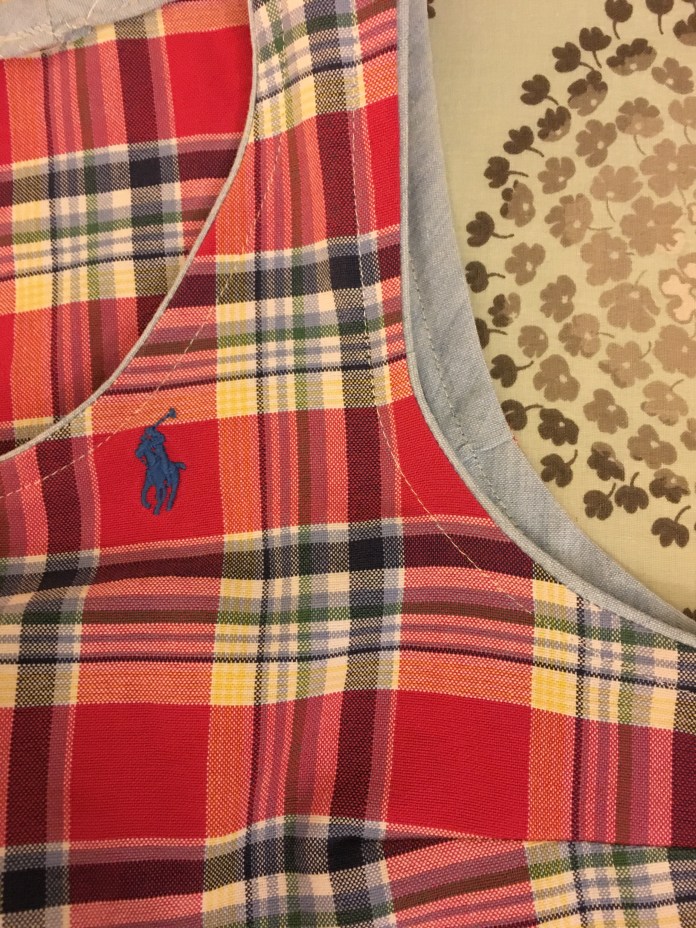 Back of shirt below. I cut the back from the back of the shirt. I needed the big piece because the Gemma tank neckline in back goes up high. I wouldn’t have had enough to piece it. Also the polo player.
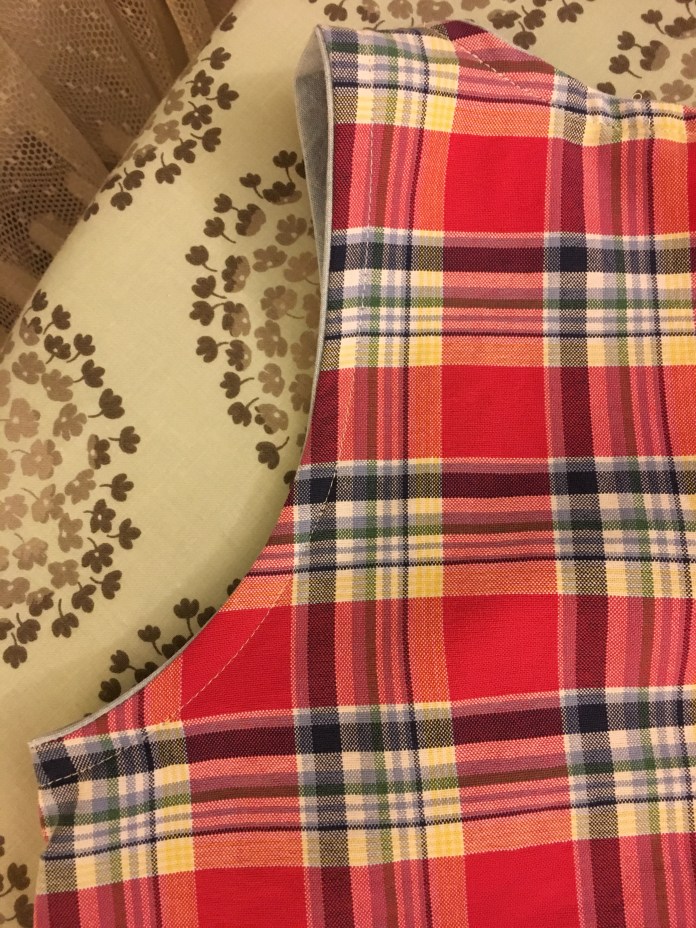 I did the binding for the chambray-like tank the same way. I cut 1.5 inch strips and followed exactly the steps as above except that I didn’t shift the fabric as much. In this case, I was ok with some of the plaid poking out but I wasn’t going for the look of an edge all the way around the seams since I wanted the tank to be a neutral piece I could layer with many colors. I felt a little bad about cutting into such a nice shirt but it wasn’t being worn. It is a really thin, fine dress shirt cotton poplin and was really easy to work with. I have plenty left over for more projects.
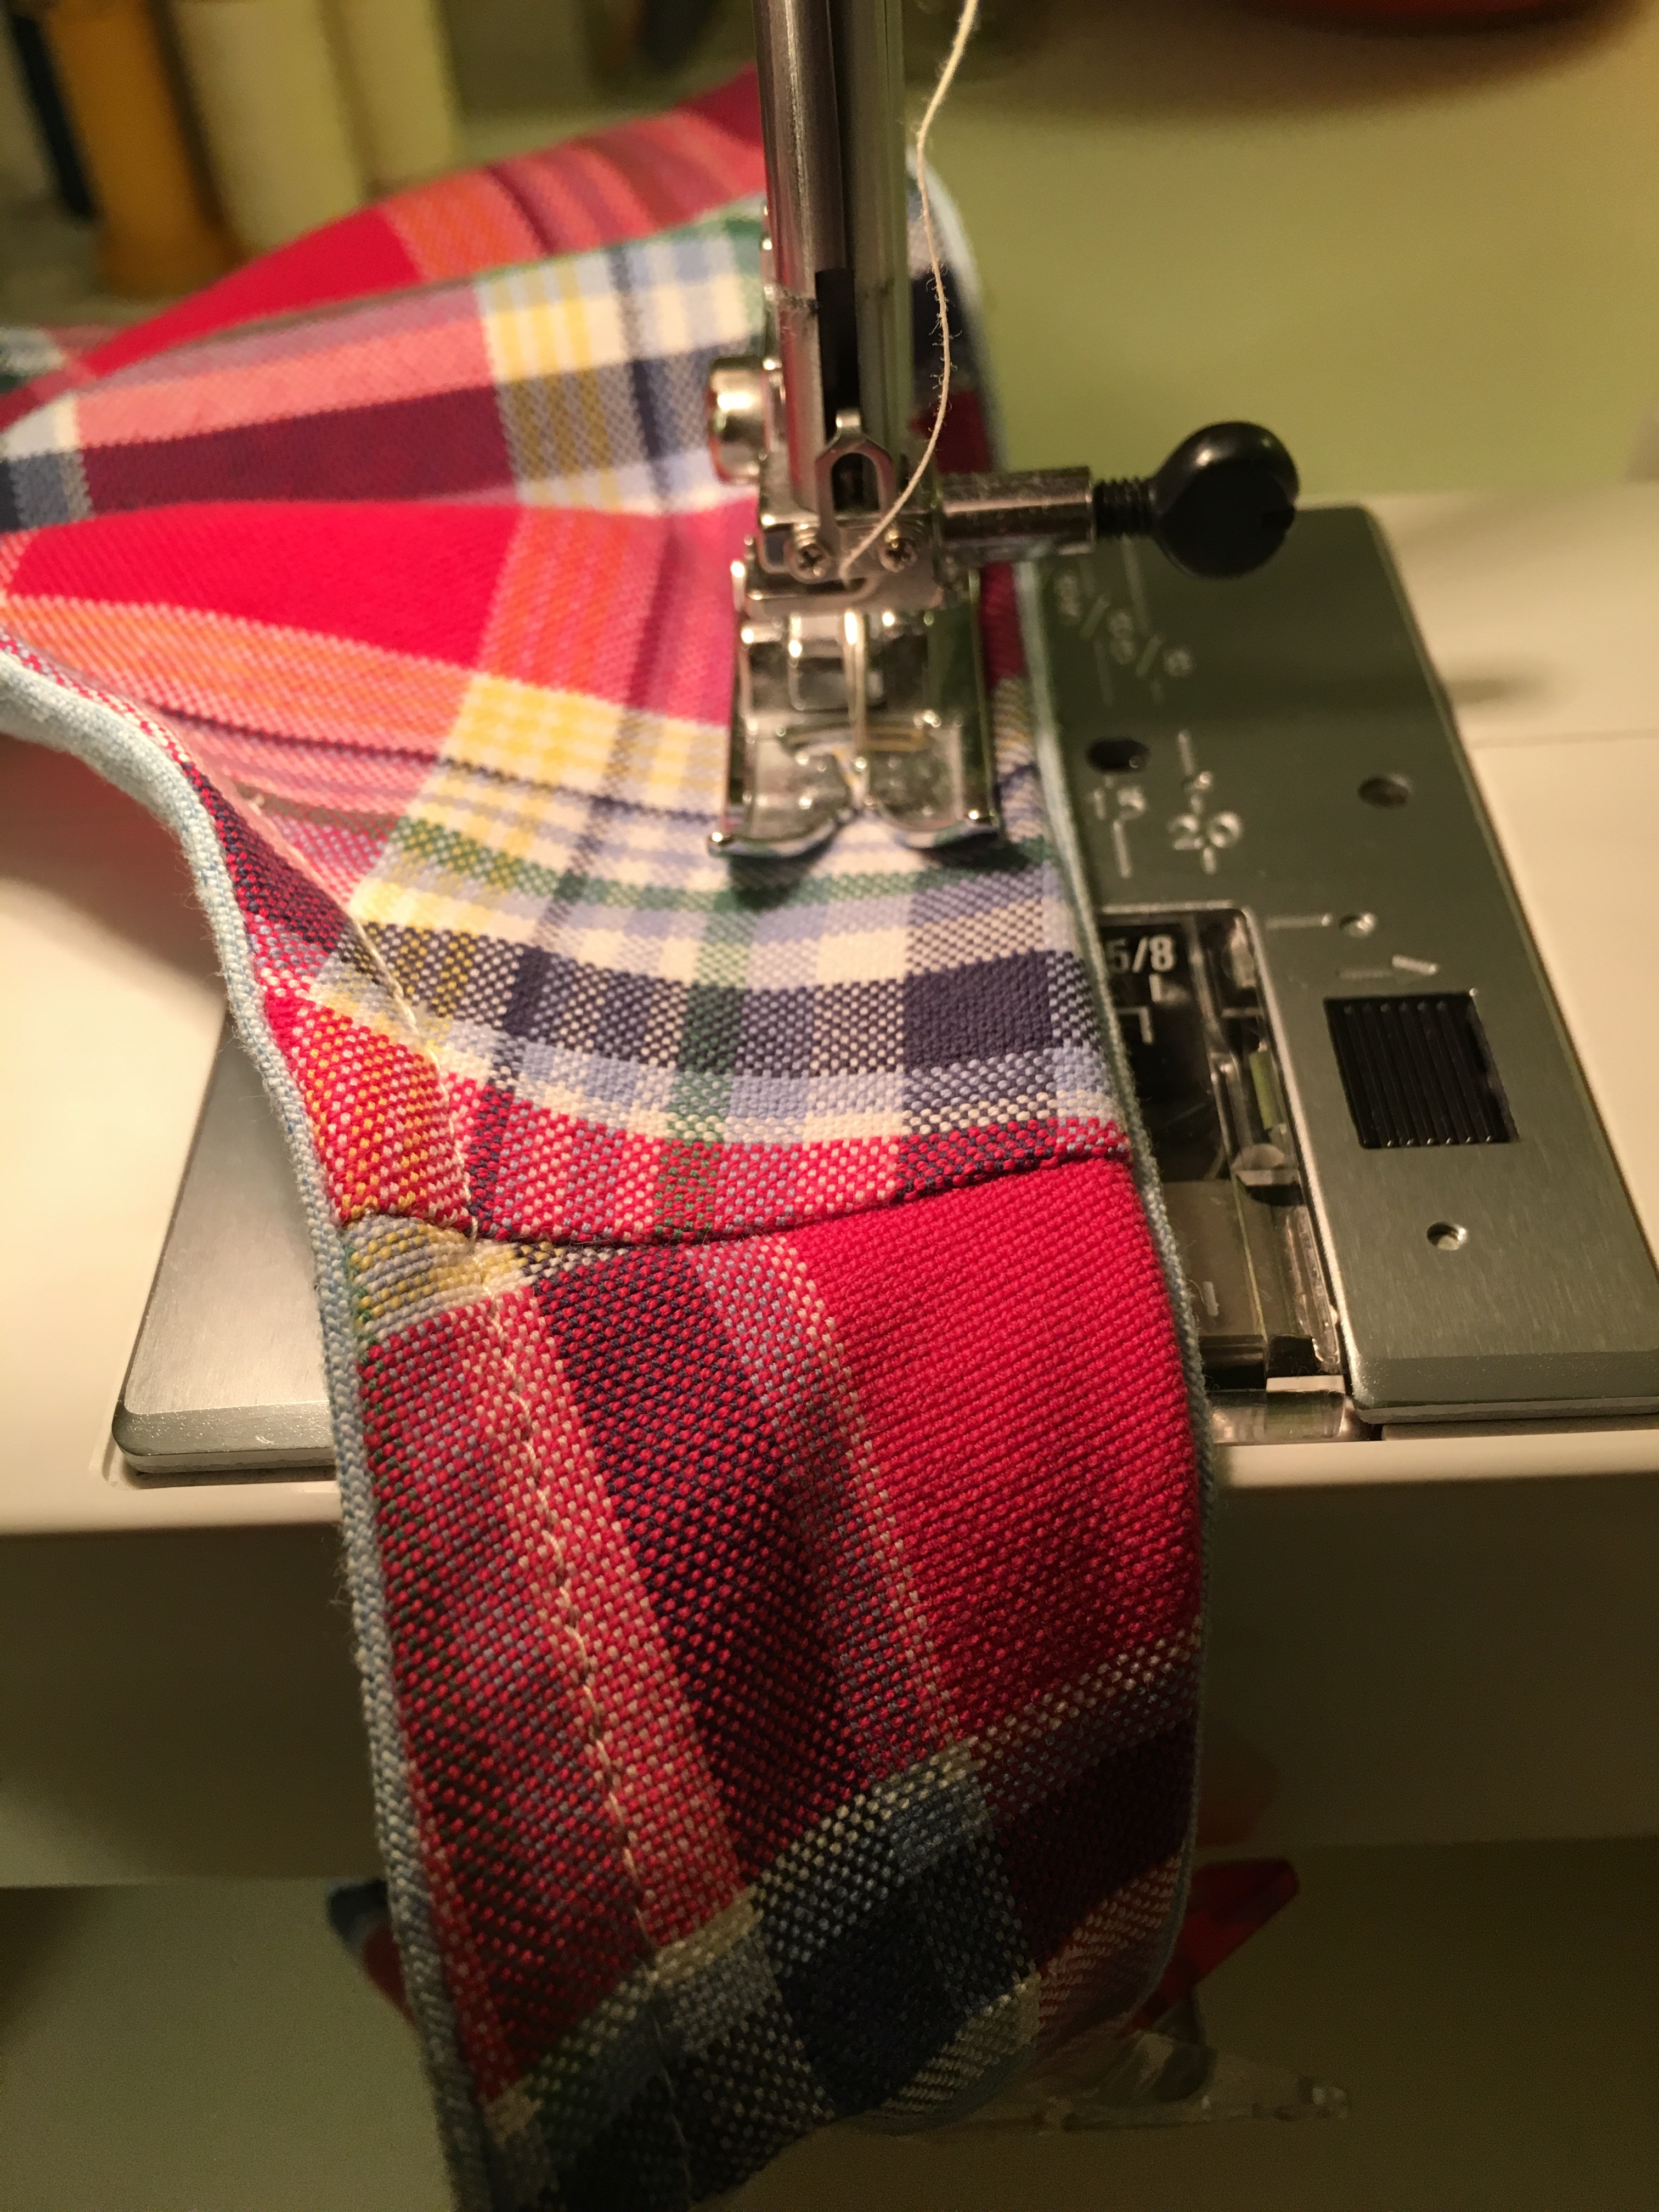
 Same steps.
 After sewing the first seam with the binding ironed up (this is the outside of the shirt) before turning garment inside out to make the fabric sandwich.
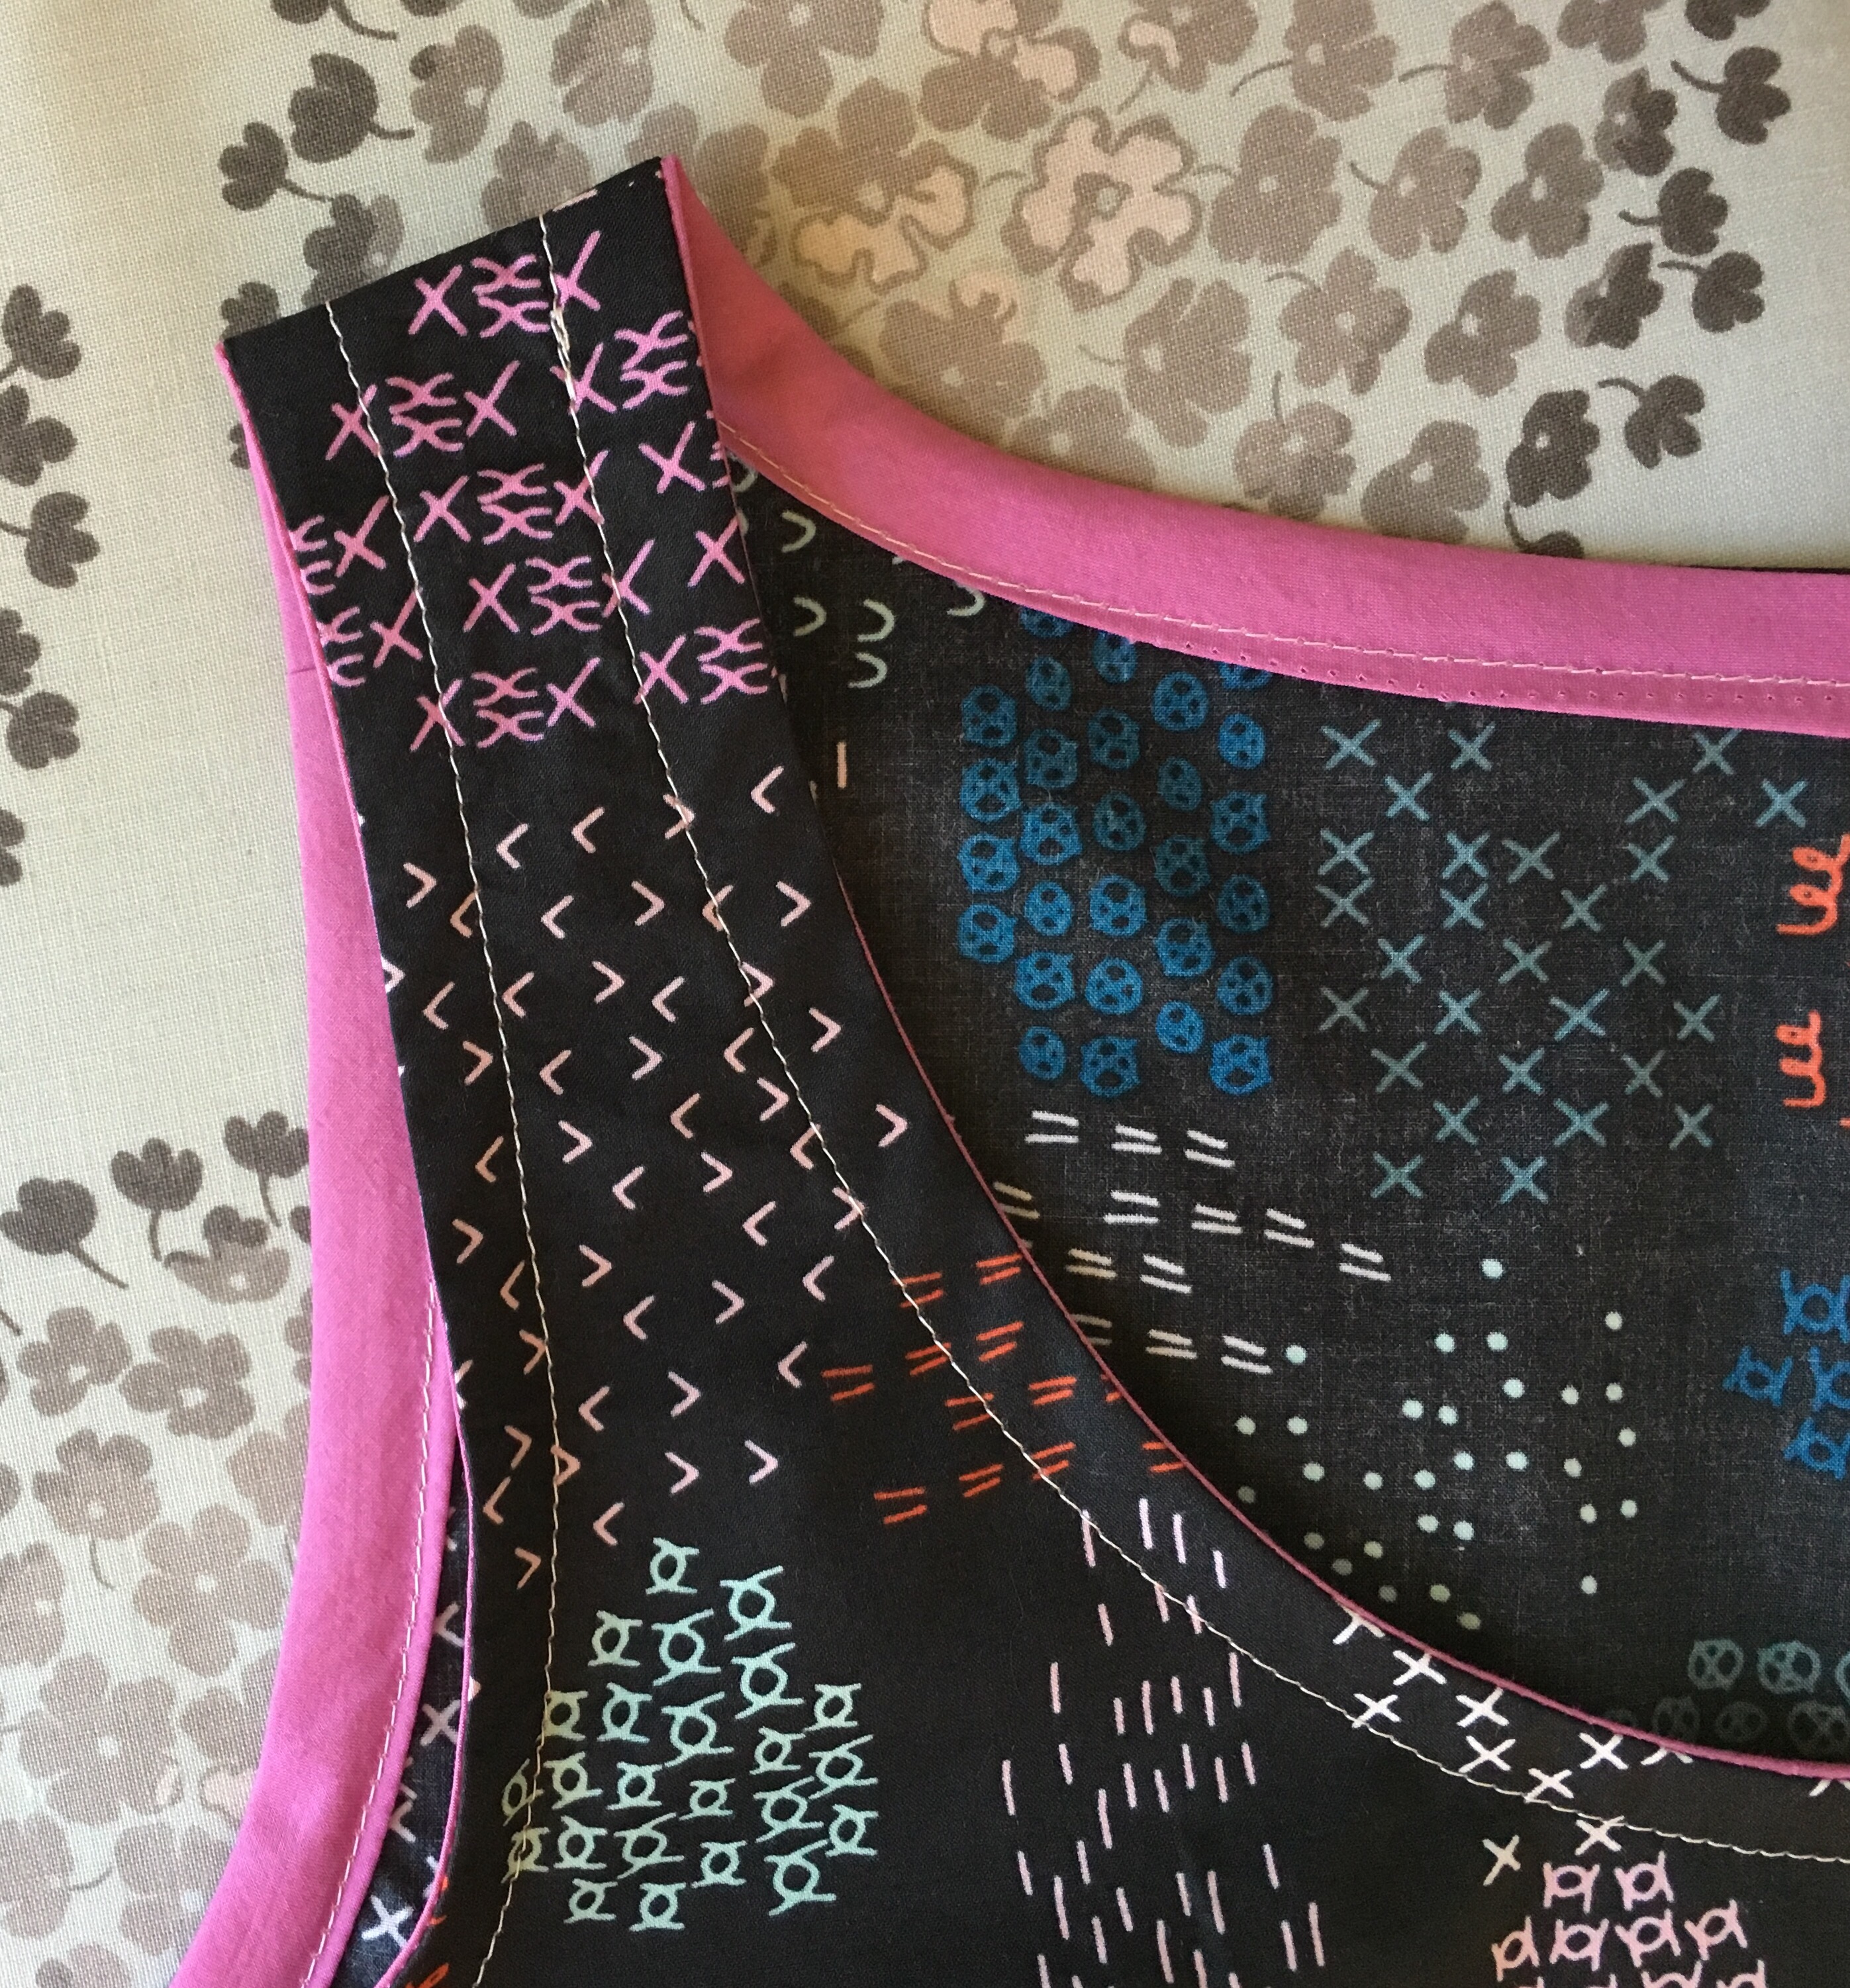
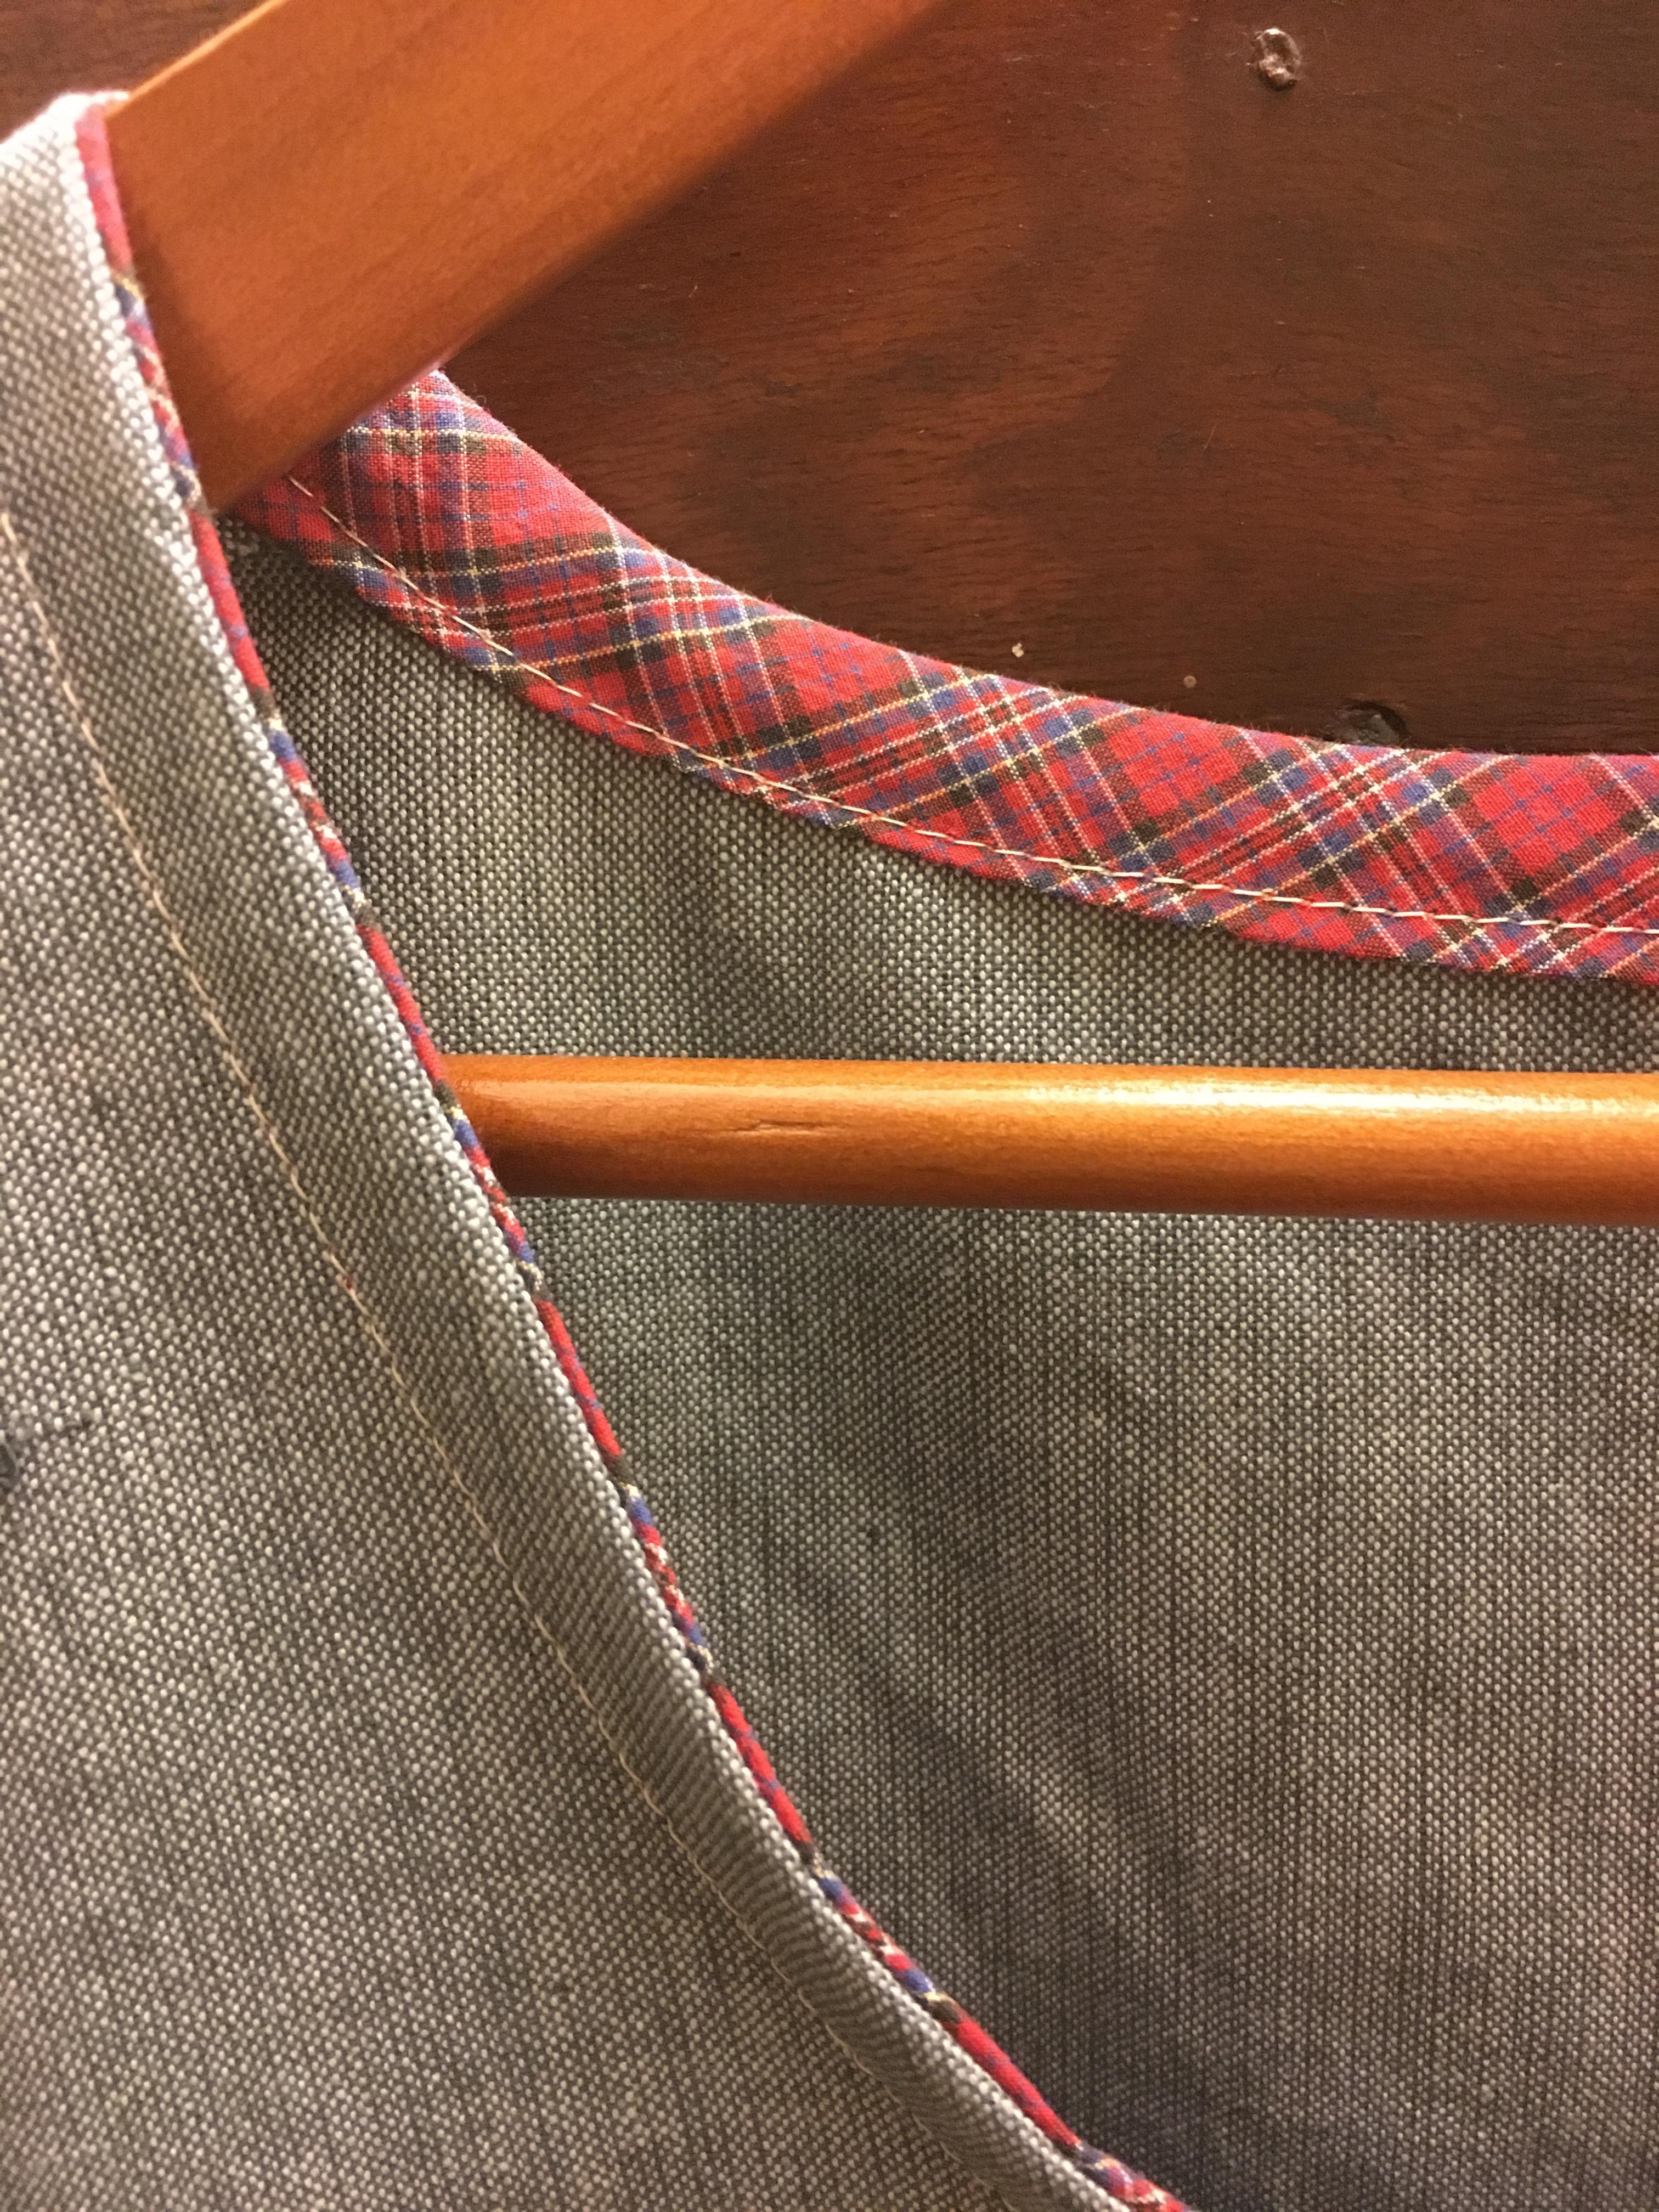
 Finished neckline below with binding sewn in place.
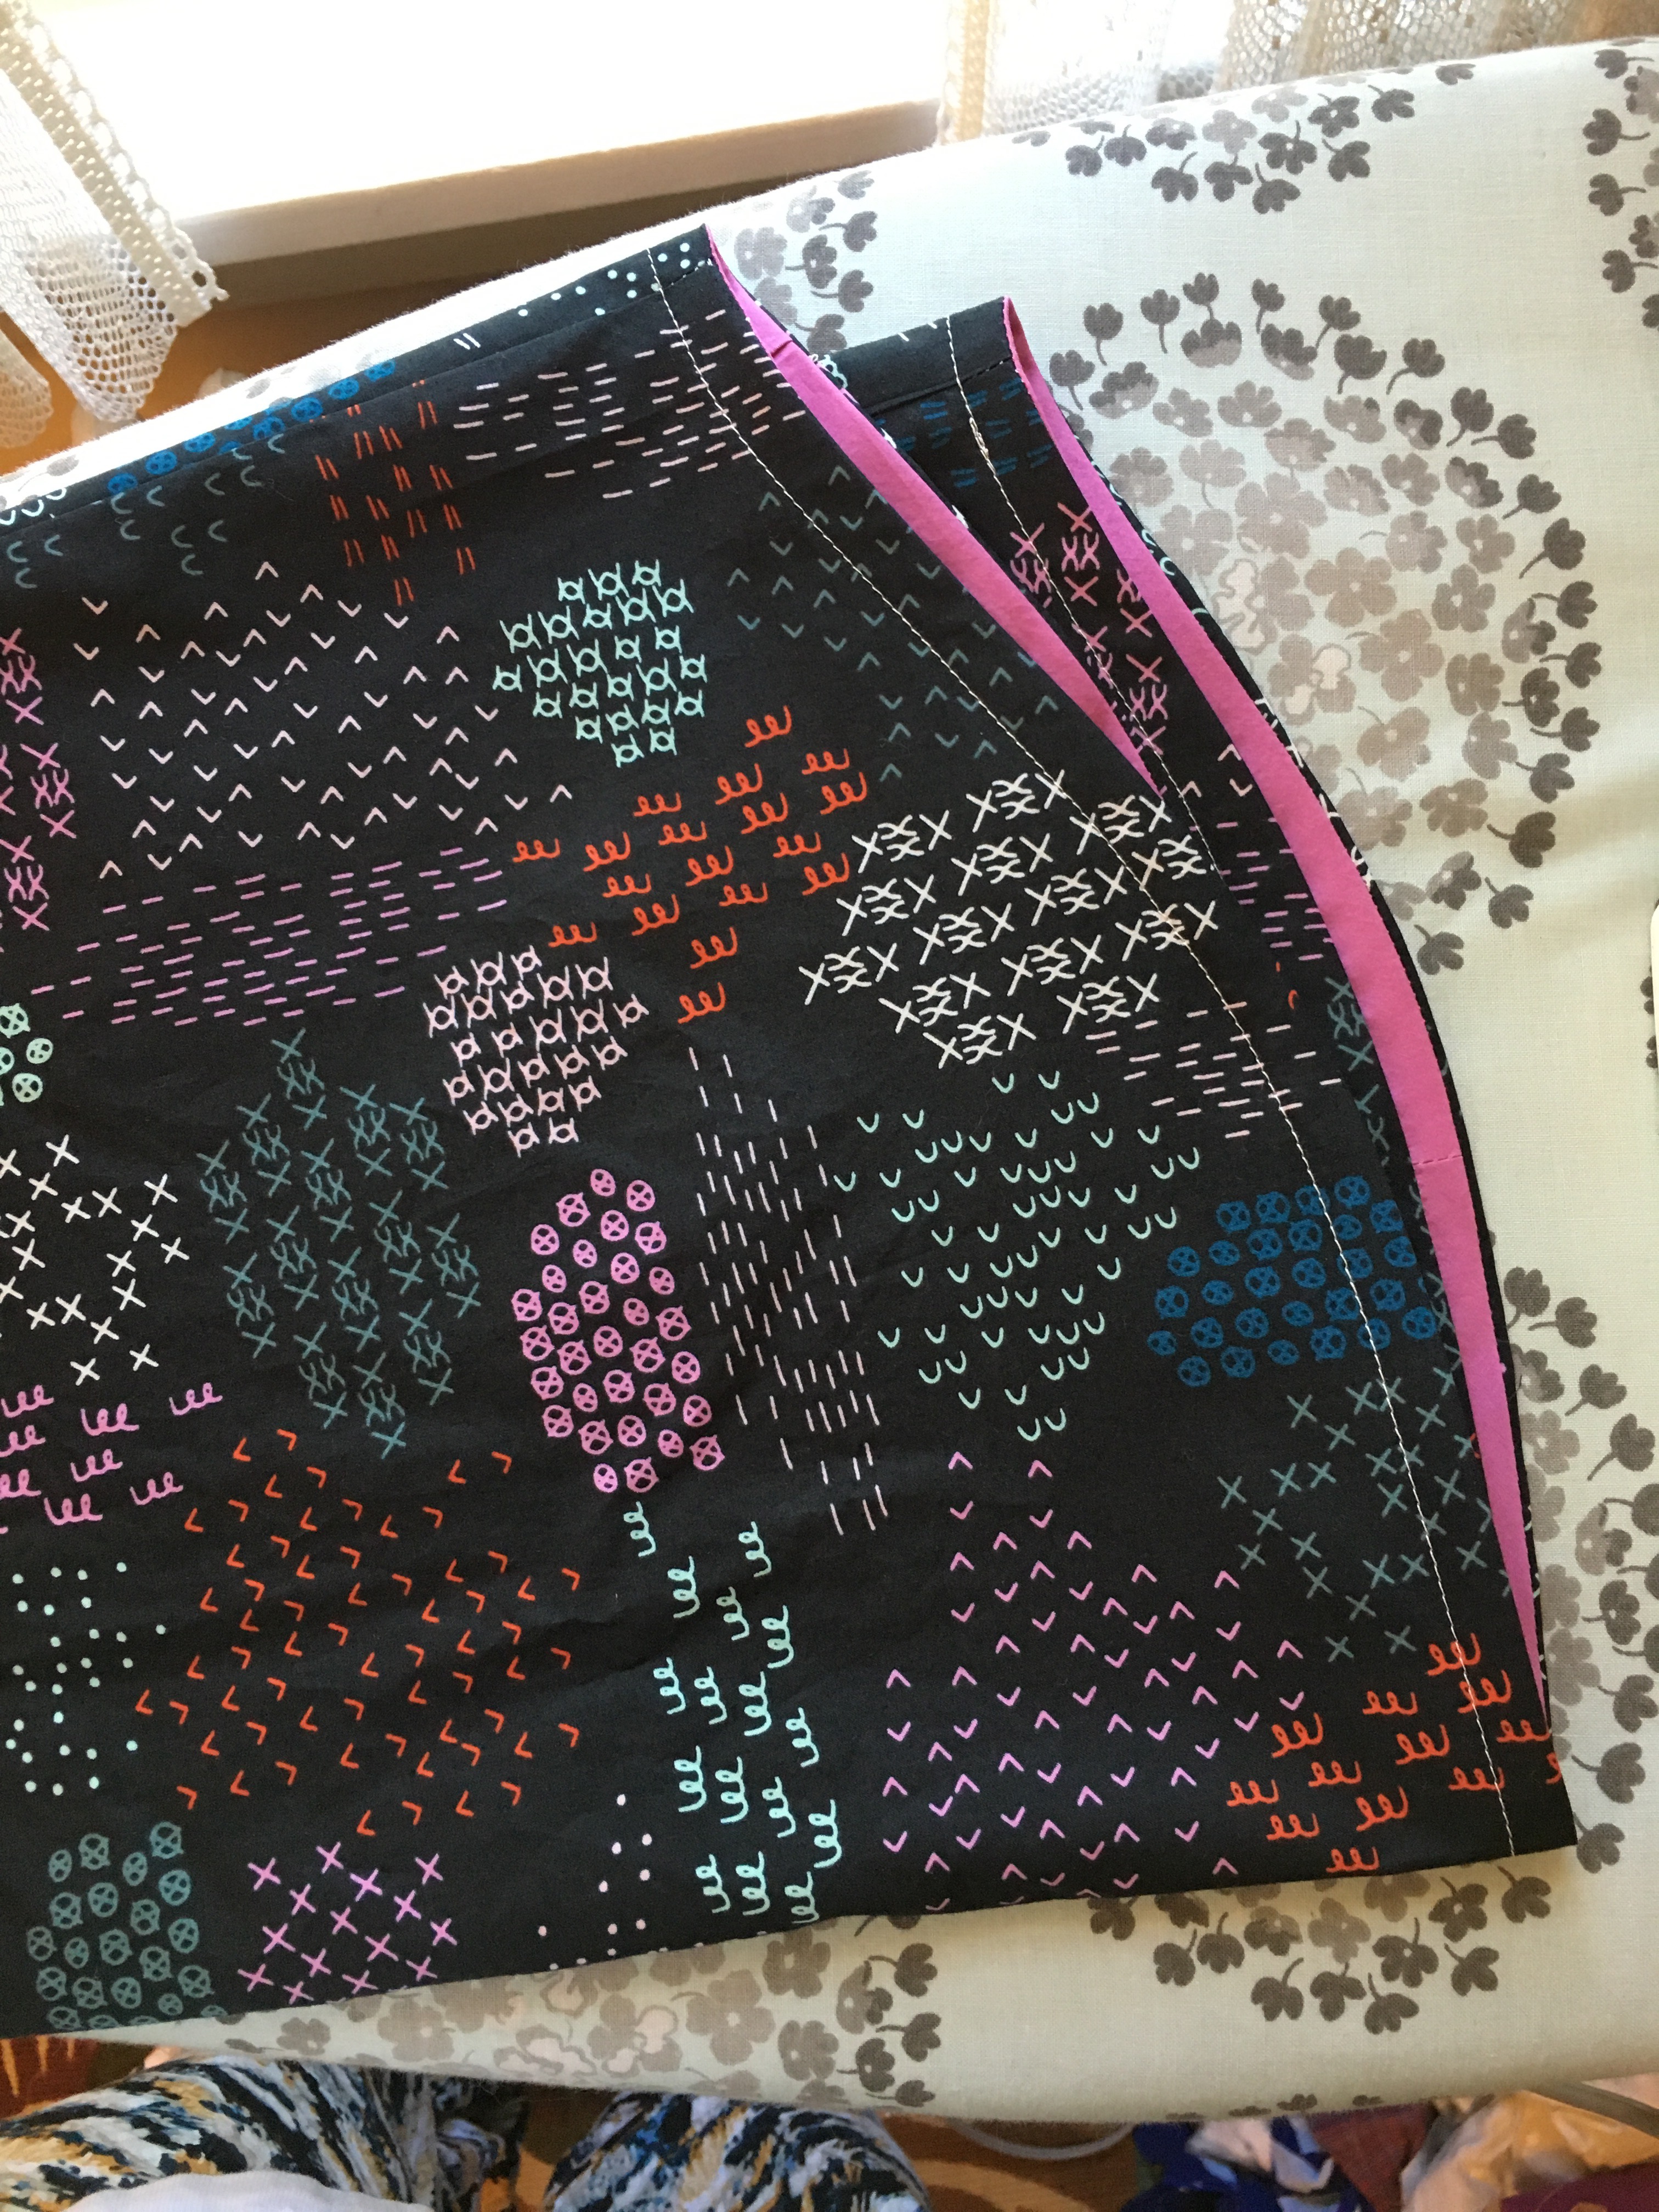
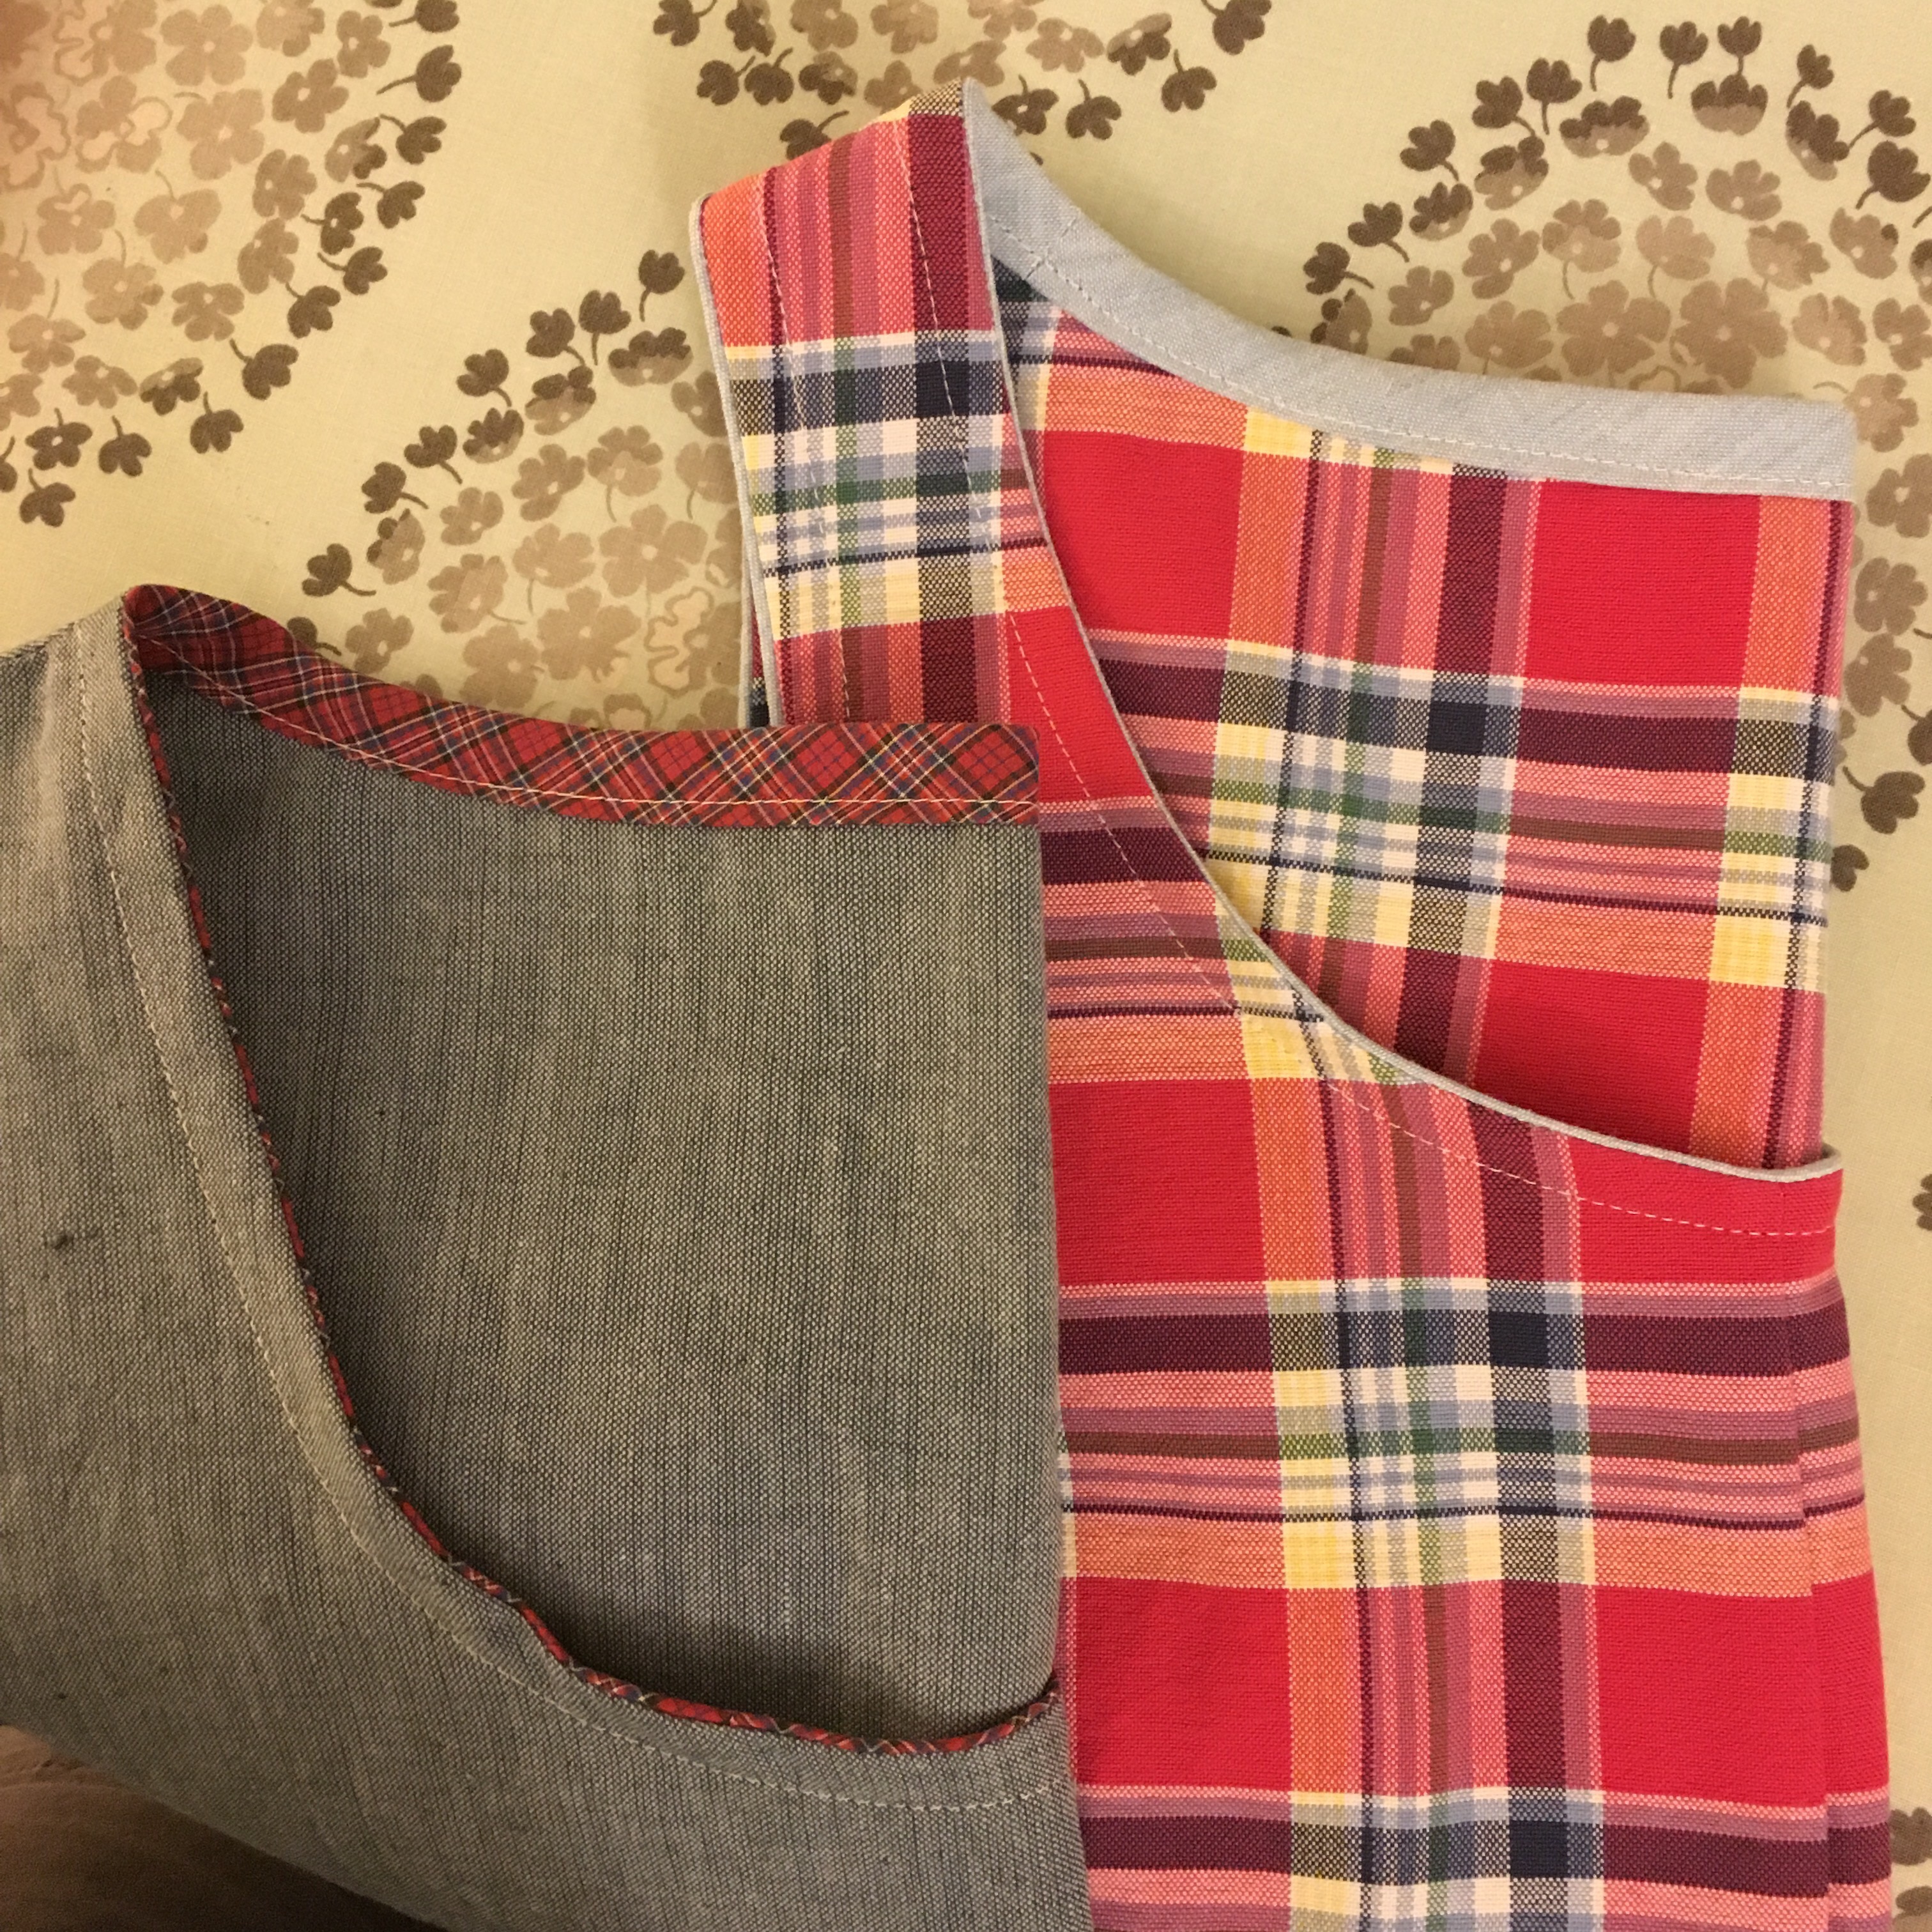
 Both versions.
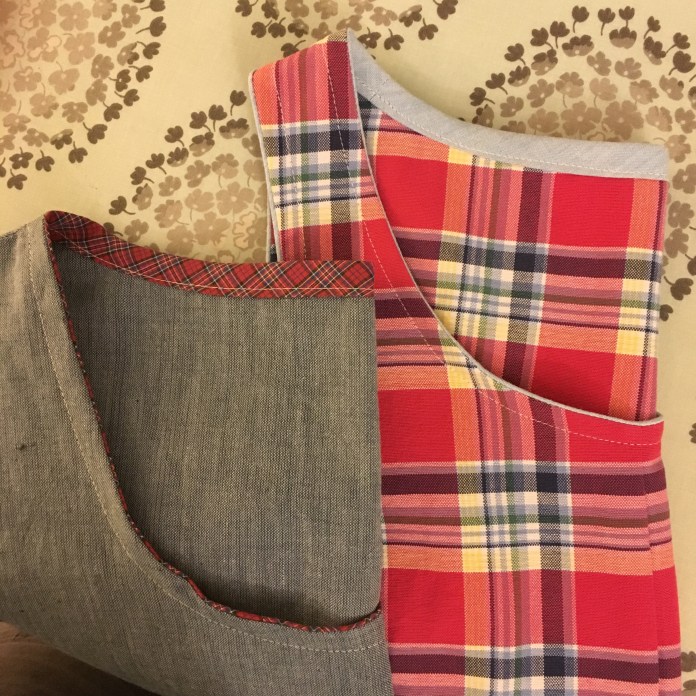 Another view so you can see the blue edging.
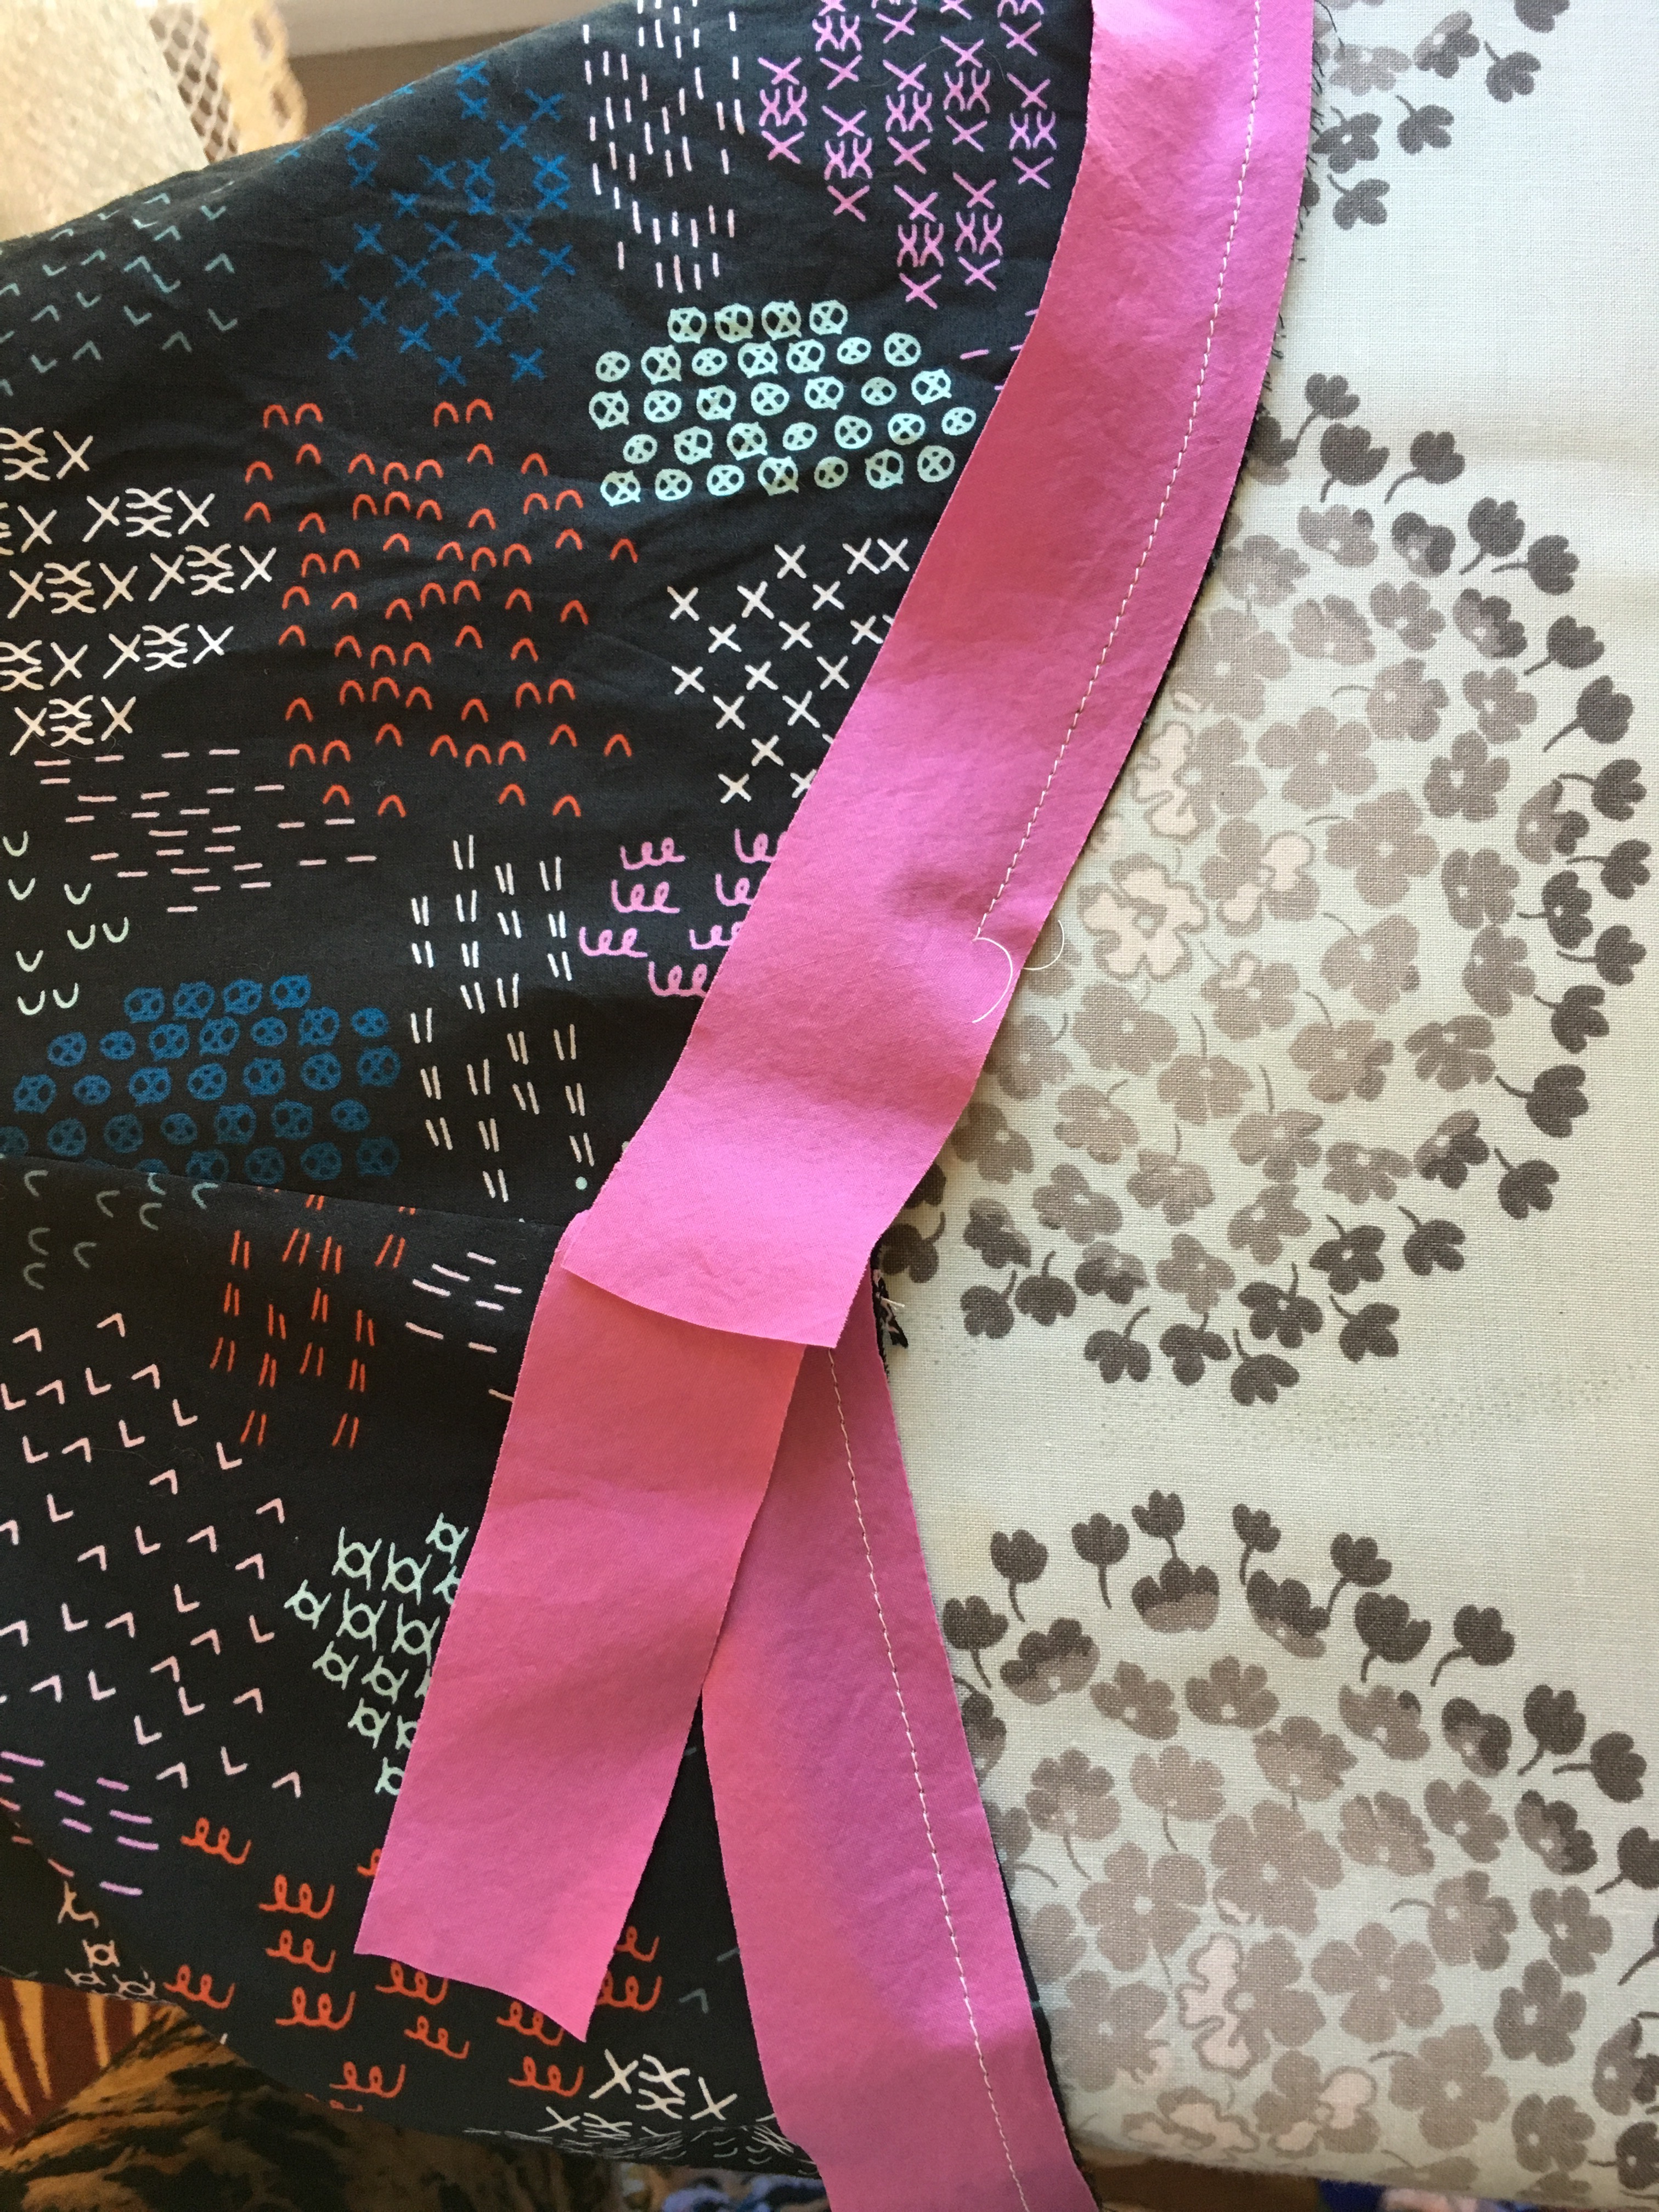
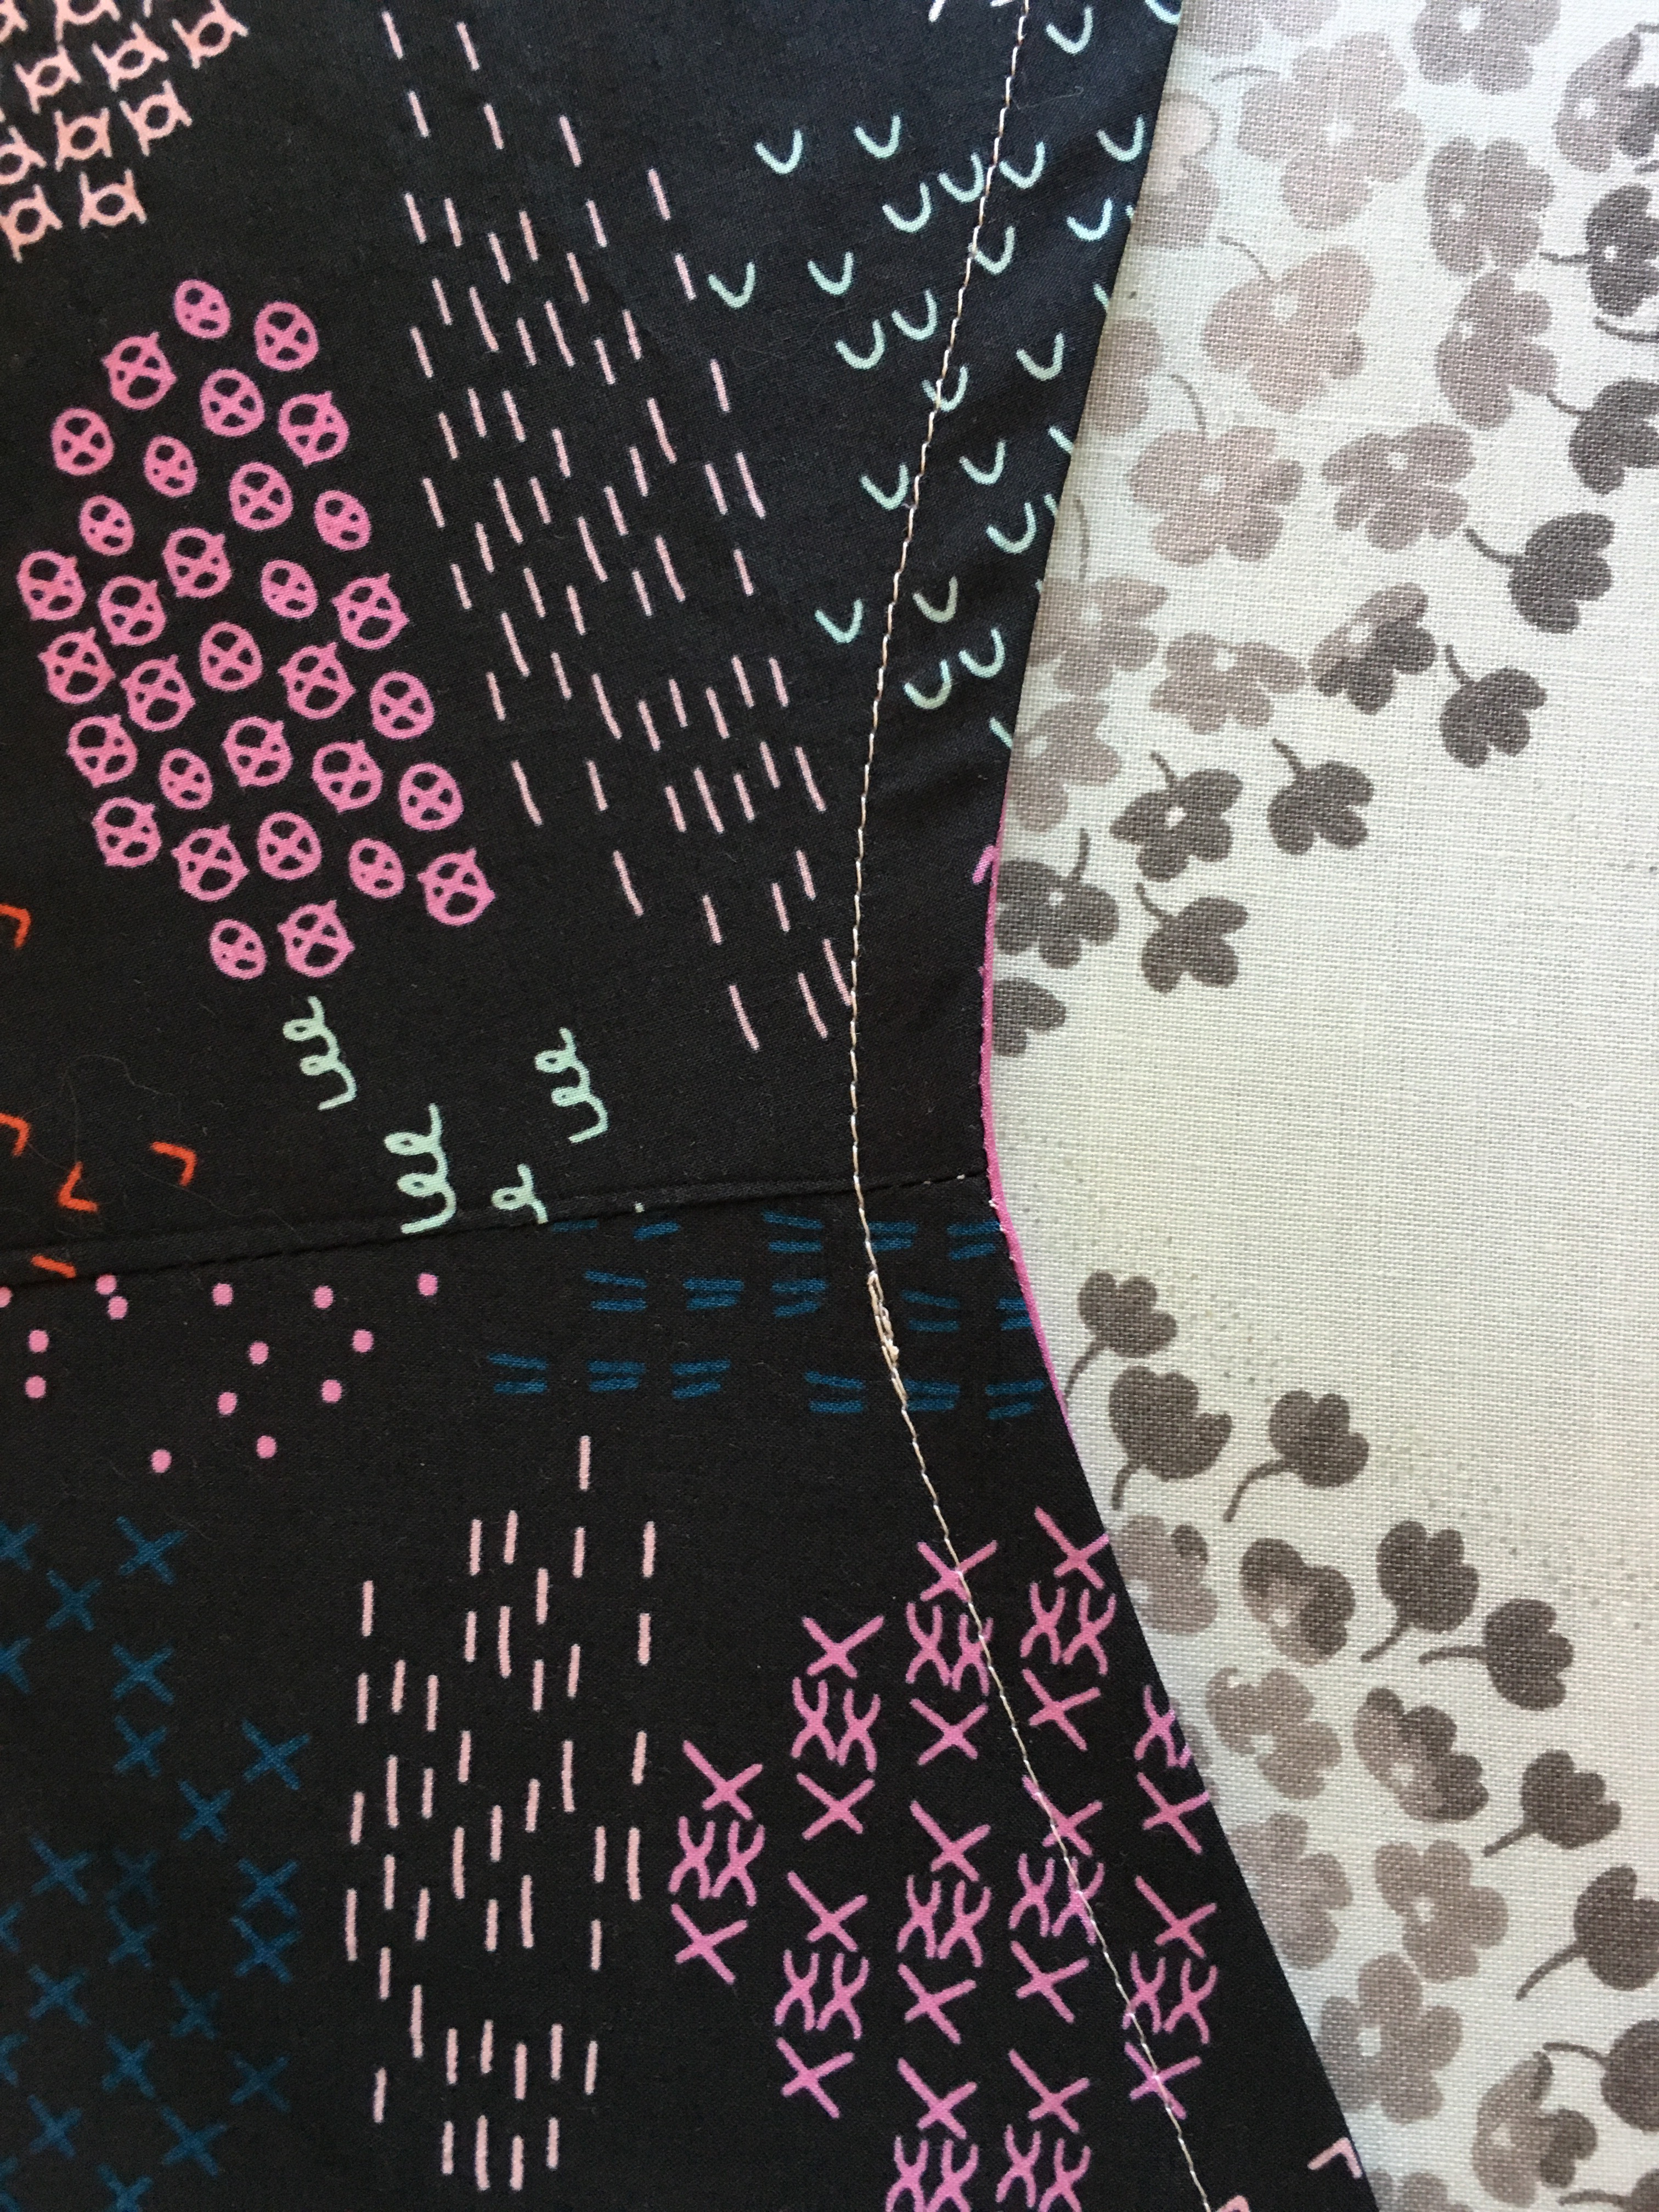
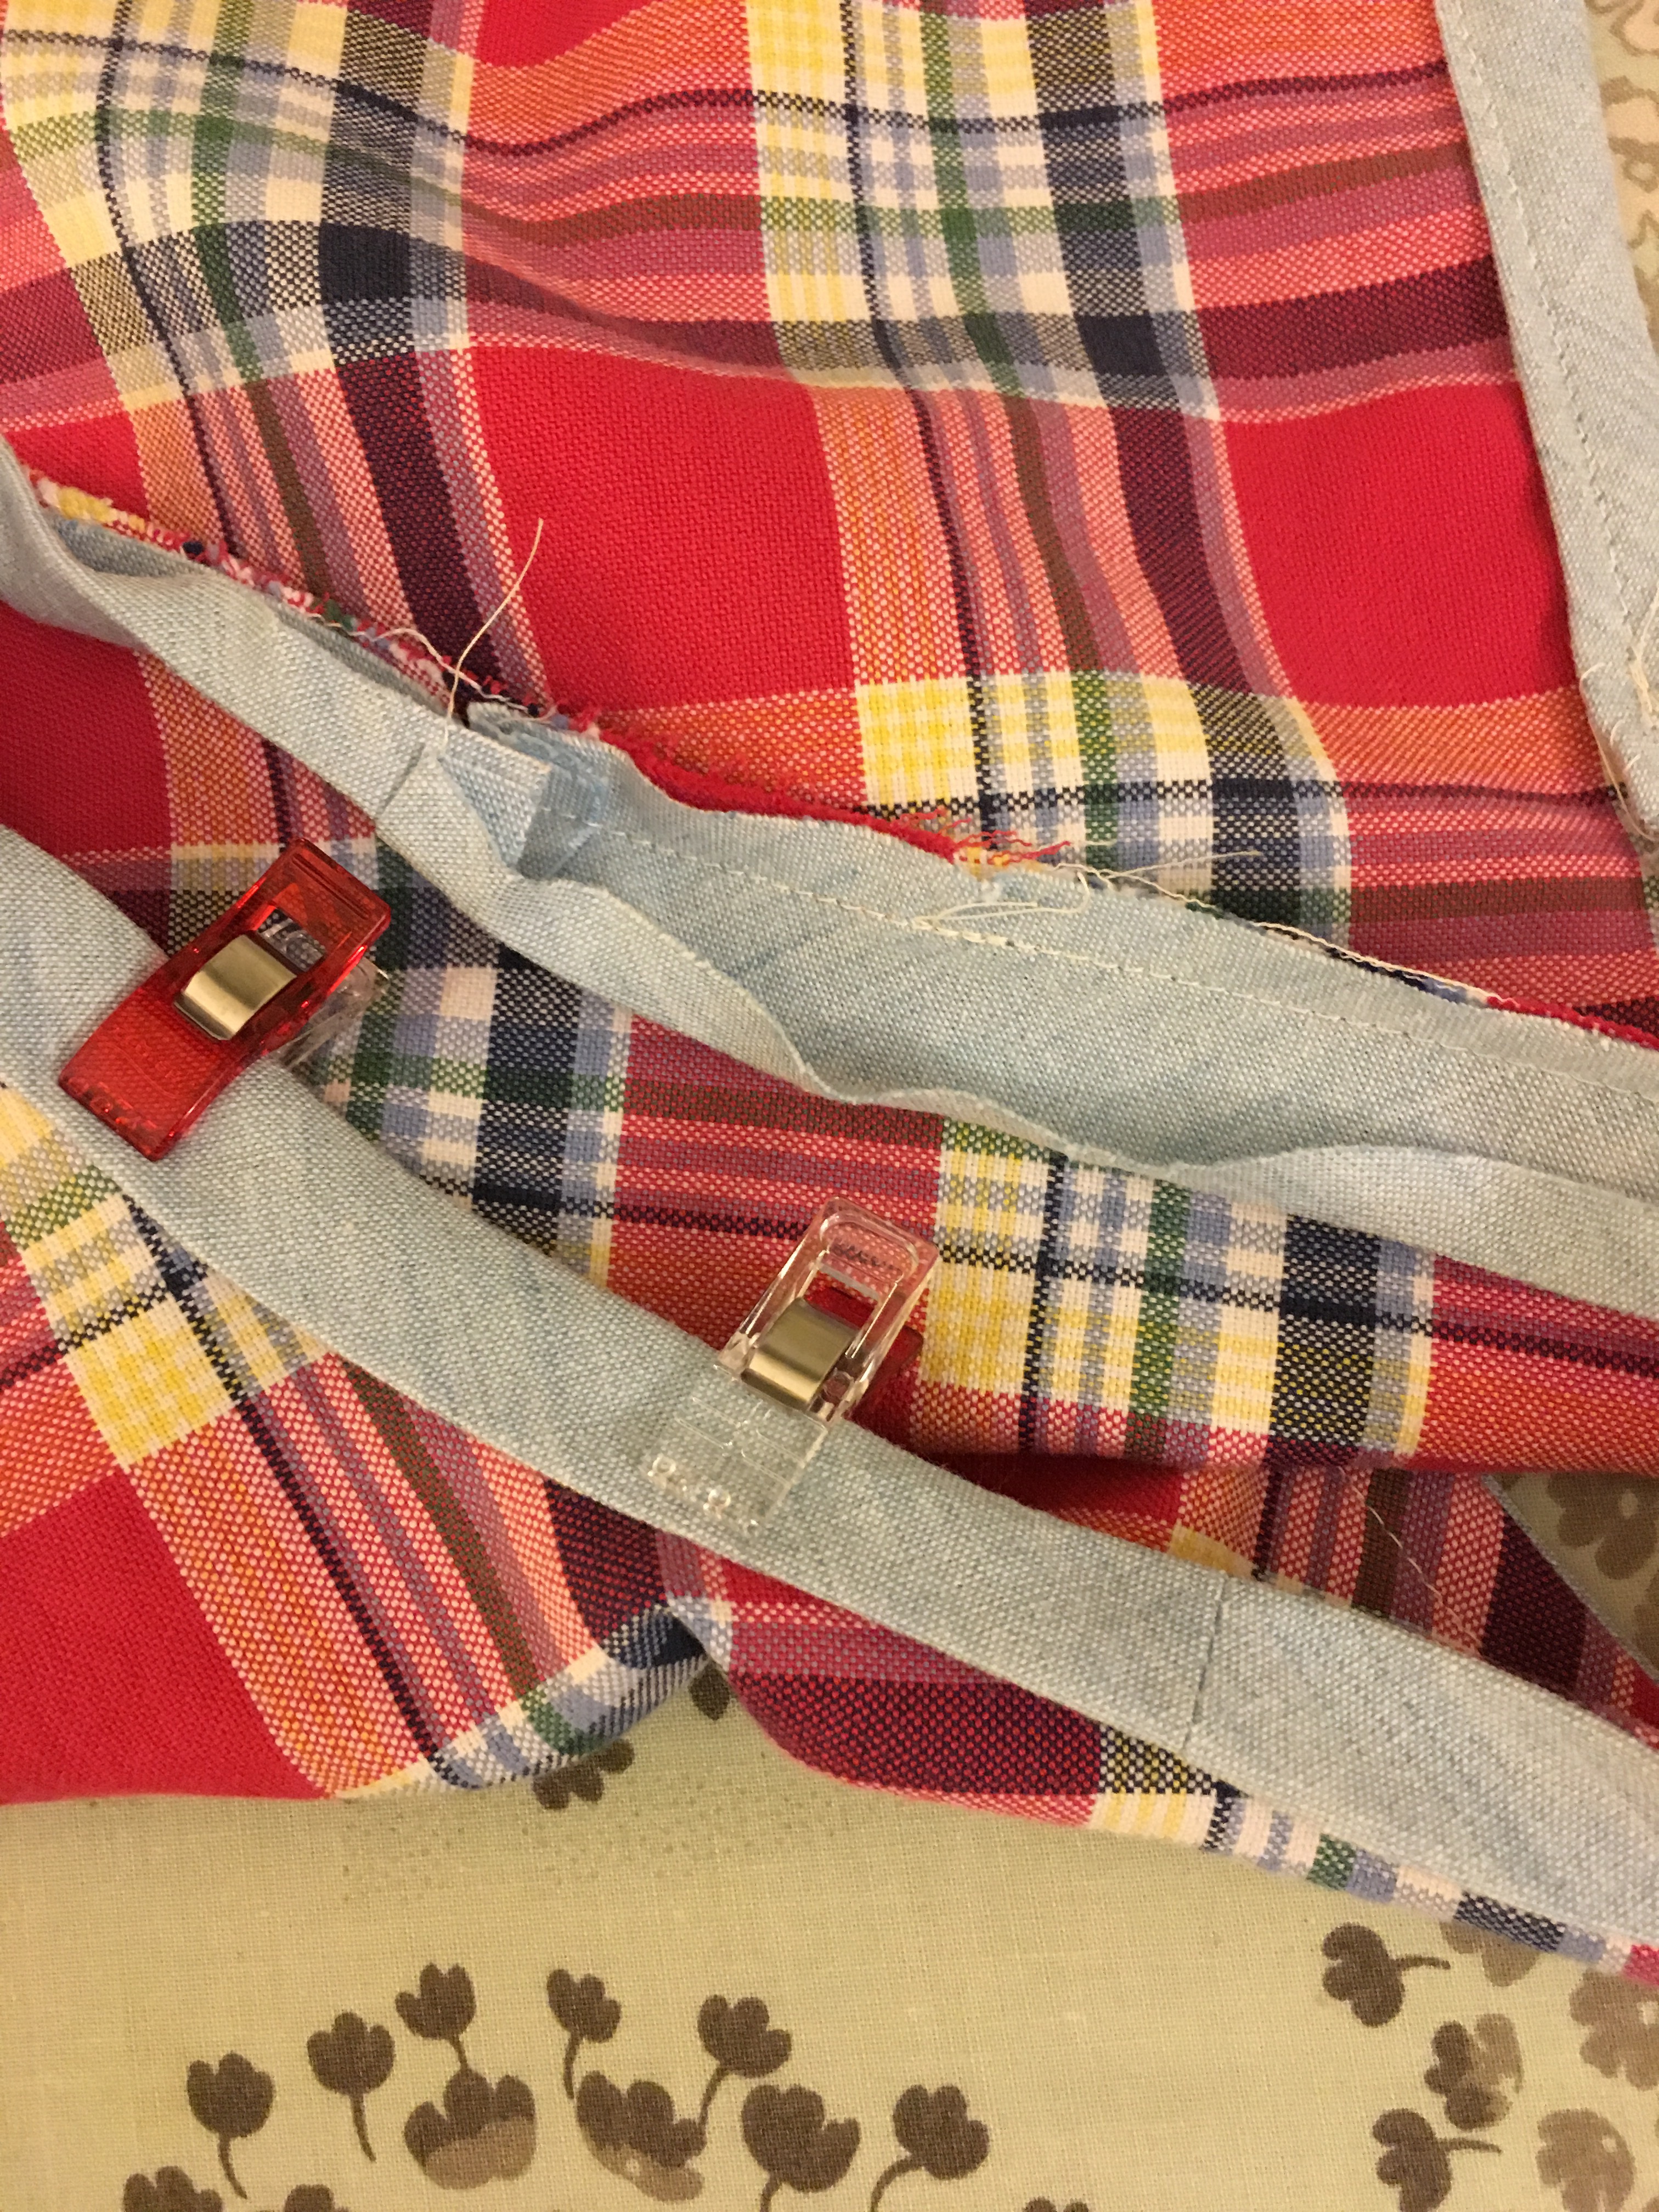
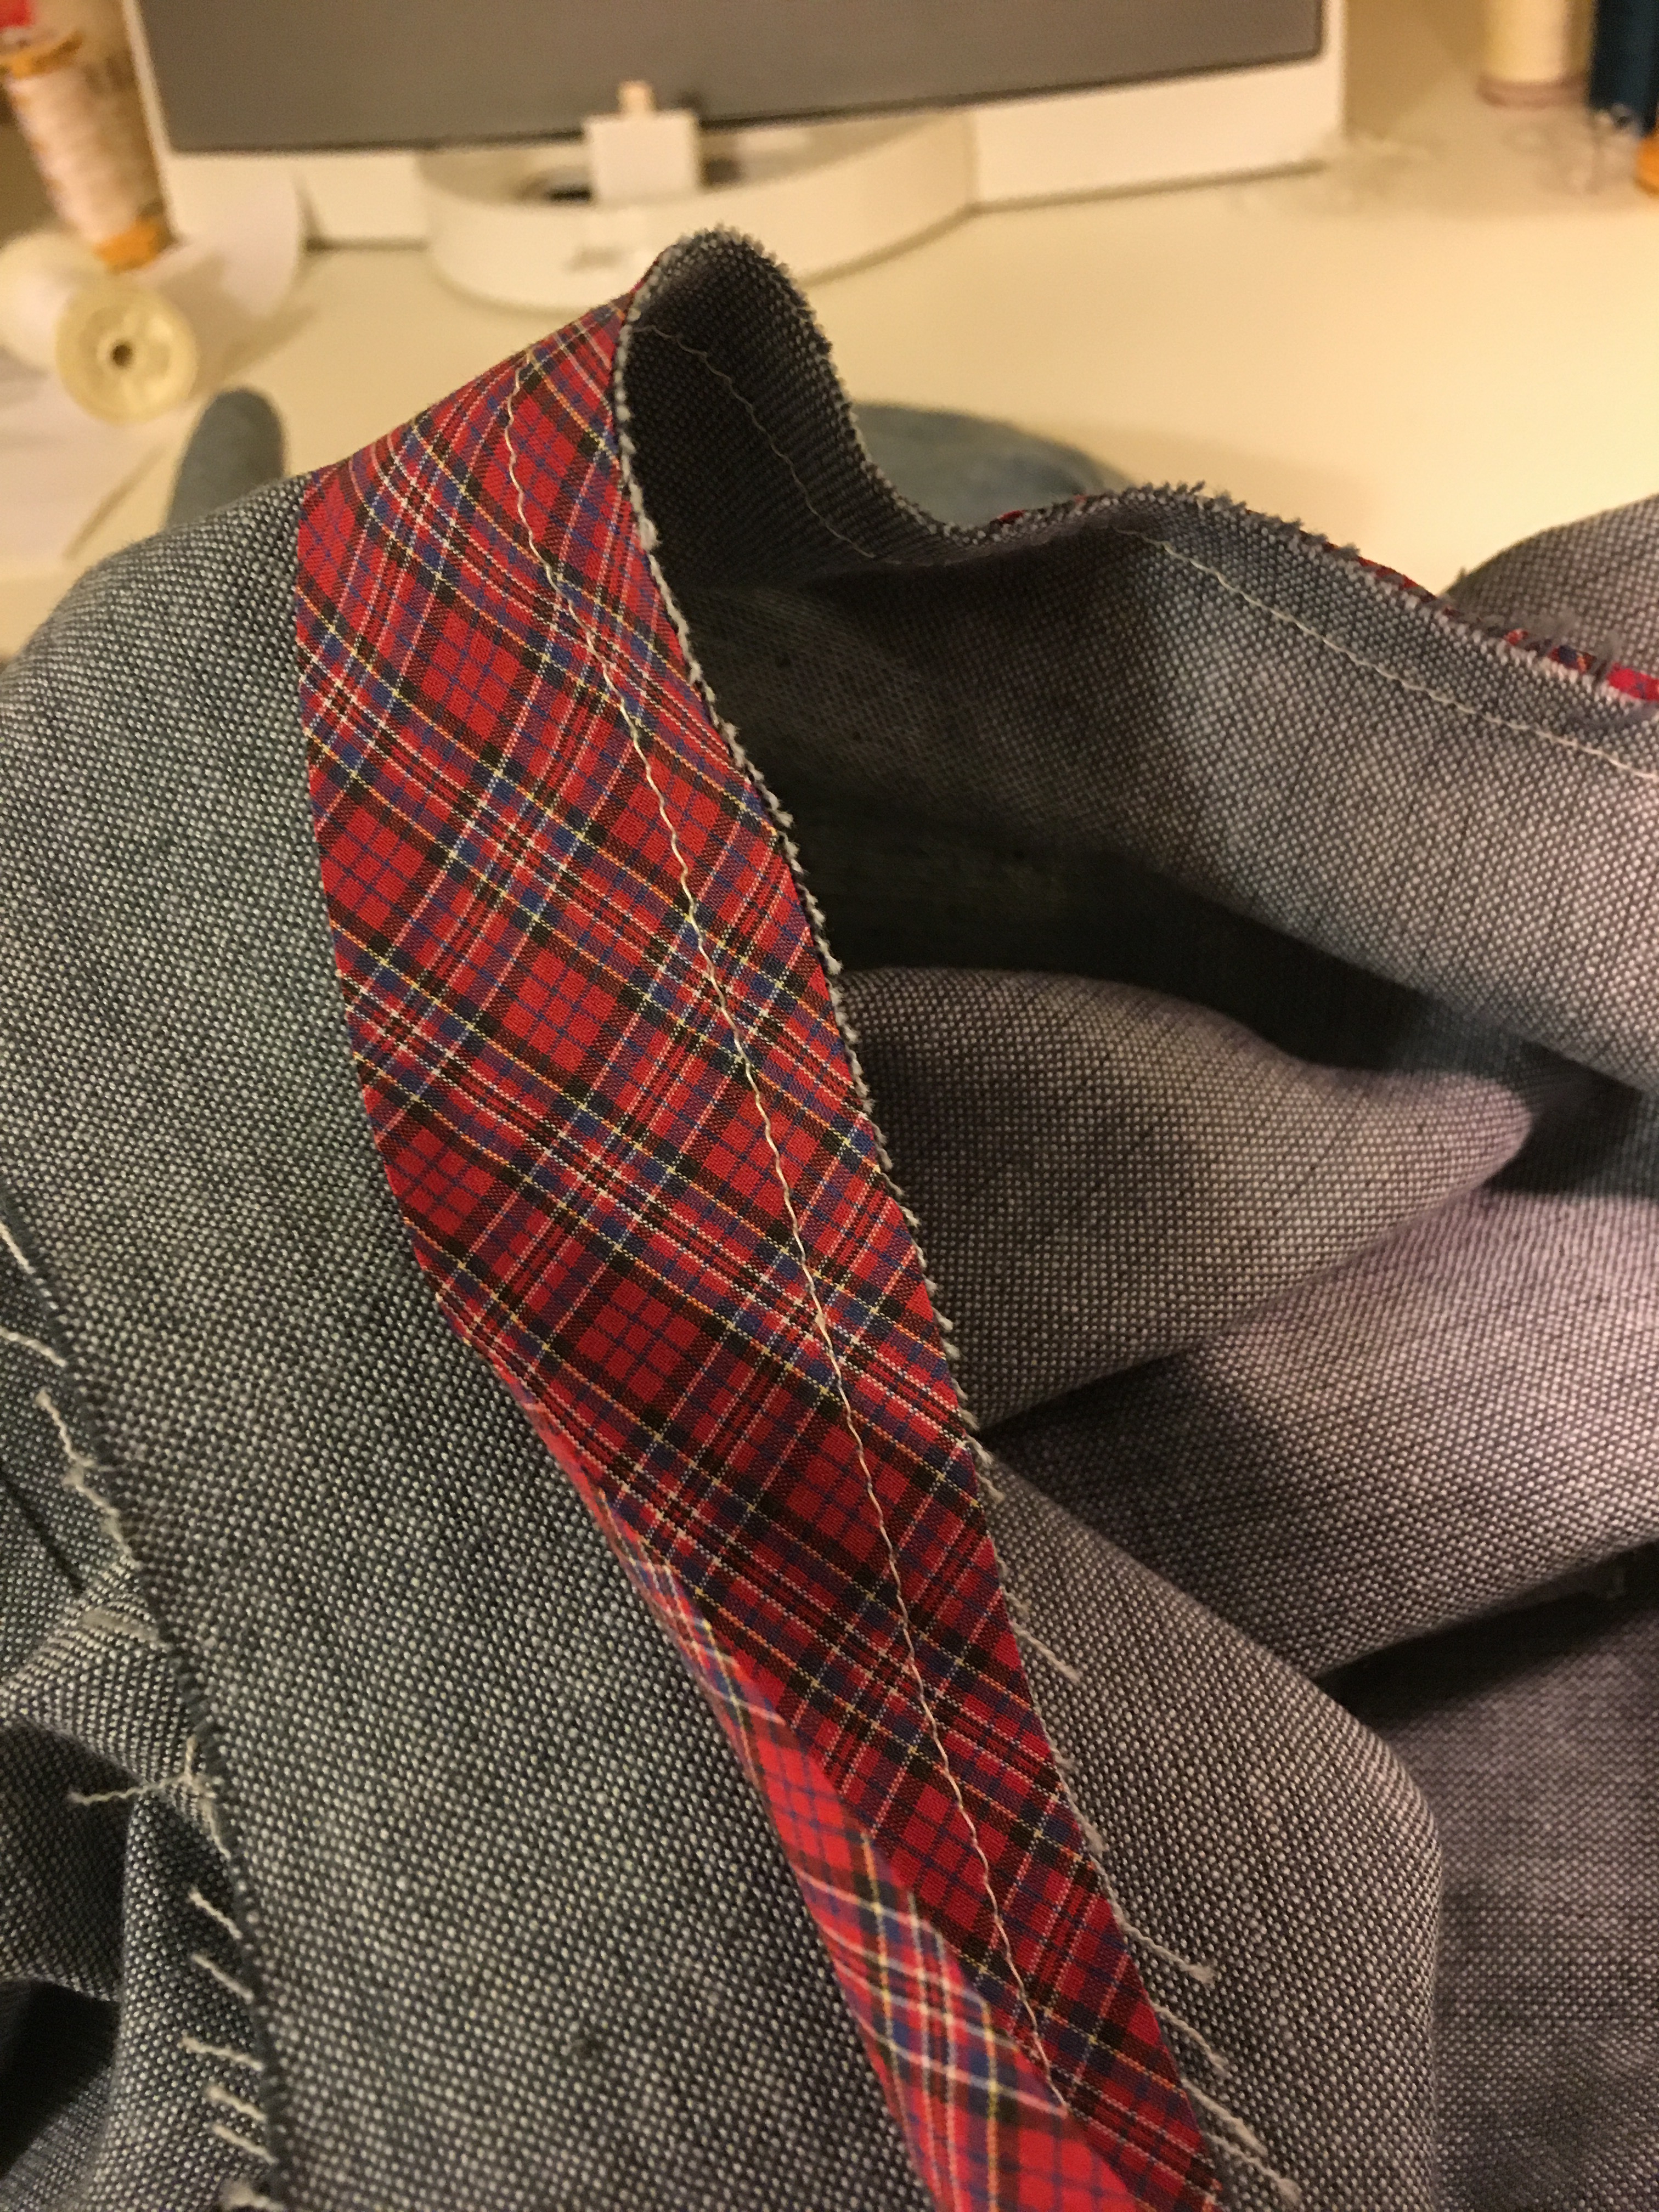
 Applying binding to the hem. You can see how the front seam doesn’t line up exactly in terms of plaid matching but it is pretty close.
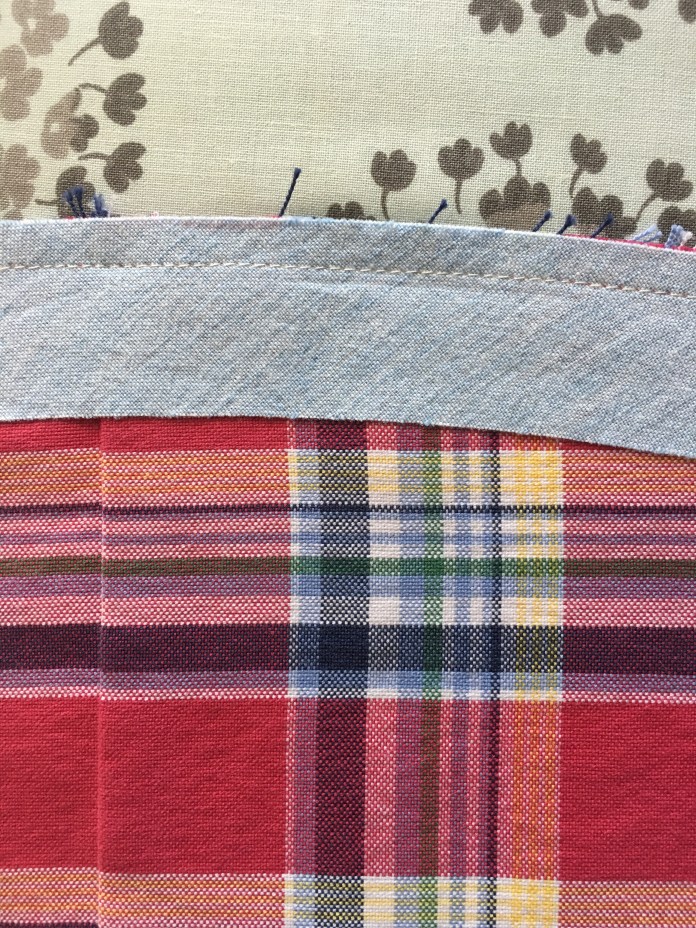 Another view of how I line up the edge with the seam when making the binding sandwich.
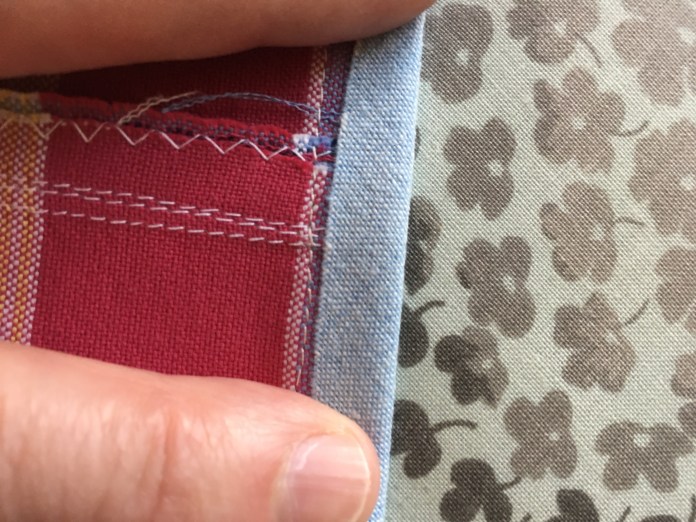 So many pictures (I went a little crazy).
 I ended up sewing a couple of lines of stitching when I joined the front pieces in an attempt to better match the plaid. Not the neatest but this is going to be a hang out on the weekend Gemma so I wasn’t a perfectionist.
 More pictures showing the front seam (wonder clips are a good investment btw.)
 More binding close ups.
 Front door pictures of finished shirts.
 Sadly I cut a small bit of the fabric with my rotary cutter by mistake in my haste when I cut out the front. You can see a little repair I did under the arm hole with some interfacing and some zigzagging. It isn’t really noticeable when being worn.
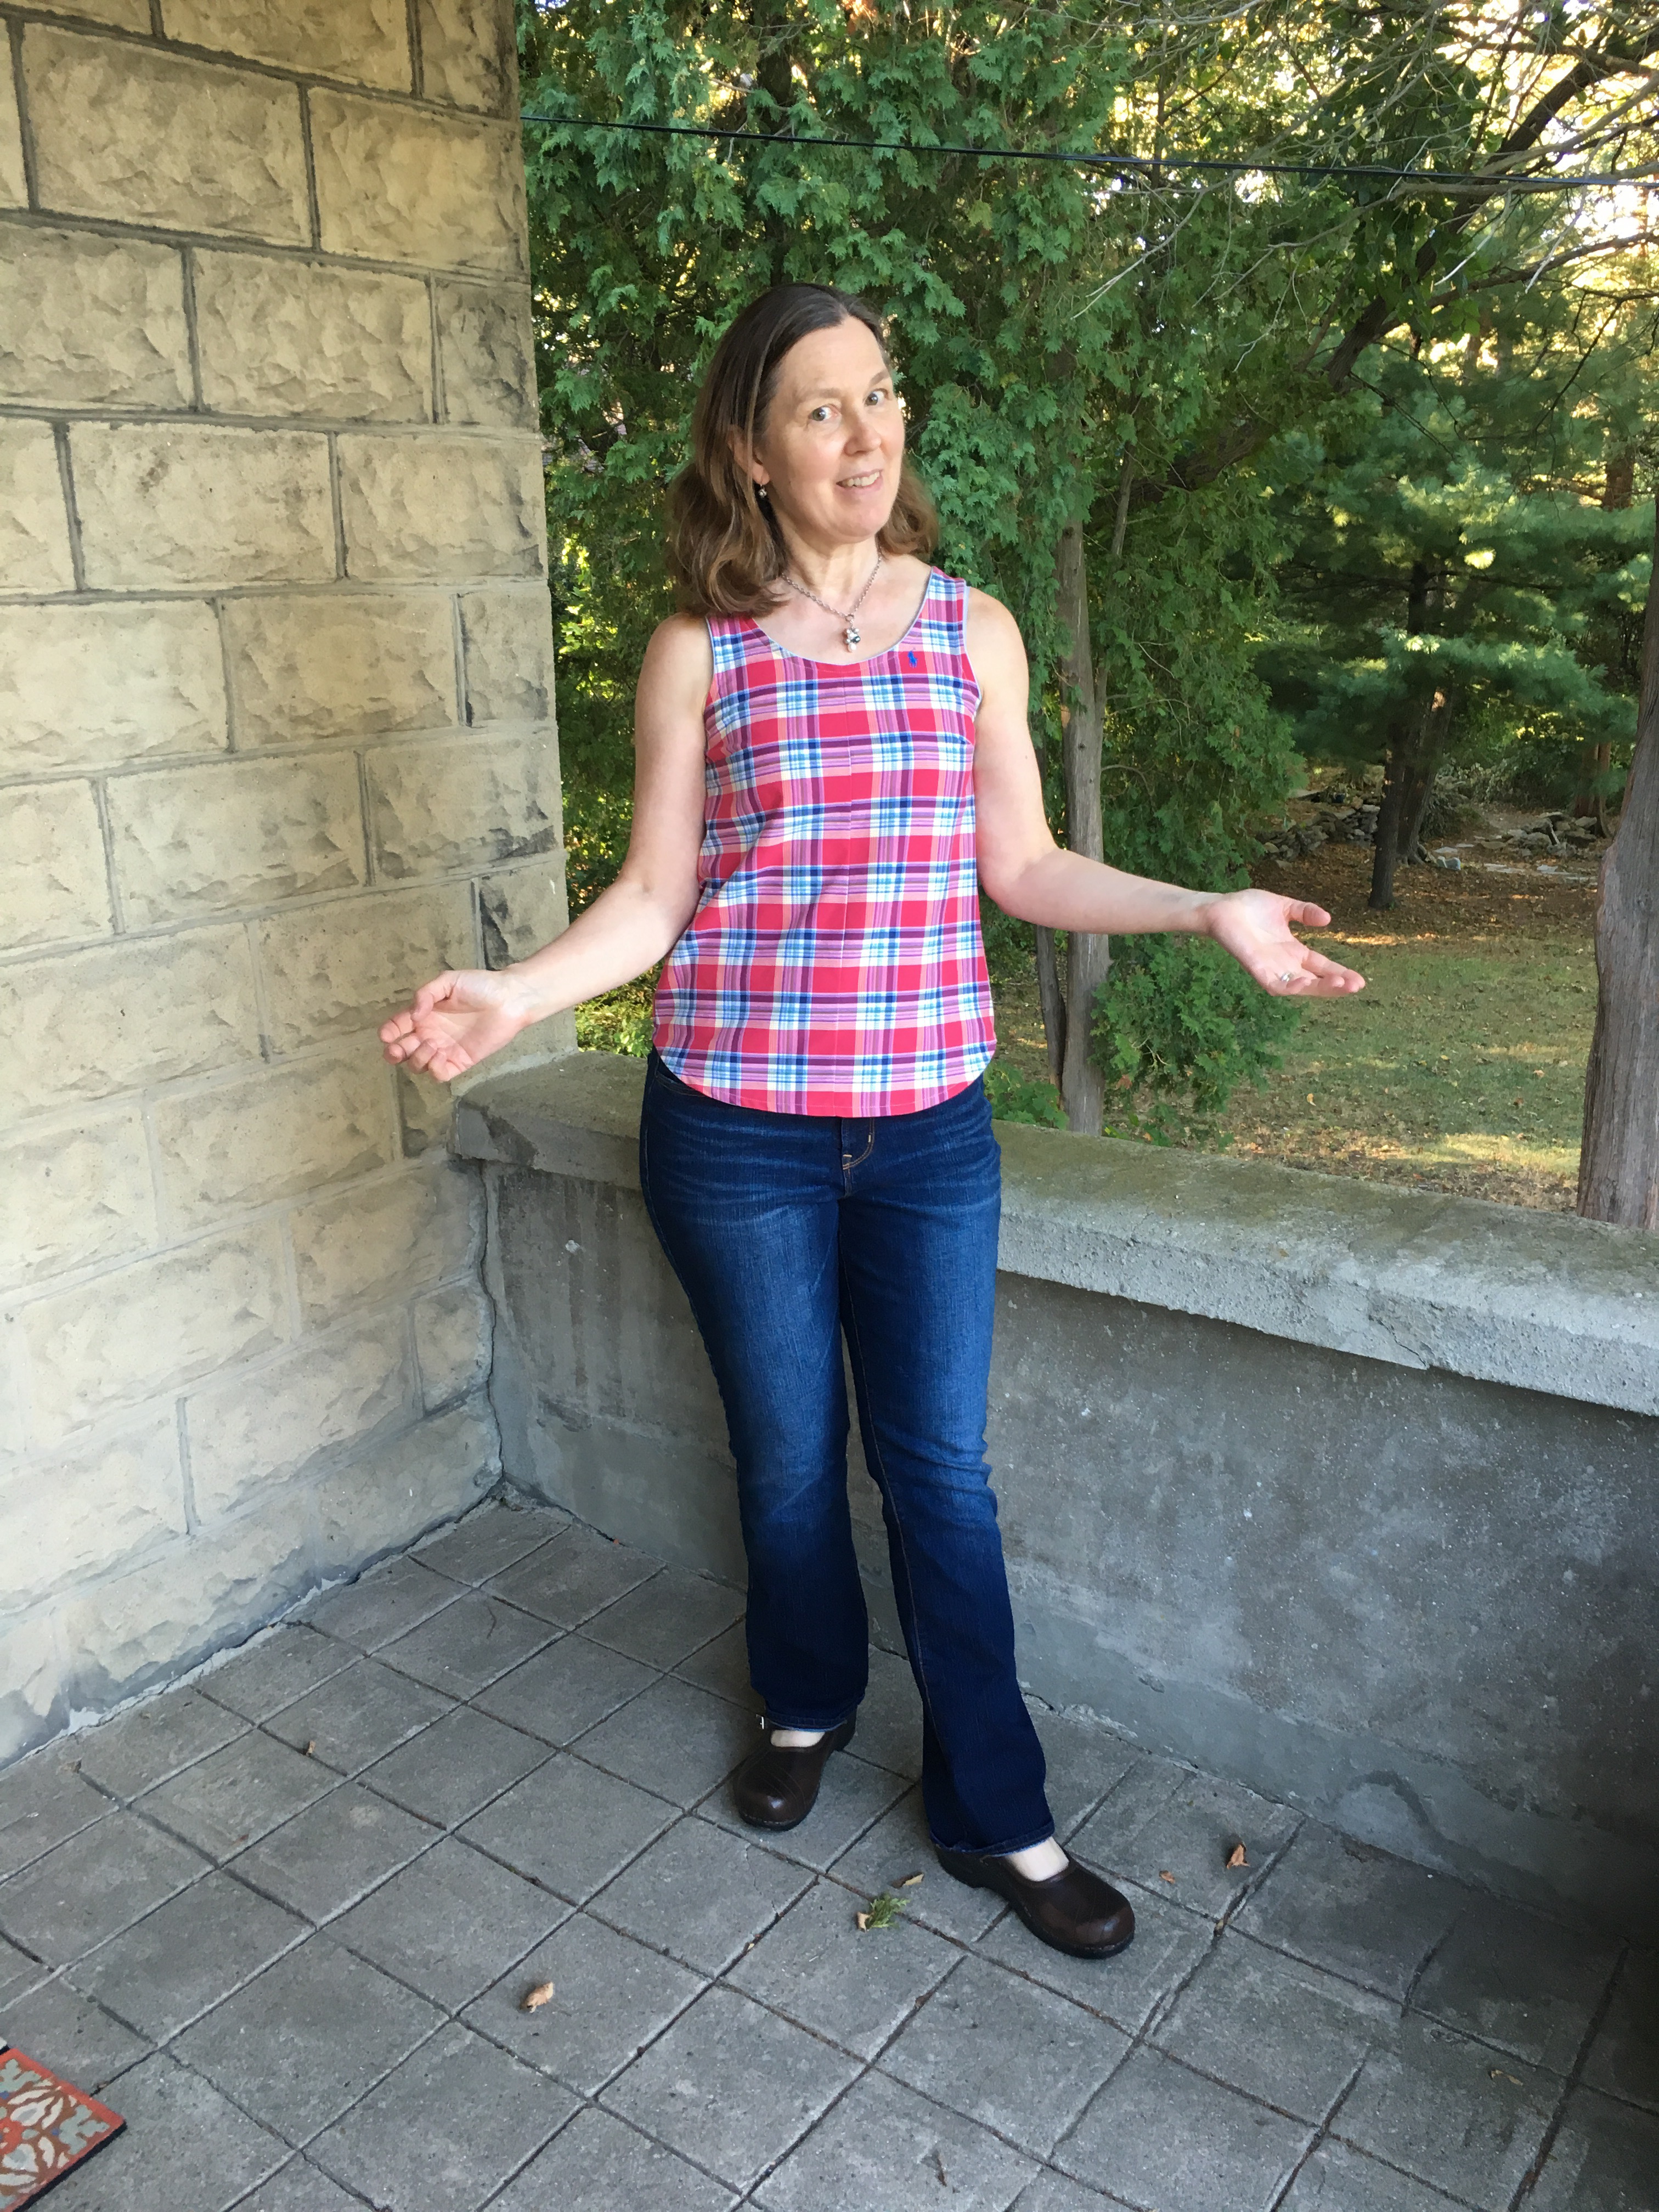
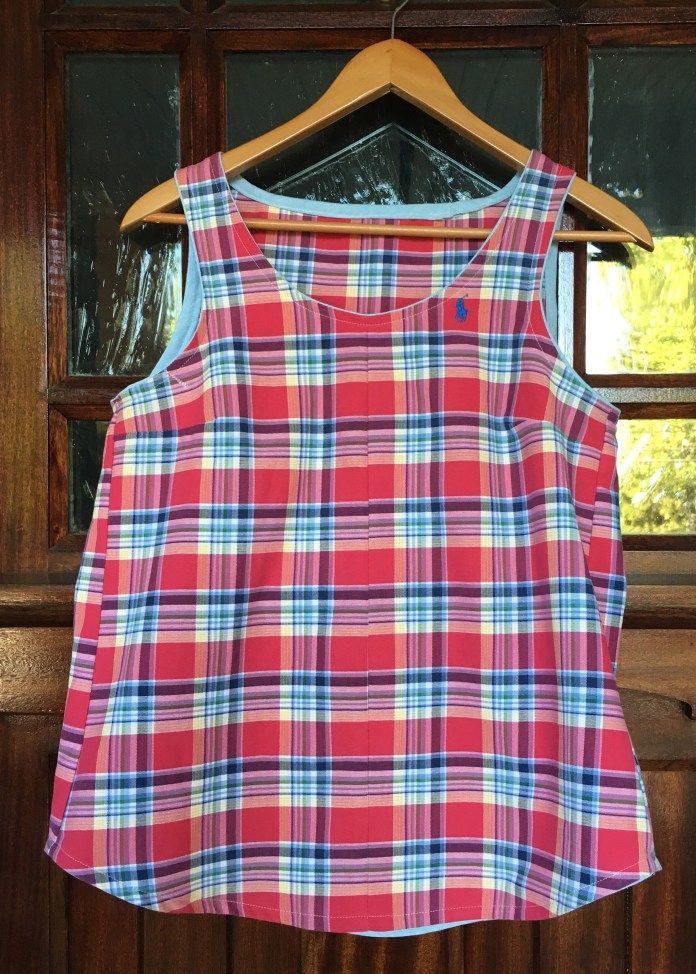 And as worn. Thanks to my daughter the photographer. Front view.
  Both of these are cut between the medium and small line on the pattern using the scoop neck. Perfect with jeans.
 Side view and back view.
 And version 2. Pretty good for upcycling right? Run, do not walk, to your local Goodwill.
 Side view.
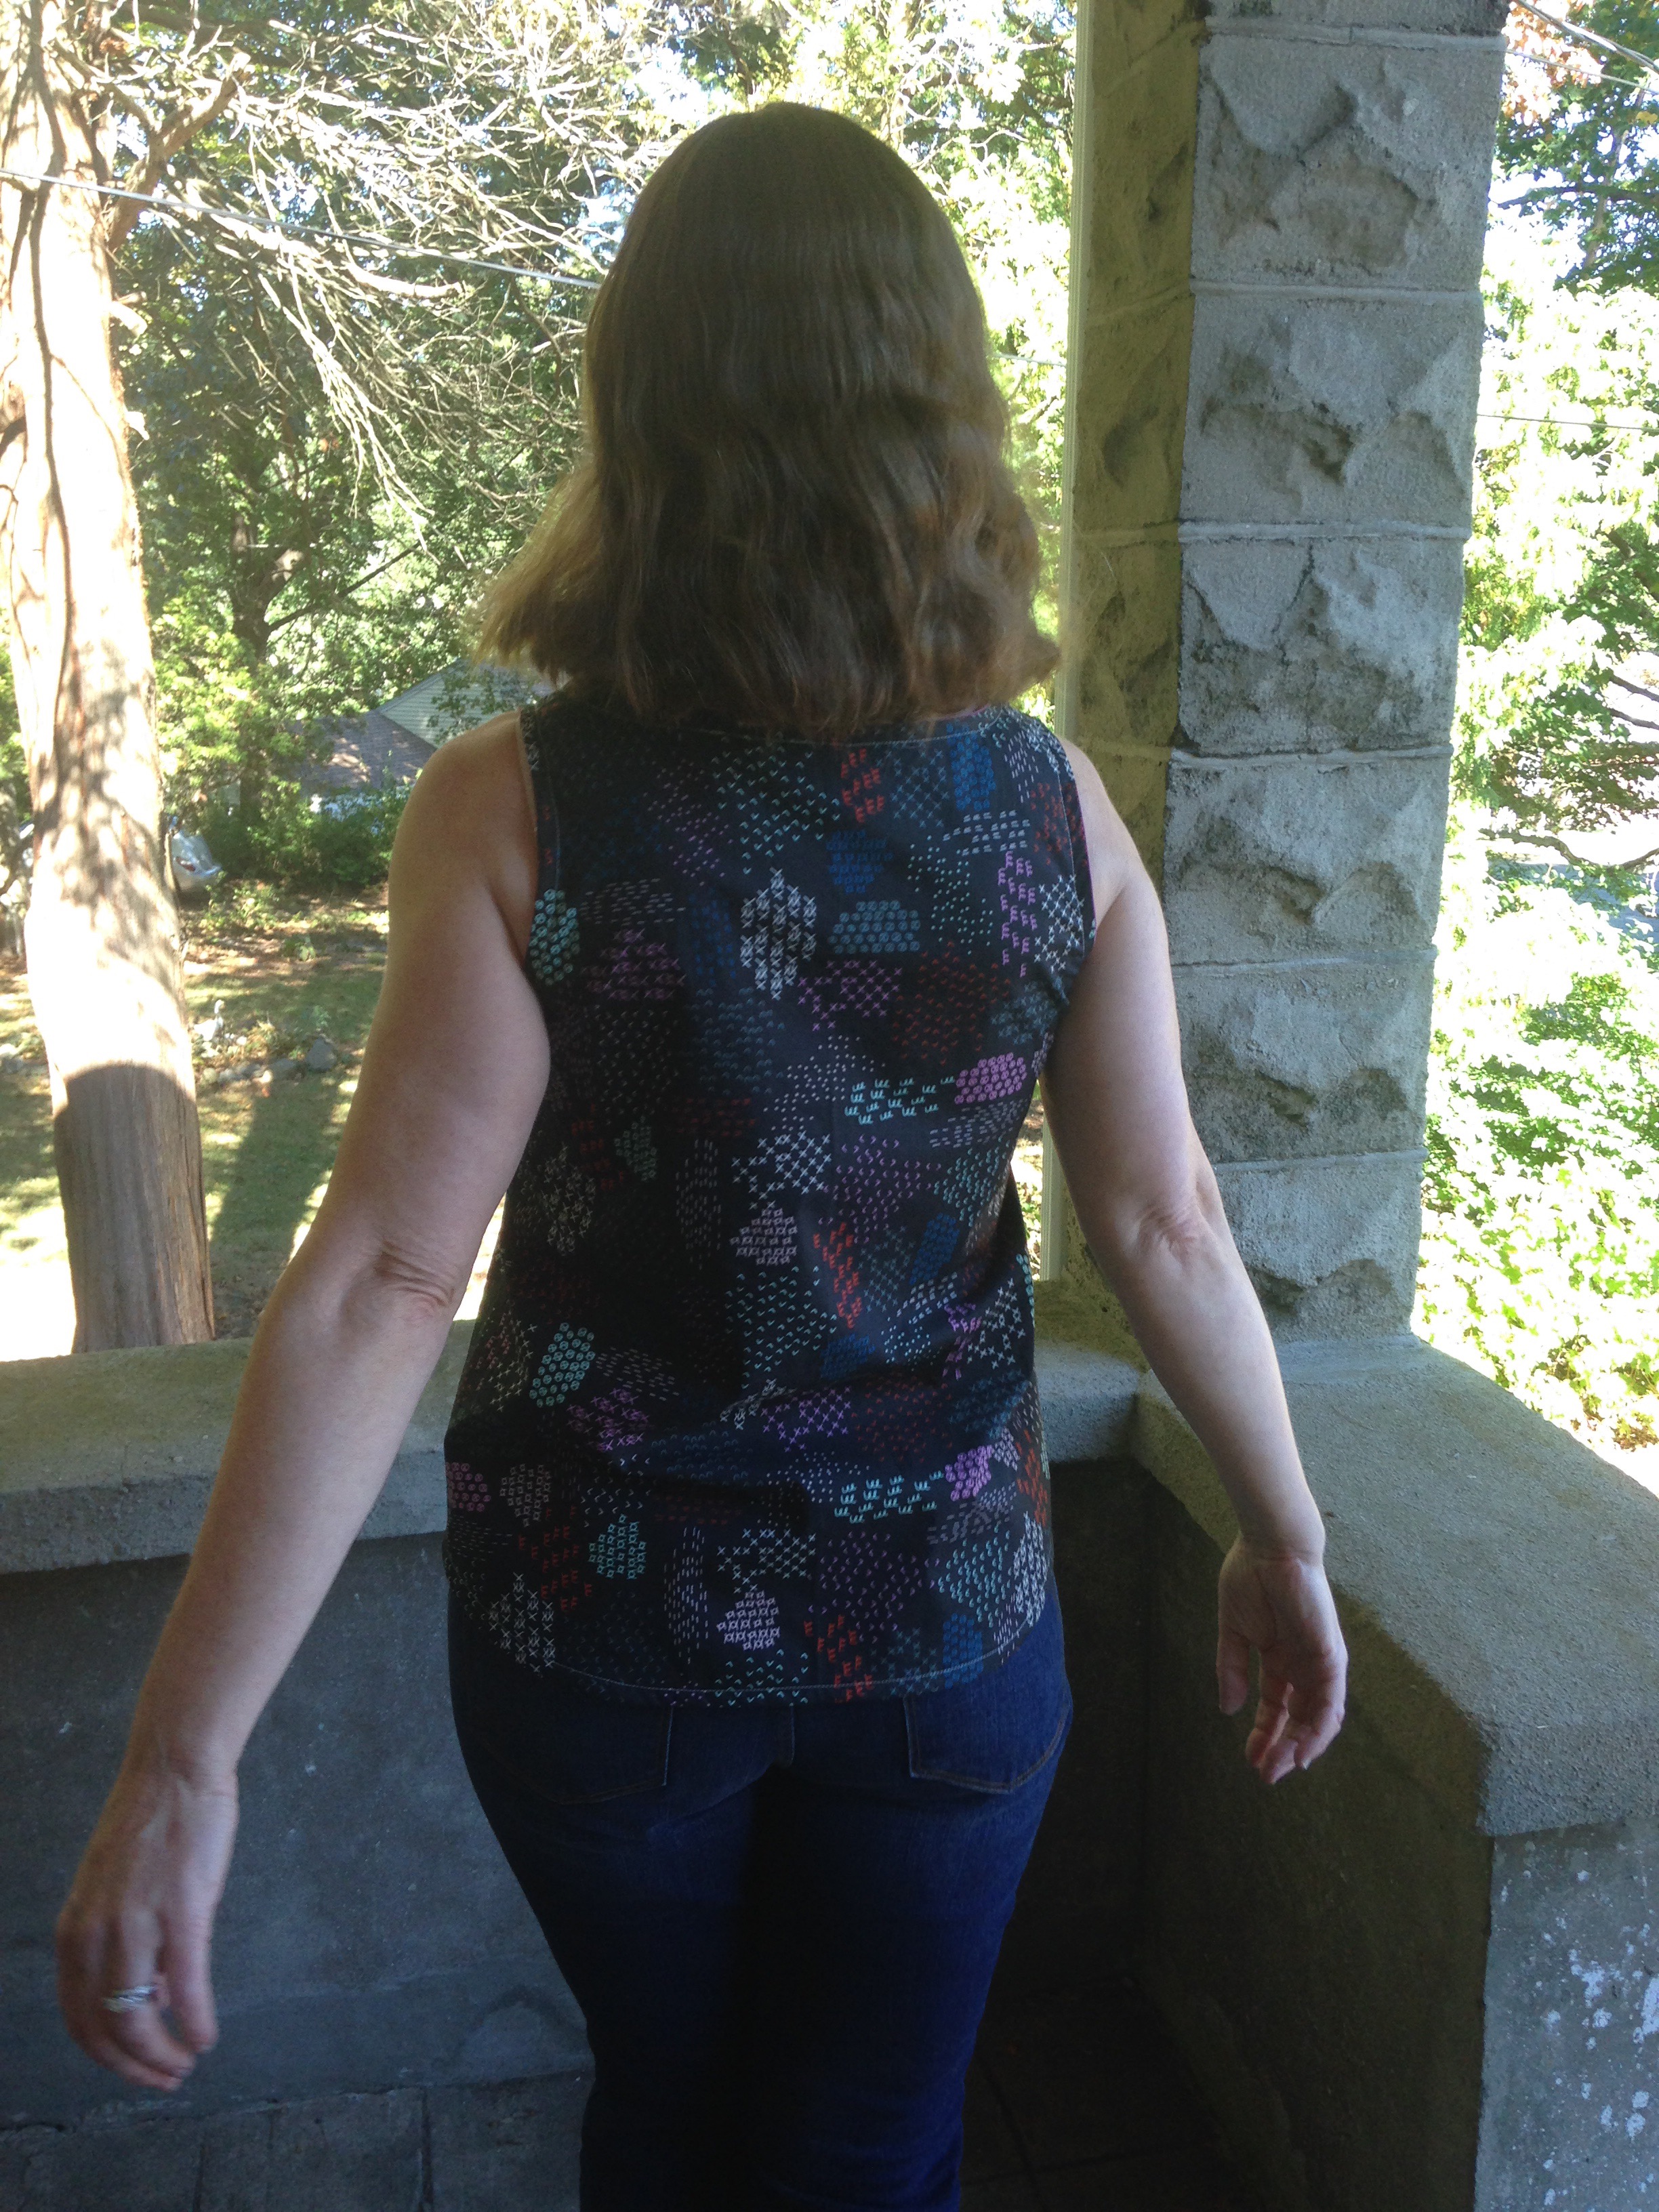
 Back view.
 Love these shirts and love this pattern!


 I had already started making a version of the Josephine Blouse by Made By Rae in this Loominous fabric when I saw a version of the Roscoe blouse on instagram with contrasting neck and sleeve binding and that was it.
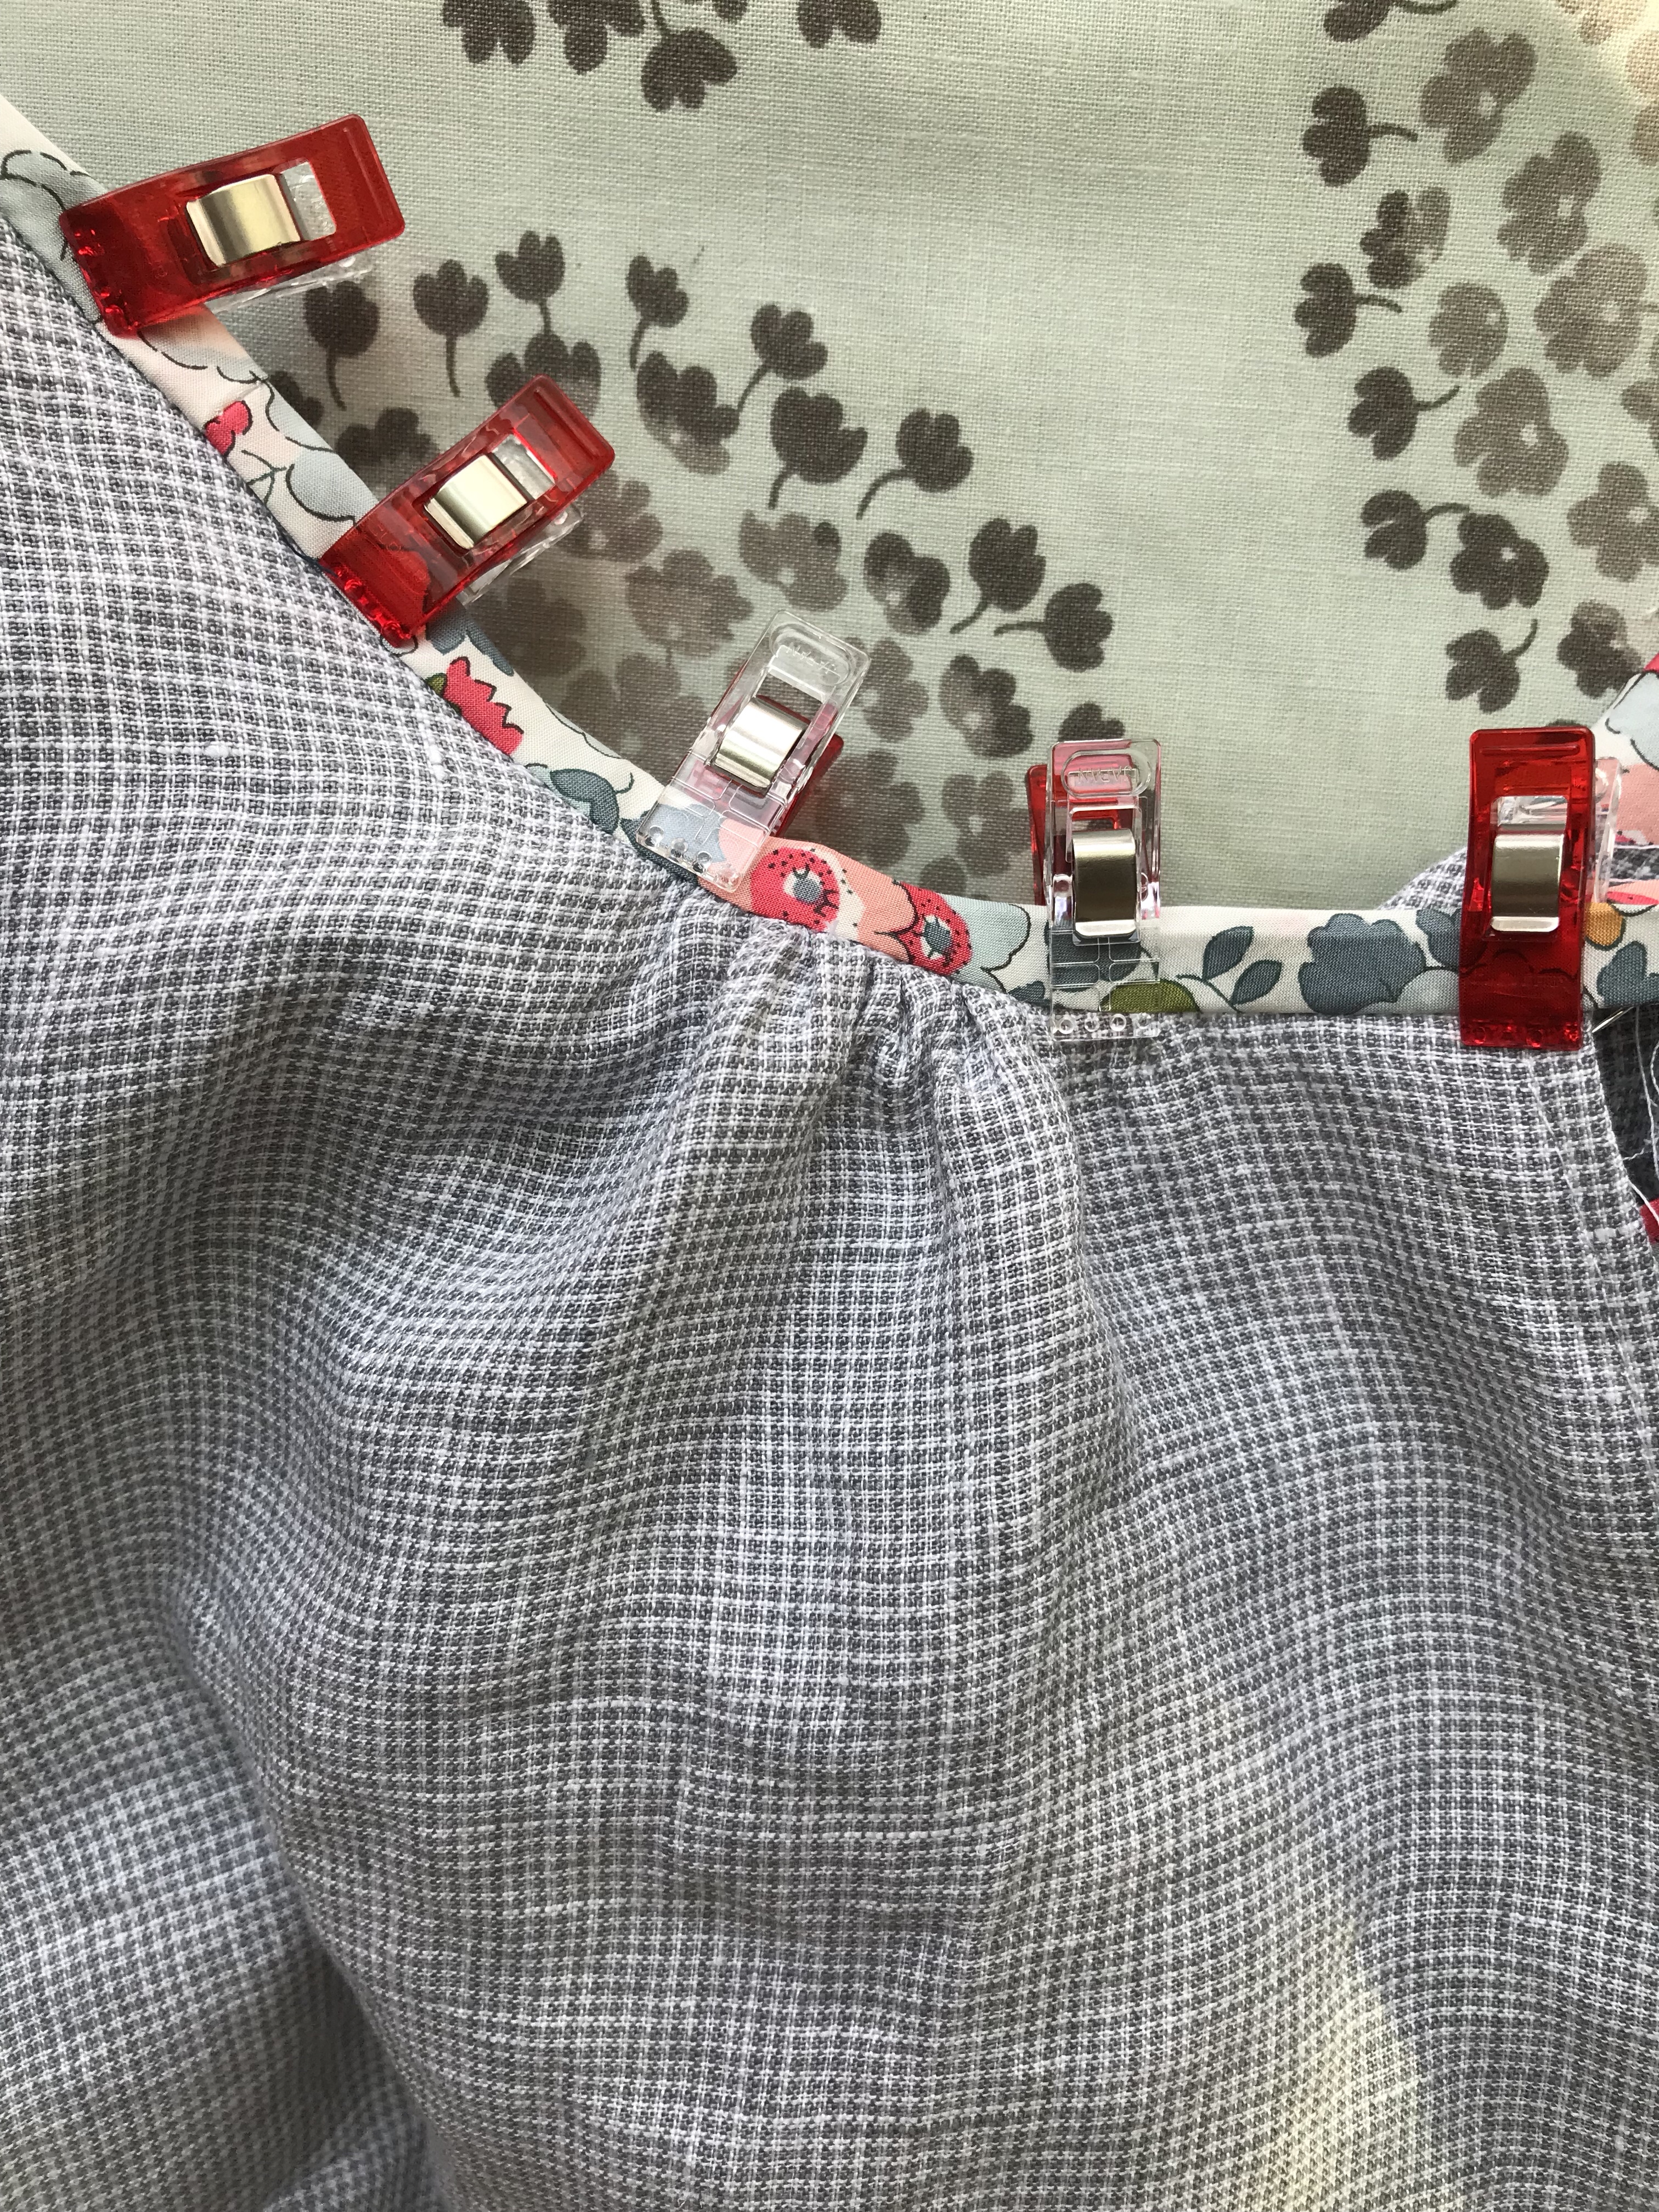 I had a vision of a boho blouse in linen with a Liberty floral trim. I had already purchased this lightweight Telio linen checked fabric and I realized that this Liberty lawn would be perfect. Both fabrics from fabric.com. (I plan to also make the Roscoe at a later date but will be making it in rayon.)
 The Josephine is usually made with pleats but Rae posted a version with gathers that is the perfect Boho Blouse. It is loose and cute but shaped with bust darts. Many of the other styles such as the Roscoe have raglan sleeves and need a really flow-ey fabric such as rayon but the Josephine’s slimmer profile works well in cotton and in linen. It is less full cut and the gathers are more controlled. Rae suggests using elastic thread but I find that I have more control with my two rows of gather stitches. The linen is so crinkly that the gathers don’t have to be perfect and it still looks good.
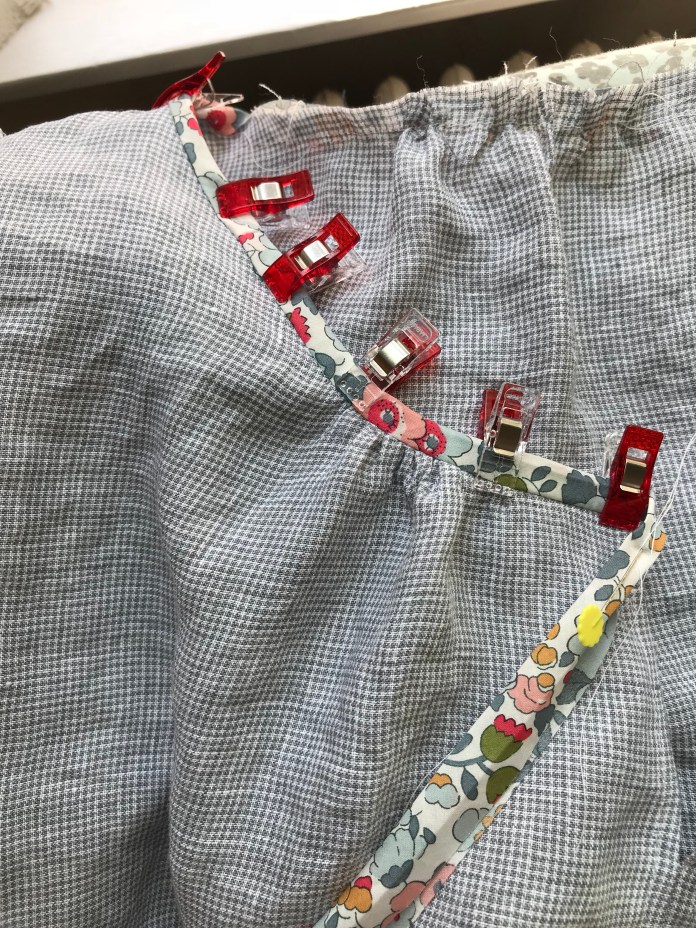 The actually cutting and sewing of the pattern is very straightforward. The front is sewn together and the back is one piece cut on the fold. You gather the fabric in the center back and the center of the two front pieces. You cut the two mirror halves of the front, one back piece and two sleeves.
  I then made the bias binding and two rectangles to make cuffs.
  I usually stitch just on the edge of the cuff, not in the ditch.
  I like the look of the visible stitching.
 I have to say I was thrilled with how this turned out. I used bias strips of Liberty as hem facings, as one does.
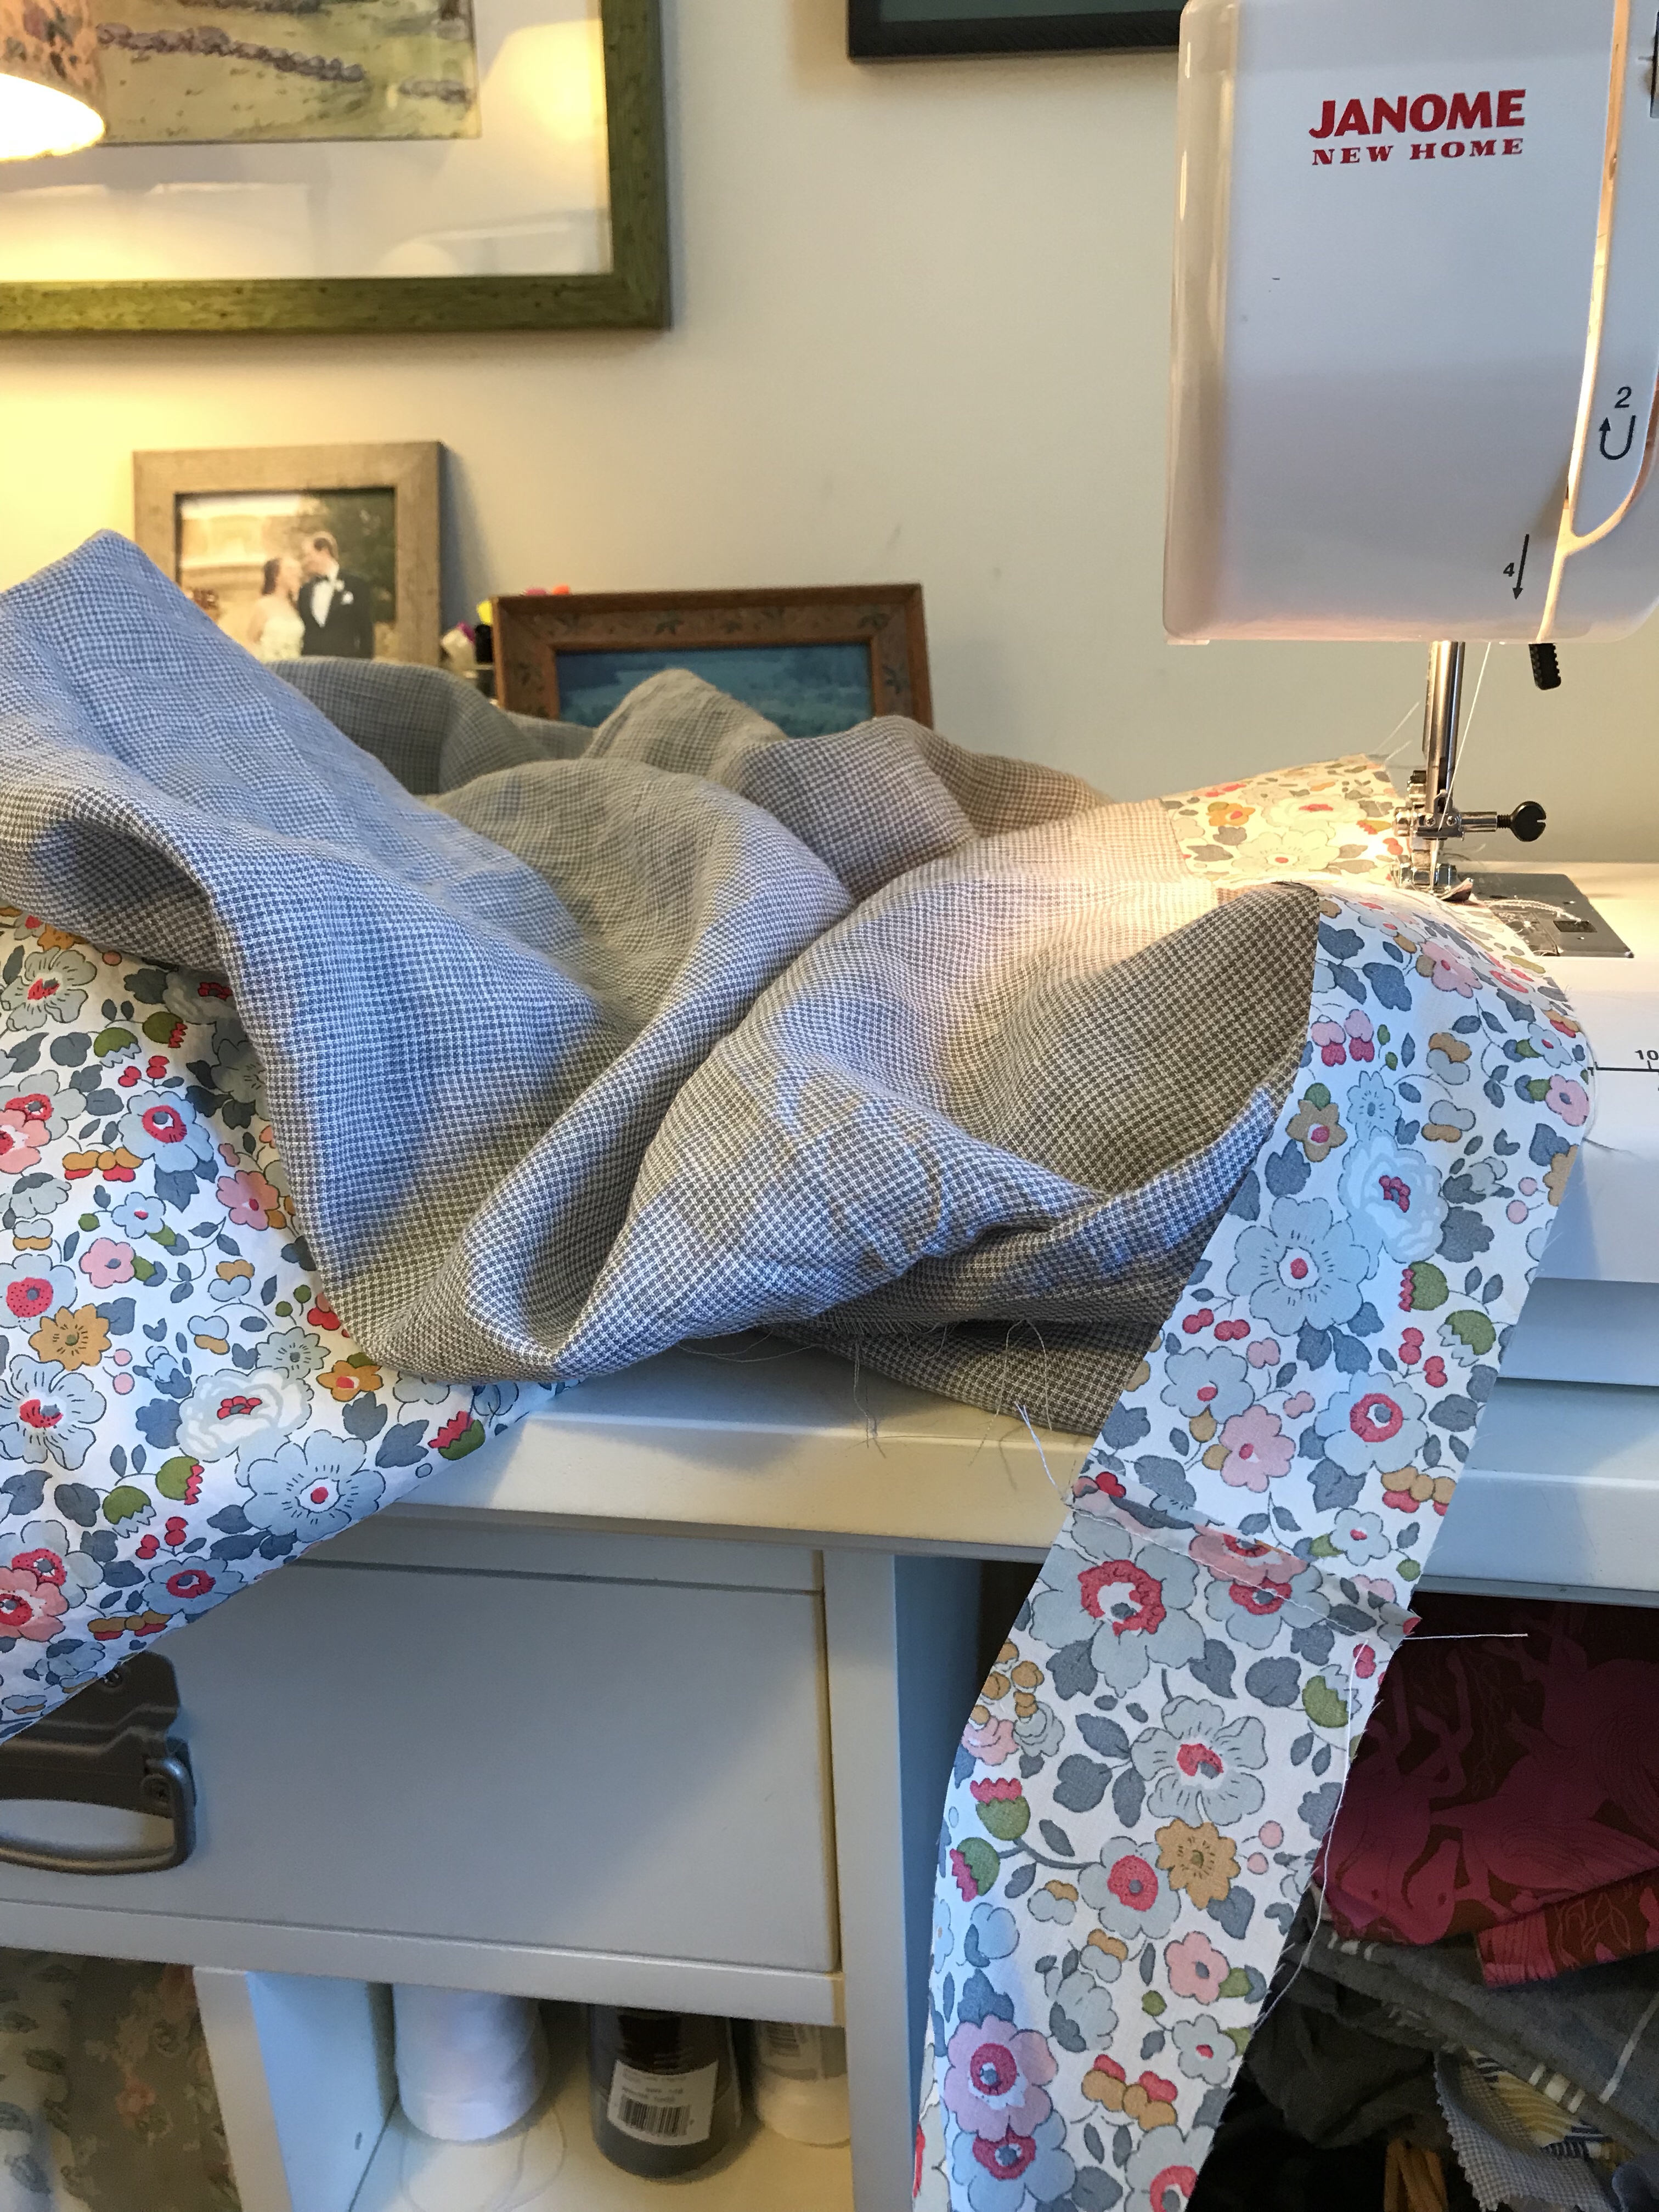 Finished blouse below. It is finally warm enough for front door pictures.
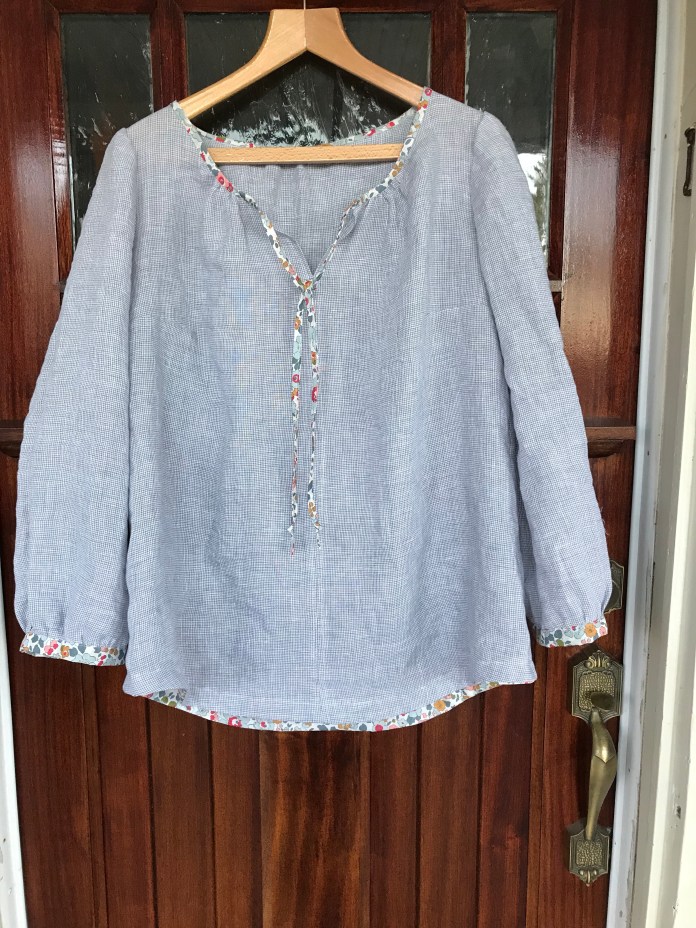 My sewing room has one window that faces west. Such beautiful light.
 I had enough of these two fabrics to also make a version of the Gemma tank cropped with a gathered linen skirt. This dress is going to be perfect for spring. More late afternoon light. I can’t get enough of it after a long, dark winter.

 And many pictures of the blouse as worn. This is going to be in frequent rotation. I love the neckline. Rae is a genius with necklines.
 I used the curved hem from the Gemma tank as my guide for this hem. I love how you can mix and match Rae’s patterns.
  Back view.
 The other side view.
 I look as though I am summoning the backyard spirits but I think my husband caught me on the way to fix my hair and put it behind my ears.
 As you can see in the next picture. He takes a zillion pictures and then I whittle them down to a few.
 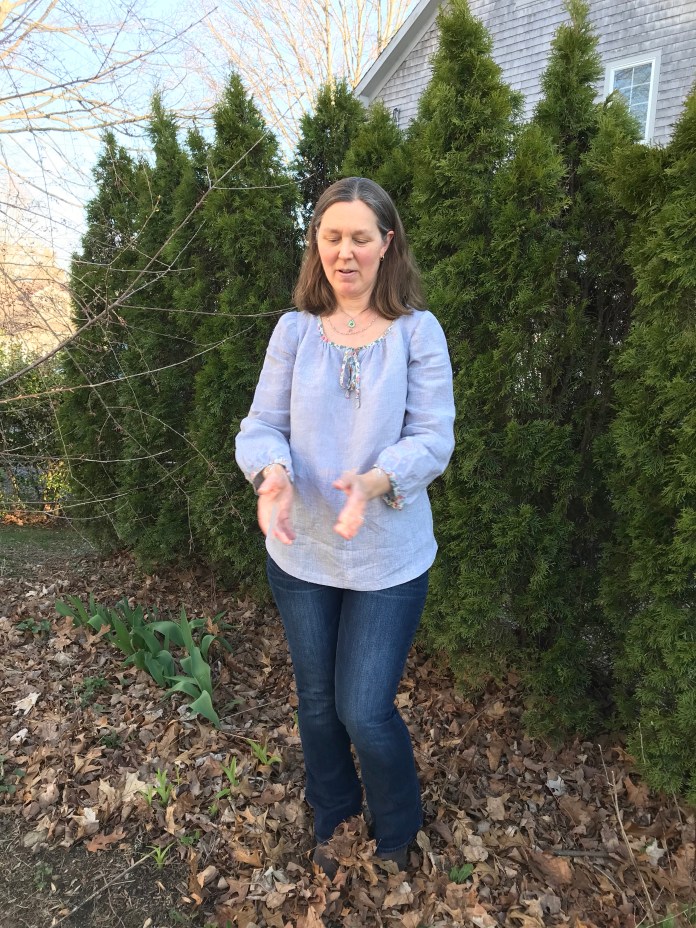 What can I say? Perfect combination of pattern and fabrics. The Loominous version is going to be great too.
  Almost finished! Spring sewing is officially underway.