Bias Binding, Helen's Closet Patterns, Sewing

Ojos Flame Challis York Pinafore

img_3226Ever since I saw this beautiful version of the Helen’s Closet York Pinafore, I knew I wanted to make one for myself. One of my goals this year has been to use some of nicer fabrics in my fabric stash (the ones I have been saving and afraid to cut into) to sew garments. This is a very sheer, float-y rayon and I have wanted to sew something but hadn’t been able to decide which pattern to try.

This weekend the temperature in Connecticut finally dipped below 80 degrees and I decided to take the plunge.

img_3192

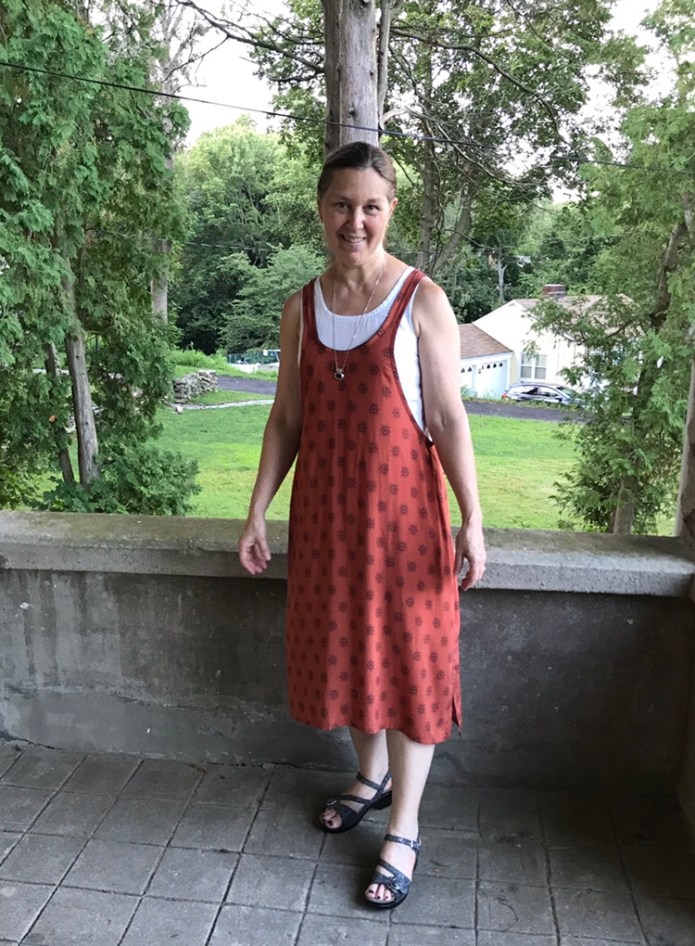
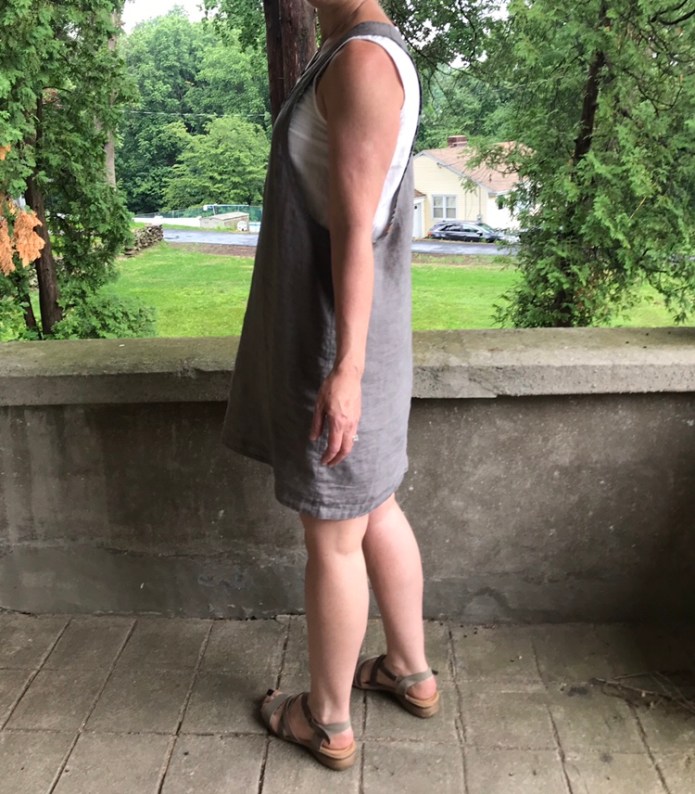
Helen’s version of this longer pinafore used a facing and spaghetti straps instead of bias binding. I originally thought I would do that too but the more I thought about it, the more I thought I could achieve a similar effect by tapering the straps. I ended up piecing the front strap because I decided on this approach after I cut everything out (I had originally thought I would do the spaghetti straps but then changed my mind) but I don’t think the piecing is noticeable and it actually enabled me to get more length out of the relatively small piece of fabric.

img_3227

I tapered the straps so that they would be 1.5 inches at the top of the shoulder and used a navy cotton lawn for my bias binding. I feel as though the lawn gives a bit of structure to the strap and is less slippery so that the straps don’t slide off my shoulders. It is total heresy, I know, but I didn’t stay-stitch or under-stitch when I sewed the bias binding. I generally don’t. I try to handle the neck and arm holes very little and I don’t pin the binding on, I just hold it gently in place and sew.  When I iron the folded binding before top-stitching it in place, I just iron the fold into the lawn, not the rayon. Then I fold by hand and use wonder clips to hold it in place before I sew the top seam. You can see pictures of how I do this in my Gemma Tank posts. I spent a lot of time sewing bias binding when I made many Gemmas two summers ago and this approach is pretty quick and gives me good results.

img_3224

All in all this was a very quick sew. I like how swishy it is (you can see it in action on my Instagram post) and I like it with my white double gauze Gemma

img_3198

and also with my chambray Gemma, and I actually have a navy lawn Gemma that is almost finished (the source of the scraps I used for the navy lawn bias binding) which I think will also work well.

img_3211

I may also make or buy an inexpensive navy slip dress to layer under the pinafore which I think would be a nice casual look. I like that this garment works with dressier sandals but also with flip flops, as all the best summer dresses do.

img_3220

img_3219

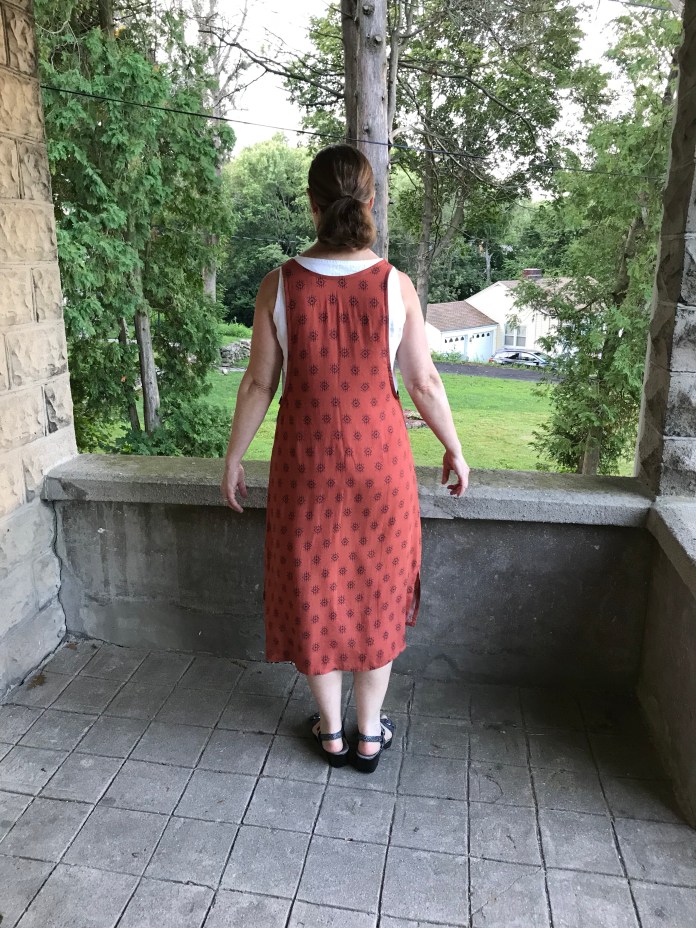
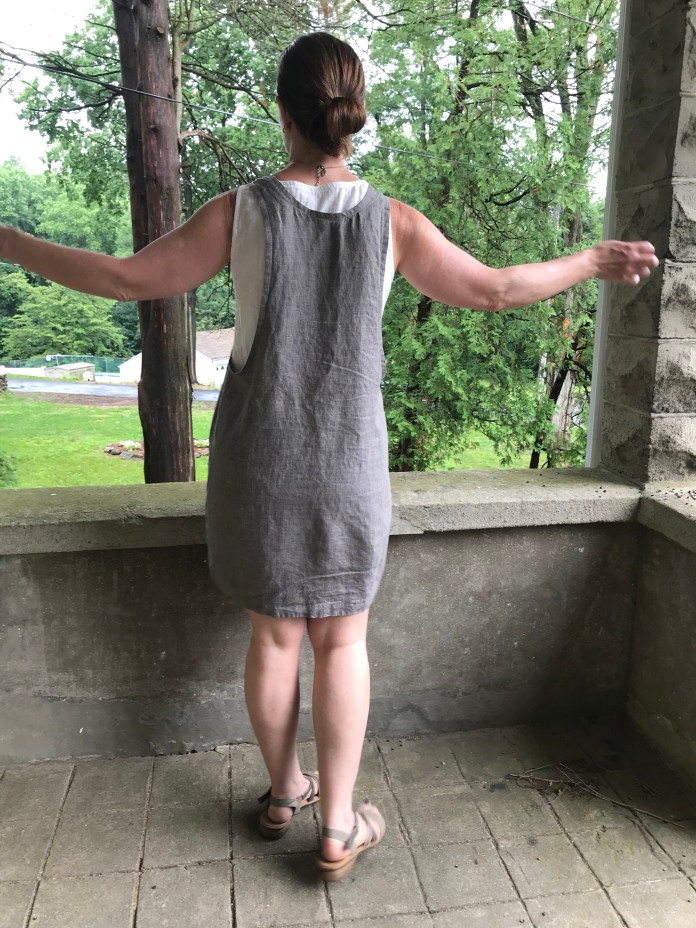
I feel as though I achieved a similar feel to Helen’s floral longer York but preserved the nice armhole shape which is one of my favorite design elements (and good motivation to keep swimming those laps at the pool!)

img_3201

I cut the back piece a bit longer than the front, not on purpose-it just worked out that way- but I ended up leaving it a bit longer in back because I liked how it turned out.

img_3203

This is my fourth York Pinafore. I have three more cut out. What can I say? When I love a pattern, I love a pattern and this is such a good one. It is all I have been wearing this summer (with my many Gemma tanks). You can see some of the many outfits I have been able to make by searching the hashtag #wearyouryorkday.

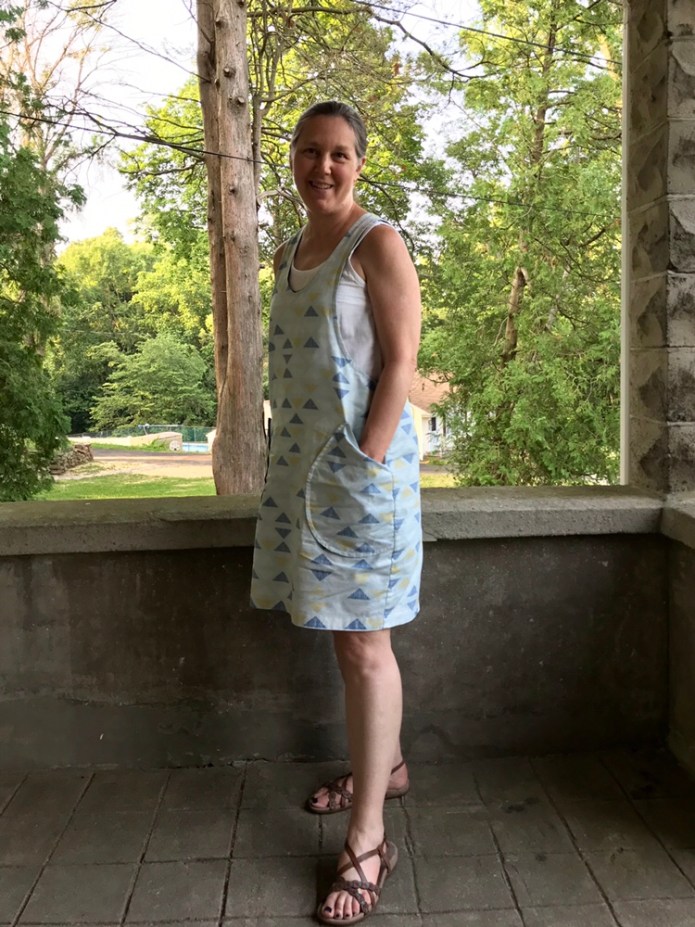
Here is a version in Cloud 9 Linen-Cotton canvas print:

img_2680

img_2646

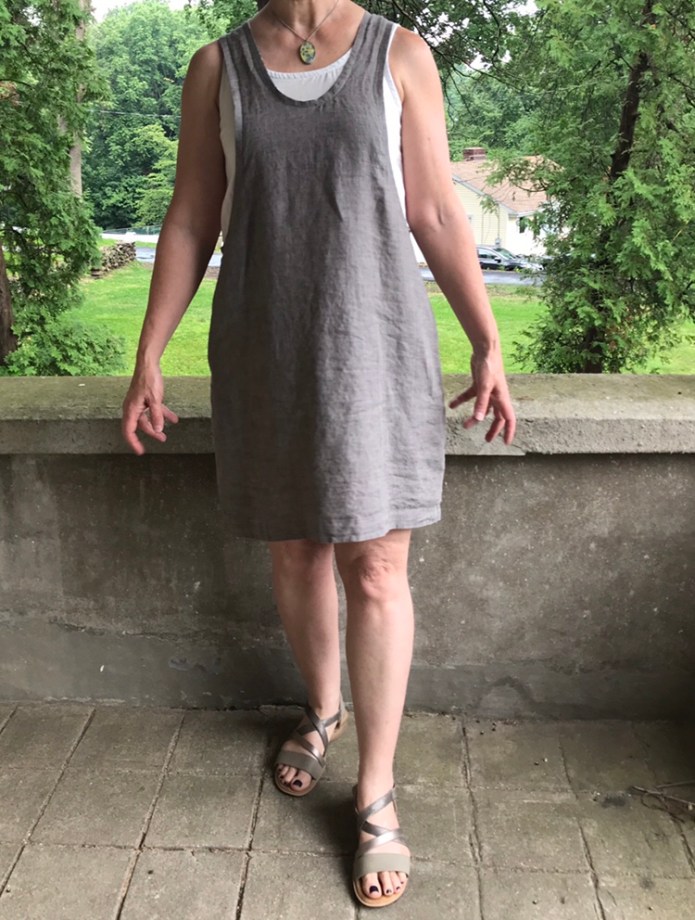
And this incredibly versatile version in Essex Linen which I blogged here:

img_2473

It goes with everything I own, literally.

img_2568

img_2276

img_2514

And my original lightweight linen muslin which I love so much:

img_2138

If you haven’t tried this pattern yet, what are you waiting for? Go forth and sew a linen or cotton or rayon York! You won’t regret it.
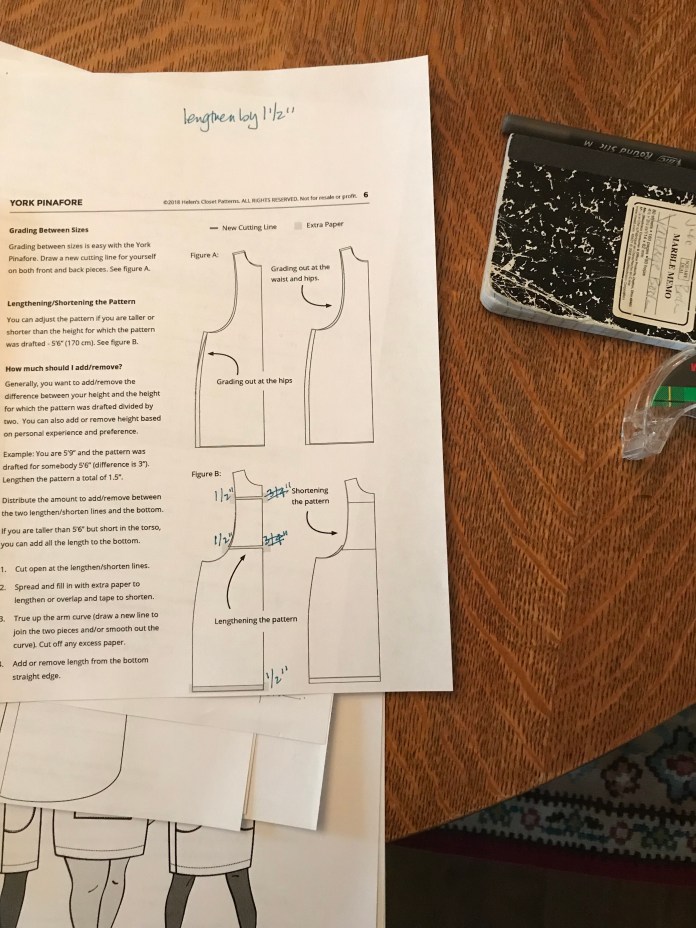


Standard
Gemma Tank, Helen's Closet Patterns, Made By Rae Patterns, Sewing

Helen’s Closet York Pinafore in Linen X 2

When I first spied a tester version of the Helen’s Closet York Pinafore during Me Made May before its official release, I knew it was going to be hugely popular. I guessed that this was Helen’s new pattern because I am a Patreon Supporter of the fantastic Love to Sew podcast hosted by Helen and Caroline and in one of the subscriber-only extra LTS podcasts, Helen mentioned that her to-be-launched new pattern was a modern take on a pinafore. Since I am from Connecticut, I didn’t know what she meant by pinafore-here in the US, we call this particular garment a jumper- but when the tester posted a picture during Me Made May and referred to the garment she was wearing as a pinafore, I knew it must be the pattern.

Since the pattern release, it has been popping up all over the place and for good reason. It is a cute modern design, a relatively easy sew and it is fun to customize. I was thrilled because now I have  a pattern to use to sew all the slightly heavier fabrics in my stash (I have a number of linen blends and heavier cottons I purchased for various reasons and have not yet used). And it only takes 2 yards of fabric. So the day it was launched, I purchased the pdf and printed it out.

I had some issues with my printer-it cut off parts of the pattern- but I connected the lines and it looked ok and I cut out the front and back from this linen and started playing with the fit. I cut my first version by cutting between the medium and large cutting lines which usually works for me. I basted the shoulder and side seams and then started trying on the jumper and playing around, taking it in a bit in here and there, sewing more rows of basting stitches, and pretty soon my seam allowances were all over the place but I liked the shape. I was actually afraid that if unpicked the basting seams to sew French seams or add pockets, I wouldn’t be able to replicate the shape, especially since the fabric I used was a lightweight, rumpled linen blend.  So, I sewed a line of stitching along the innermost line of basting stitches, trimmed off the rest of the wonky seam allowances and called it done.

Here are some pictures of the finished garment:

and as worn with my much loved Gemma Tank in white double gauze. It is a little wonky and sack-like but I love it.

img_2137

img_2152

img_2136

img_2143I had altered this Floral Voile Ruby Dress to make it into a blouse during Me Made May since I hadn’t worn it much in the year since I sewed it. I happened to have it in my sewing room and tried on the York over the blouse and realized it was a perfect match for the linen so I used the extra fabric to make bias binding and a hem binding since the length was a bit short  and I finished it in time to wear to my stepdaughters’ graduation.

Since I raced to finish this wearable muslin before going on vacation, I didn’t actually read the meticulous fitting instructions that Helen included in this pattern.

img_2165-1

After vacation, I printed out another set of pattern pieces and decided that this time I would read and follow the instructions. I was also excited for pockets!

Based on the instructions, my measurements put me in a size Large and given my 5’9” height, Helen’s directions suggest adding 1.5 inches to the pattern by adding 1/2 an inch in three separate places. But when I lined up the version I had already made, it was much smaller than the new pattern that I had printed out and pieced together and in particular, the straps were shorter in my first version and I was pretty happy with where the upper part of the skirt hit my torso on version one. I actually think with my long torso it is sometimes more flattering to have the waist of the garment hit a little higher than my natural waist. So despite the really wonderful, logical instructions, I did not add any length to the straps of the pattern and just cut the pattern out between the M and L lines except for the straps which I cut on the M line at the top and the L lines along the armholes to add a bit of width to the straps. Since the new printed pattern was so much longer than the version I had already sewn, I just cut along the L hem line and decided to sew it up and see what happened. As I did with version 1, I drew a new curve for the neckline about half-way between the two versions of the pattern.

I decided to go for broke and sew French seams even though they always take more than 5/8 inch when I sew them (I have a hard time enclosing all the fraying edges with the 1/4 and 3/8 seams used to create French seams as Helen instructs in the pattern. I ended up sewing a 3/8 seam with wrong sides together and then a 1/2 inch seam with right sides together since it seemed as though I would have lot of extra width. The finished version was longer than version one as planned but even with my 7/8 inch French seams, it was also more roomy. It did not completely make sense but I figured I must have made more adjustments than I realized with my first version- it was such a blur. I tried on version 2 and took pictures. I liked it but did not love it because the linen-cotton blend I used for version 2 was more stiff than the linen I used for version 1 and I felt that overall, the finished garment was less flattering. Here it is with another favorite Gemma tank. I used quilting cotton for the top-stitching to accent the design features and this version had pockets but I didn’t like it as much because it was bigger and didn’t drape as nicely and felt a bit more dowdy.

img_2222

I had even lined the pockets using beautiful fabric given to me by a friend (leftover from a Gemma tank that I sewed during Me Made May.)

img_2239I was a bit disappointed but I chalked it up to a learning experience and figured I would try washing it and see if the fabric would soften up a bit.

And YAY! it not only softened up but it shrunk as well and now I love it! Go figure! Here are more pictures with more Gemmas. It is just a bit shorter, just a bit more fitted and much drapier. It is like a whole new garment.

img_2268

img_2298

img_2302

img_2276

img_2252

img_2244
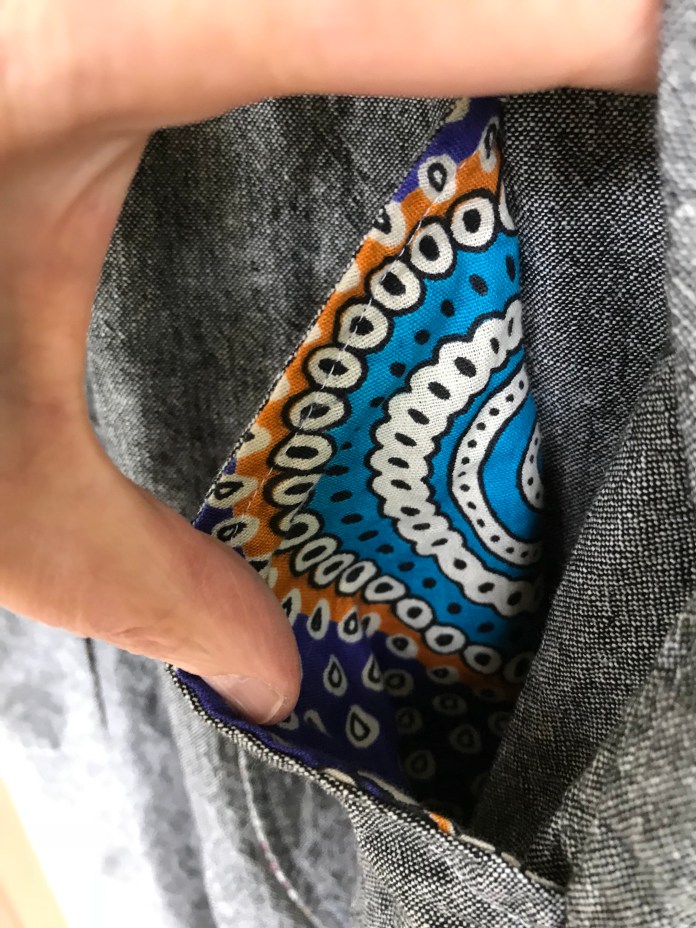
So maybe the fabric I cut out hadn’t been pre-washed (although I am almost positive I had washed it before I put it away last year) or maybe this linen-cotton blend really shrinks a lot? Either way, I am thrilled because after taking the time to line the pockets

and sew French seams and do all the things,

I am really happy with it. Now the only challenge is to figure out what to do about version 3. I am thinking that I will need to make more adjustments to my paper pattern. Such is the life a sewist.

In any event, I plan to wear this all summer. It goes with everything in my closet, especially my huge collection of Gemma Tanks.

Several years back I made many versions of the Made By Rae Gemma tank and I plan to wear my York every week this summer with a different Gemma. I think I have enough that I can wear a different combination every week. Want to join me? I will post every Tuesday with the hashtag #wearyouryorkday I actually have a couple of Gemmas cut out that I have been wanting to finish and this is just the incentive I need.

Congratulations to Helen on such a wonderful new pattern. I made four versions of the her Blackwood Cardigan this May and have more planned. She is on a roll!


Standard