
 These dotty little ladies are one of my favorite fabric designs from Cotton and Steel although there are so many wonderful designs that it is hard to choose. I bought several yards of this fabric knowing that I would definitely make a Gemma Tank top from this fabric at some point but the Dress E from the Stylish Dress Book has been on my radar for a long time and this fabric seemed to me to be perfectly suited to the style so yesterday I took the plunge.
Making this dress requires a commitment. First you have to buy the book, then you have to buy Swedish Tracing Paper in order to trace your pattern which is actually not for the faint of heart because multiple pattern pieces overly each other. It is doable but not necessarily easy. The pattern pieces do not include seam allowances, my bust size put me between size 10 and size 12 and most of the posts I had read about this dress said that it ran big. I didn’t know what to do. Of course I could have made a muslin which would be the smart thing to do but I decided to just plunge ahead. As it turns out, hem allowances are also not included in the pattern pieces, you have to add them. Needless to say, I didn’t realize this until after I had cut out my fabric. So although I thought I had been so smart to add 2 inches for my 5’9.5″ height, I actually hadn’t really because there was no hem included on the pattern to begin with. Yikes!
I also struggled a bit with the tucks especially since the front bodice seemed so wide despite taking about an inch out of it when I cut it out. I ended up just starting at one end of the bodice and sewing 1 inch tucks every 2 inches across the bodice which gave me 9 seams instead of the 5 that the pattern calls for. They are not completely centered but you really have to look closely to see. Amazingly, it worked out pretty well. I might even like it better than the original. I didn’t end up using the neck facing because with all my changes, I thought it probably wouldn’t work so I used my favorite bias binding (oxymoron alert) technique. I also used a hem facing, which had been my plan but in light of the extra short hem-less pattern piece, was now a necessity and used facings for the sleeves because I didn’t want them to be too short. I used one of the Cotton and Steel basics fabrics that I used for the bias binding of my Octopi Gemma Tanks. I also added an inch to the length of the back bodice and took about 3 inches out of the width of the back skirt. I could definitely cut out more width front and back. It is full! I think if I made this again, I might sew my tucks down one more inch to match the length of the back bodice since I have such a long torso and to control some of the volume. I actually would probably cut out some of the volume altogether. I cut a 12 with seam allowances for the sleeves and arm scythes and the shoulders were still tight even though the neck gapes a bit. It is my opinion that different pattern makers have different body types that they primarily design for and I am so spoiled making Made by Rae designs that almost always fit with perhaps a minor tiny tweak. So I think that I will try using the Josephine Pattern that I have had forever and never made and reverse the tucks and see if I can make something similar that fits better through the upper chest and shoulders for my swimmer’s shoulders and 5’9″ frame. Pictures of my work in process and finished dress below. Tucks and bias binding of neckline: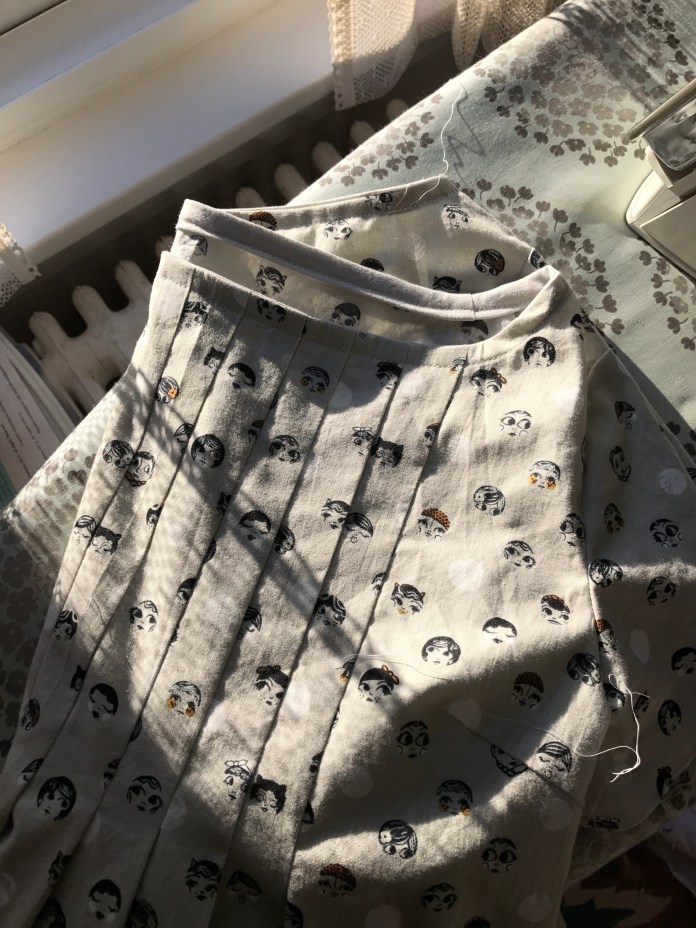 Hem facing:
 Sleeve Facing:
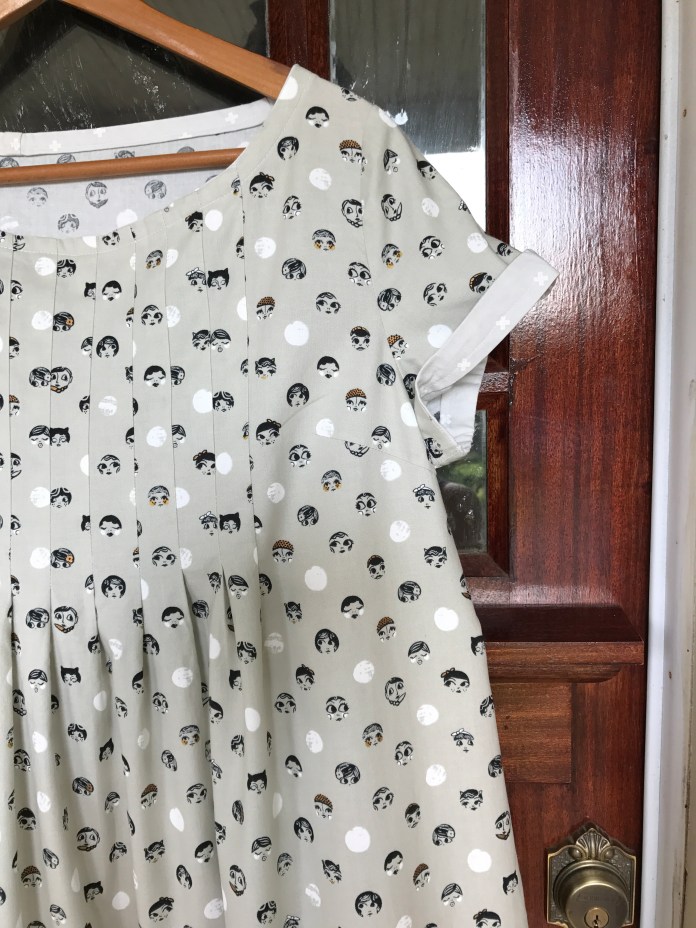 and close up of finished sleeves:
  Finished Dress on Place of Honor (front door)-note the fullness:
 Back of Dress (full, very full):
 and as worn. Front:
  Side:
Side: and back:
  I think this ended up being one stylish dress!

Wow. Sounds like LOTS of work and creativity, like starting a dessert recipe and finding you don’t have three of the ingredients and have to guess how/what to substitute. And you did all that and finished in one day? Very becoming.
LikeLike
Pingback: Heritage Rayon Challis Beatrix Dress | nursebeansews
Pingback: June 2019 Sewing: Made By Rae Tops and the Zadie Jumpsuit | nursebeansews