
 Back in October, I was lucky enough to find myself in Austin, Texas, visiting my son for his birthday and staying with a friend I have known for over 20 years through two states (we both moved from the same Brooklyn neighborhood to the same school district in the same Connecticut town without realizing it and ran into each other at the elementary school), one preschool playgroup, parenting teenagers, our respective divorces, many bowls of bibimbap (she is Korean and we have had many fun shared meals with and without kids) and many other hills and valleys of our respective lives. While I was there we had a bit of time to kill on a Sunday afternoon before we met my son and his girlfriend for dinner (food in Austin = amazing btw) and I set the gps for a little store I had seen online, The Cloth Pocket. Once there I realized that I had stumbled on a gem. They have lots of fabric but what sets them apart is how carefully curated the inventory is-you basically want to buy everything in the store because it is all amazing. The store owner has great taste. My friend Ginny looked on in a bit of shock as I went to town, knowing that I was stocking up for projects for the next year. One of the things I bought was this beautiful Ellen Baker double gauze. The fabric is called Charms and you may still be able to get it by linking here.
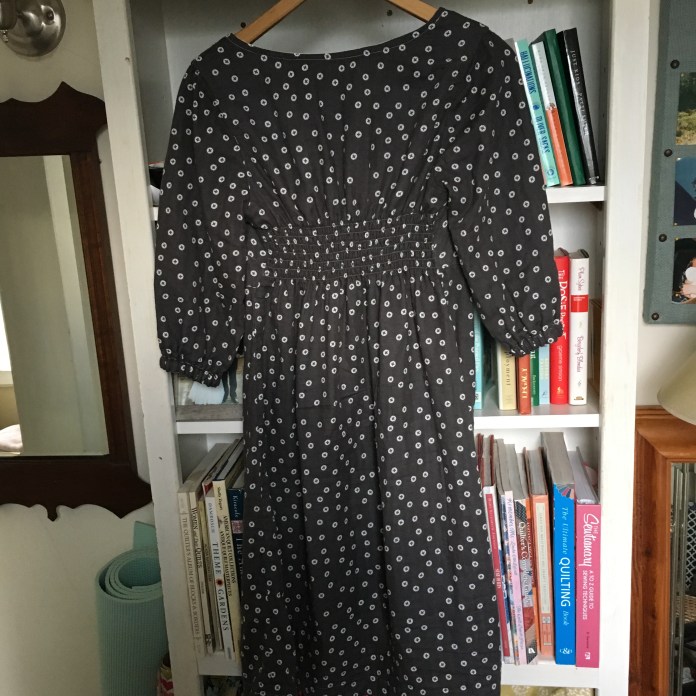 I like to make two of a pattern at a time. I started the double gauze dress and a second Washi with sleeves (made with Bound fabric by April Rhodes also from the Cloth Pocket-sadly now sold out-) right after the holidays. I worked on these a bit at a time. Here are the bodices. I have made the Washi dress pattern 8 times this year so it goes really fast.
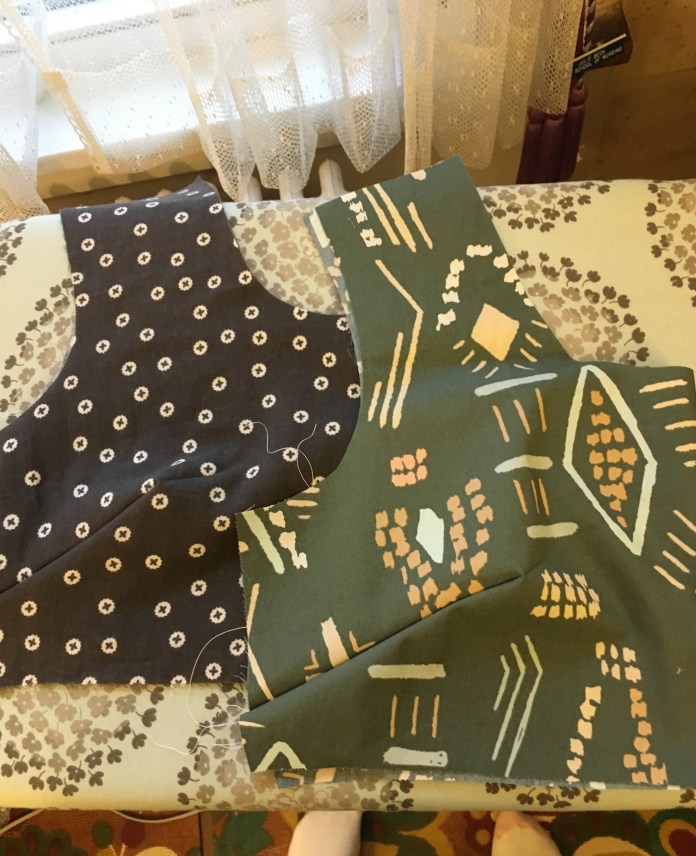 The double gauze is a bit trickier to work with than quilting cotton. It stretches and shifts and frays and so I wanted to do french seams which took a bit more time. In my experience, it is better to cut the pattern with a bigger seam allowance for the seams that you plan to french seam. I did that in this case and it ended working well. I actually sewed the first seam and still had a lot of frayed threads poking through so I sewed a second seam.
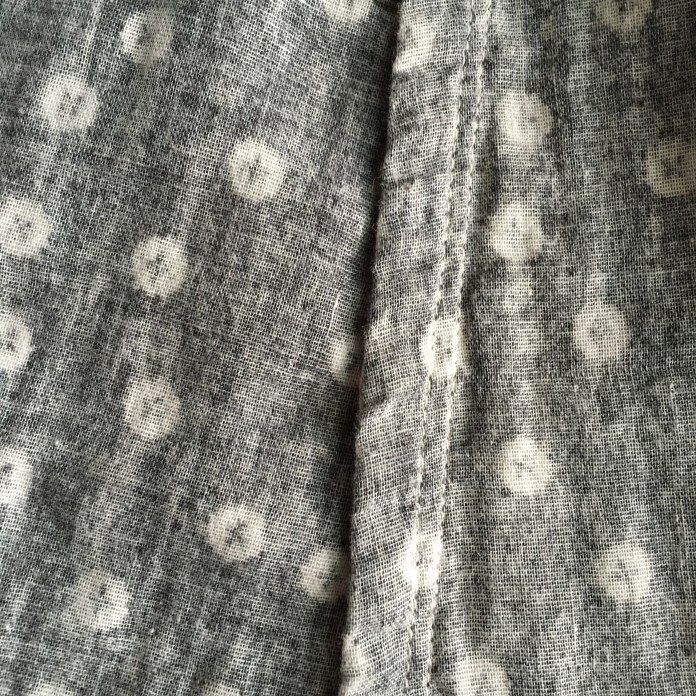 Luckily I had enough ease and while the fit is close, it fits nicely. Double gauze has a bit more give than quilting cotton so I planned to make the fit a bit closer.
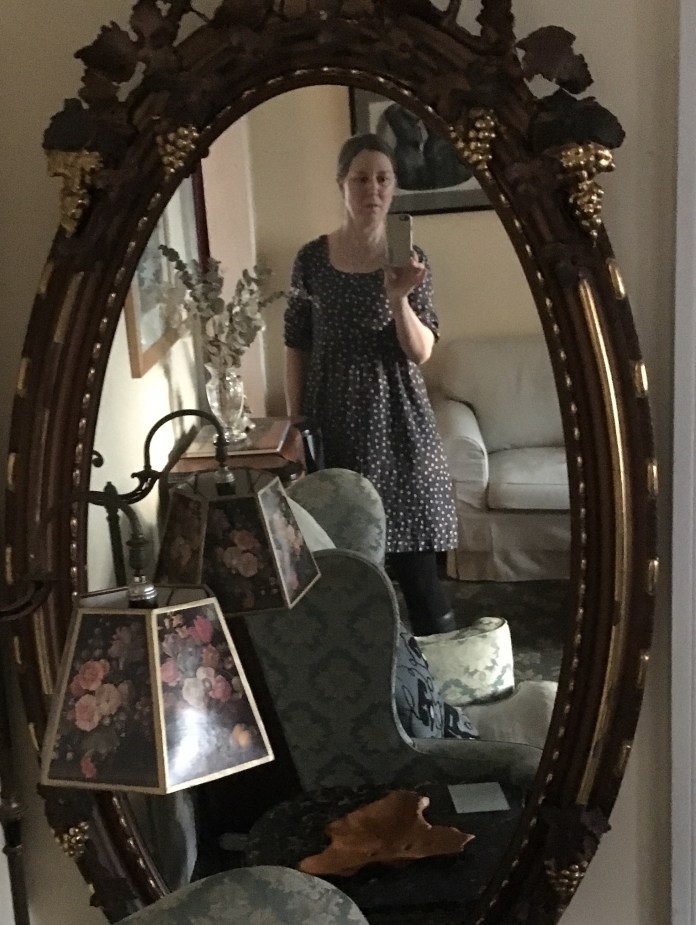 Looking at this picture reminds me that I have plans for this blue chair that involve fabric that isn’t blue! Hoping to learn how to make a slipcover sometime this year. The good thing about double gauze is that it has good recovery. One time through the washer and dryer and you wouldn’t have any idea that it had stretched in the sewing/ironing process.
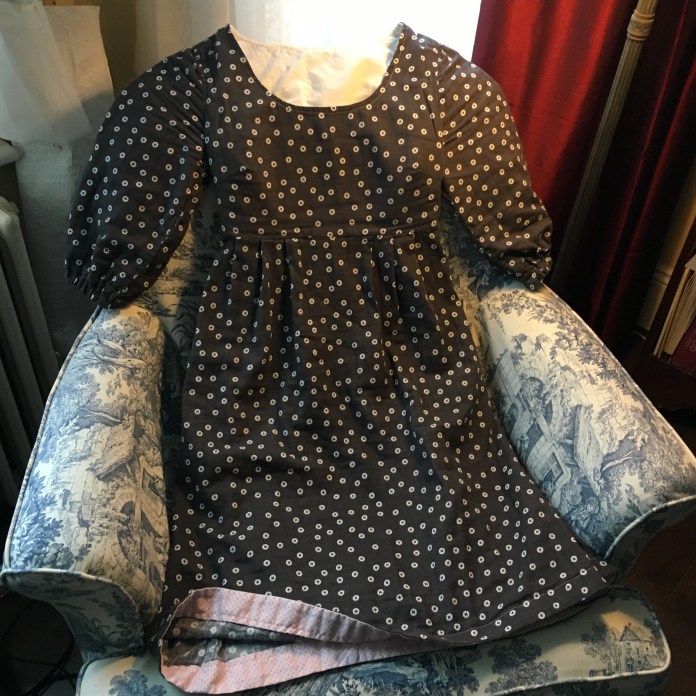 I made a size Medium and added 2 inches to the length (I am 5’9″). This is shorter than my typical Washi. I usually add 3 inches but recently I have made a couple of somewhat shorter versions to wear in the winter and fall with tight or leggings and boots. The summer versions I like to have about knee length and the double gauze version falls a couple of inches above the knee. Washi in progress post shirring below. There is a great explanation of how to do the shirring on the Made by Rae website.
 I lined the bodice with organic cotton unbleached batiste which I bought from fabric.com and which I need to buy more of because it is a perfect lining fabric. I top stitched around the neck seam because I thought it would make the neckline hold its shape better. I do this about half the time depending on the fabric I use. I used the sleeve pattern that you can print from the Made by Rae website. Rae has a tutorial that explains how to measure and add sleeves.
  I added a bit of ribbon with snaps for bra and slip straps. The key is to remember to do that during the sewing of the lining which gives a much nicer finish. I used the video tutorial by Rae for sewing the lining using the sausage technique to get a clean finish. It is bit tricky with the sleeves since there is quite a lot of fabric in the fabric sausage but it ended up working well.


I finished the hems with a facing made of quilting cotton in a pale pink print. I cut a 3 inch strip for the main hem and a 2 inch strip for the sleeves.See below-a bit rumpled after wearing. The width of the finished hem below is a bit less than 1 1/2 inches. 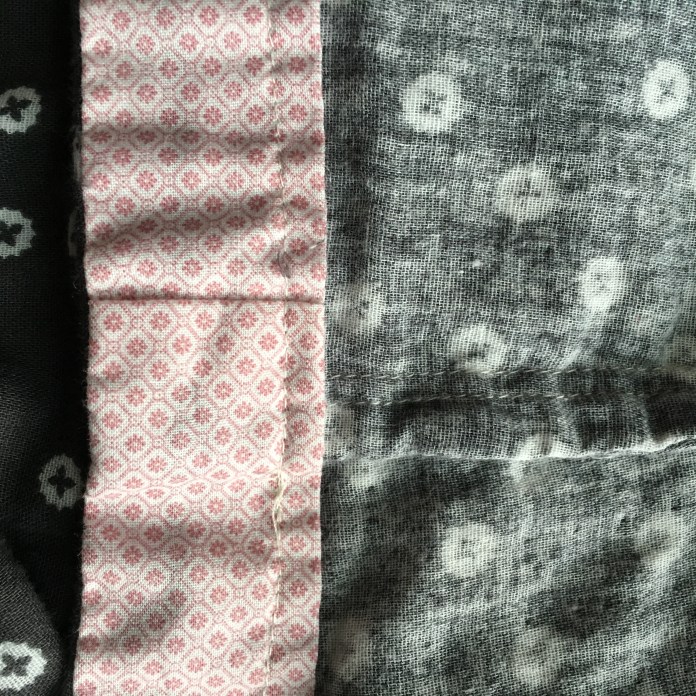 I sew the strips on with a 3/8 seam (eyeballing it) and then fold and iron and sew a line of stitching to catch the upper edge. These are not bias binding, just strips of fabric cut on the grain. Since they are going to be sewn on to a basically straight edge, I find that this works fine and it is much quicker and easier than bias strips. For the double gauze dress sleeves, I used a 2 inch strip and created a channel and inserted elastic.
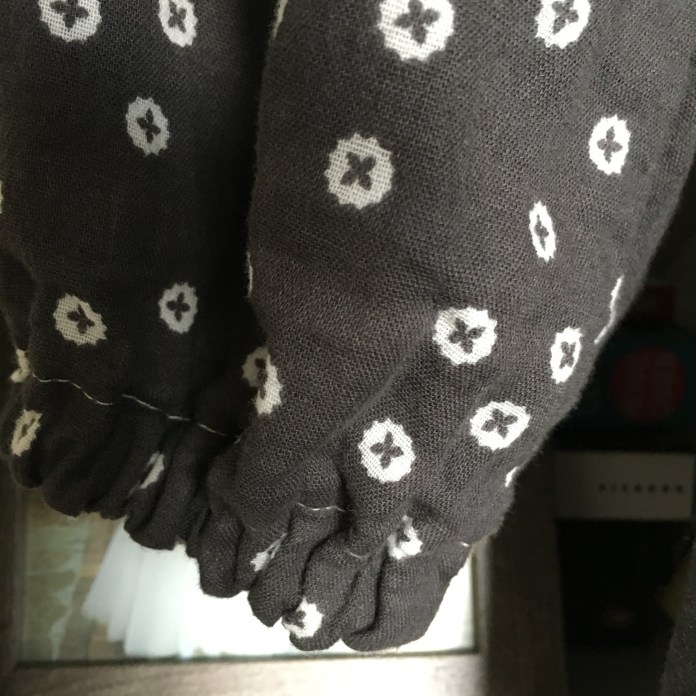 On the Bound version I used a 3 inch strip for both of the hems because I didn’t plan to use elastic and I thought it would lie flatter and that has been the case. Although I didn’t originally plan it, I ended up using the same pink cotton for both dress facings since it was the perfect weight and I had just enough. Sleeve facing in process below. I fold it so that the amount folded under is almost as big as the hem. It lies nice and flat. I don’t have any issue with not catching the entire folded edge and I am happy with the finished product. I do a lot of ironing. I iron the first seam after I sew it and then fold on the seam and iron and then do the sort of three way fold and iron again inside out and then flip it and iron it on the right side prior to sewing and make sure I am happy with how everything lines up before I sew. Sometimes it is so well ironed that I don’t even pin the sleeves. I do pin the hem to make sure nothing shifts.
 If I were using a fancier fabric, I would hand sew the hem but I have used this technique for quilting cotton, heavy flannel and double gauze and I am really happy with it.
 I like the little bit of a contrasting fabric, it is quick and it is forgiving and the seam between the two fabrics is an easy visual guide for where to turn the hem up. I included more examples of this in a prior post about finishing techniques that I have used on many of my garments.
 I love both of these dresses and I know that they will get a lot of use.
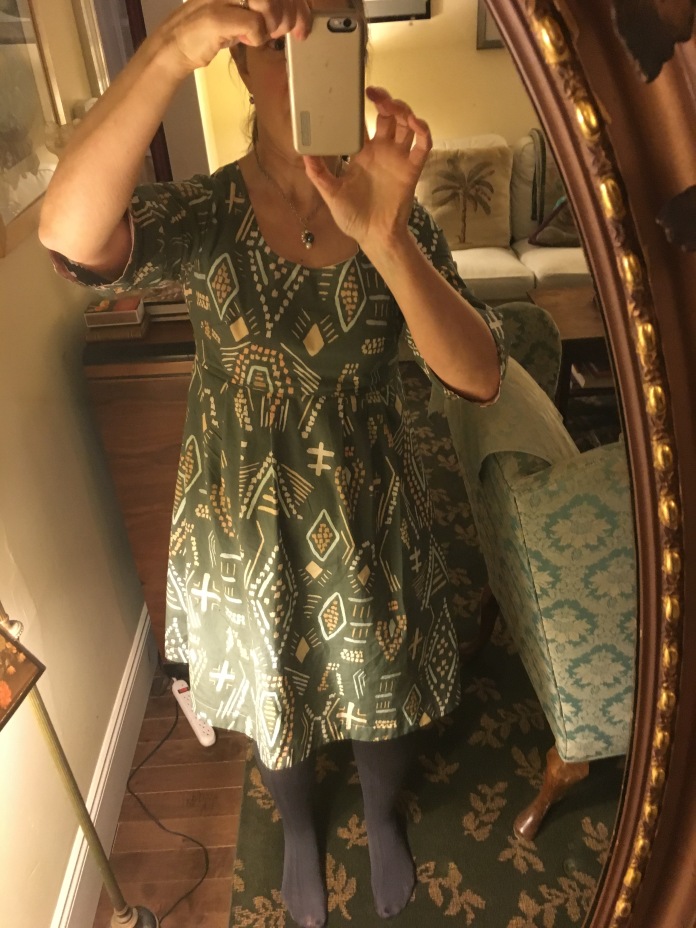 Ironically though today it feels like spring so I now have visions of summer sleeveless Washi dresses dancing in my head. Great pattern! So versatile.


I still have a couple of large pieces of fabric purchased on that trip in October and I recently used some of a birthday gift to get some beautiful fat quarters that I plan to sew into quilts for my children. I have been quilting for 25 years but I had a long hiatus during my main parenting years and it is amazing how many new wonderful fabric lines there are. I can’t wait to work with them.
Link: Washi Dress

Such lovely work inside and out!
LikeLiked by 1 person
Thank you!
LikeLiked by 1 person
Pingback: Nani Iro Washi Dress | nursebeansews
Pingback: Me Made May 2016 Round-Up | nursebeansews
Pingback: Nursebeansews: Sewing a Handmade Wardrobe | nursebeansews
Pingback: Nursebeansews a lot: 2016 year-end wrap up | nursebeansews
Pingback: Me Made May 2017 | nursebeansews