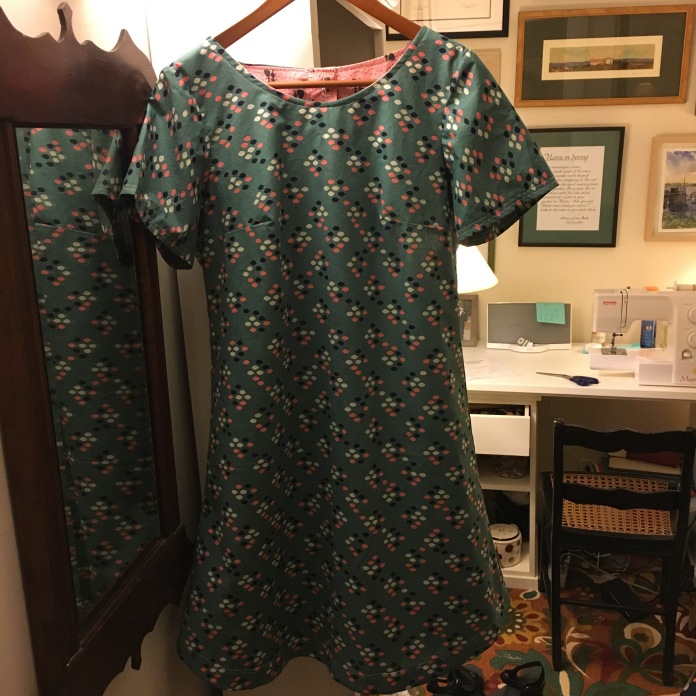
 I have had this Cookie Drop Beatrix Tunic in my head since I made my Mochi version several months ago.
 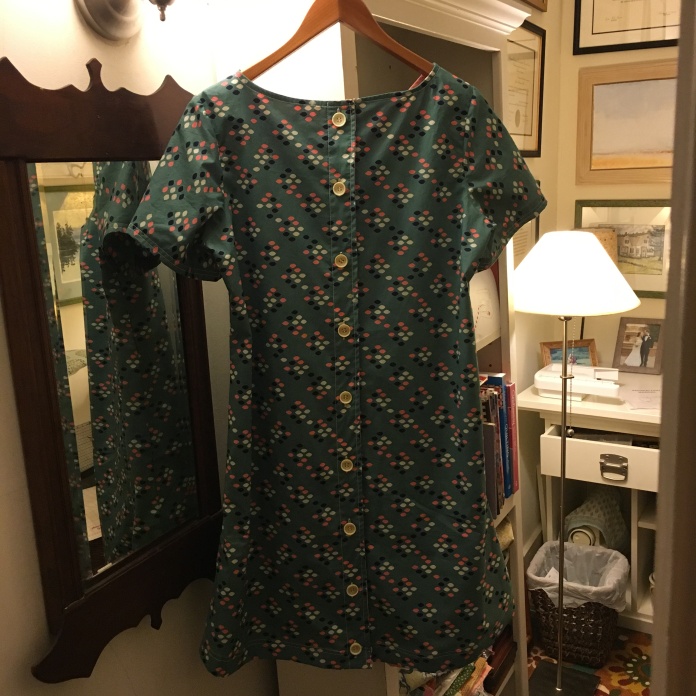 I have always loved this green color. It reminds me of the greens used in so many of the depression era quilts and of my grandparents’ house in Louisville, Kentucky. The mirror below hung in their front hall for over 60 years.
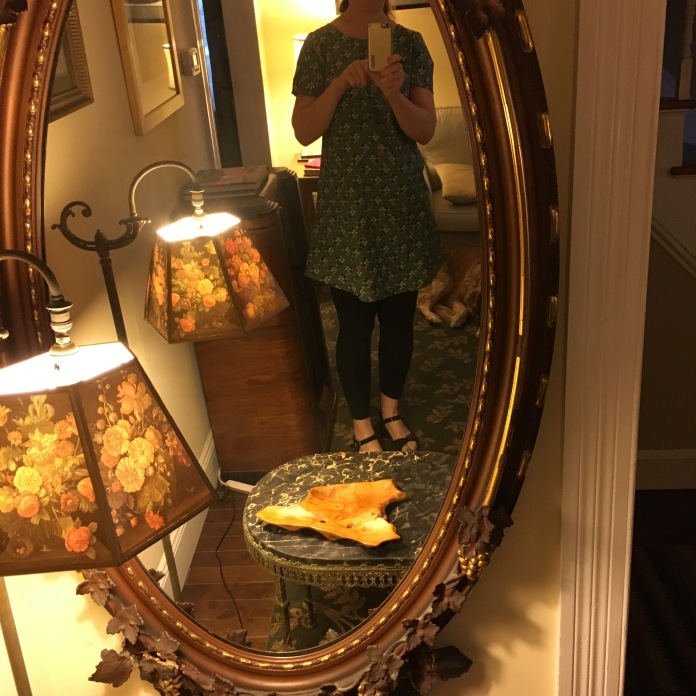 My grandmother loved soft blue greens and those colors predominated in their home. I had the idea for the pop of pink and used this fun fabric for contrasting facings.
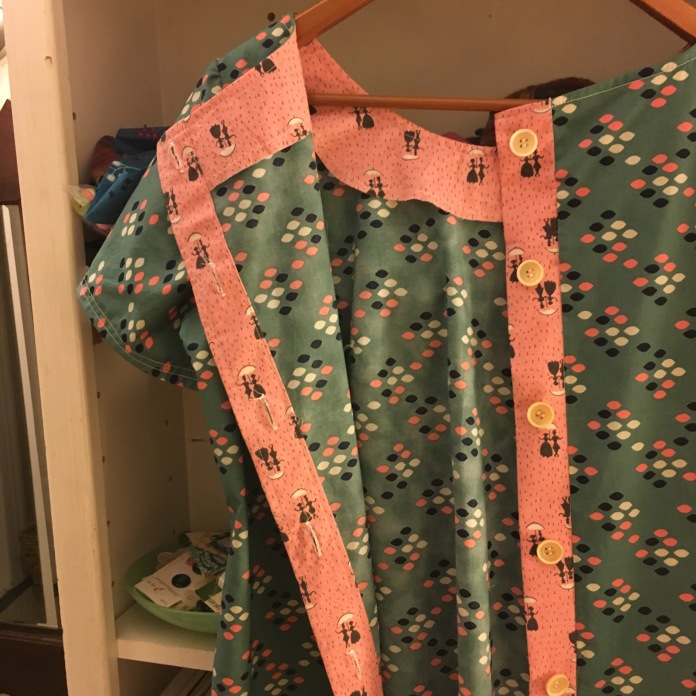 I don’t remember where I got this pink fabric but a friend recognized it. I think she may have given it to me years ago when I had an idea for a quilt with lots of pinks because it was my daughter’s favorite color. That quilt never got made because life got in the way. It may end up being a future project. I still have quilt sized scraps left over.
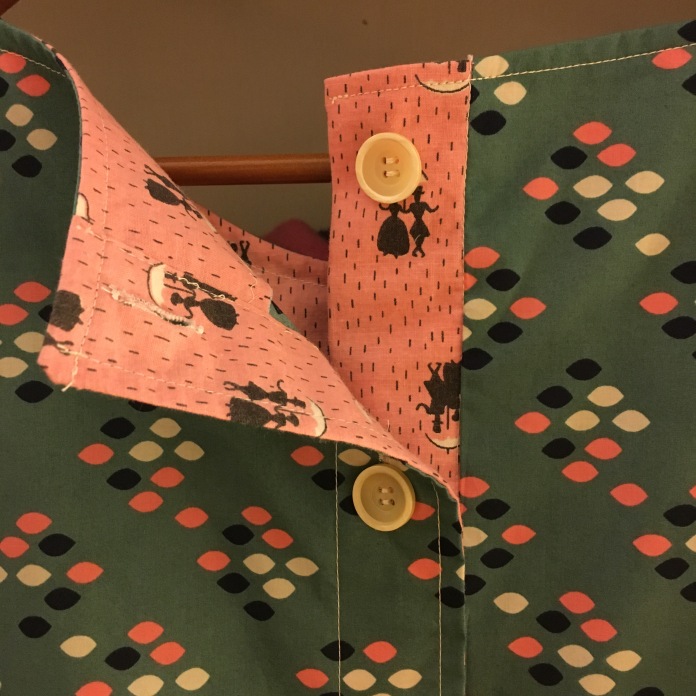 An online friend on instagram commented that the pink fabric reminded her of Mary Poppins. I hadn’t thought of that before but once she said it, I could totally see it. I love Mary Poppins. Who doesn’t? I read all the original books as a child and with my children.
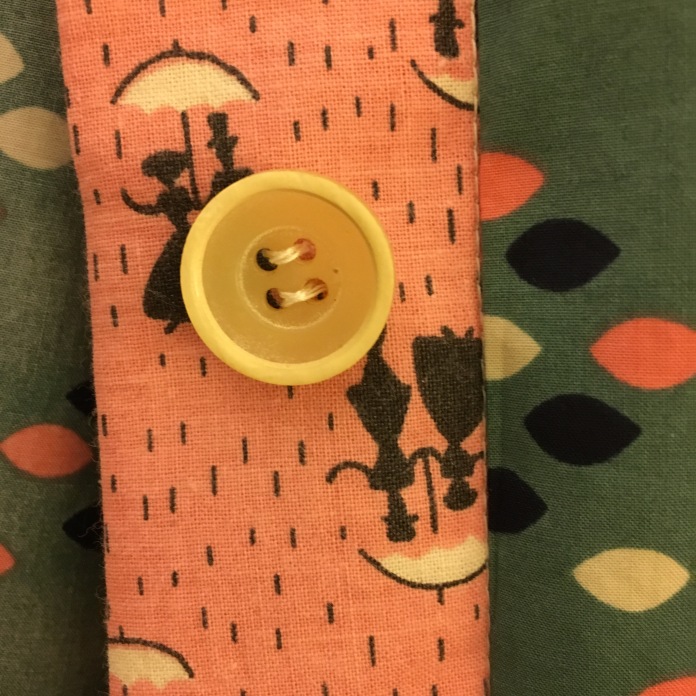 I love the versatility of the Beatrix Pattern by madebyrae. I have made and blogged about several versions. It is relatively straightforward but Rae has a great series of blog posts that walk you through the tricky parts like set-in sleeves.
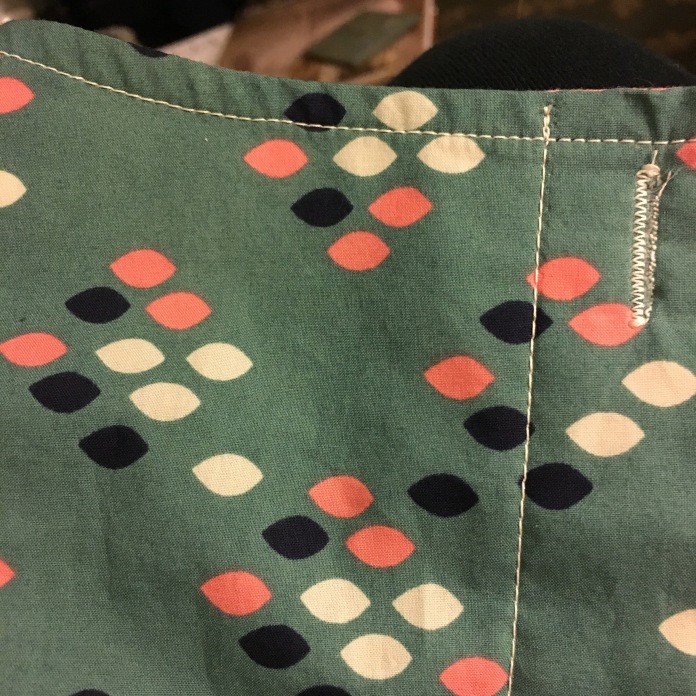
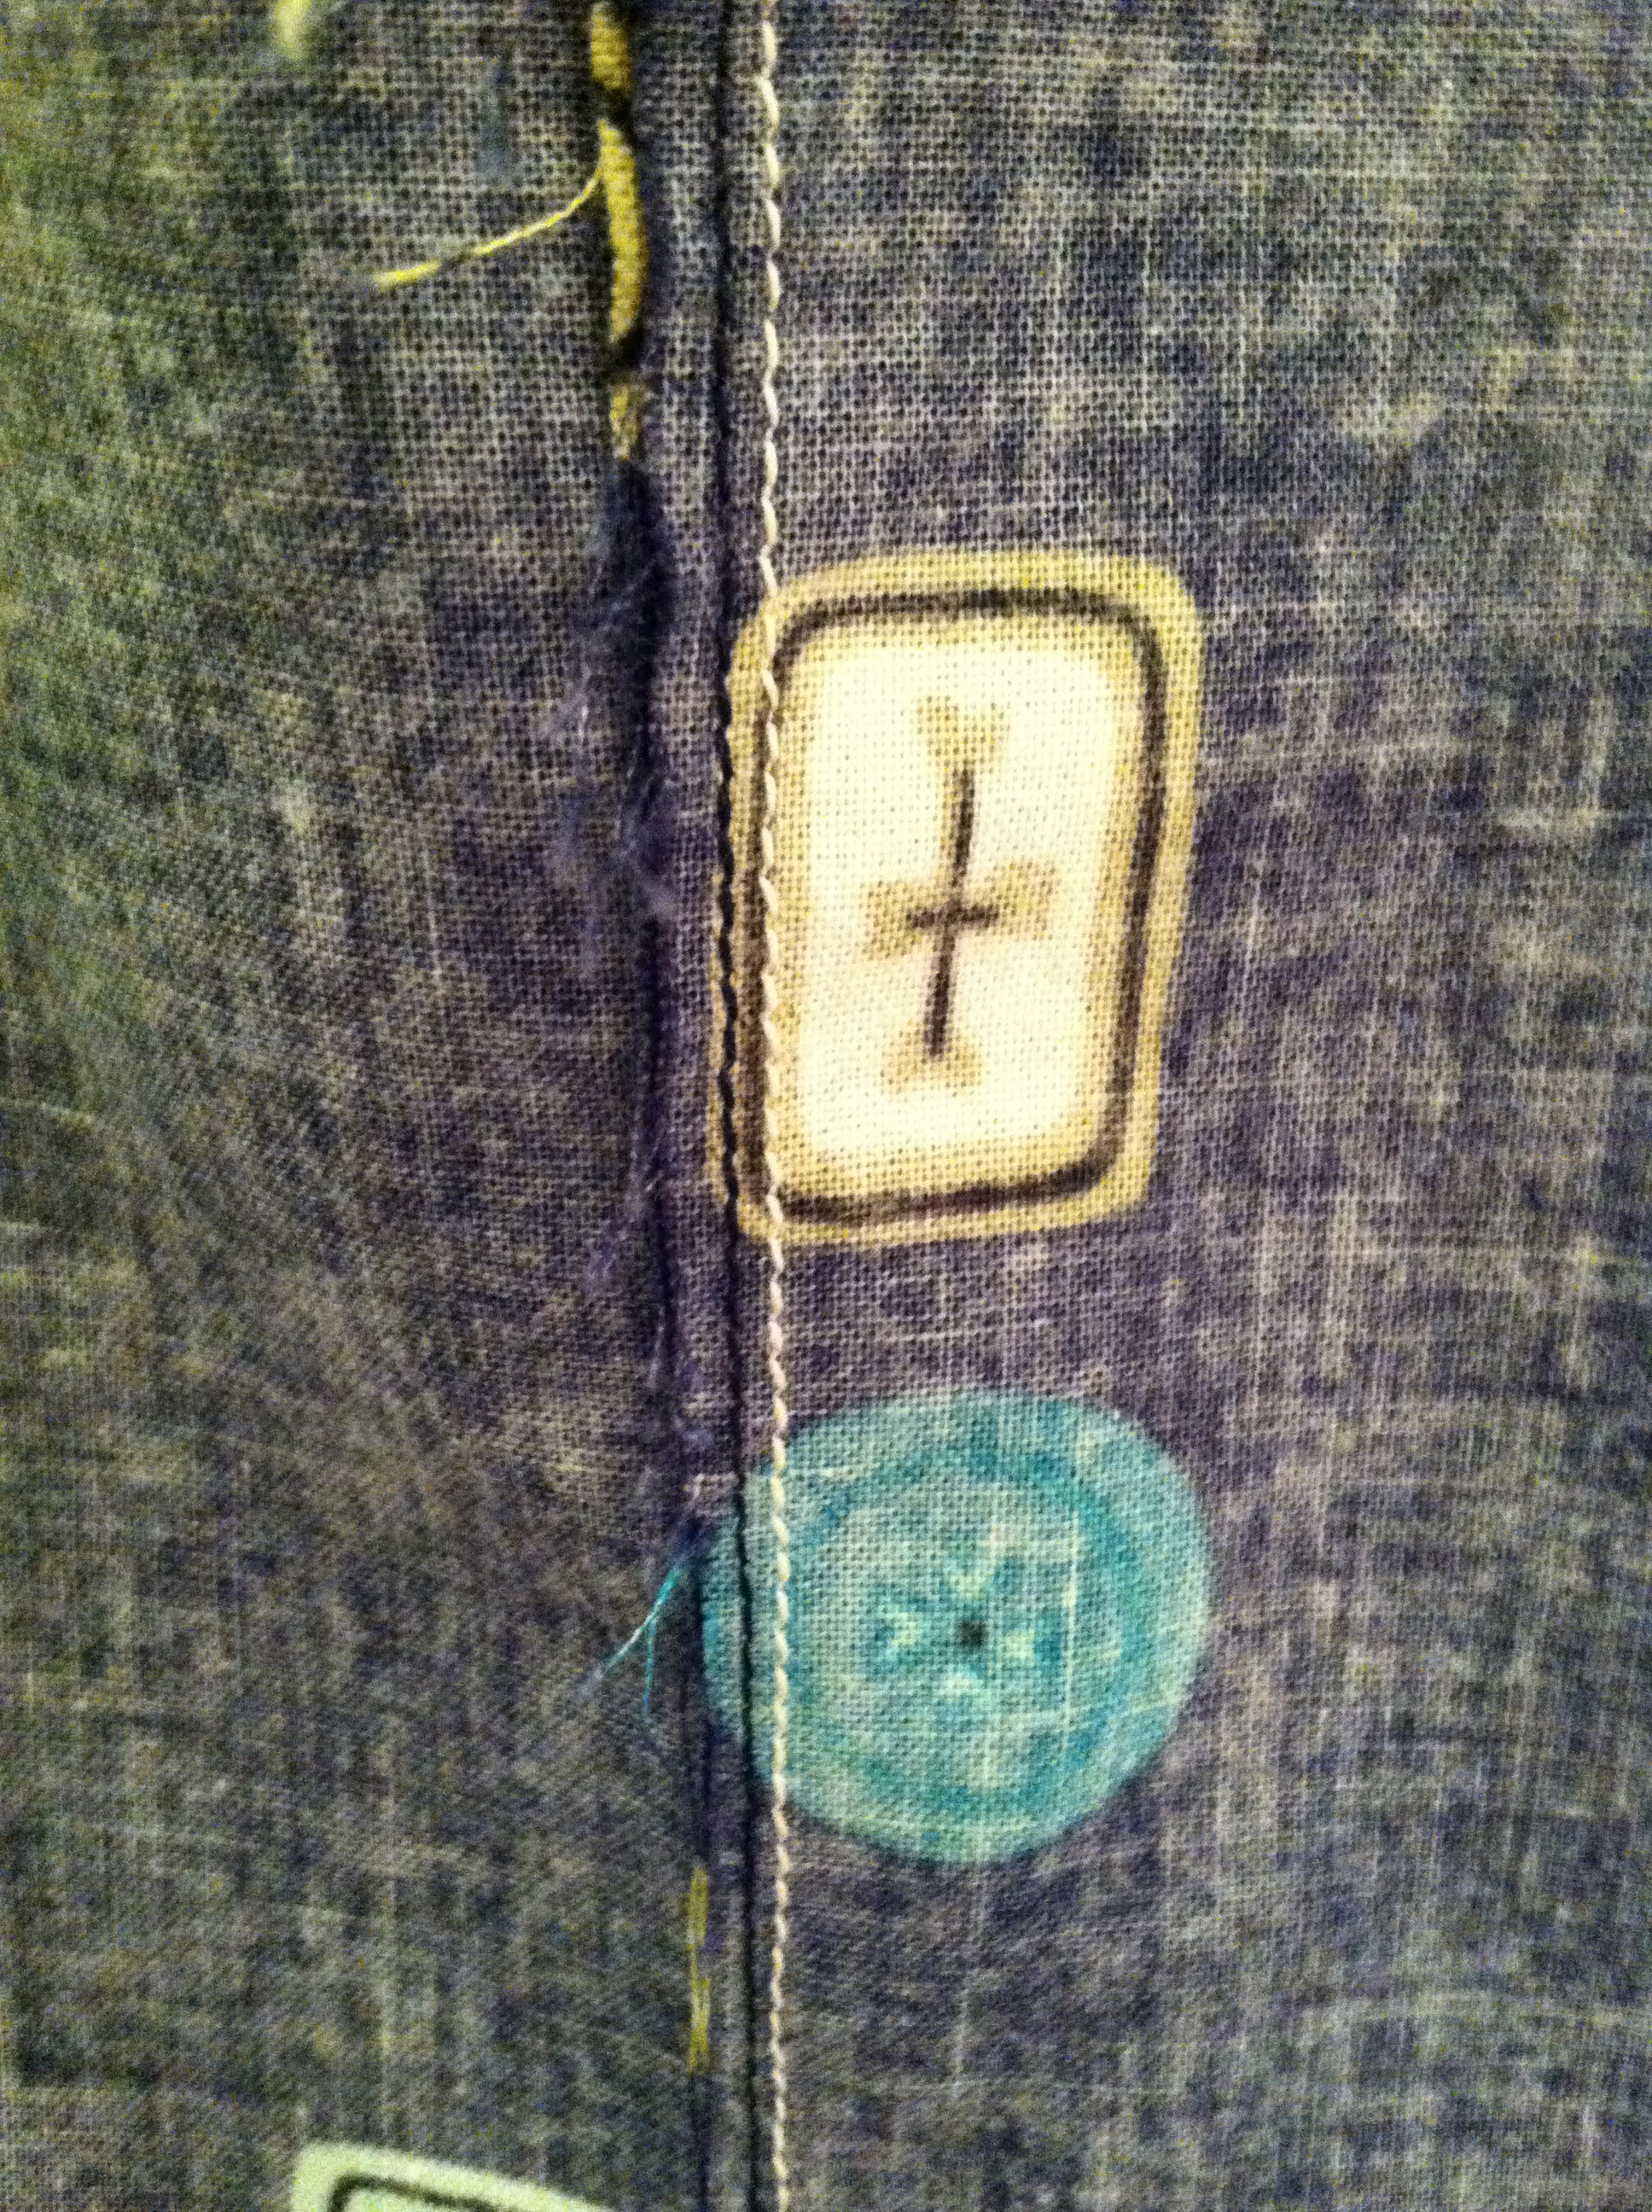
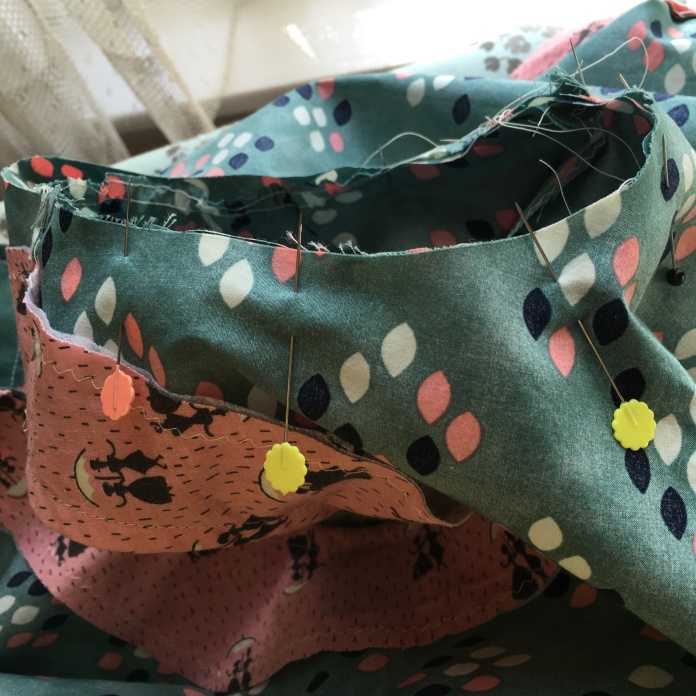 This time, I modified the pattern to use the contrasting fabric just on the inside of the garment. I used Rae’s instructions as if I was going to do a contrasting button placket using the standard measurements on the side with the buttons and then on the side with the button holes, I made the green portion wider and the pink portion narrower adding a seam allowance to each, folding the fabric at the seam where the two fabrics are sewn together, a technique I use for most of my hems. I am really happy with how it turned out. I think the pink on the outside was a little bolder than I wanted to go but I love the way it peeks out. In order to make Mary Poppins and Bert upright, I had to piece the placket facing but I think it came out fine. Waste not want not! The people are sideways on the hem facing which was necessary given the long strip that I needed for the hem facing.
  This fabric is a cotton lawn so it drapes well but was really easy to work with. Although I originally planned to use these green buttons:
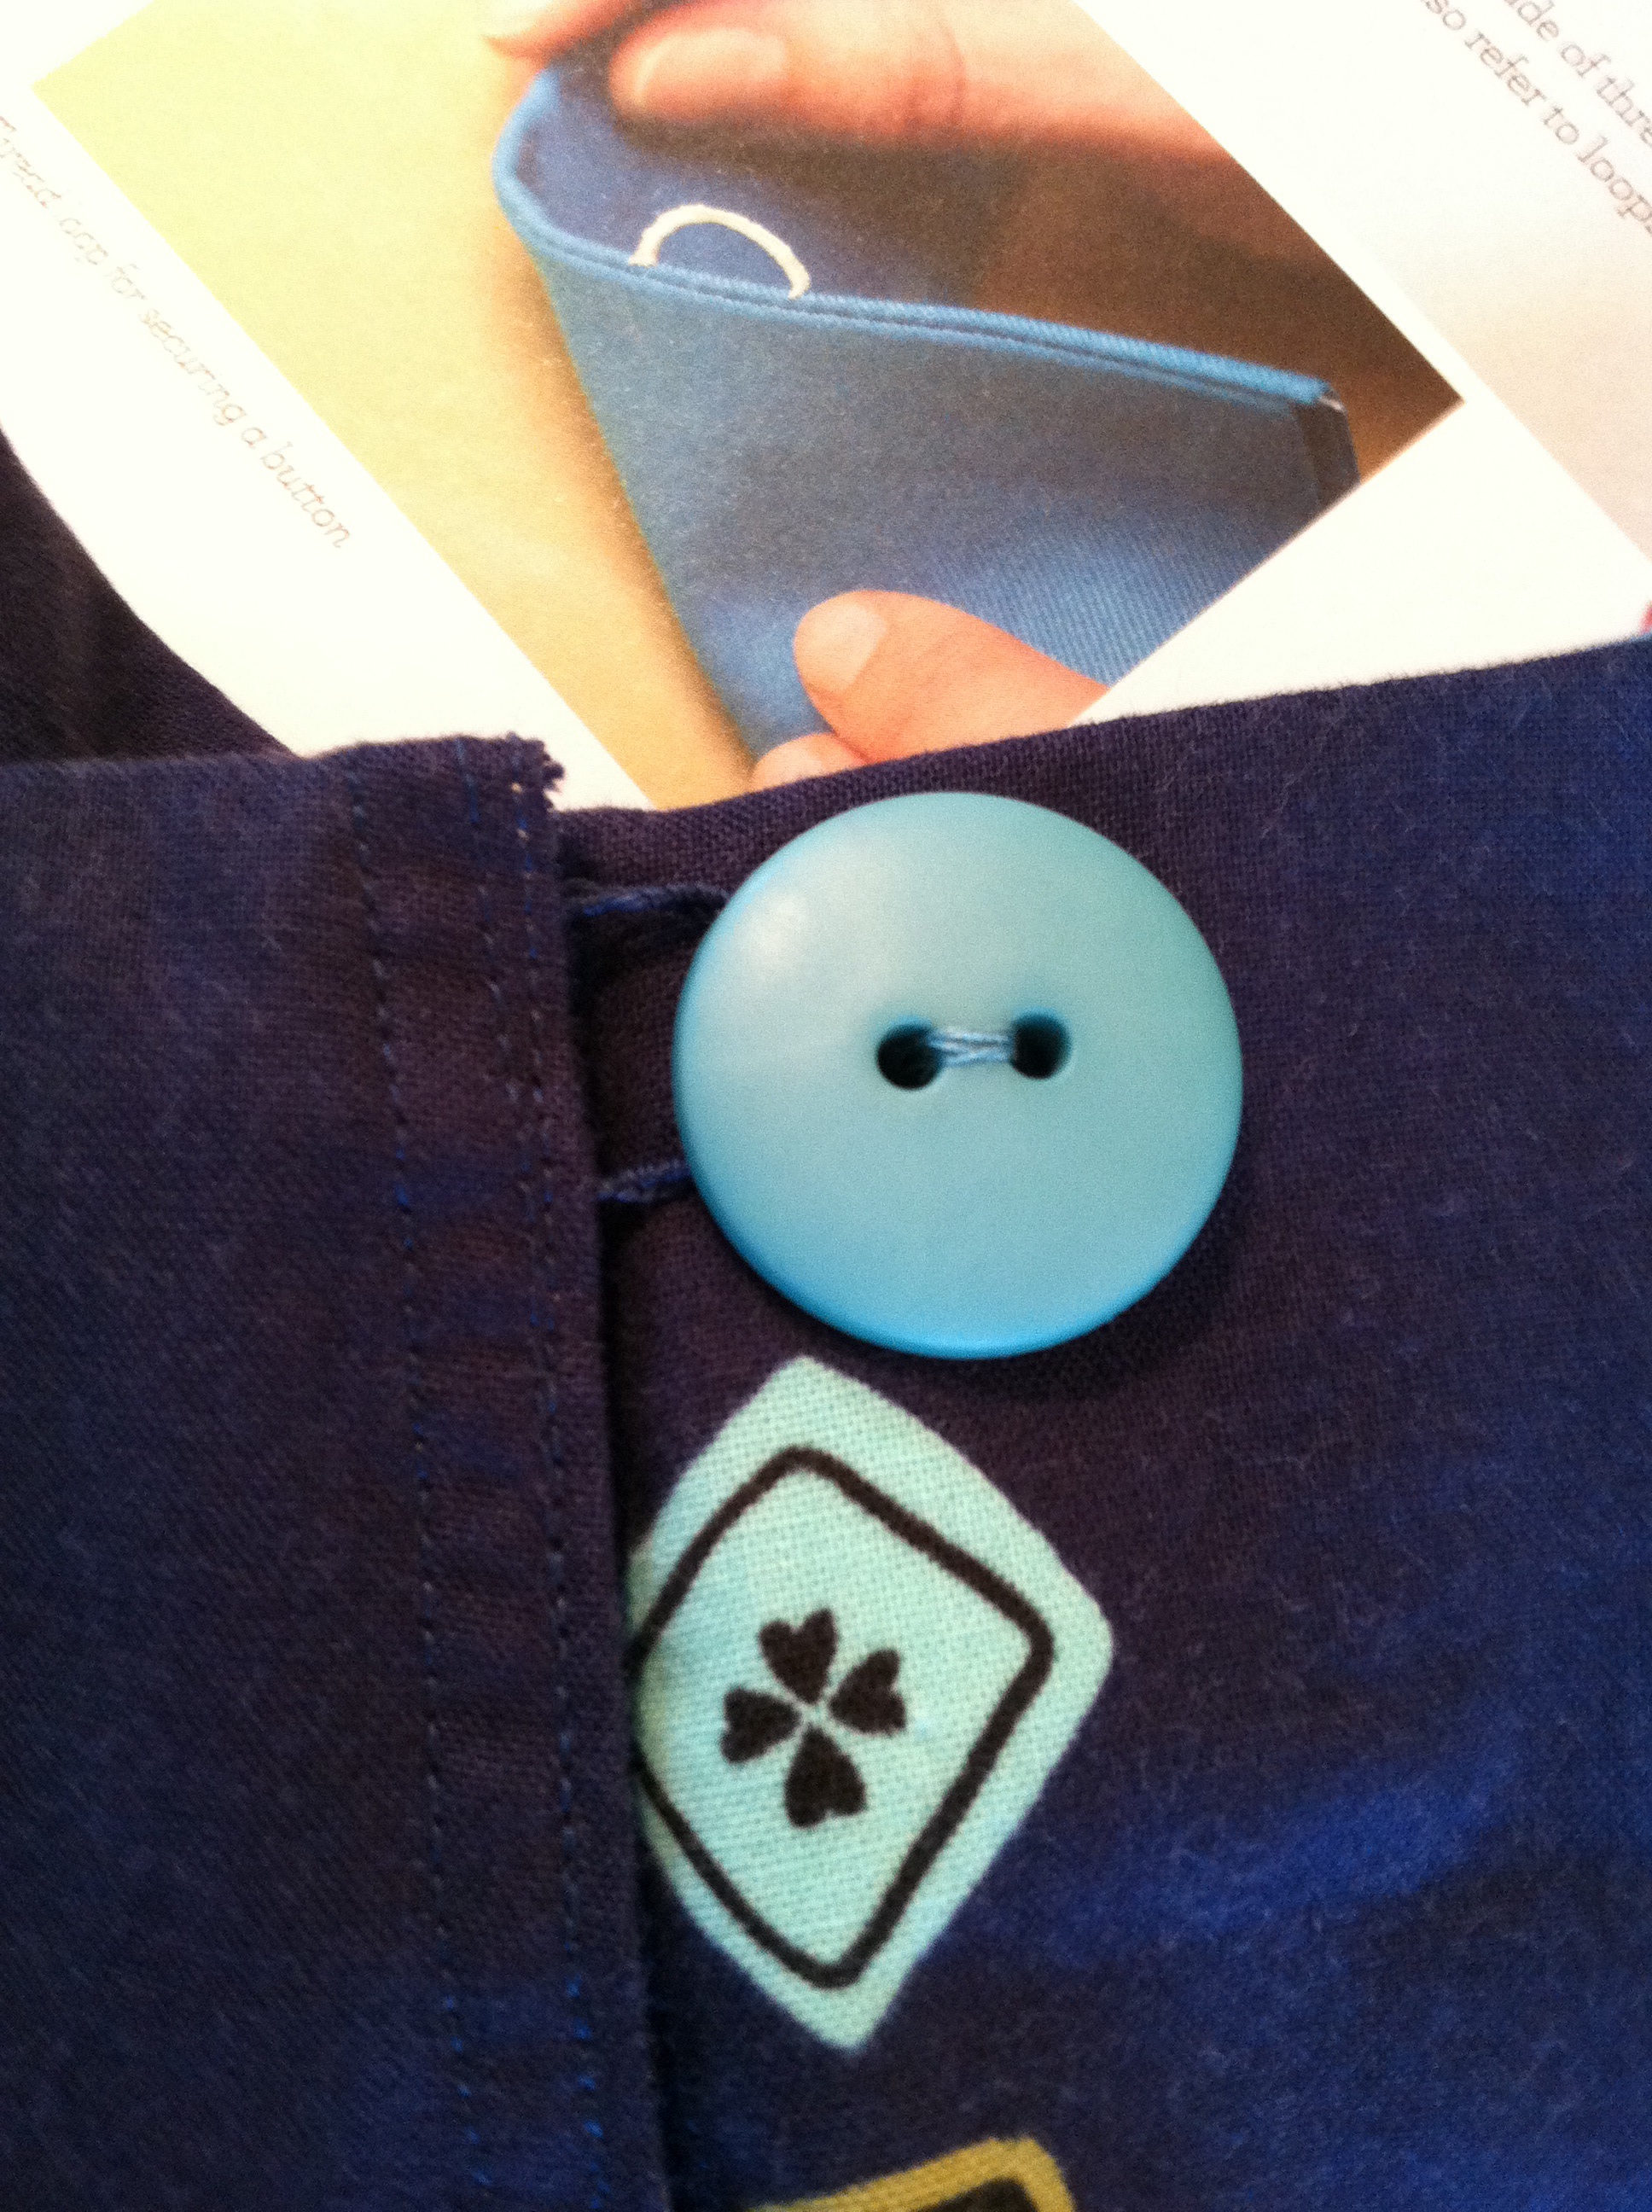
 I decided instead to use these slightly worn, older, cream colored buttons that I rescued from a button jar that I picked up at a tag sale when I first moved to Connecticut in 1995 (buttons seen below with all of my long threads after sewing button holes. I left the threads long deliberately in order to pull them through to the underside and knot them. It didn’t take that long and it looks so much neater.) I like the fact that the buttons have variations in their colors and aren’t exactly matching. I used a cream colored thread which is much softer looking than bright white. I like to sew the two rows of stitches on my button plackets because they help me line up my button holes and I like the look of the stitching.
 I used more of the pink fabric for the facing and hemmed the tunic using the facing technique that I explained here.
 In that same house where I found the button jar, I also found a little package of fabric held together with rubber bands in a pile of old towels in a linen closet. The price was less than $5. That package turned out to be 20 hand pieced quilt blocks. I later used them together with another 25 or so I pieced over the years to make a quilt for a very loved cousin who was going through treatment for cancer. My amazing teacher and professional quilter Judy assembled those blocks and figured out the best way to display them We used a lot of this same green color in that quilt.
 On the back, we created a collage of family photos and messages.
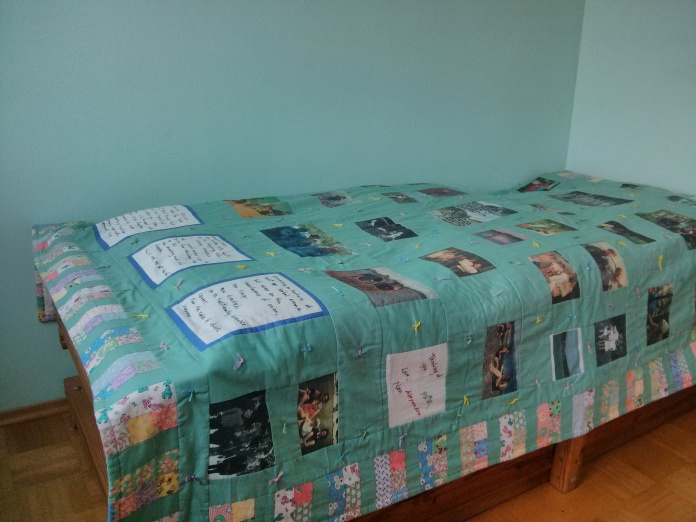 Next up in my quest to finish the works-in-process is a shift dress in cotton and steel polka dots.
 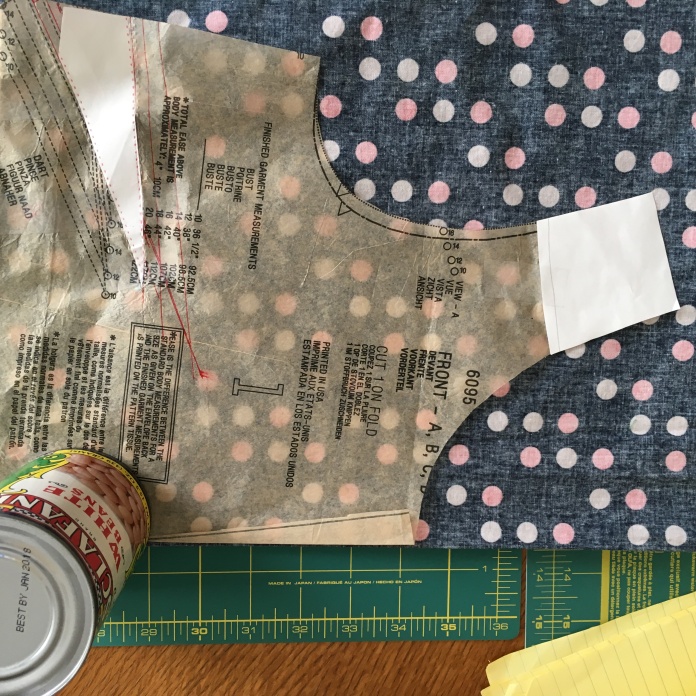 Drops and dots. What could be better? The cotton and steel cotton lawn fabrics that I used for my Beatrix tunics are still available at fabric.com as of this writing. Happy spring!